
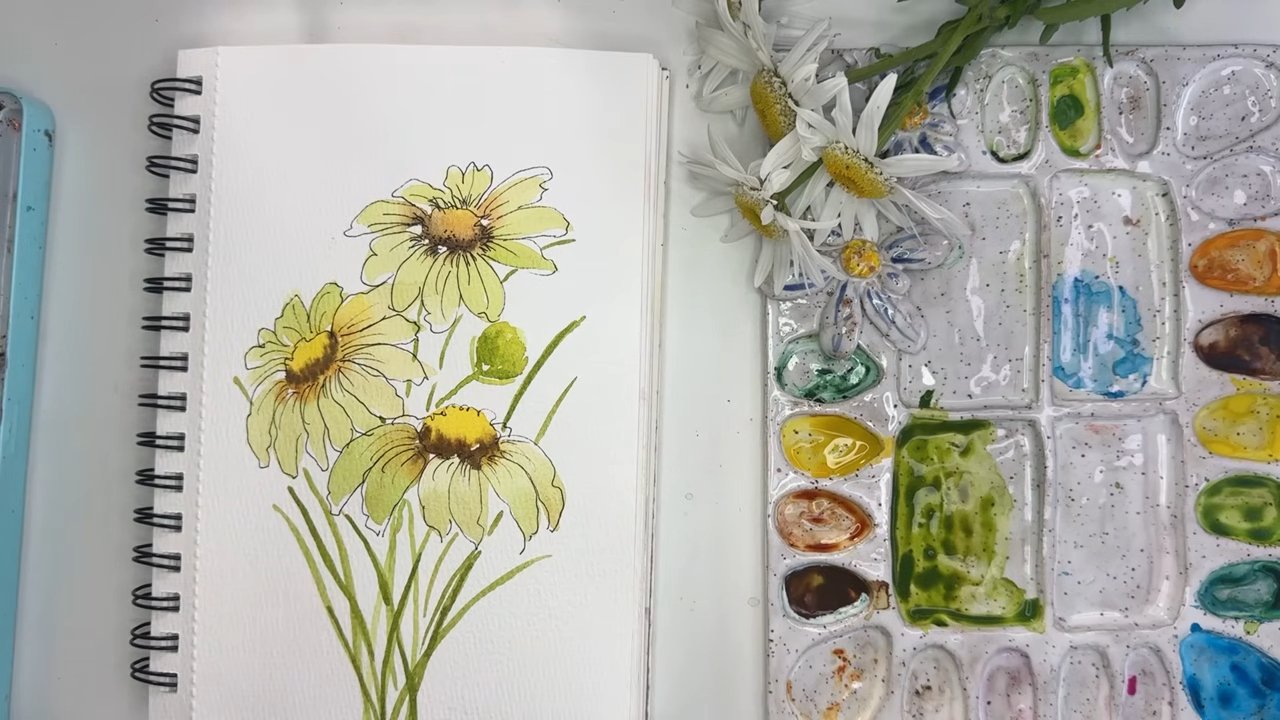
Do you want to paint something simple, relaxing, and really pretty? Debbie Walker Art has just the thing. In this tutorial, the artist demonstrates how to paint easy watercolor daisies with pen and ink.
She guides readers through each step, from mixing colors to adding the final ink details. The process is fun, beginner-friendly, and perfect for a cozy painting session. Let’s paint together!
Contents
Tools and Materials Needed
Before starting the painting, the artist always likes to ensure everything is ready. This helps maintain focus and makes the process more enjoyable. Here’s what the artist uses for this daisy painting.
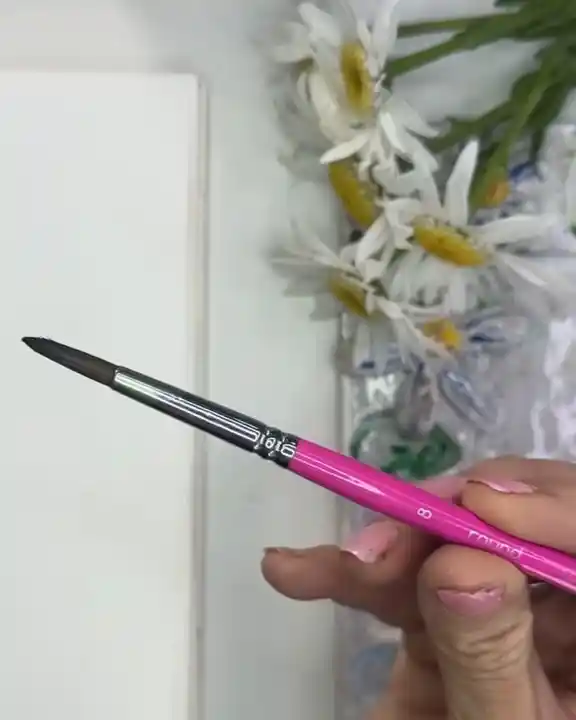
The Artist’s Preferred Brush
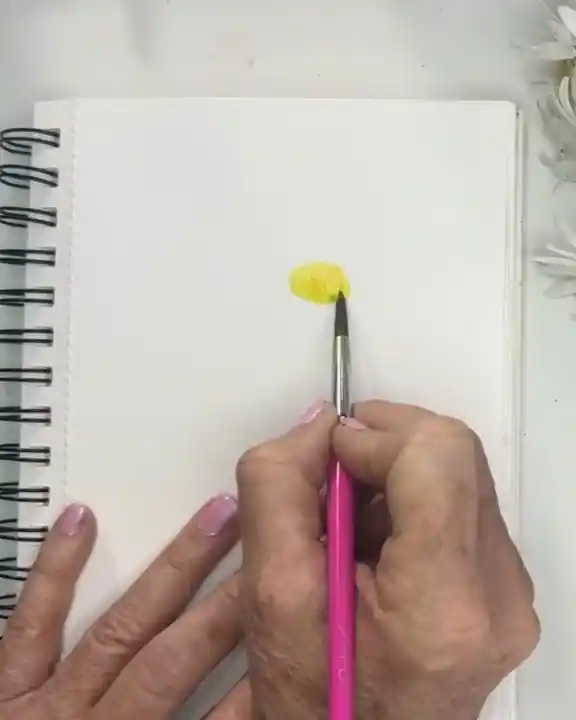
The artist uses a size 8 round brush and appreciates the way it handles. The brush tip is cared for carefully because once the tip is damaged, the brush becomes unusable for the artist’s needs.
Paint is always loaded along the side of the bristles rather than directly on the tip.
Watercolor Palette
The artist uses the Paul Rubens palette. Because the pans can become hard over time, the artist spritzes them lightly with water to reactivate the pigment. A quick spray is enough to bring the colors back to life.
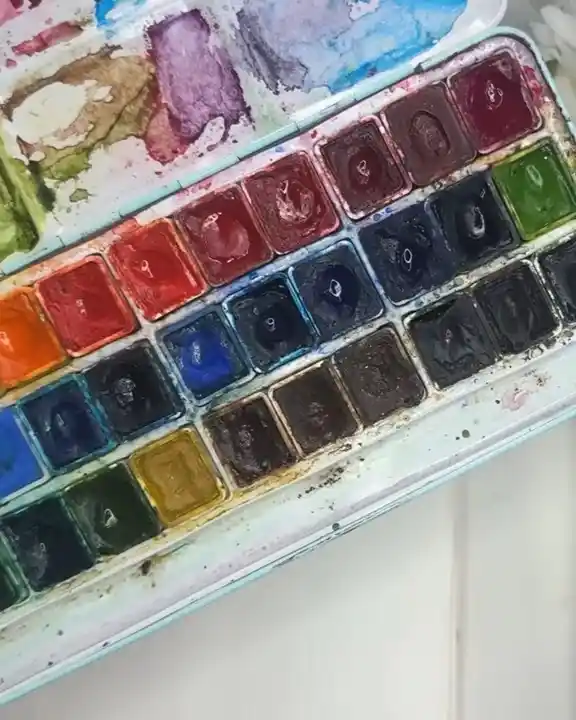
Paint Colors
The artist prepares the palette with the following colors:
- Cadmium Yellow: A small amount is placed in the mixing area, and the brush is loaded from the side.
- Sienna: Selected for its warm orange tone.
- Browns: Used sparingly for darker accents, even though the daisies rely mostly on yellow and green.
- Sap Green: The artist’s preferred green. In the Winsor & Newton range, this shade is called Tree Green and has a slight orange tint.
Watercolor Daisies: Step-by-Step Painting Process
With the palette ready, the artist begins painting the daisies. The process is kept simple and enjoyable, focusing on clean strokes and natural blends.
Painting the Daisy Center
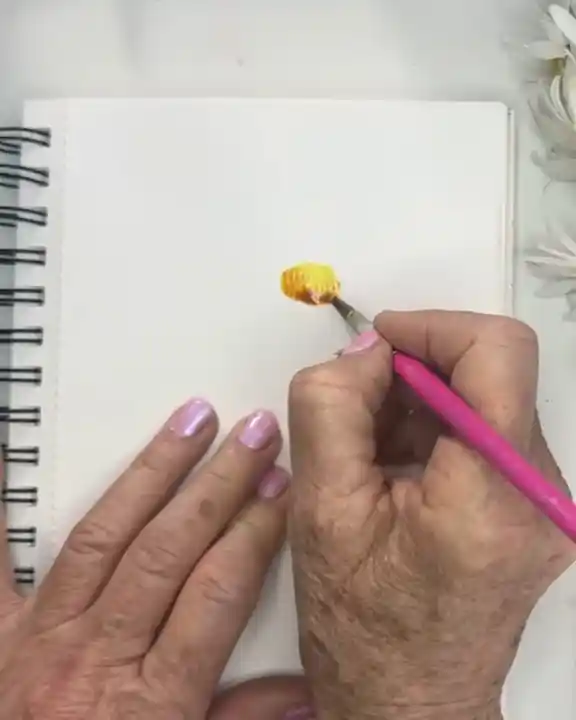
The artist starts with cadmium yellow, keeping the center wet enough to glisten without forming puddles.
While the yellow is still wet, sienna is dropped in using the wet-on-wet technique. The sienna blends beautifully, adding a warm glow to the flower’s center.
The darker brown is held off until some petals are completed. This allows the artist to judge the balance of values as the painting develops.
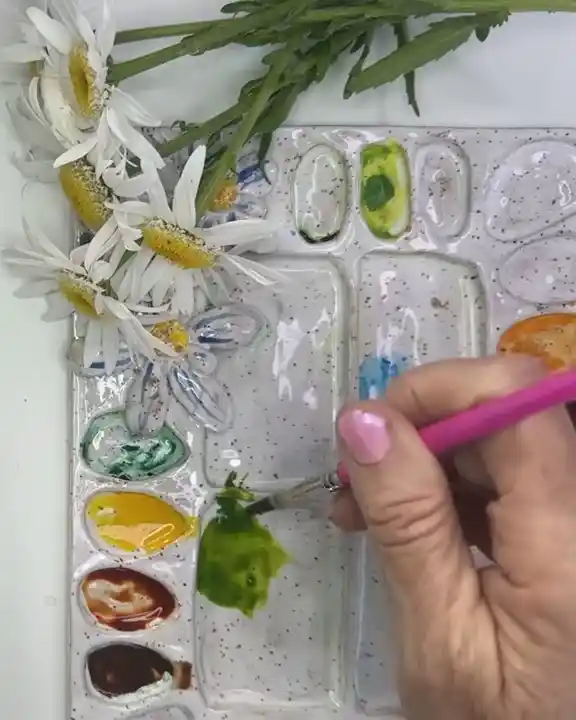
Adding the Petals
The artist switches to a very pale green mixture—approximately 80% water and 20% pigment. Using just the brush tip, the artist taps and pulls the color outward.
A point-press-pull motion forms each petal. Because daisies often have a subtle green tint, this tone is built into the strokes. Shorter petals are added in the back to suggest depth.
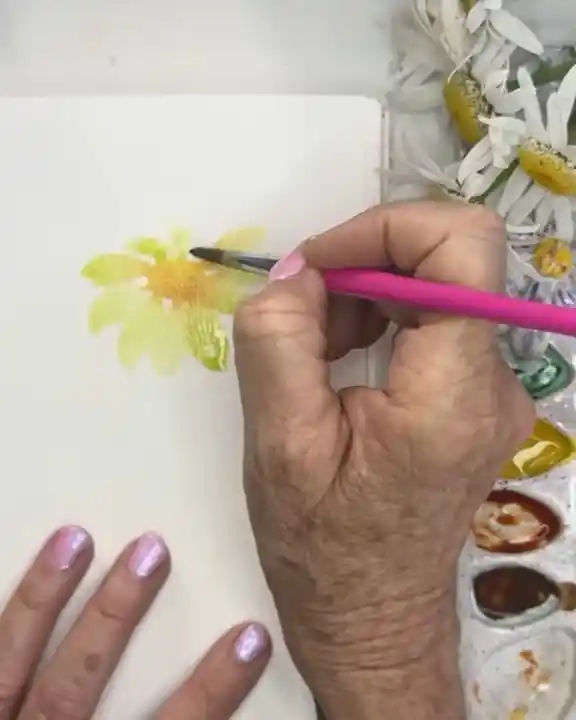
Then, I gently tap around the base of the petals to blend them all.
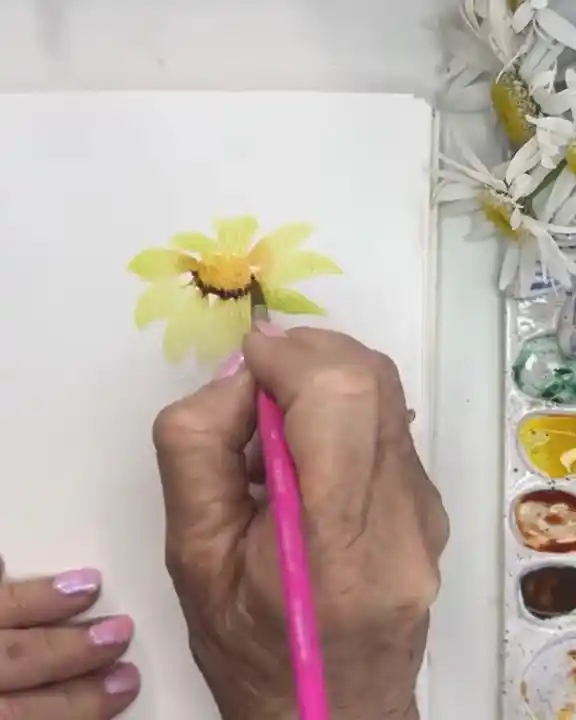
Although the artist considers adding more brown, the decision is made to keep the center clean for now.
Painting a Second Daisy
The same steps are repeated for the second daisy. The center is painted yellow, followed by a gentle tap of sienna for warmth.
The petals are formed with pale green strokes, using the brush tip and occasionally opening the “belly” of the brush to create wider, fuller marks.
Once again, shorter petals are added behind the main flower to build depth.
For darker accents, the artist loads the brush tip with dark brown and adds dots around the center. This time, slightly more brown is used to enrich the contrast while keeping the overall balance.
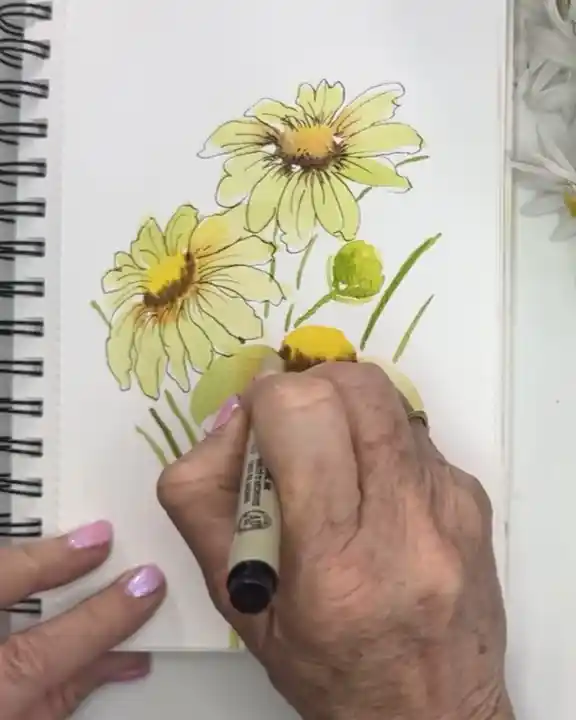
Paint the Last Daisy
The same method is used for another daisy placed nearby. The center is painted yellow, followed by a rinse and a tap of burnt sienna to blend smoothly.
For the final flower, the artist paints it at a sideways angle. The brush tip is pressed and the belly opened to create wide, expressive strokes. Sometimes the brush is turned sideways to shape unusual angles and natural flow.
After rinsing again, dark brown is gently tapped along the edge—just enough to allow the pigment to spread and soften naturally.
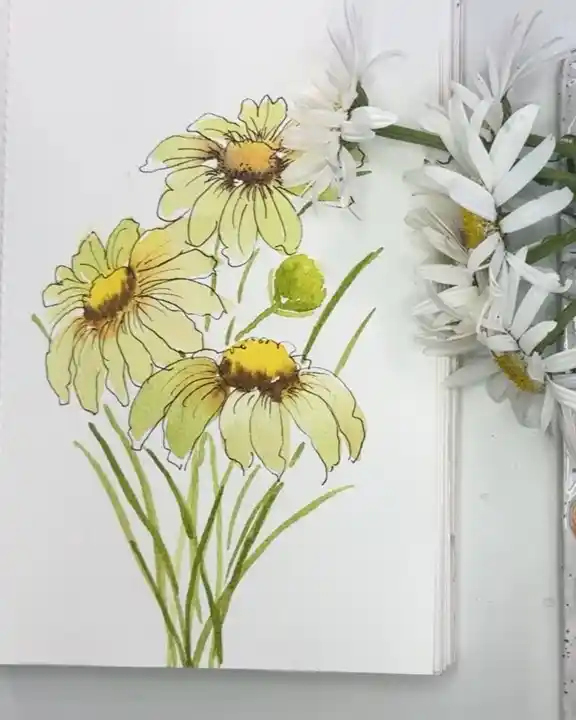
Painting Stems and Leaves
With the daisies complete, the artist begins adding stems and leaves—details that bring the composition to life.
Painting Thin Green Stems
Tree green (sap green) is used for the stems. The artist paints them thin and delicate, ensuring each stem subtly points back toward the flower’s center.
This visual cue helps guide the viewer’s eye naturally toward the daisies.
Some stems bend gently, adding a more natural appearance. Even when bent, each stem curves in a way that still directs the eye back toward the flower. A hint of yellow is sometimes added to suggest a small bud.
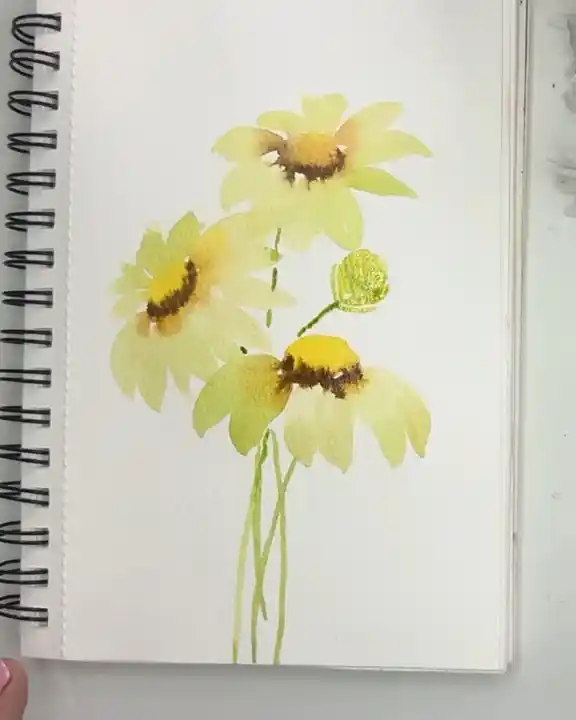
Adding Long Flowing Leaves
For the leaves, the artist considers the natural, flowing shapes typical of daisies. More green paint is picked up, occasionally mixed with a touch of brown for deeper tones.
The leaves are painted with long, smooth strokes that flow outward from the stem. The artist avoids adding too many leaves to keep the overall composition simple, airy, and fresh.
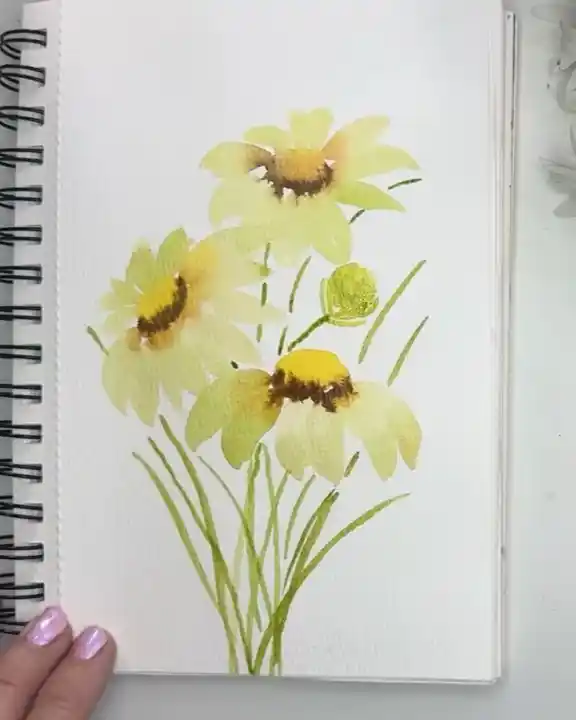
Creating Depth with Darker Values
To add depth, the artist mixes about 80% paint and 20% water to create darker spots on the leaves and stems. The artist gently taps these darker areas, creating a natural push-and-pull effect.
This makes some stems and leaves appear closer while others recede.
And there it is—the daisy stems and leaves now look charming and lively!
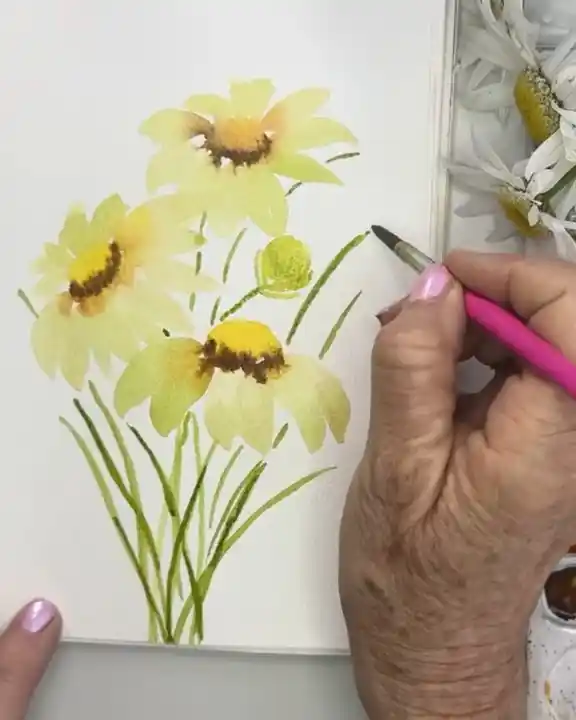
Adding Pen & Ink Details
Now comes the fun part—the finishing touches with pen and ink. This step brings the watercolor daisies to life and adds beautiful visual interest.
Preparing to Ink
First, the artist ensures the painting is completely dry. The paper should no longer feel damp or tacky.
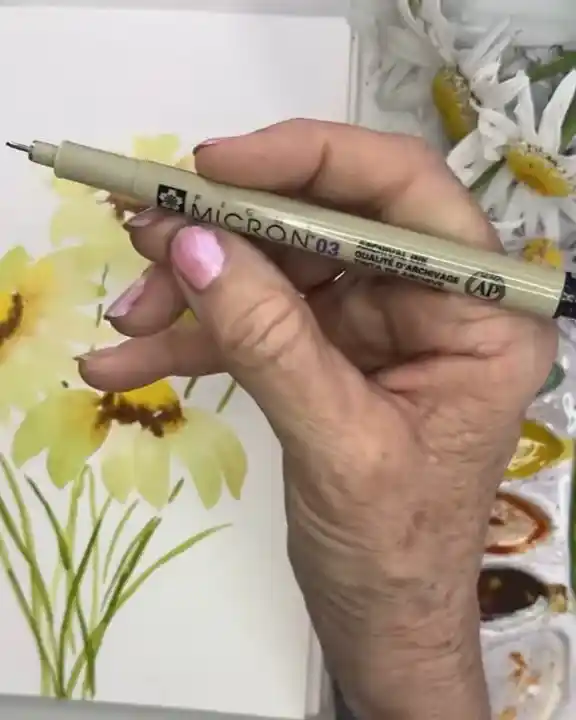
For this stage, the artist uses a Micron 03 pen—the last remaining pen for now, with new ones on the way. This size is ideal for delicate and expressive lines.
Drawing Abstract Petals and Lines
The artist enjoys drawing slightly outside the watercolor edges. The paint serves as a loose guide, but the petal shapes are mostly created intuitively.
Loose, abstract petals are formed by wiggling and wobbling the pen lines. This keeps the petals lively and prevents them from looking stiff or overly perfect.
Plenty of thin lines are added inside the petals—these small strokes bring movement and texture to the artwork.
Sometimes, a few lines radiating from the flower center are added for extra detail. Tiny dots are also sprinkled around to enhance visual interest.
Relaxing and Having Fun with Ink
This stage is especially relaxing for the artist, often done in the evening. It feels playful and pressure-free. The lines follow the watercolor shapes, with some petals intentionally wonky or imperfect.
A dome shape can also be drawn on the flower center for added depth if desired.
Final Thoughts
This step-by-step daisy painting offers a calming way to practice watercolor using simple, enjoyable techniques.
The pen and ink details are what truly bring the flowers to life. With a brush and a pen, the artist continues creating expressive, beautiful artwork.