
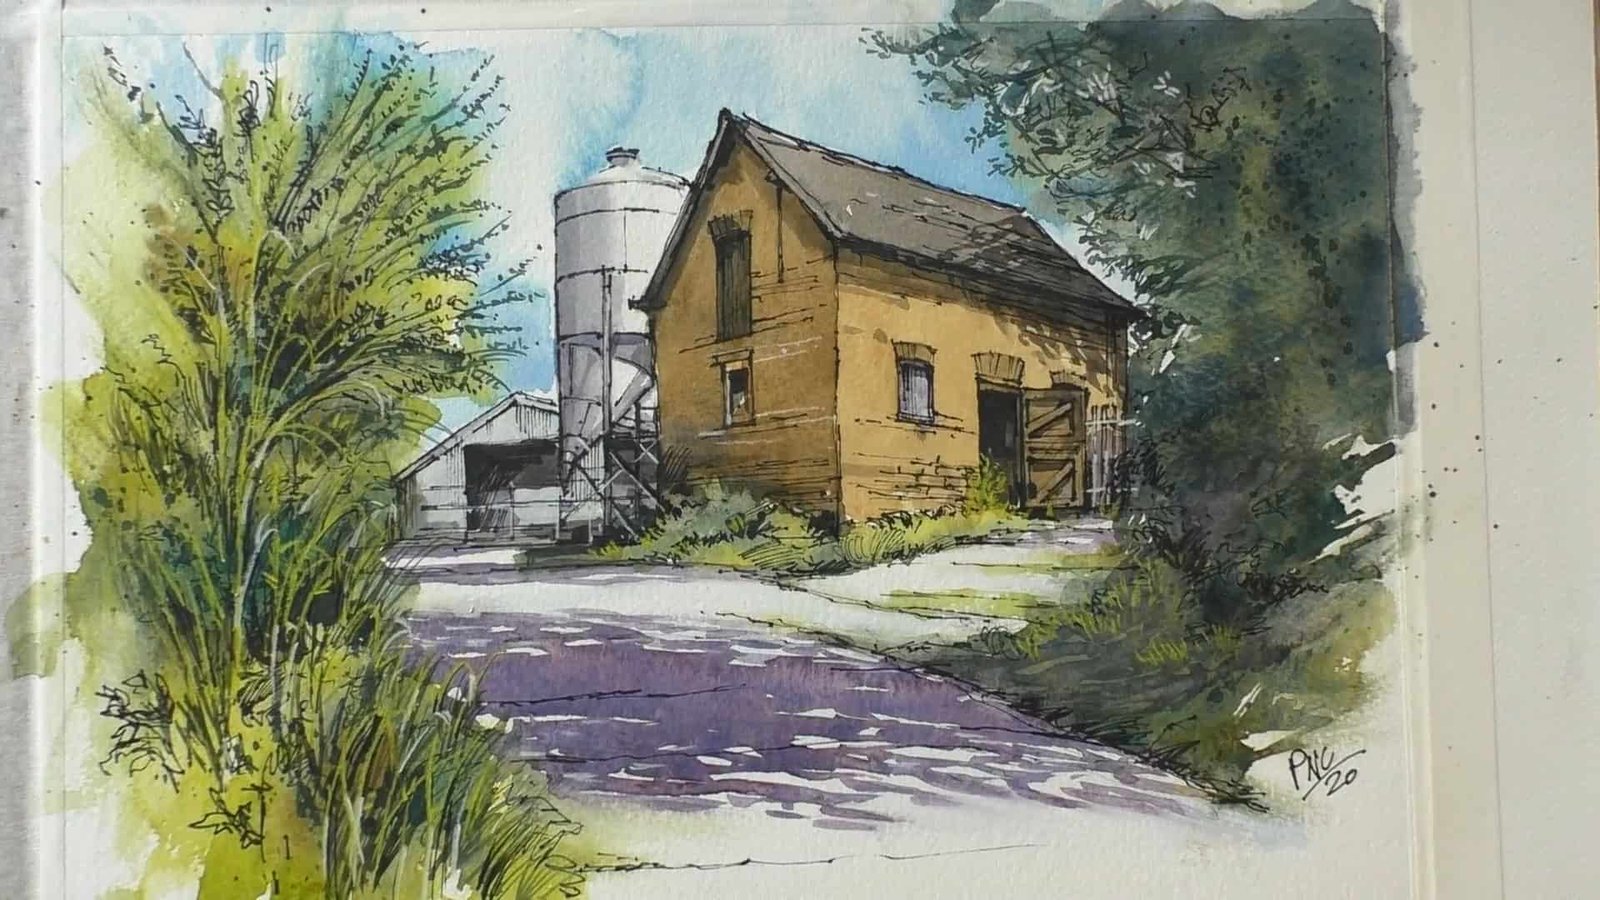
Do you like learning new watercolor techniques that add charm and freedom to your art? Paul Clark from Art by Paul Clark shares a detailed guide on painting a little barn using line and wash.
The method combines pen drawing with watercolor washes to create lively scenes. Let’s follow along and try it yourself.
Contents
Step 1: Materials and Preparation
Before you begin painting, you need the right tools. Paul Clark highlights everything he uses to create the barn scene.
You prepare:
- Watercolor paper: Bockingford rough works well
- Three brushes: ¾ inch flat, size 12 round, and size 3 rigger
- Waterproof marker: fine for line work, Sharpie for bold shadows
- Watercolors: Cobalt Blue, Alizarin Crimson, Cadmium Yellow, Cerulean Blue, and Payne’s Grey

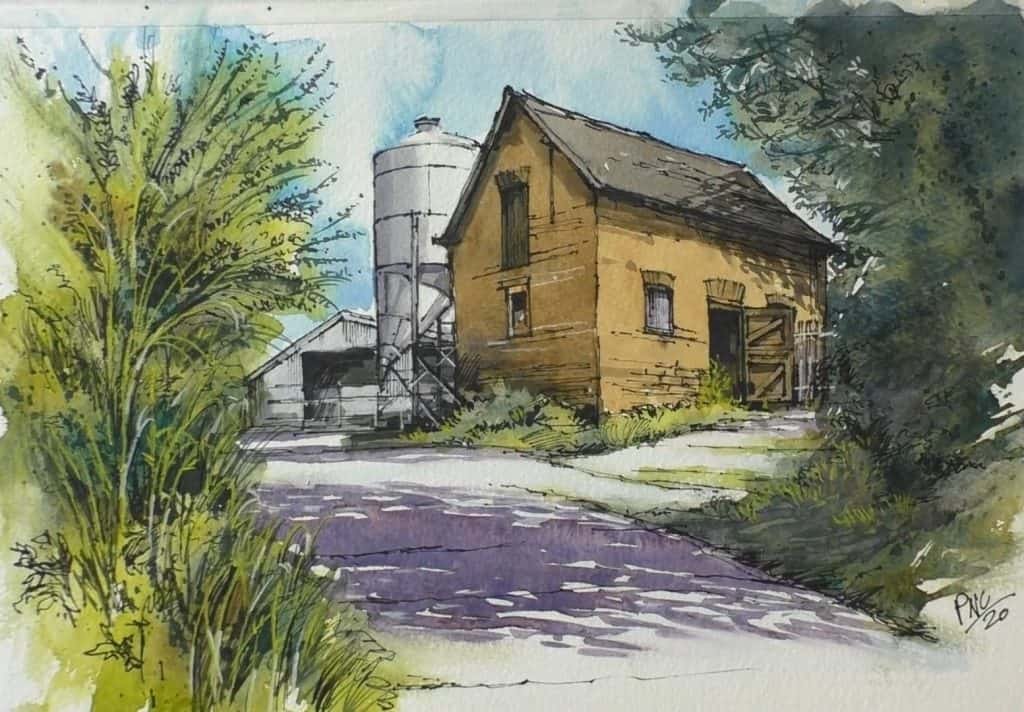
Paul Clark also shares his reference photo of the little brick barn. He suggests sketching basic shapes first with pencil and notes how perspective lines help with accuracy. He reminds you that it is a painting, not an architectural drawing.
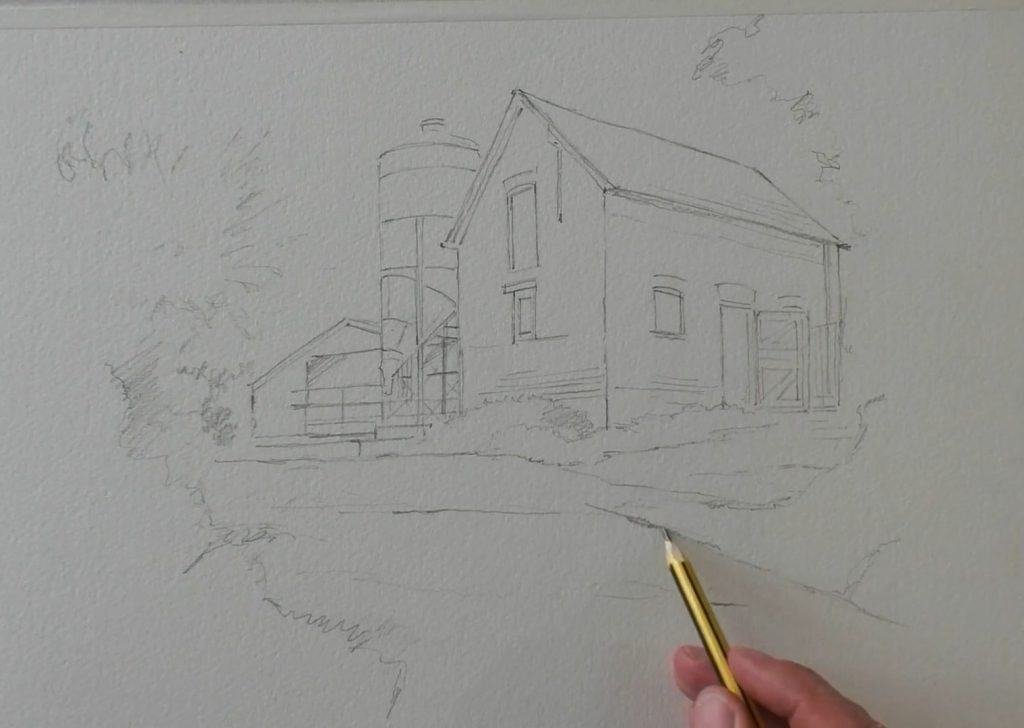
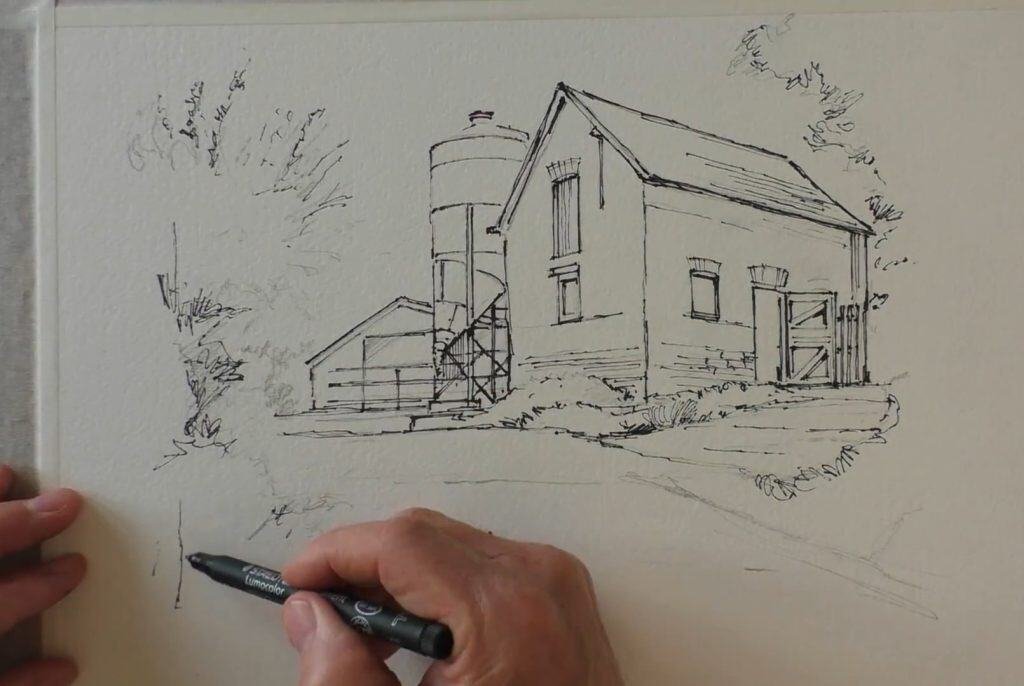
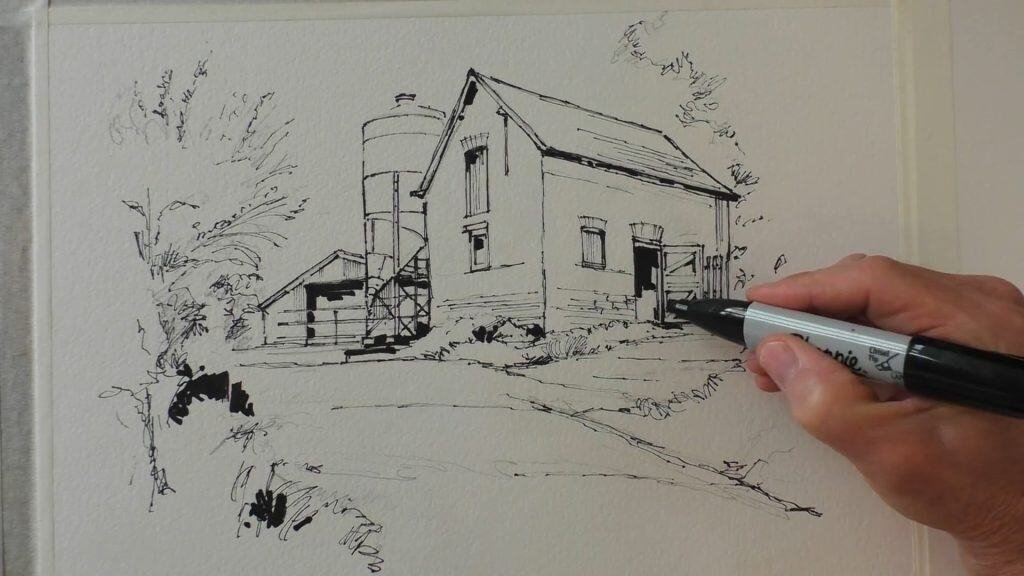
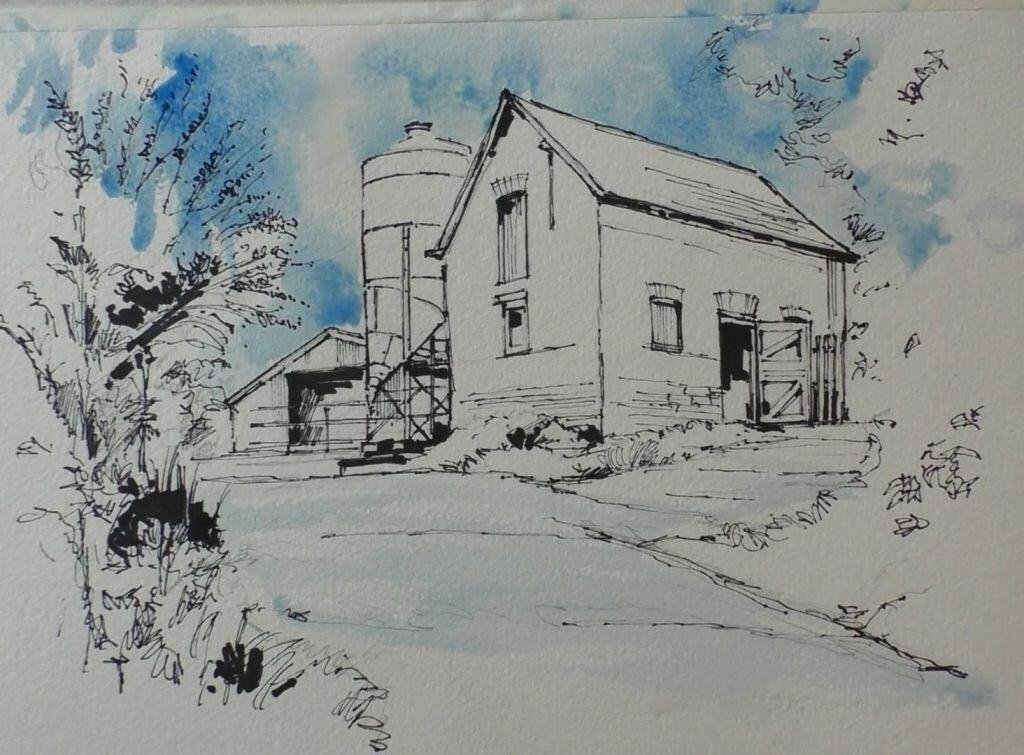
Step 2: Starting with the Line Drawing
Once your materials are ready, it’s time to pick up the pen. Paul Clark suggests keeping your hand relaxed and your lines loose.
He explains that broken or wobbly lines add charm. This is not an architect’s drawing, so don’t aim for perfection. Instead, let your lines feel spontaneous and lively.
To add depth, he switches to a thicker Sharpie permanent marker. With its broad tip, he blocks in areas of very dark shadow. This step builds contrast early and helps shape the barn.
He also reminds you not to spend too much time here. Draw steadily, but don’t overthink.
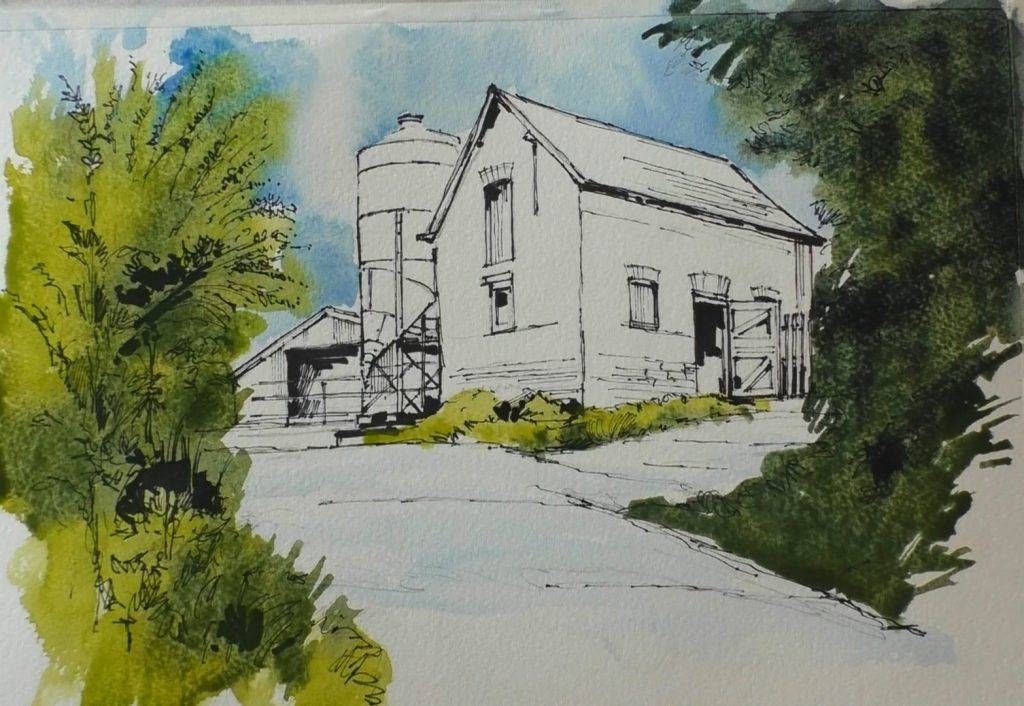
Step 3: Painting the First Washes
Now the fun part begins: adding color. Paul Clark starts with the sky, showing how to wet the paper with clean water before applying paint.
He mixes Cerulean Blue with Cobalt Blue and uses the flat brush. This brush makes it easy to paint around the barn’s straight edges. He then dabs in a light wash for the drive.
For the grass, he mixes a bright green. Since the sky is still damp, the green bleeds into it, creating a natural effect.
He darkens the mix with more blue and Payne’s Grey. Using this, he paints the shadowed trees on the right. Dropping color into wet areas gives soft edges and depth.
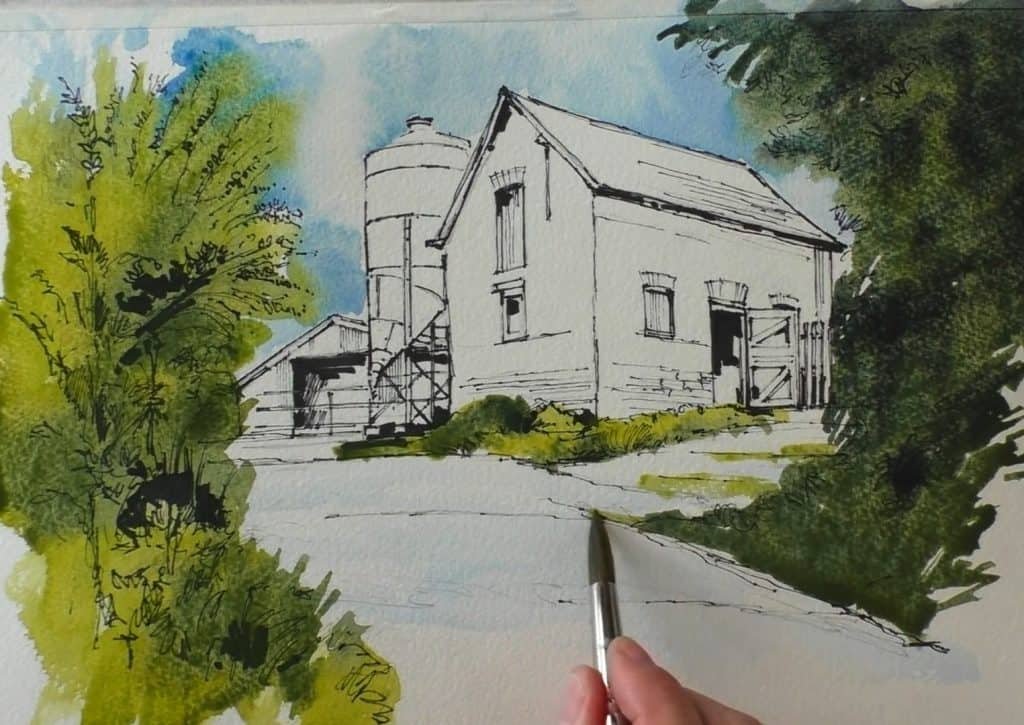
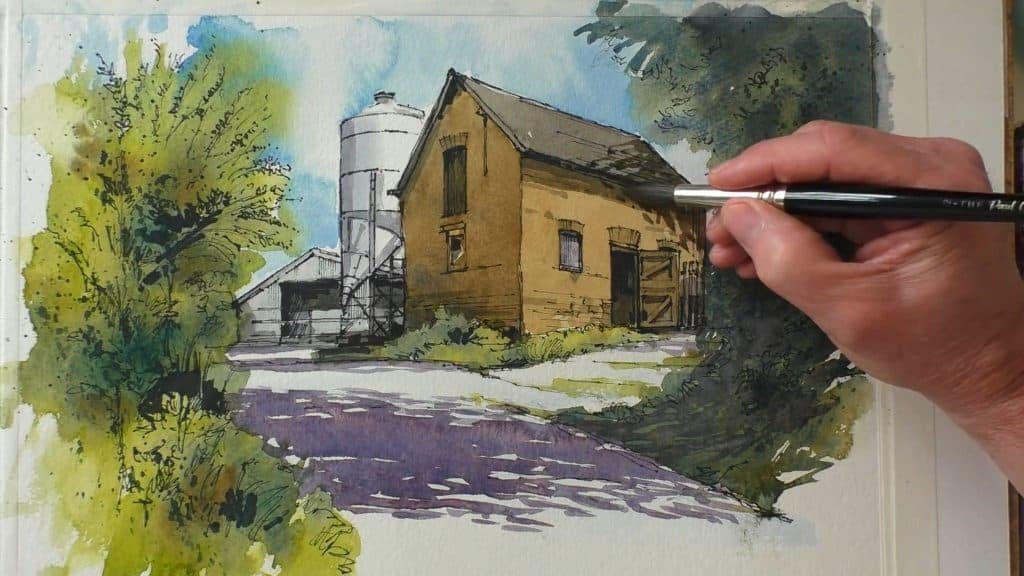
Step 4: Developing the Landscape and Barn
At this stage, the painting begins to take shape. Paul Clark paints the bank and adds some weedy bits along the drive.
He warms his green mix with a touch of Alizarin Crimson. For earthy tones, he suggests Yellow Ochre. You can either use it straight from the tube or mix it from 80% Yellow, 15% Alizarin, and 5% Cobalt.
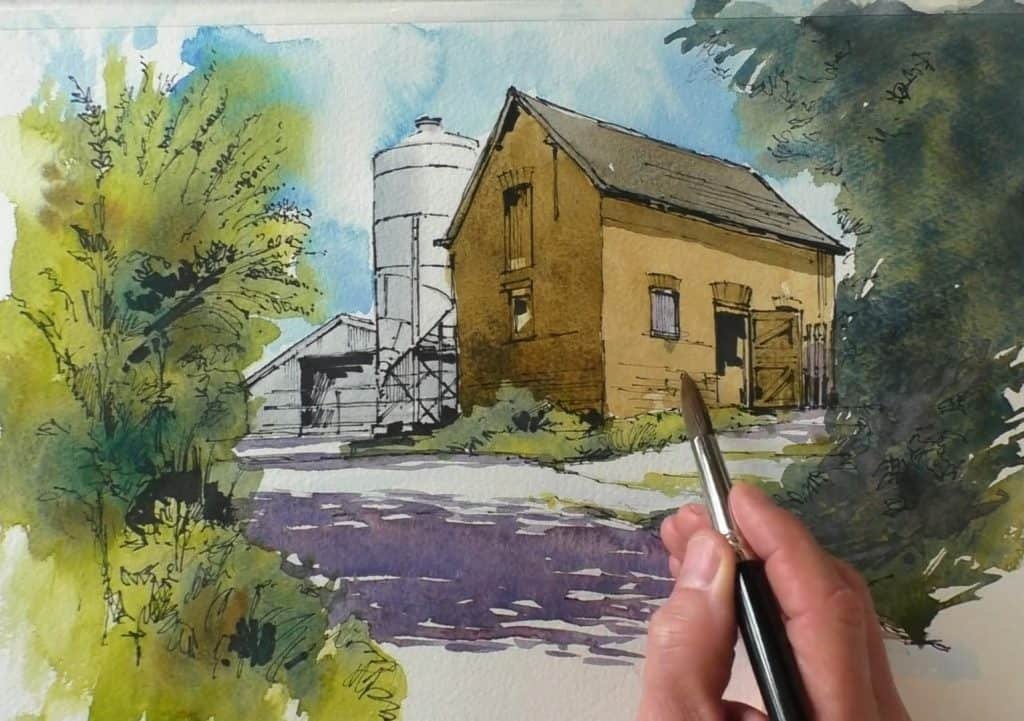
Shadows add realism, and he creates a soft grey with 45% Cobalt, 45% Alizarin, and 10% Yellow. He shows how to apply it wet on the silo tower for a gentle shadow edge.
The barn roof is a dark brown, which he mixes from equal parts of his three primaries.
He applies this same mix to the shadowed side of the barn and under the roof. Step by step, the barn grows more solid and believable.
Step 5: Adding Texture and Details
With the main washes complete, it’s time to add life to the details. Paul Clark shares a few favorite techniques here.
He demonstrates the splatter technique for foliage. This method creates random, natural marks.
He drops dark green into the splats to suggest leafy textures. Then, with Payne’s Grey, he defines the darkest areas of the painting.
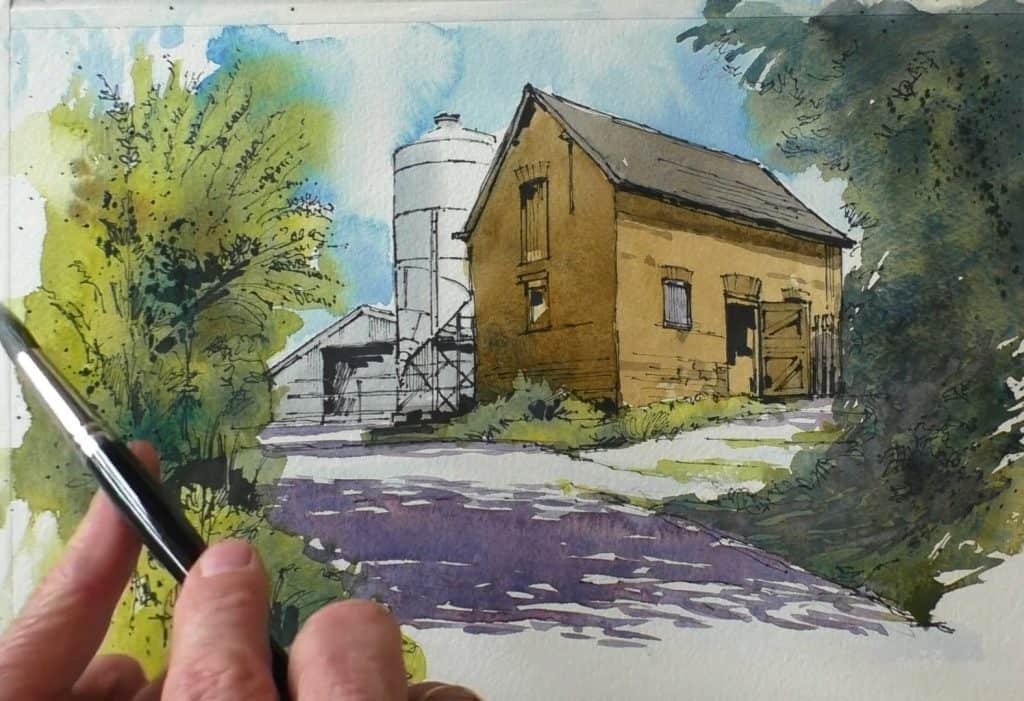
Once everything is dry, he adds a strong shadow across the roof and wall of the barn. This shadow does not appear in the photo, but he feels it improves the composition.
Using the rigger brush, he paints small touches of dark green to define details. This brush is perfect for thin, delicate lines.
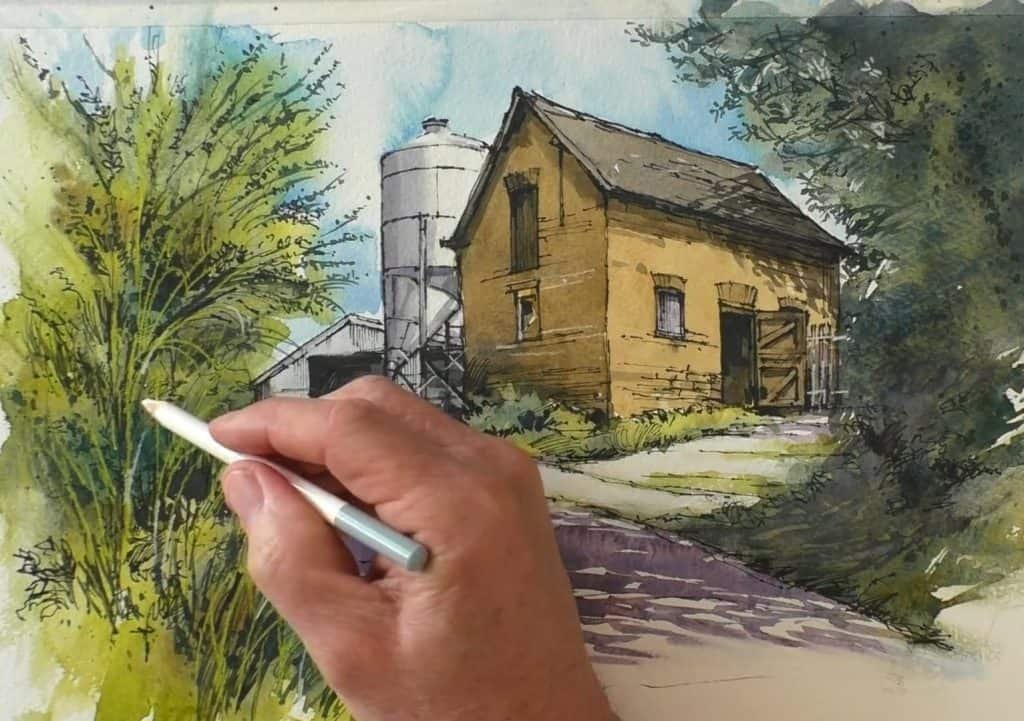
Step 6: Final Touches
The last stage adds polish and subtlety. Paul Clark enjoys softening hard edges with a damp tissue. This gentle blur helps parts of the painting feel more natural.
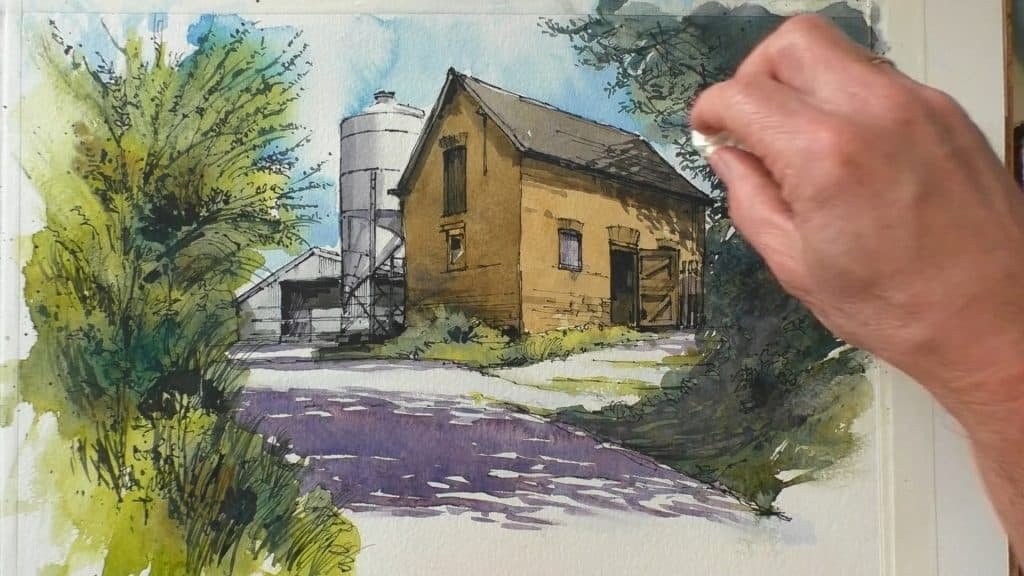
He then picks up his marker again, but with restraint. According to him, “less is more.” Small lines suggest detail without overloading the image.
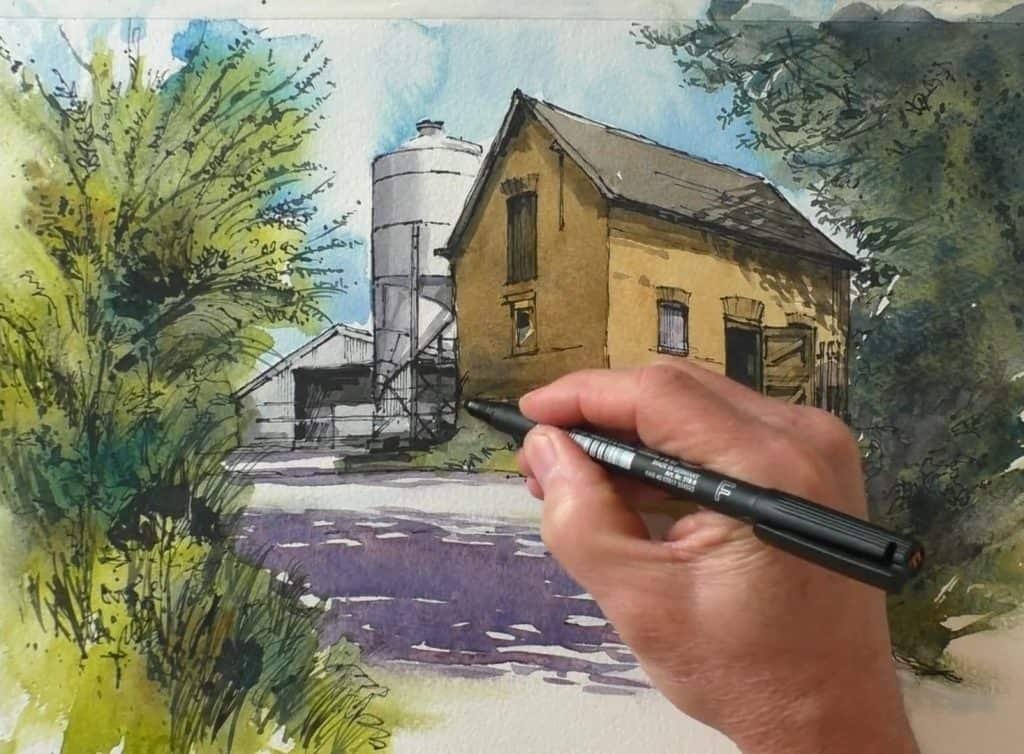
Next, he adds highlights. A white pastel pencil gives sparkle to the barn and roof. A yellow-green pastel pencil adds definition to the grass. He switches back to the white pencil again for final highlights across the field.

He also places a few extra bits of foliage detail on the right side. With the painting complete, he finishes by signing his work.
Final Thoughts
Line and wash watercolor blends strong pen work with soft paint. Paul Clark’s barn tutorial shows you how simple shapes can turn into a lively painting. You learn to use washes, textures, and highlights step by step.
Would you like to try this style for your next project? Gather your tools, follow these steps, and see how your own barn painting comes to life.