
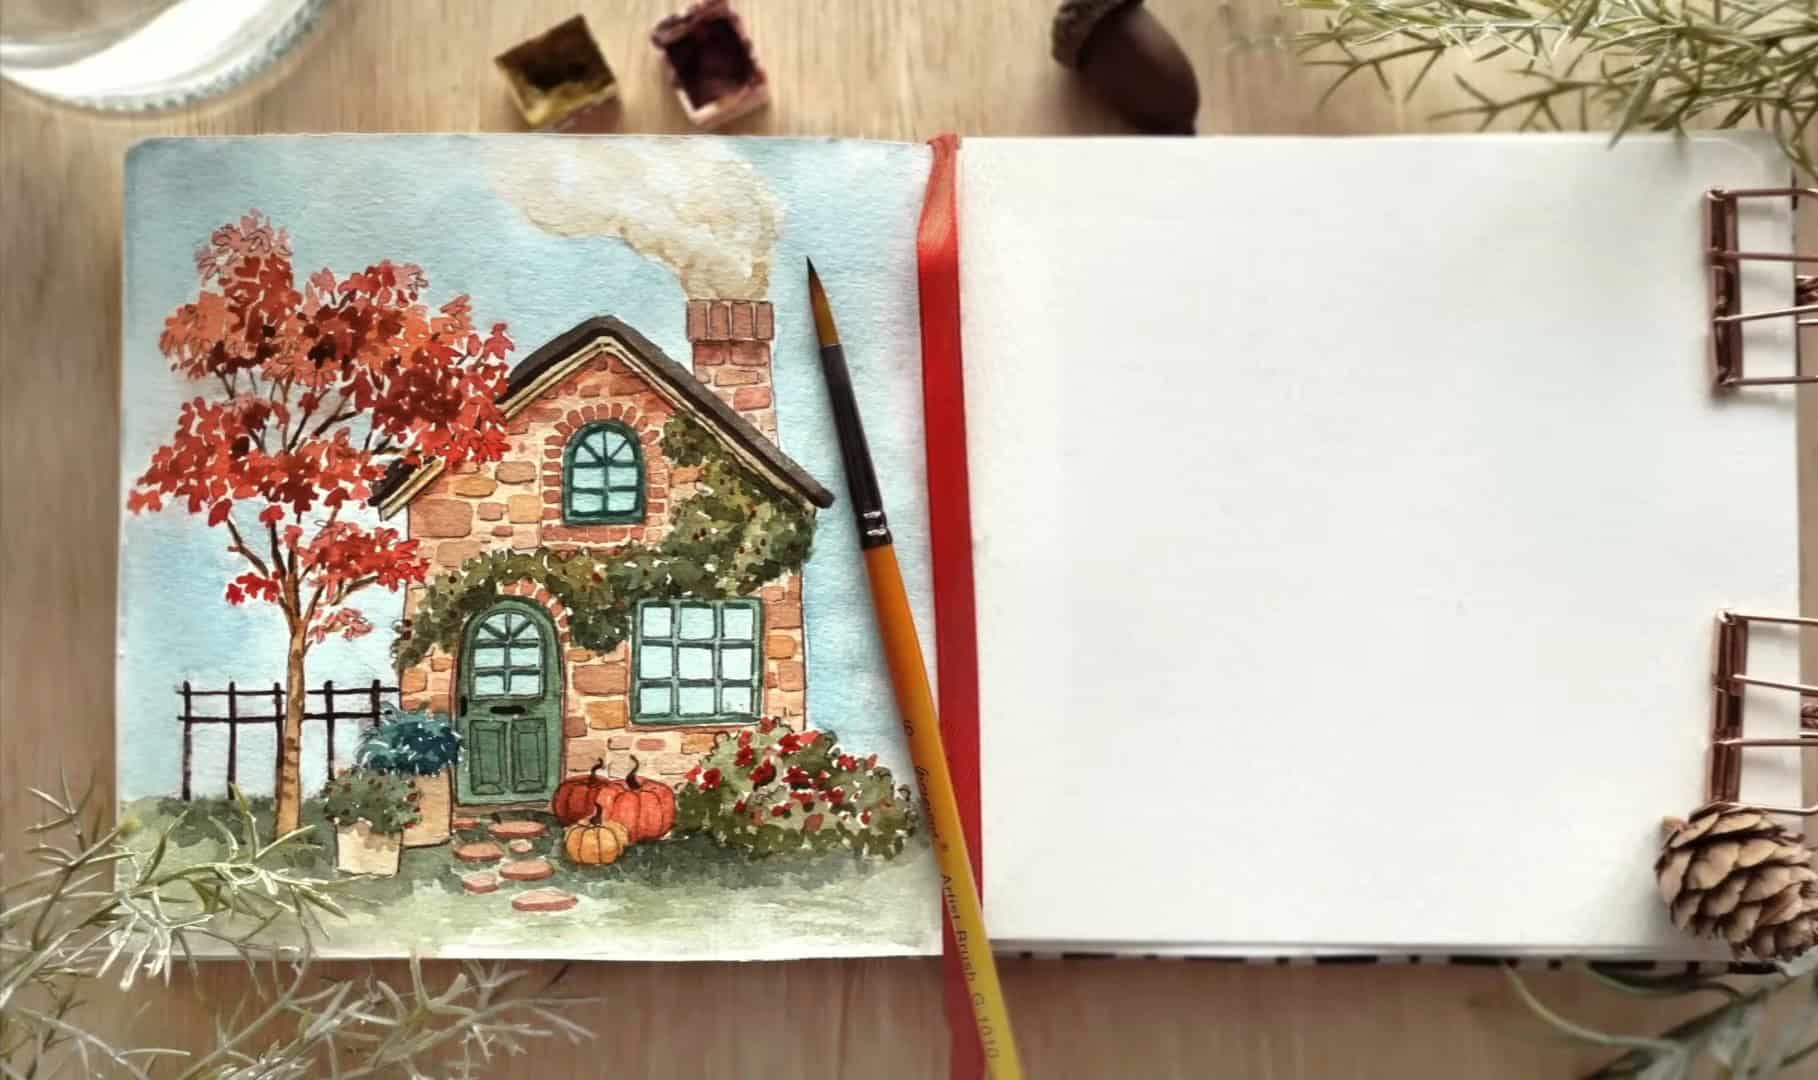
Can a small watercolor scene capture the warmth of autumn? In this tutorial, Nia from the Nianiani channel shares her process of painting a cozy stone cottage surrounded by red maple leaves and fall details.
She combines fine ink lines with gentle watercolor layers to create a rustic storybook atmosphere. Follow her step by step to bring this autumn cottage to life. Ready to paint along? Let’s begin.
Contents
- 1 Step 1: Planning and Sketching the Cottage Composition
- 2 Step 2: Gathering Inspiration and References
- 3 Step 3: Preparing the Colors and Materials
- 4 Step 4: Painting the Autumn Tree
- 5 Step 5: Painting the Plants and Pumpkins
- 6 Step 6: Painting the Cottage Exterior
- 7 Step 7: Adding Details and Shadows
- 8 Step 8: Inking, Outlining, and Final Touches
- 9 Final Thoughts
Step 1: Planning and Sketching the Cottage Composition
Every beautiful watercolor painting begins with a clear sketch. Nia starts her autumn version of the mini cottage by planning the composition carefully.
Setting the Scene
To balance the scene, she places the cottage on the right side of the paper and leaves space for a tall tree on the left. This setup gives the painting room to breathe.
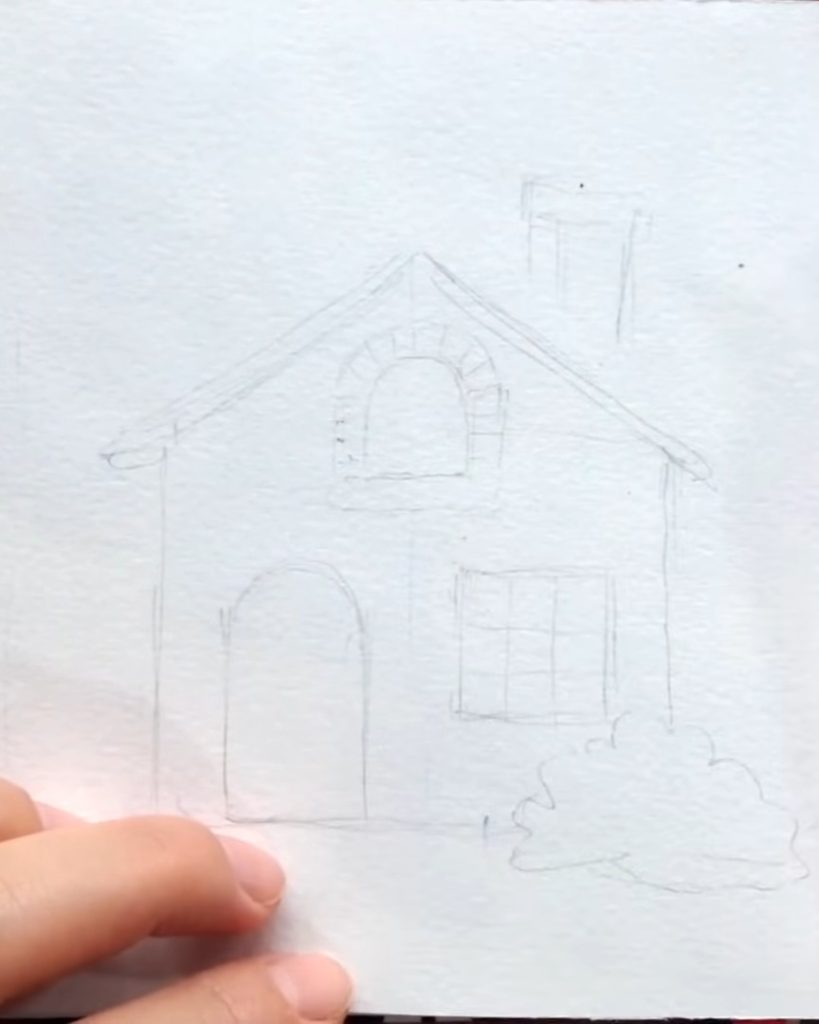
She draws the basic shapes first: a square for the main structure and guidelines across the middle to mark the roof’s center and edges.
Then, she adds charming architectural touches. She sketches an arched door and an arched window to create a rustic look.
On the right side, she places a large square window to fill the empty space and make the design feel complete.
Before adding details, Nia keeps her sketch loose and light. She cleans up the lines gradually with an eraser as she finalizes each section.
Refining the Sketch
Once the main shapes are done, Nia starts refining her drawing. She slowly erases stray lines and adds smaller elements – window frames, panels on the door, and the chimney on top.
As she observes her composition, she feels it looks a bit too low on the page. To balance it, she adds a little curl of smoke rising from the chimney, which subtly extends the scene upward. This small detail helps make the whole painting feel more alive.

Adding Nature Elements
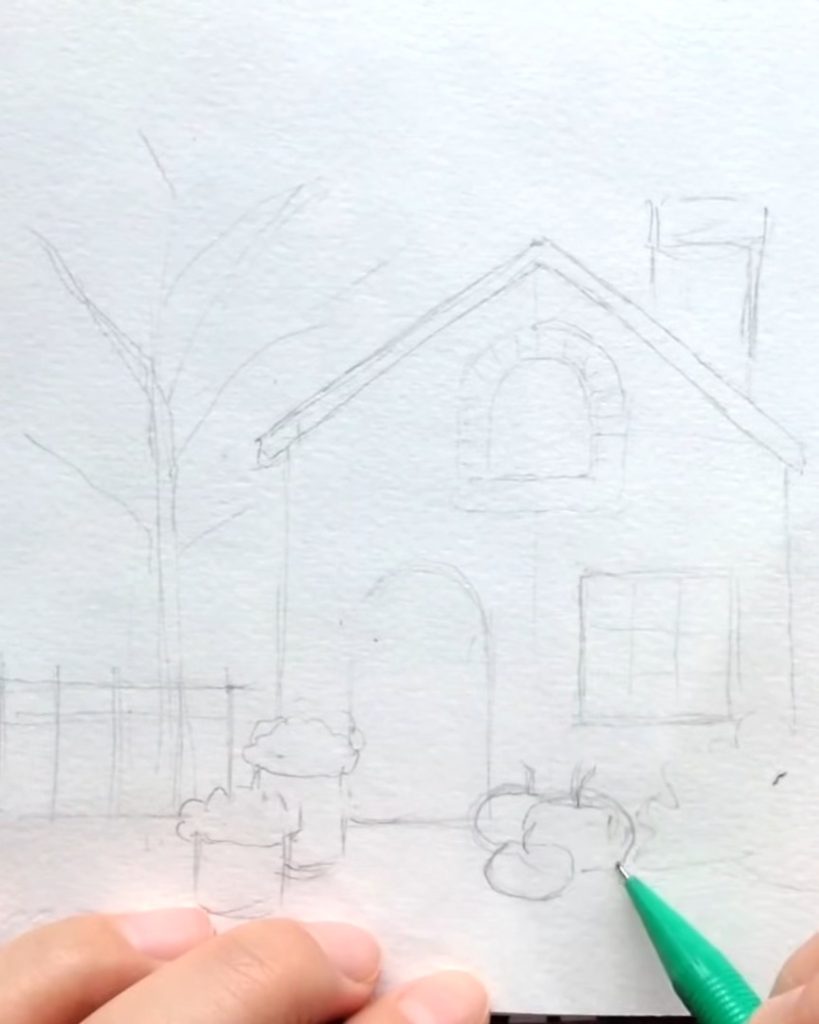
To capture the season, Nia includes autumn details around the cottage. On the left, she plans a red Japanese maple tree. Its vivid color will contrast beautifully with the muted browns of the stone walls.
She also sketches small plants, bushes, and a few pumpkins in front of the cottage to strengthen the autumn feel. By keeping some open space between these elements, she makes sure the final composition won’t look overcrowded.
Now that the base sketch is complete, she’s ready to find inspiration for the finer textures and colors ahead.
Step 2: Gathering Inspiration and References
Before painting, Nia spends time collecting visual references.
Choosing Reference Images
She browses Pinterest and gathers a few reference photos of small, rustic cottages. One image inspires her with its cozy shape, while another features creeping plants covering the walls. Both match the autumn mood she envisions.
Nia also finds a painting by GielleArt, an artist known for her soft, woodsy, storybook-style illustrations.
Nia admires how GielleArt combines nature with charming architecture. Her own composition becomes a mix of both references — a rustic home wrapped in foliage and warmth.
Step 3: Preparing the Colors and Materials
With the sketch ready, Nia sets up her palette and tools. Preparation helps her stay relaxed and confident while painting.
Paints and Brands Used
Nia carefully selects her watercolor paints for a warm autumn palette:
- Indigo (Schmincke)
- Hooker’s Green (Cotman)
- Yellow Ochre (Holbein)
- Quin Red (Daniel Smith)
- Quin Sienna (Daniel Smith)
- Sepia (Holbein)
Each color brings its own purpose — Indigo adds cool shadows, Yellow Ochre gives warmth, and Quin Red adds the heart of autumn’s glow. By mixing these hues, she can achieve a rich variety of browns, oranges, and greens.
Pens and Linework Tools
Nia also introduces her favorite ink pens: Unipen fine liners in brown. They are waterproof and fade-proof, perfect for watercolor and ink combinations. She chooses brown over black because it blends better with autumn tones and creates a softer finish.

With all her tools prepared, she’s ready to bring the first part of the scene to life.
Step 4: Painting the Autumn Tree
Before painting the cottage itself, Nia begins with the tree on the left. Painting foreground elements first helps her avoid leaving awkward gaps later.
Painting Order and Overlap
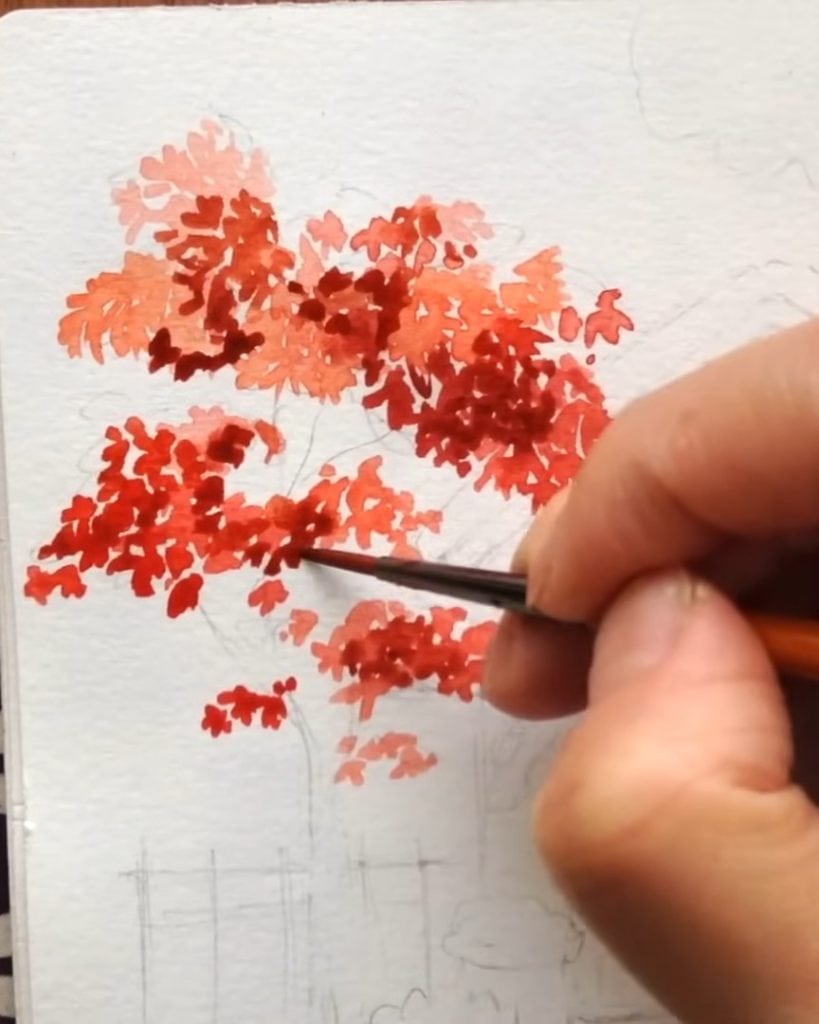
She mixes Quin Sienna and Quin Red to form a beautiful red-orange tone for the maple leaves. Because the tree overlaps the roof, she paints it first. This way, she doesn’t have to worry about painting around it later.
Starting with the largest shape, she fills in the canopy loosely, leaving the trunk area open for now.
Building Leaf Textures
To mimic the flow of real leaves, Nia uses three brushstrokes that meet at the top and flop downward. She repeats this pattern across the entire tree to build texture.
She also separates different leaf sections using value changes. For areas in front, she uses a lighter mix of Quin Red and Quin Sienna.
For leaves in the back, she darkens the tone with a little Sepia. This helps the tree look dimensional and natural.
She reminds beginner artists to keep the edges uneven. Some clusters should hang lower than others. Unevenness makes the tree feel more organic and lively.
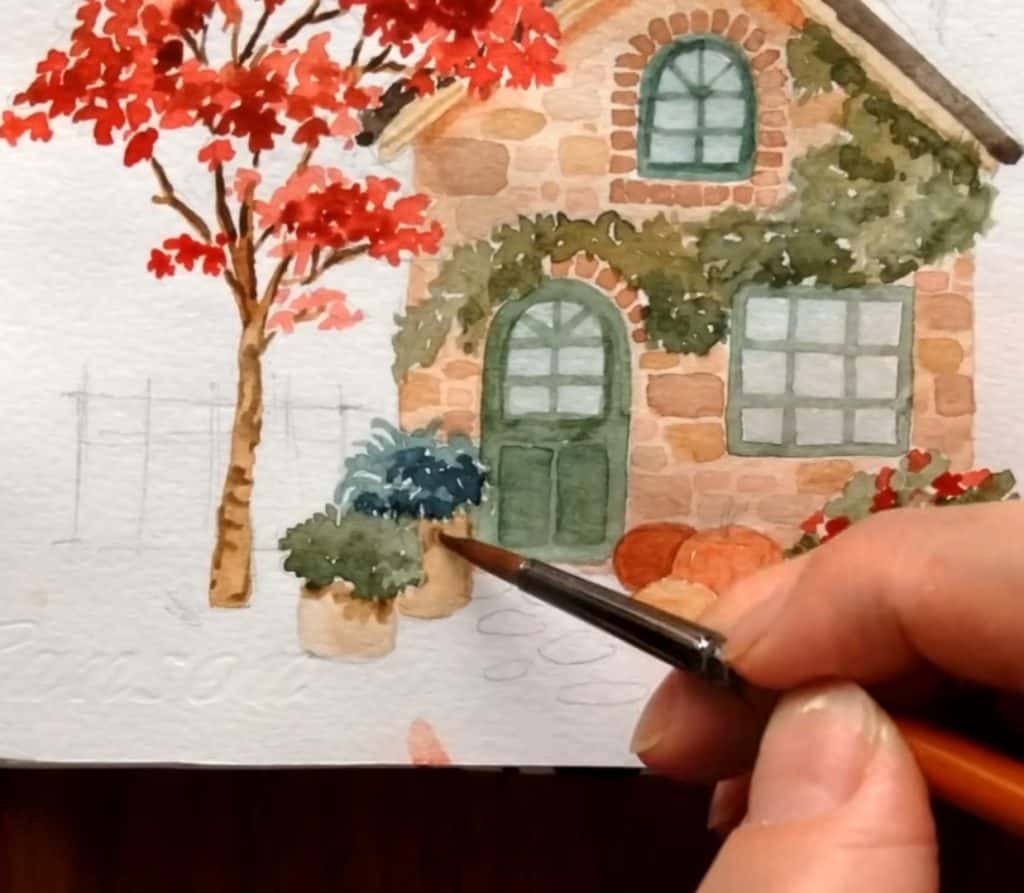
Step 5: Painting the Plants and Pumpkins
Next, Nia moves to the smaller details around the cottage: the potted plants and pumpkins. The accents strengthen the autumn atmosphere.
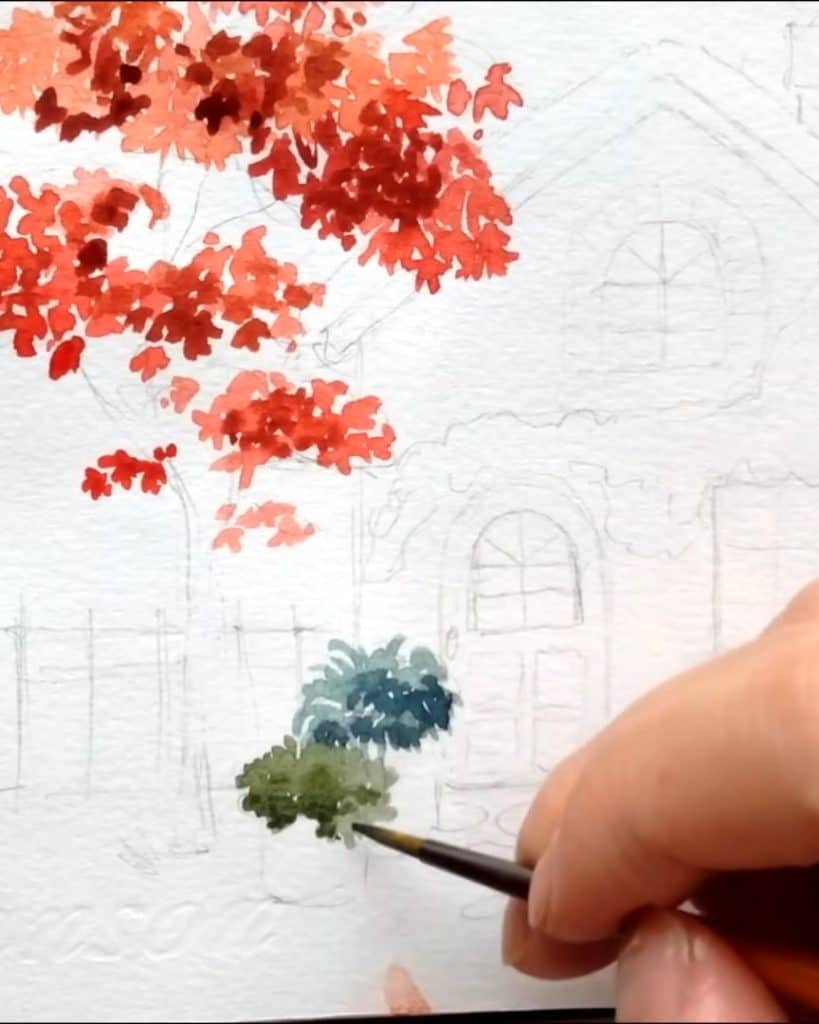
Potted Plants
She begins with the larger plant in a big pot. Using a mix of Indigo and Hooker’s Green in a light consistency, she paints long, floppy leaves.
While the surface is still damp, she drops in a darker version of the same mix to form natural shadows.
For the smaller pot, she adds more Yellow Ochre into the green to vary the tone. Here, she uses tiny dot-like brushstrokes instead of long lines to create a different texture.
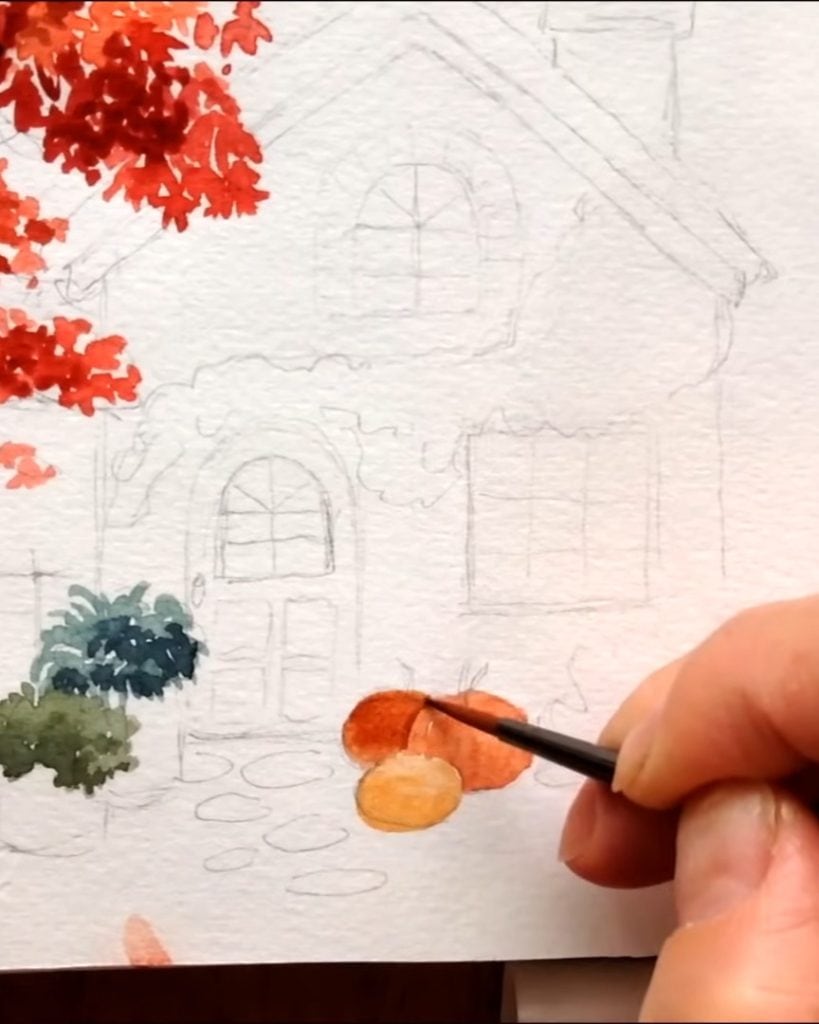
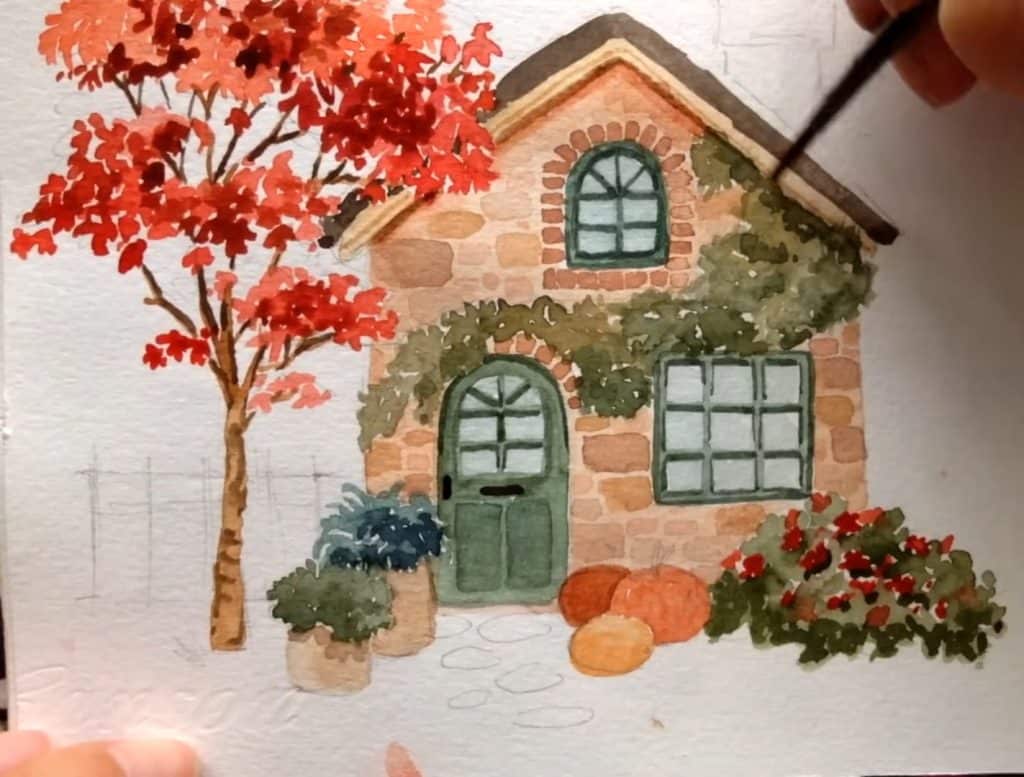
Pumpkins and Autumn Details
Nia mixes Yellow Ochre and Quin Red to create a muted orange for the first pumpkin. For the one in front, she adds more Yellow Ochre to lighten it. The last pumpkin gets a deeper tone with a touch of Sepia and Quin Sienna.
She adds small shadows underneath to ground them and paints the stems with thick Sepia. Together, these pumpkins bring warmth and a seasonal touch to the cottage scene.
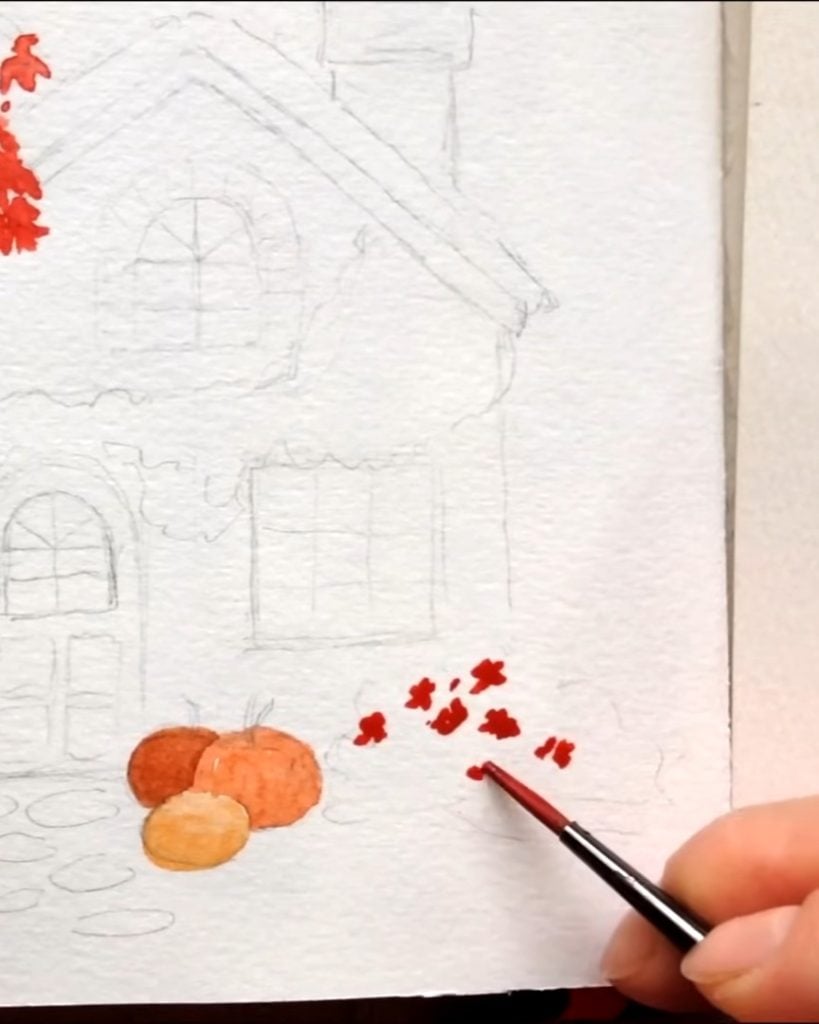
Adding Small Bushes and Flowers
To balance the red of the maple tree, Nia uses the same Quin Red and Quin Sienna mix for the flowers. She paints some as five-petaled blooms and others as simple red dots.
The repetition of color ties the entire painting together. Then, let everything dry before starting on the cottage.
Step 6: Painting the Cottage Exterior
Now, Nian paints the cozy stone cottage. Her goal is to make it rustic, textured, and full of charm.
Creating a Rustic and Woodsy Feel
Nia aims to make her stone cottage look lived-in and cozy. She adds climbing ivy and wall plants that spread over the windows and roof edges. These natural details make the structure feel part of its environment.
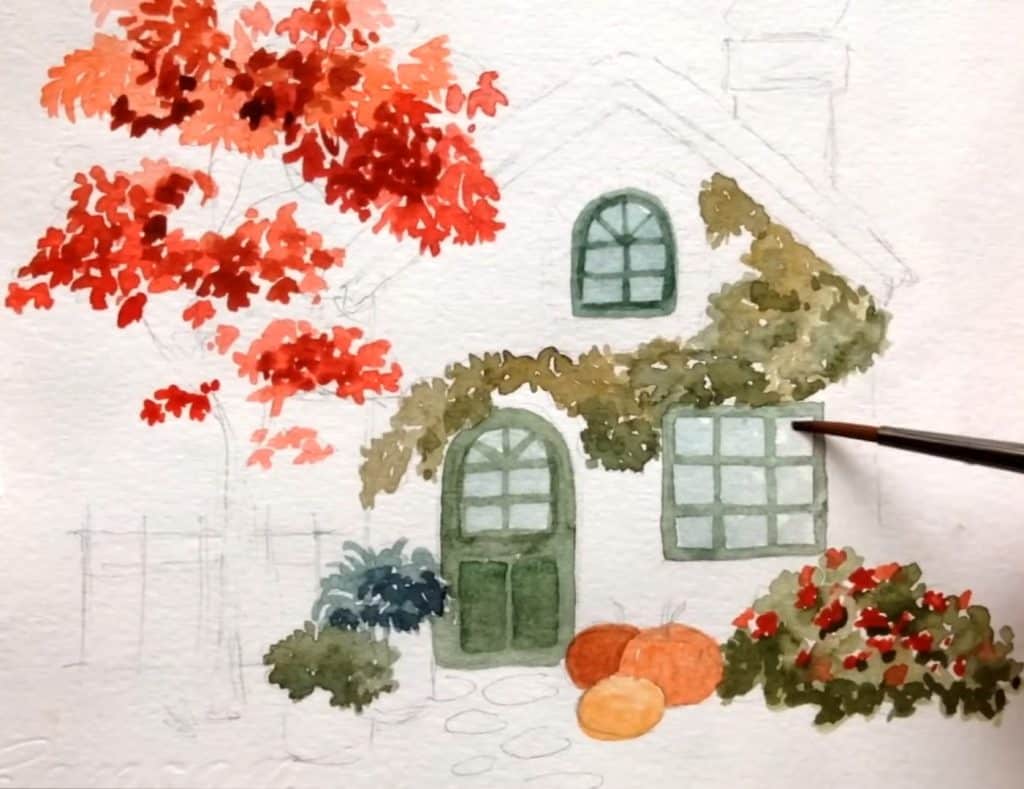
Windows and Door
For the window frames and door, Nia mixes Hooker’s Green, Indigo, and a little Yellow Ochre. This creates a bluish-green shade that contrasts beautifully with the brown walls.
She paints with medium consistency to leave room for later layers. Once dry, she adds molding panels on the door using the same color again to suggest wood details.
For the glass windows, she applies a light Indigo wash to create a subtle reflection effect.
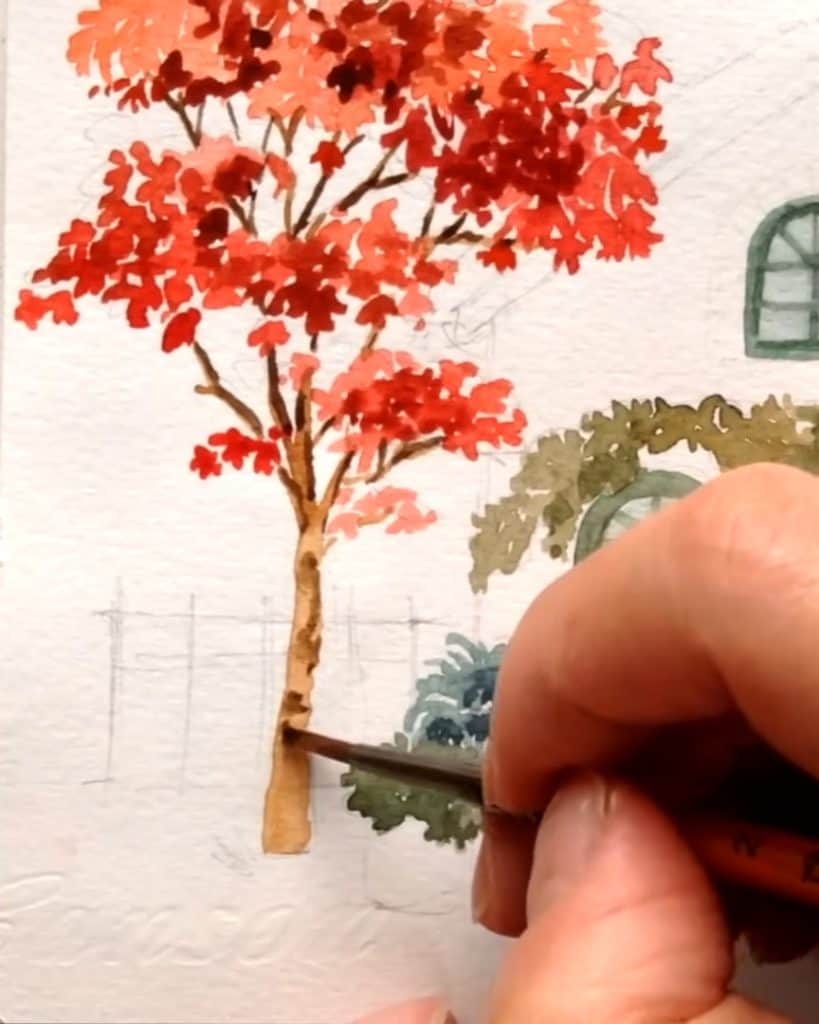
Painting the Trunk and Branches
After the leaves dry, she paints the trunk using Yellow Ochre mixed with Sepia. The result is a warm brown tone that fits well with the red leaves.
Later, she adds more Sepia to darken the smaller branches for better contrast. Using a dry brush, she gently drags paint to form bark texture. This adds realism without over-detailing.
With the tree complete, the painting already feels like autumn.
Base Colors and Wall Texture
She begins with the exterior walls using a soft mix of Sepia, Yellow Ochre, and Quin Sienna in thin layers. She paints lightly, letting the paper texture show through to mimic the uneven surface of stone.
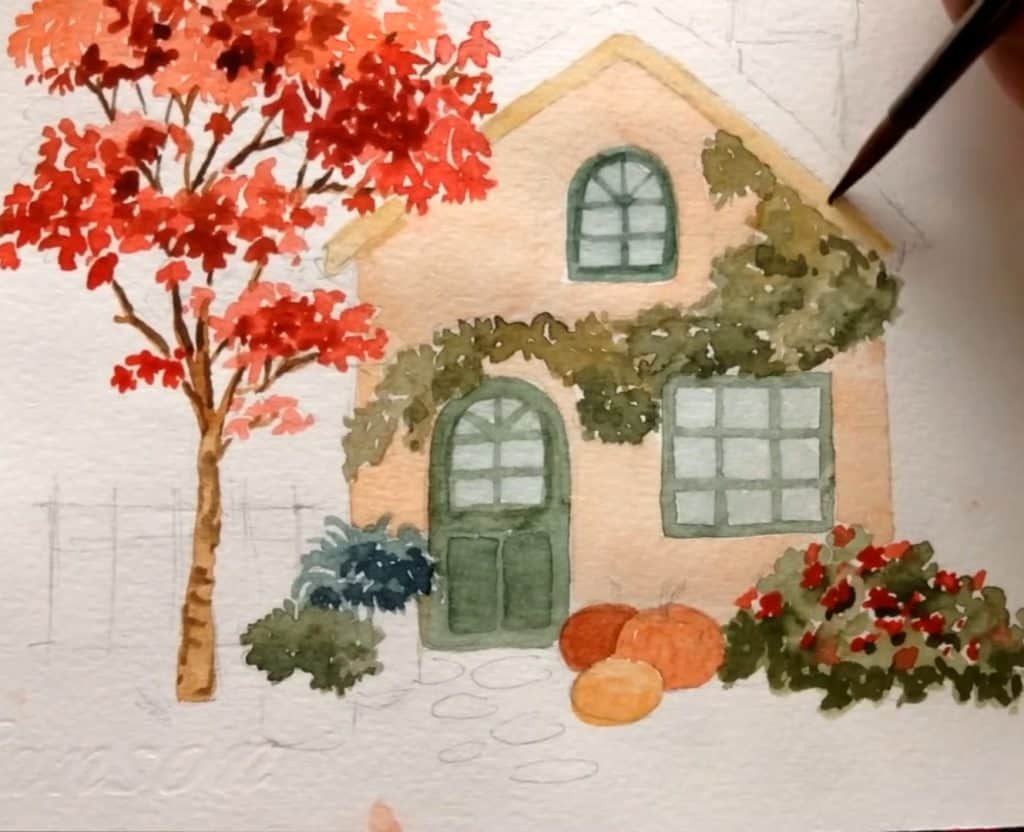
Paint the Roof
For the roof, she uses Sepia and Yellow Ochre in thin layers. Then she deepens certain parts with darker Sepia for shadows.
She paints a clear dividing line between the wall and roof using the base wall color again, which helps define the structure.

Step 7: Adding Details and Shadows
With the main structure complete, Nia enhances the scene by layering textures and shadows for depth.
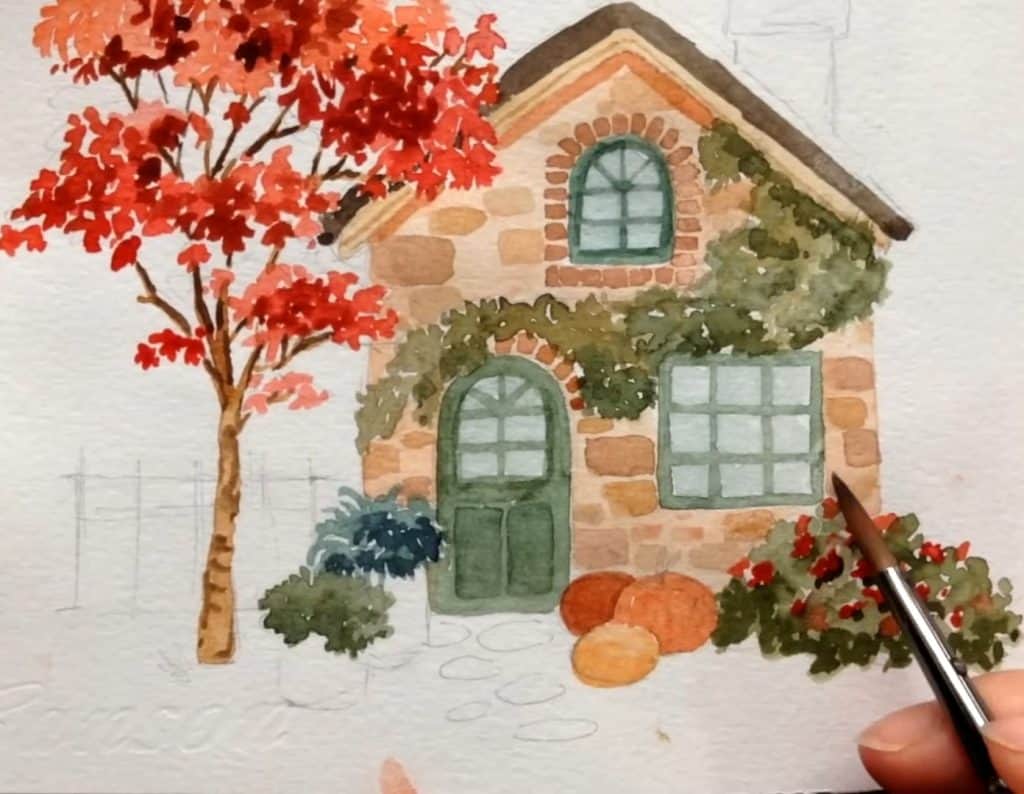
Painting Stone Textures
Nia adds texture to the cottage walls, starting with the stone frame around the attic window.
She mixes Sepia and Quin Sienna for a warm tone and paints uneven stones using a round brush. Sometimes, she adjusts the mix with Yellow Ochre for color variety.
Each stone is painted in different sizes and shades to create a natural look. With light to medium paint consistency, she keeps the texture soft, giving the cottage a gentle, rustic charm.
She paints the pots using a mix of sepia and yellow ochre. For the shadows underneath the plants in the pot, she uses the same mixture as the base color of the pot.
Adding Door Details and Deepening Shadows
Once the stone texture is dry, Nia focuses on the cottage door. She uses a thick mix of Sepia to paint small details like the mail slot and door handle.
For the door frames, she applies the same base color but in a heavier consistency to make the edges stand out. Using a fine brush, she paints thin dark lines for precision.
Afterward, she strengthens the shadows beneath the roof, around the window frames, and around the door with more Sepia to create contrast and depth.
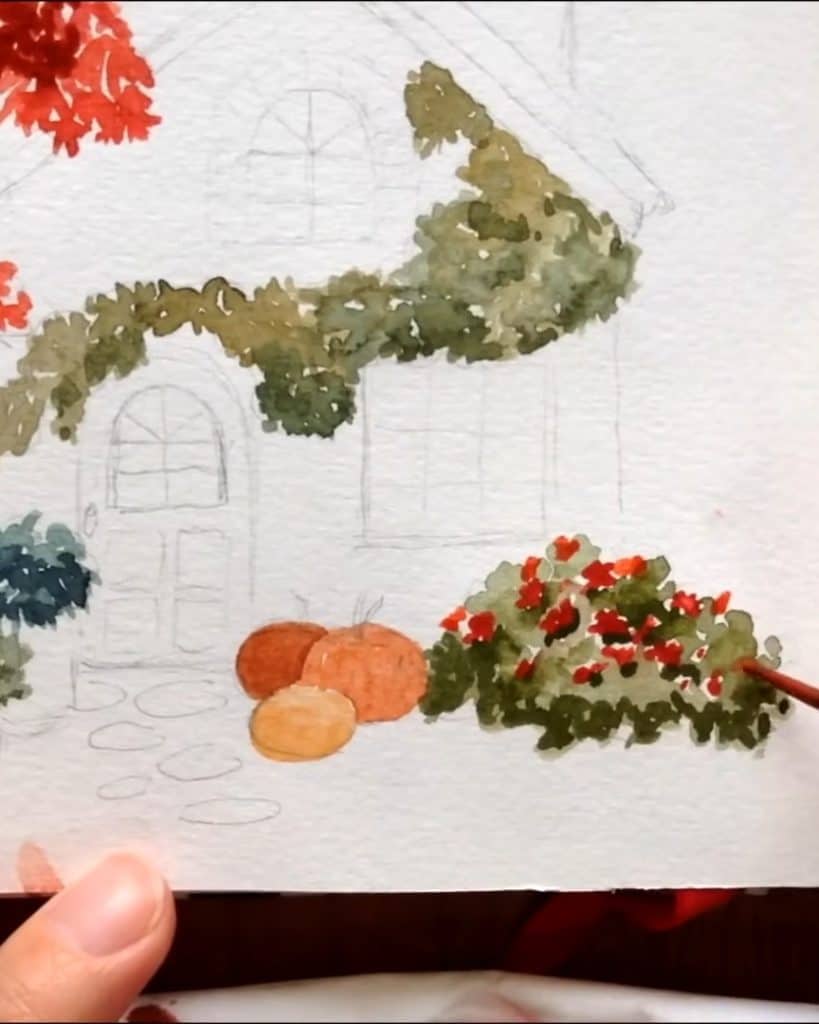
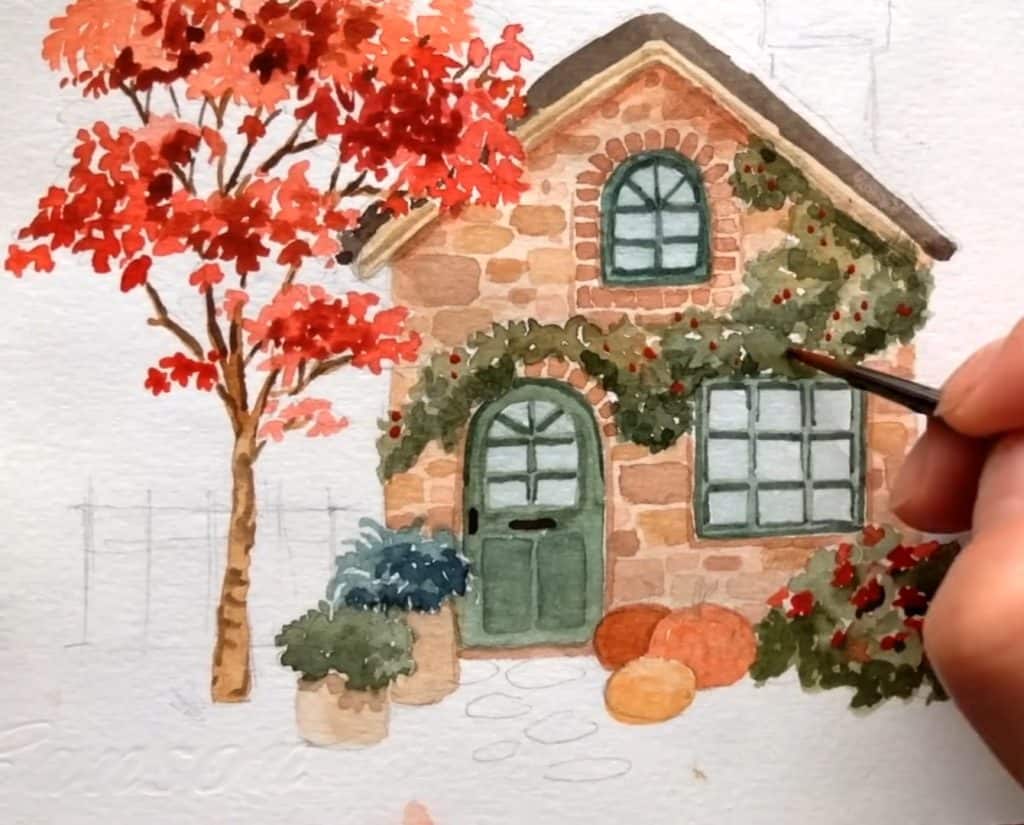
Enhancing Greenery and Bushes
Nia looks back at the plants and bushes to refine their values. She adds a thicker mix of Indigo and Hooker’s Green for shadows, creating depth among the leaves.
Then she dots tiny red berries in a few places. These small touches balance the overall color palette and make the greenery more vibrant.
To keep the bushes airy, she leaves bits of white paper between brushstrokes. This negative space gives the illusion of light shining through the leaves.
Paint the Chimney
Next, Nia works on the chimney using the same approach as the cottage walls. She starts with a base layer of warm brown, then lets it dry completely before adding texture.
Using different tones of brown in light to medium consistency, she paints uneven stones for a natural look.
For the top section, she directs the stones vertically to define the structure.
After each layer dries, she deepens the shadow beneath the chimney’s top edge with more Sepia, giving it a strong, dimensional finish.

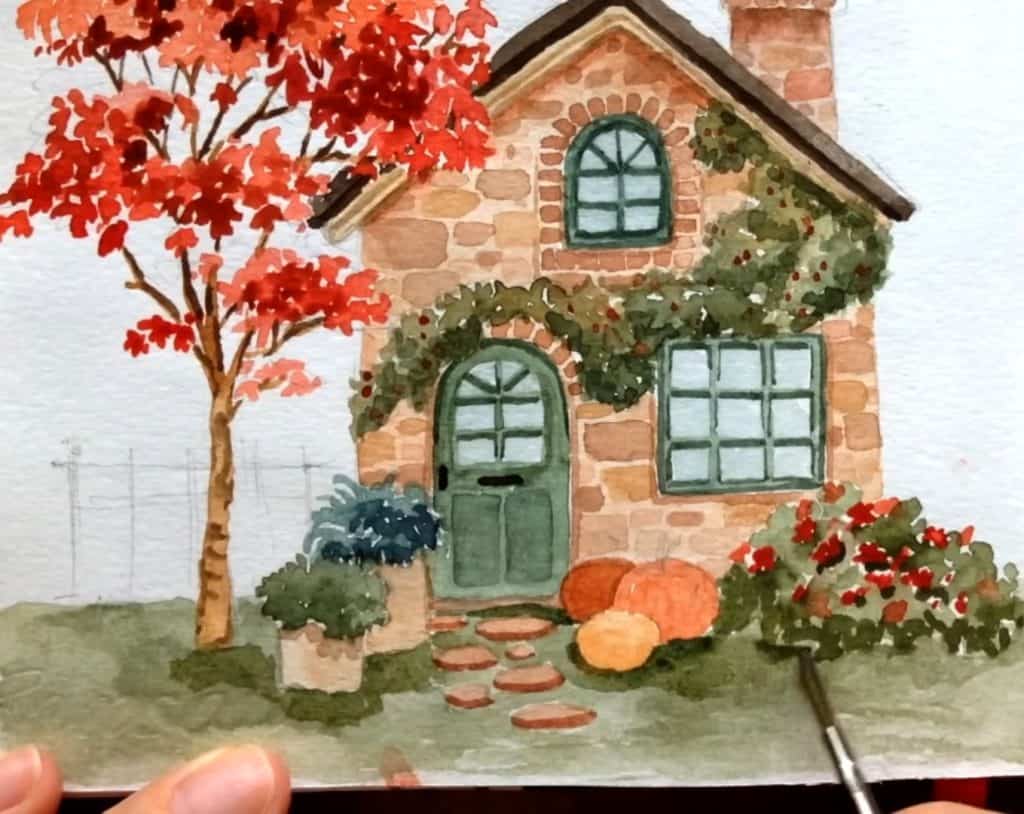
Ground and Walkway
Nia paints the walkway stones using the same brown tones already on her palette. She keeps them irregular in shape to maintain a natural feel.
Next, she paints the grassy area using Hooker’s Green, Indigo, and Yellow Ochre. First, she lays down a light base, then adds darker strokes around the plants, pumpkins, and tree roots for shadows.
These small layers anchor the cottage firmly in its setting. The painting now feels cohesive from top to bottom.
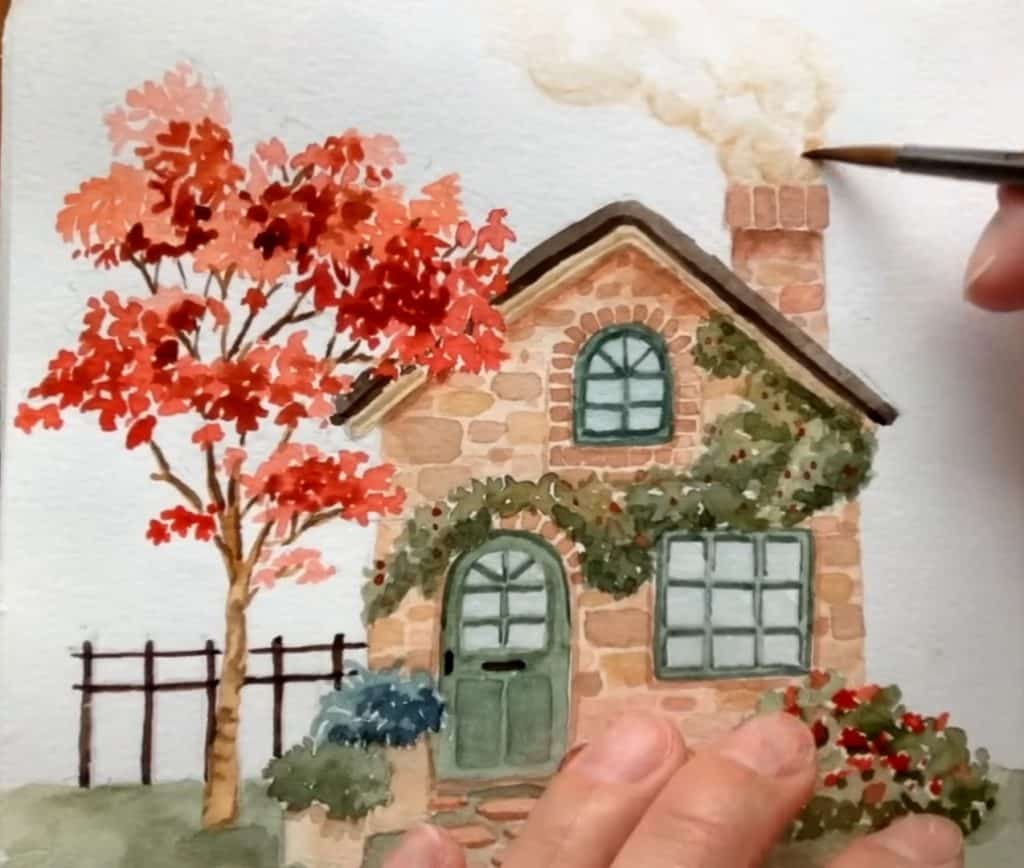
Painting the Chimney Smoke and Fence
Nia paints the chimney smoke using the same color mix as the cottage base, adding a touch of Yellow Ochre for warmth. She layers the smoke from a very thin wash to a medium consistency in some areas to create gentle dimension.
For the fence, she uses a consistent Sepia mix, keeping the strokes simple and clean. Then, she returns to the smoke, adding slightly thicker layers near the chimney edges to make it look denser and more realistic.
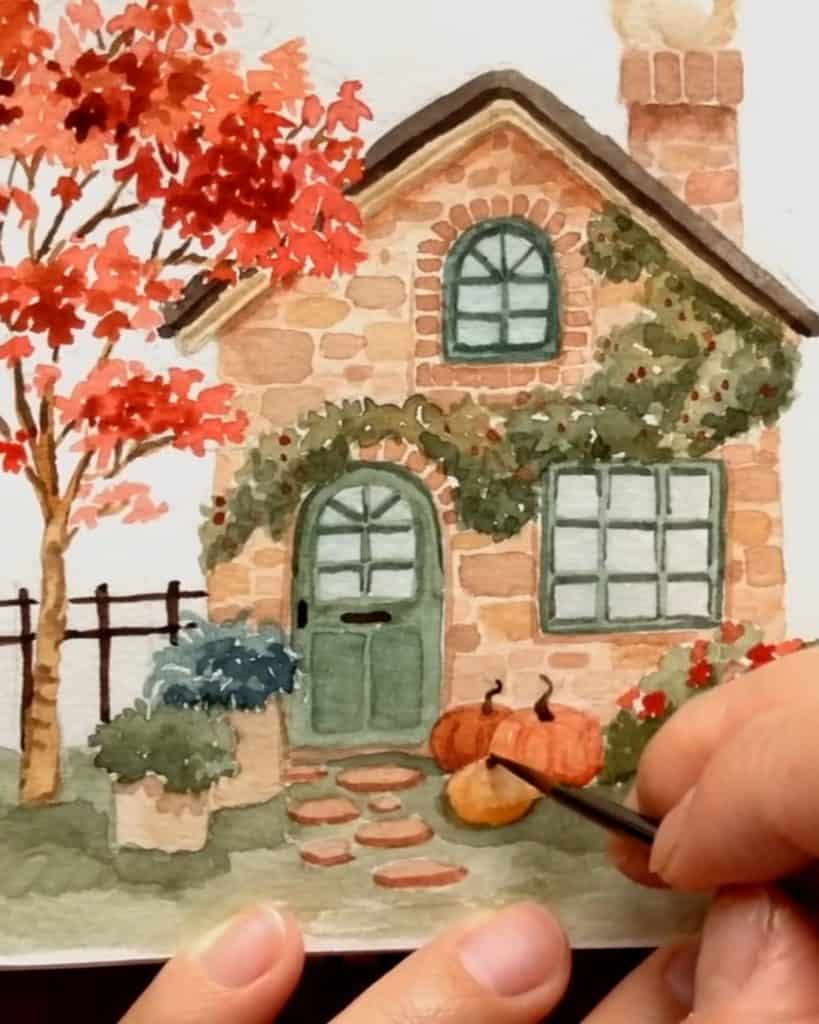
Adding Final Pumpkin Details
Nia revisits the pumpkins, using the same color in a thicker consistency. She adds ribs and shadows with medium paint and finishes the stems using rich Sepia.
Step 8: Inking, Outlining, and Final Touches
Now, Nia adds the final ink details and finishing touches that bring everything together.
Outlining with Pen or Pencil
Using her Unipen brown fine liner, she carefully outlines key elements: the roof edges, the door, and a few of the larger stones. She avoids outlining every detail, choosing only where contrast is needed.
She notes that colored pencils can also work beautifully for a softer finish, especially for this style of watercolor and ink illustration.

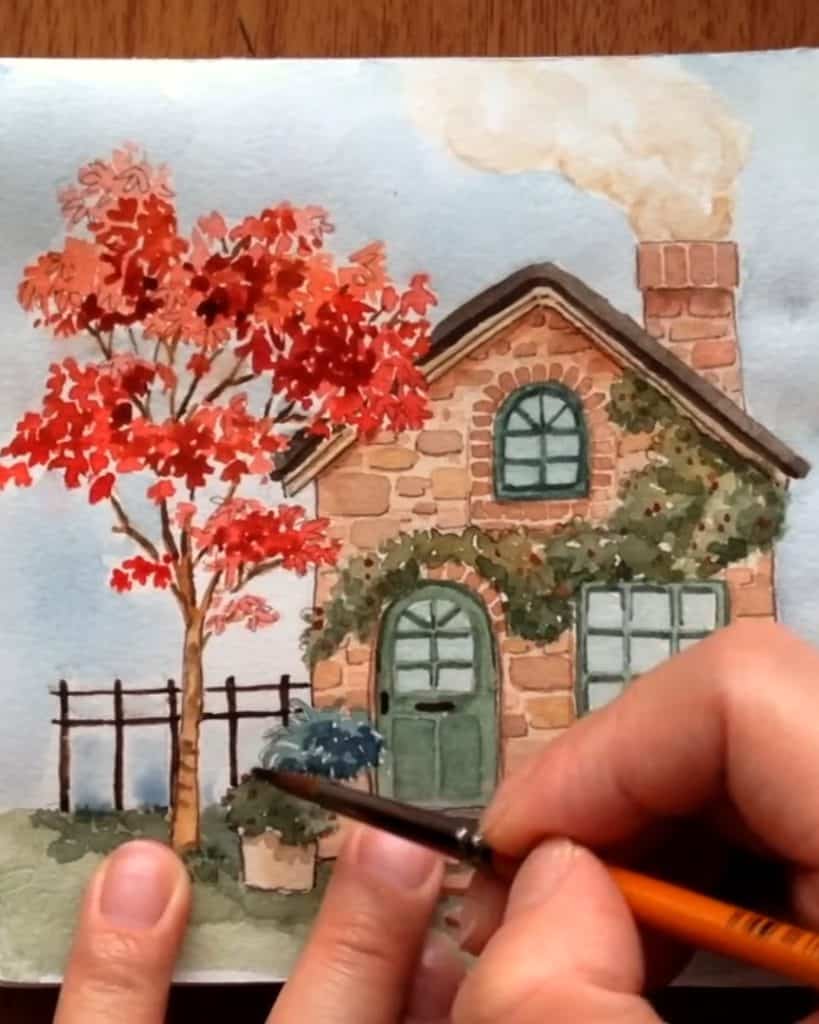
Adding a Background Wash
To complete the composition, Nia decides to add a background wash. She mixes a very light Indigo wash to contrast against the warm tones of the cottage and leaves.
Because her paper is 200 gsm and tends to warp, she dries it carefully with a hairdryer. This helps the sheet flatten while keeping colors clean and crisp. The cool blue background instantly enhances the red and orange tones of autumn.
Now, the painting looks complete: bright red leaves, rustic walls, glowing pumpkins, and gentle smoke rising from the chimney.
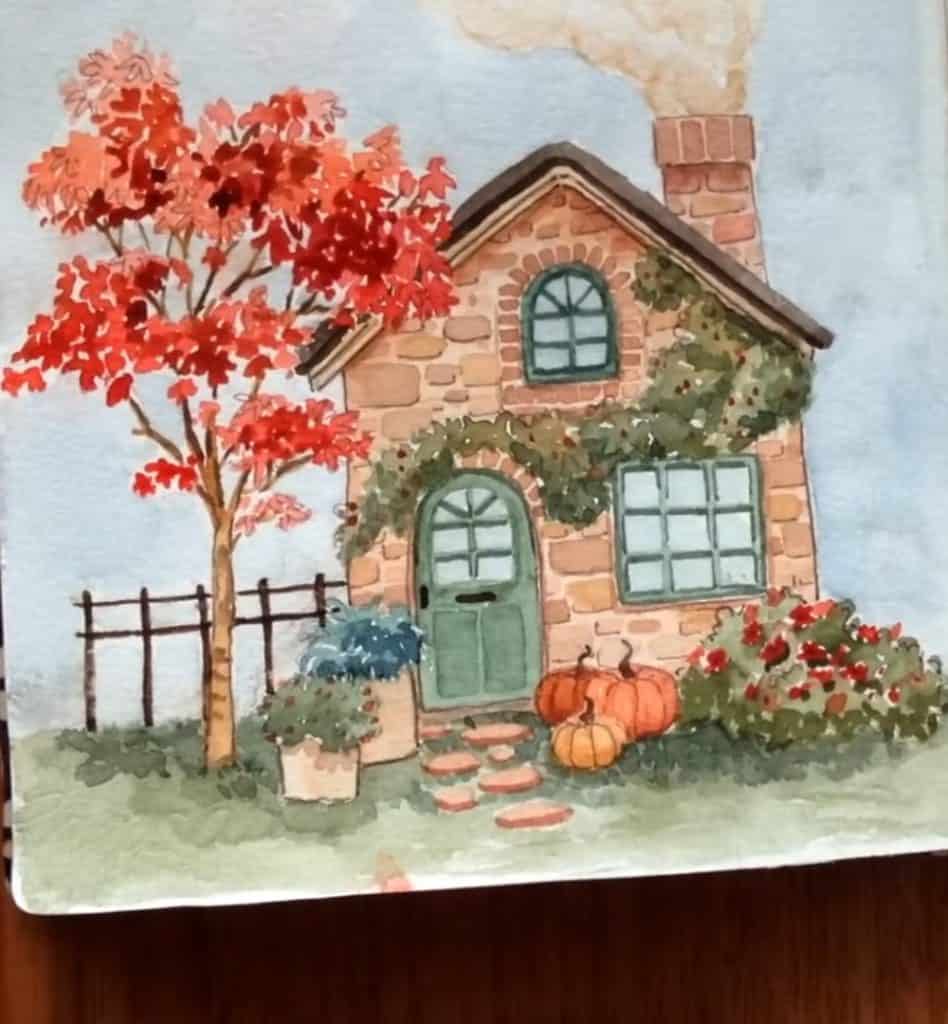
Final Thoughts
It’s lovely how Nia’s stone cottage painting feels alive, isn’t it? Every soft wash and fine ink line builds a scene full of warmth and story. Try following her steps and see where your brushes take you — maybe to your own quiet autumn world on paper.