
Looking for a simple yet stunning way to capture the beauty of anemone and hydrangea flowers in your artwork?
In this tutorial inspired by Karla Jodoin, the artist will guide you step-by-step through the process of drawing these gorgeous blooms. From sketching the basic shapes to adding intricate details, the tutorial shows how to bring the flowers to life.
Let’s get started!
Contents
- 1 Getting Started with Supplies
- 2 Step 1: Sketching the Floral Composition
- 3 Step 2: Inking the Anemone Petal Outline
- 4 Step 3: Drawing the Hydrangea Blooms
- 5 Step 4: Adding Stems and Leaves
- 6 Step 5: Refining Anemone Flower Centers and Erasing Guidelines
- 7 Step 6: Adding Final Details and Dimension
- 8 Step 7: Finishing the Leaves with Texture
- 9 Wrapping Up
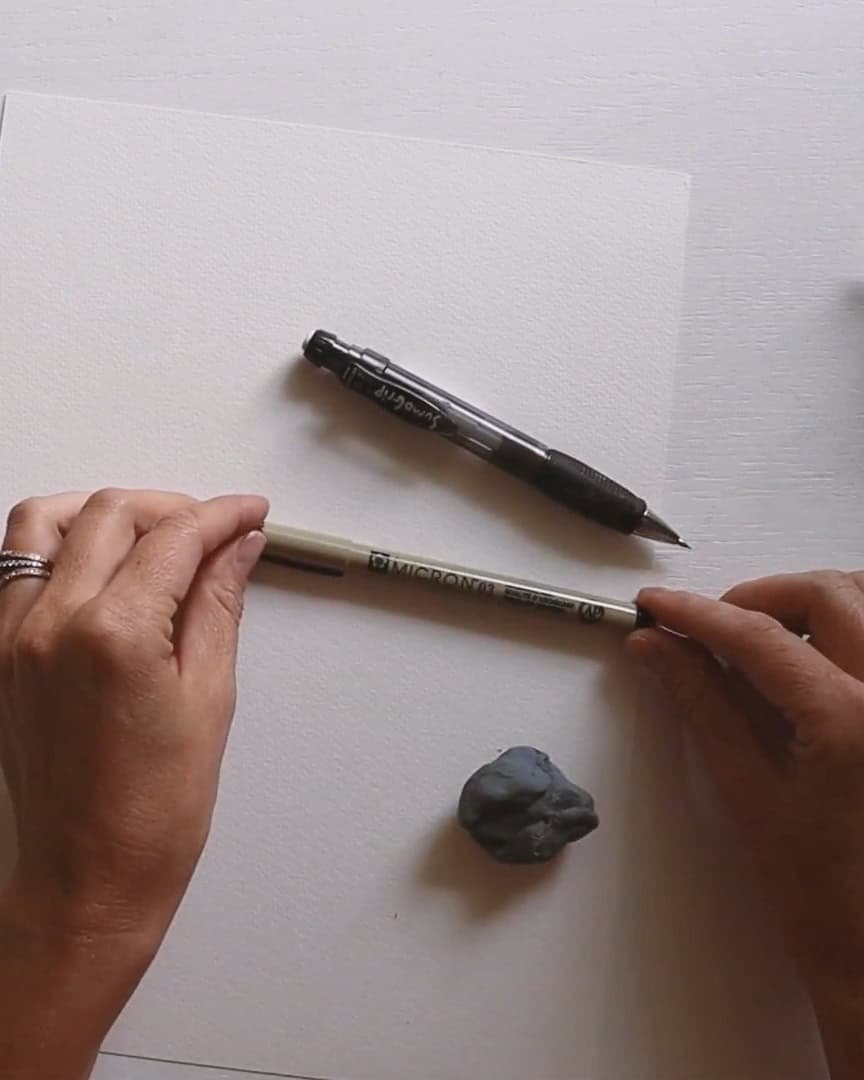
Getting Started with Supplies
Let’s begin with the basics. These are the tools the artist always reaches for when drawing flowers.
Here’s what the artist uses:
-
- A sketching pencil: the artist goes with a Sakura mechanical pencil.
- A fineliner: the artist likes the Sakura of America Micron pen, size 3.
- A kneadable eraser
- Good quality art paper:the artist is using Strathmore watercolor paper. It’s thick and has a lovely, natural texture that the artist enjoys.
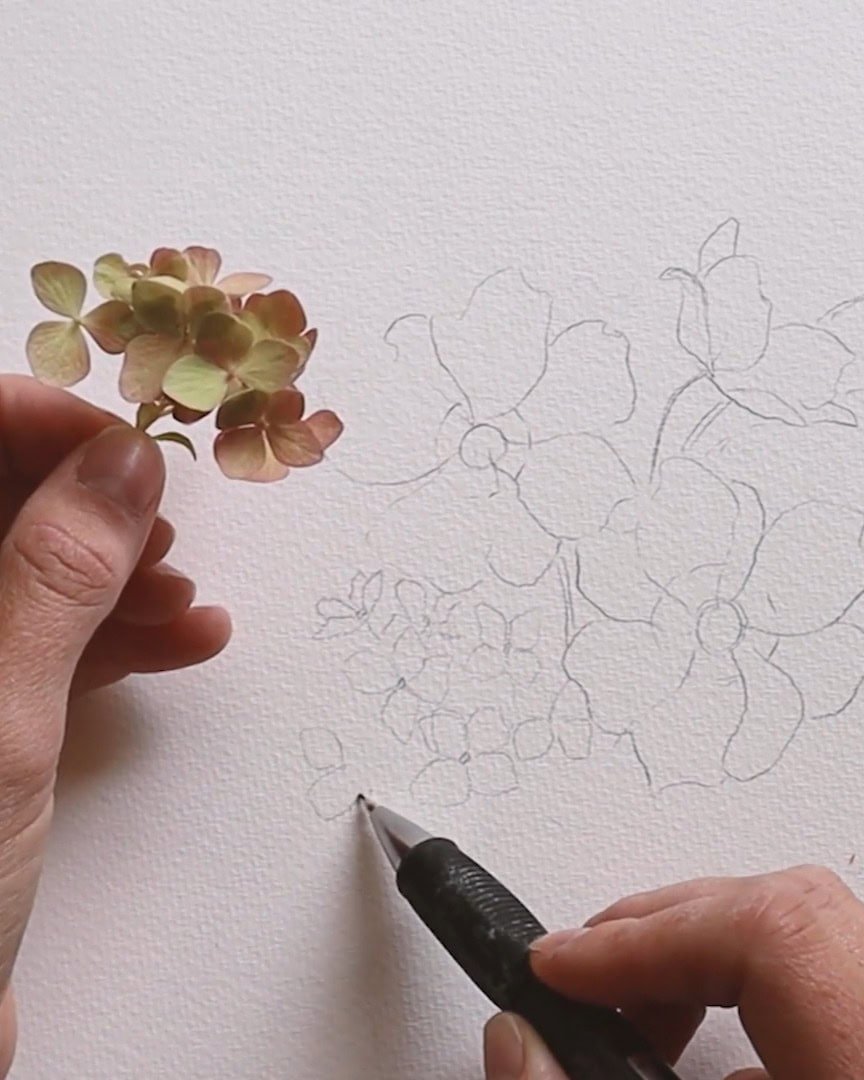
Step 1: Sketching the Floral Composition
The artist likes to start every drawing with a light, rough outline. It helps the artist get a feel for the overall composition before committing to any details.
The artist begins by sketching a few simple circles—one for each flower’s stamen. Around each of those, the artist draws another light circle to mark where the anthers will spread out.
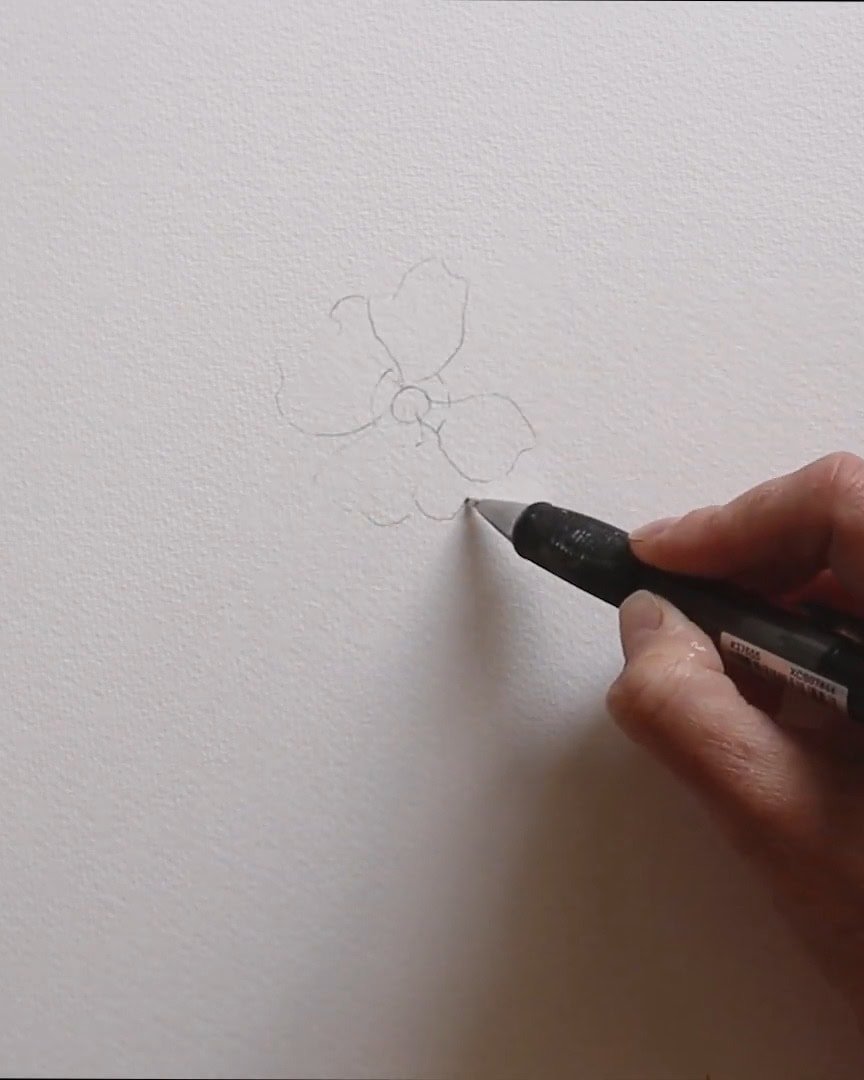
Next, the artist lightly sketches the petals around each center. The artist is not adding details yet. Right now, the artist is just looking at the flowers and blocking out the main shapes.
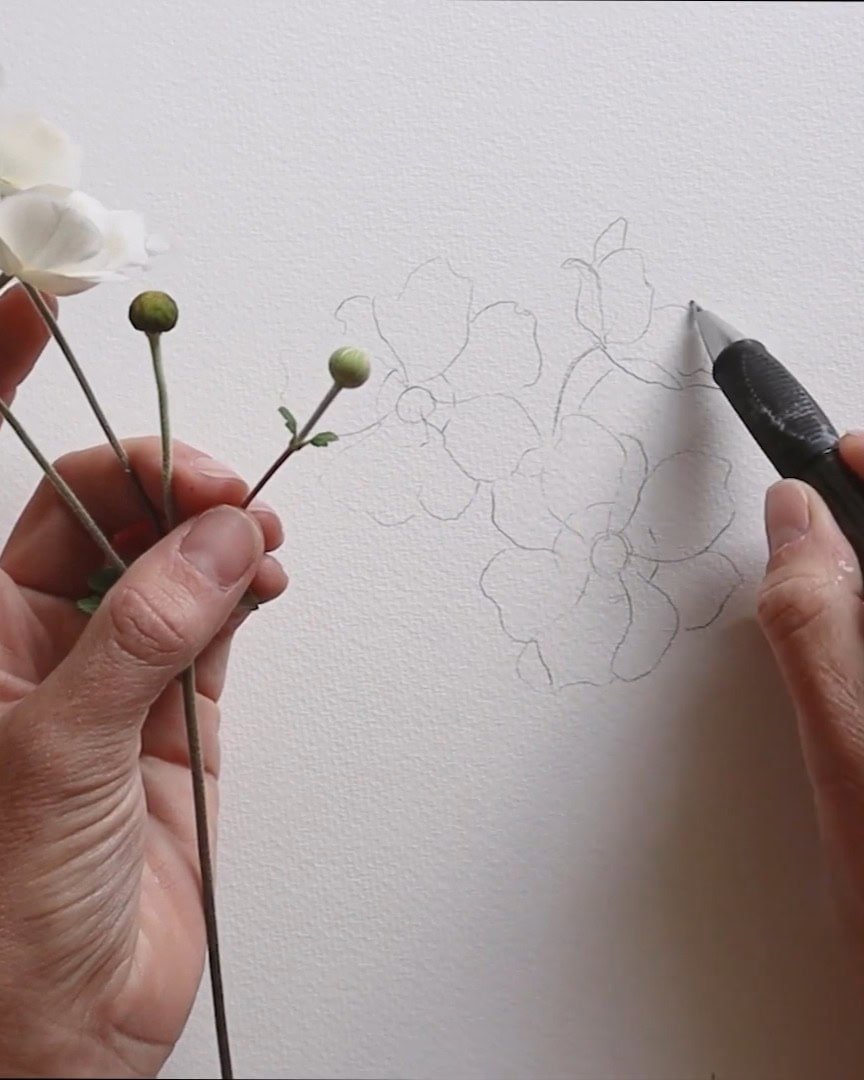
To create some contrast, the artist also sketches a few hydrangea blooms. They’re easy to draw and look great next to the larger anemone flowers.
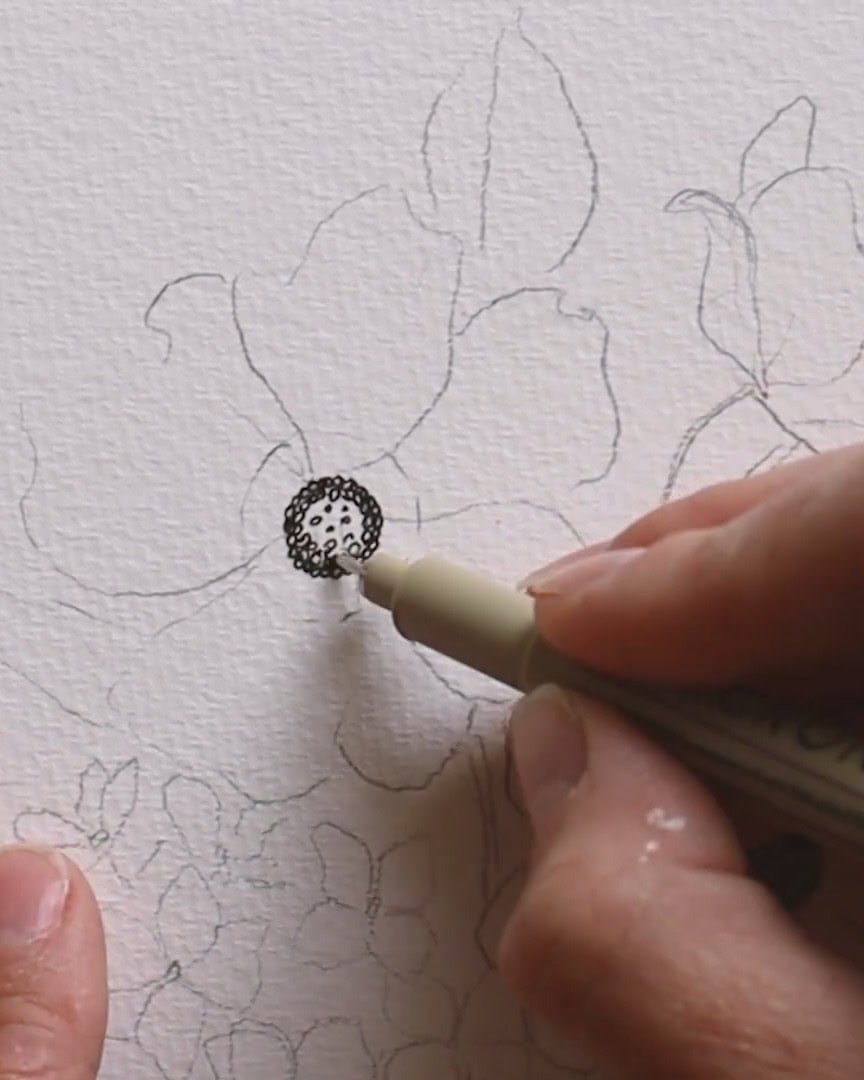
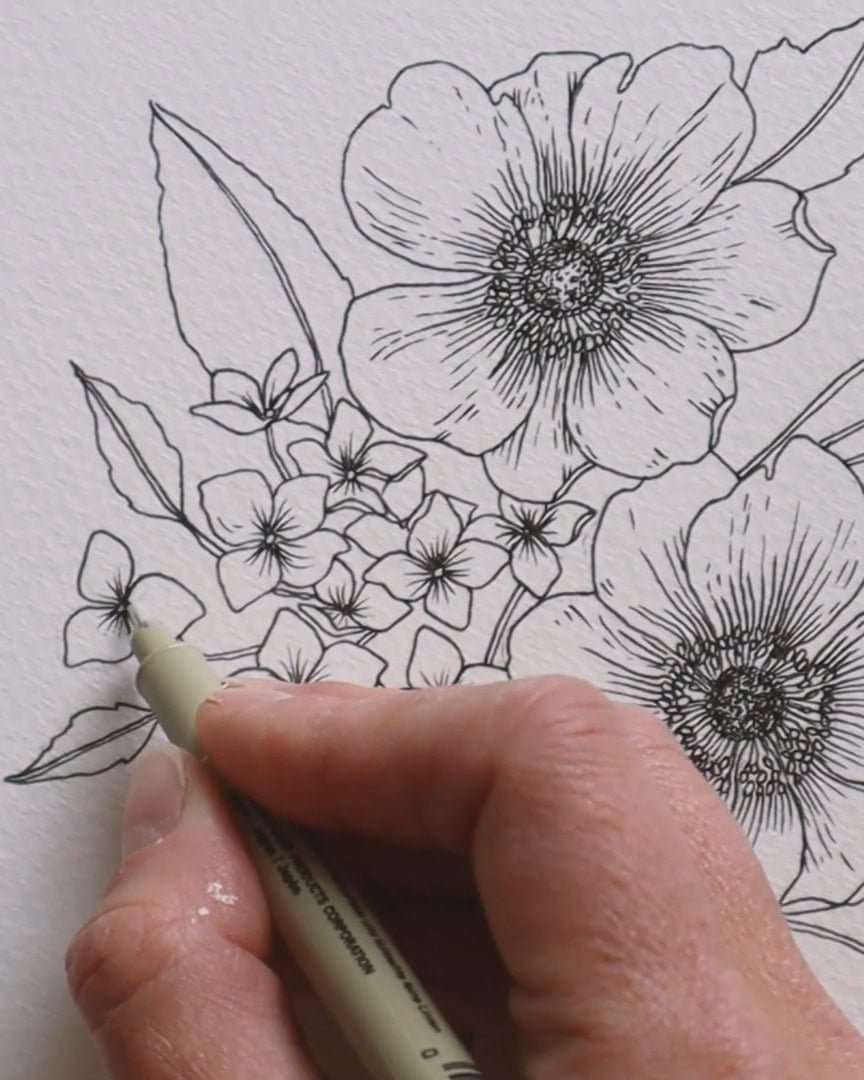
Step 2: Inking the Anemone Petal Outline
Once the pencil sketch feels right, the artist moves on to inking. The artist takes time here and builds each part with care and intention.
Inking the Anemone Centers
The artist starts with a Sakura Micron fineliner and begins at the center of the anemone. To draw the stamen, the artist layers many tiny circles inside the large circle sketched earlier.
If you look closely at a real anemone, the stamen is full of these little circular shapes. The artist tries to mimic that texture as best as possible.
Outlining the Petals
With the centers done, the artist starts adding the petals. Each petal has an elongated U-shape, but the artist doesn’t make them identical. Real flowers aren’t perfect, and that’s what makes them beautiful.
To create texture, the artist adds:
- Small dips along the edges
- An extra line next to the edge to show folds or curled areas
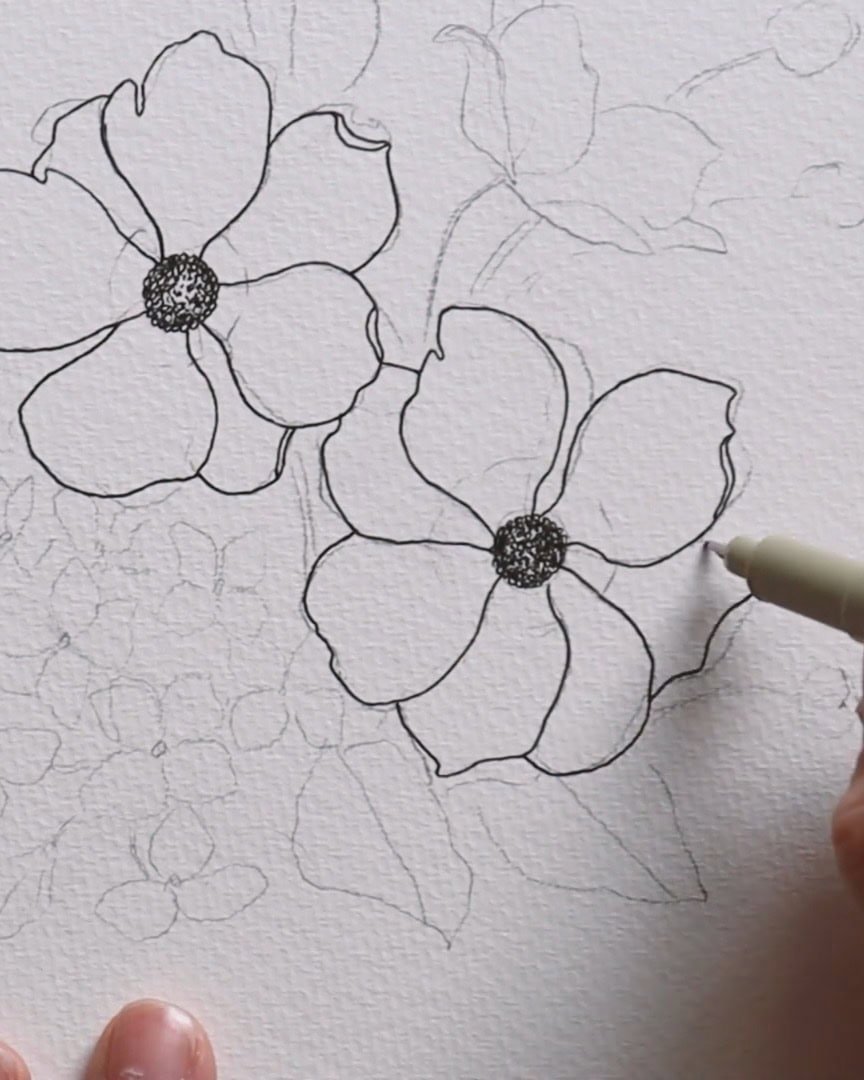
The artist goes around the flower and fills in all the petals, keeping the movement natural and loose.
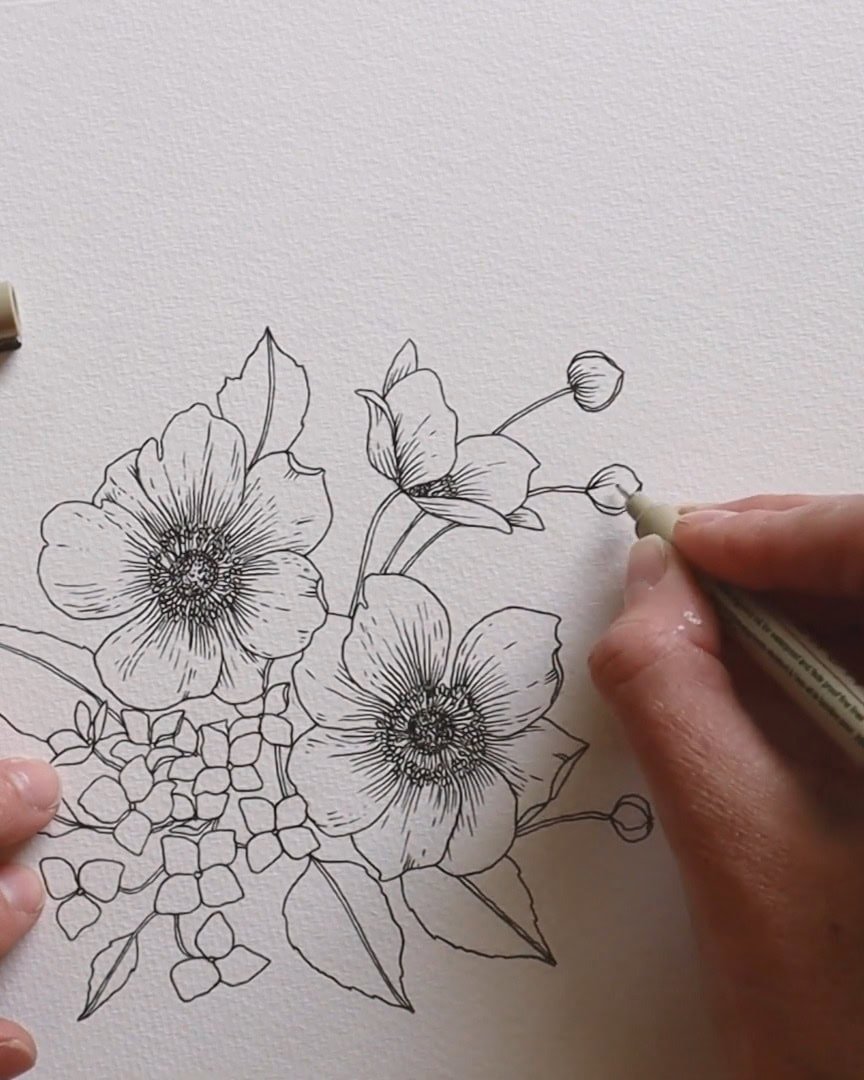
Drawing the Side Bloom and Buds
Next, the artist moves to a side-view bloom. The petals have the same shape, but the artist only draws a partial U-shape at the bottom so it looks like it’s viewed from the side.
Then, the artist inks a few small circles for the stamen and moves on to a few buds nearby.
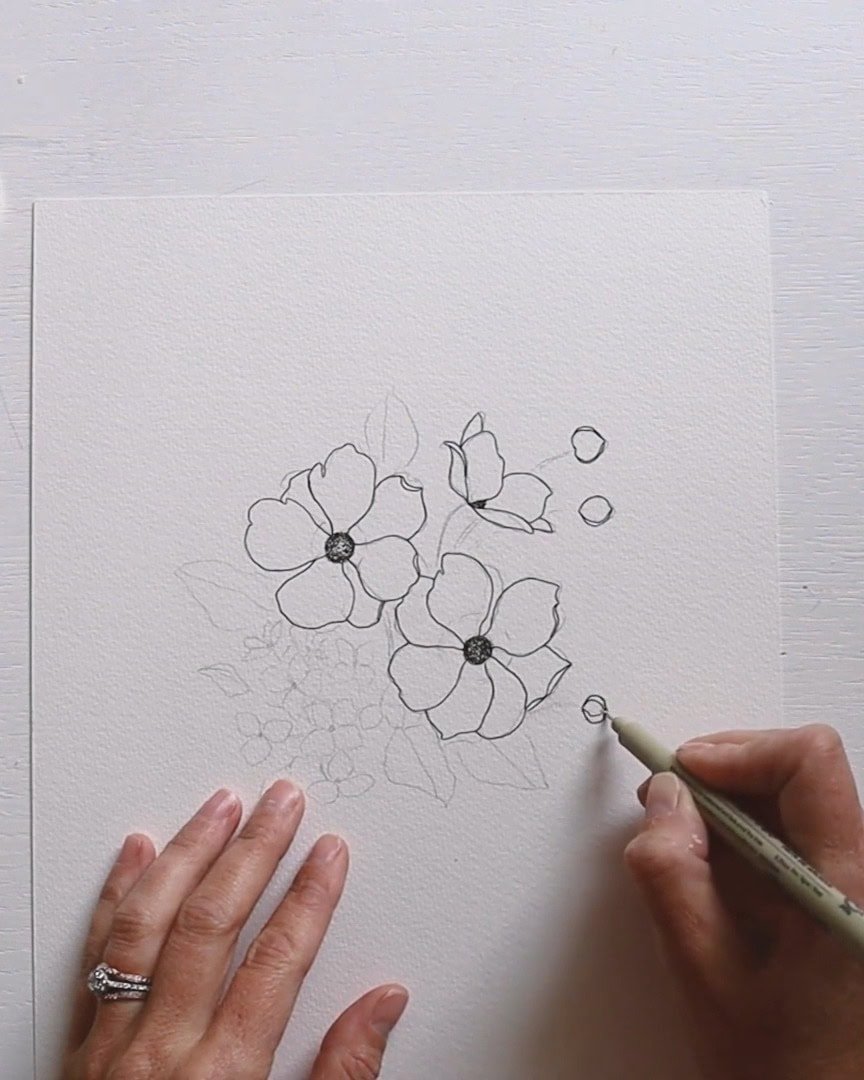
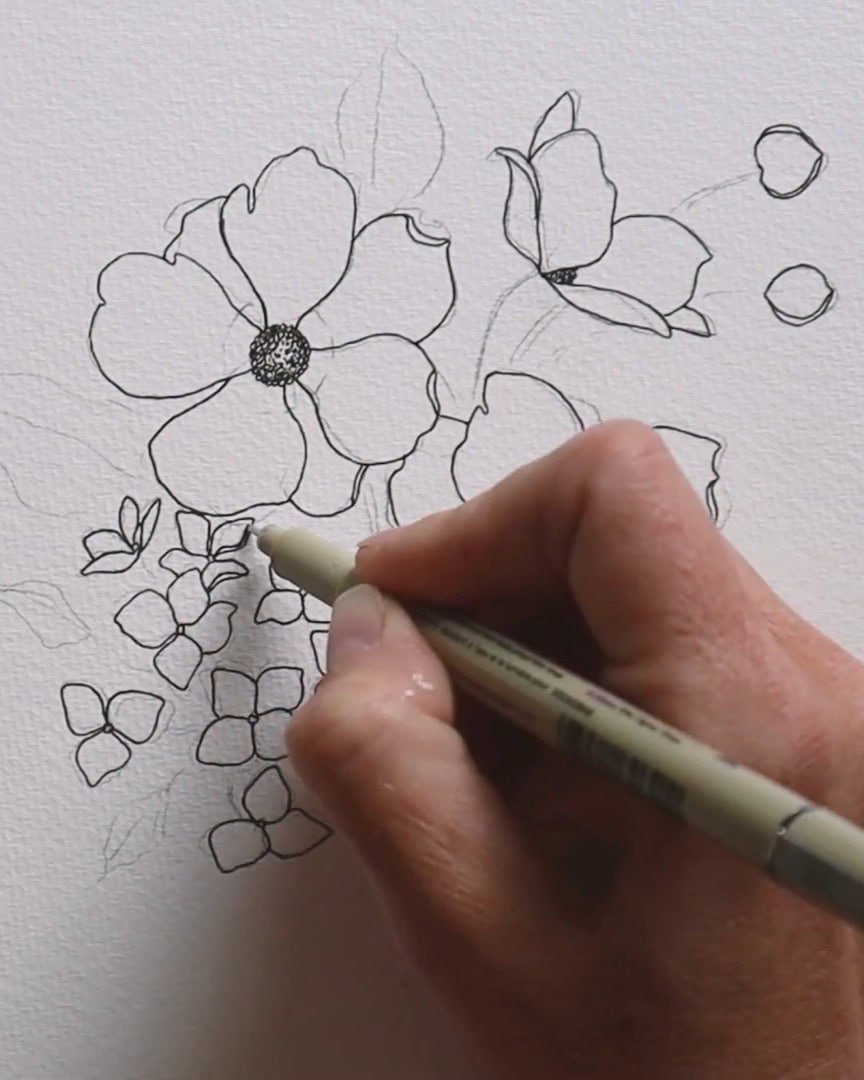
Step 3: Drawing the Hydrangea Blooms
Now that the buds are done, the artist moves on to the hydrangeas. These flowers are simple but add so much charm to the piece.
The artist begins with a small circle in the center of each bloom. Then, the artist draws diamond-shaped petals around them.
Some have three petals, and some have four, just like the real ones the artist is looking at. The artist also adds a few extra blooms to fill in the space nicely.
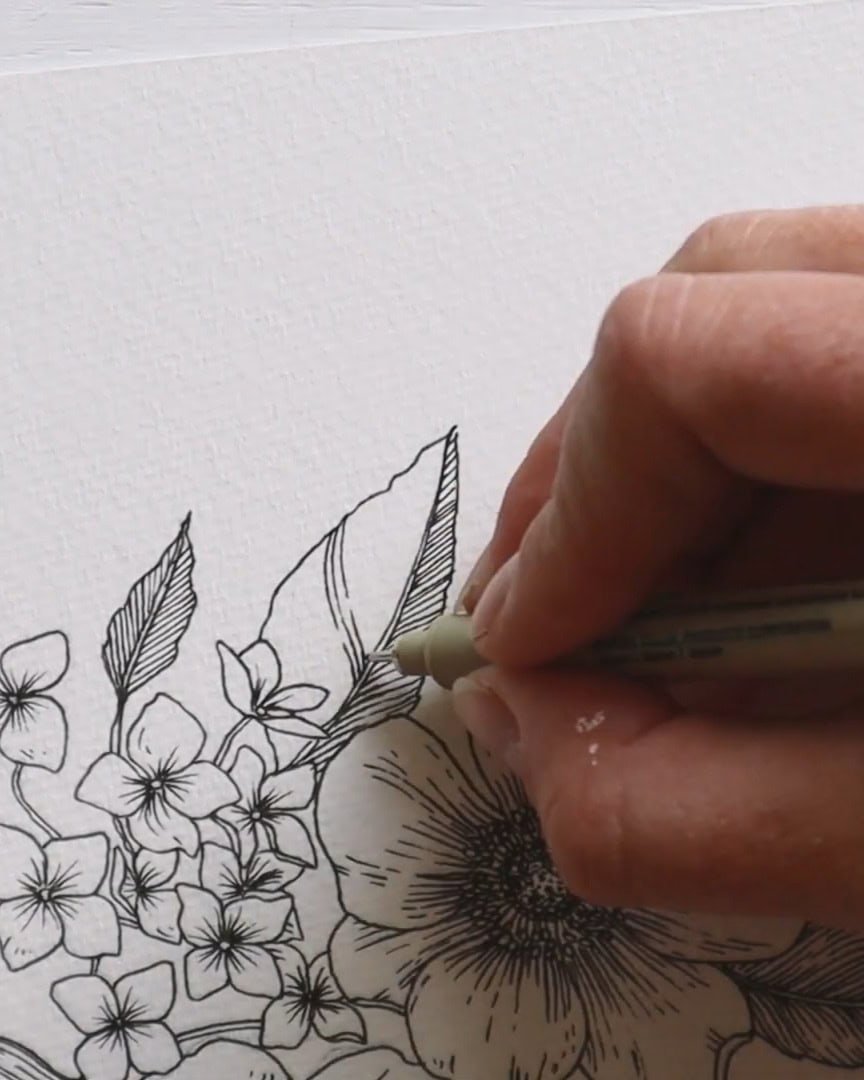
Step 4: Adding Stems and Leaves
Now that the flowers are in place, it’s time to bring in the stems and leaves. They help tie the whole piece together.
The artist starts with a central vein for the smaller leaves, then draws a jagged curved line on each side.
The artist doesn’t stress too much about perfecting the lines—everything comes together beautifully once the details are done.
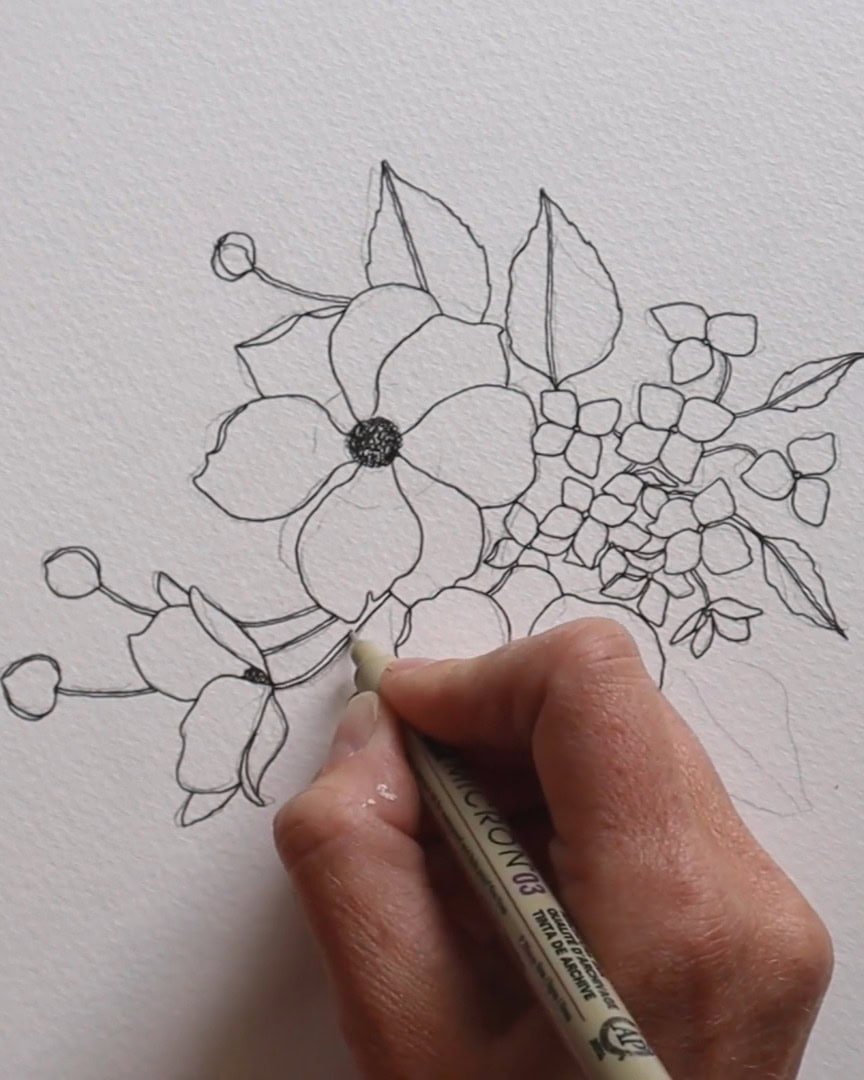
The artist uses two parallel lines for the larger leaves for the center vein, and then builds out a diamond shape with the same jagged edges.
Sometimes, the artist rotates the page to keep the hand comfortable as the drawing continues.
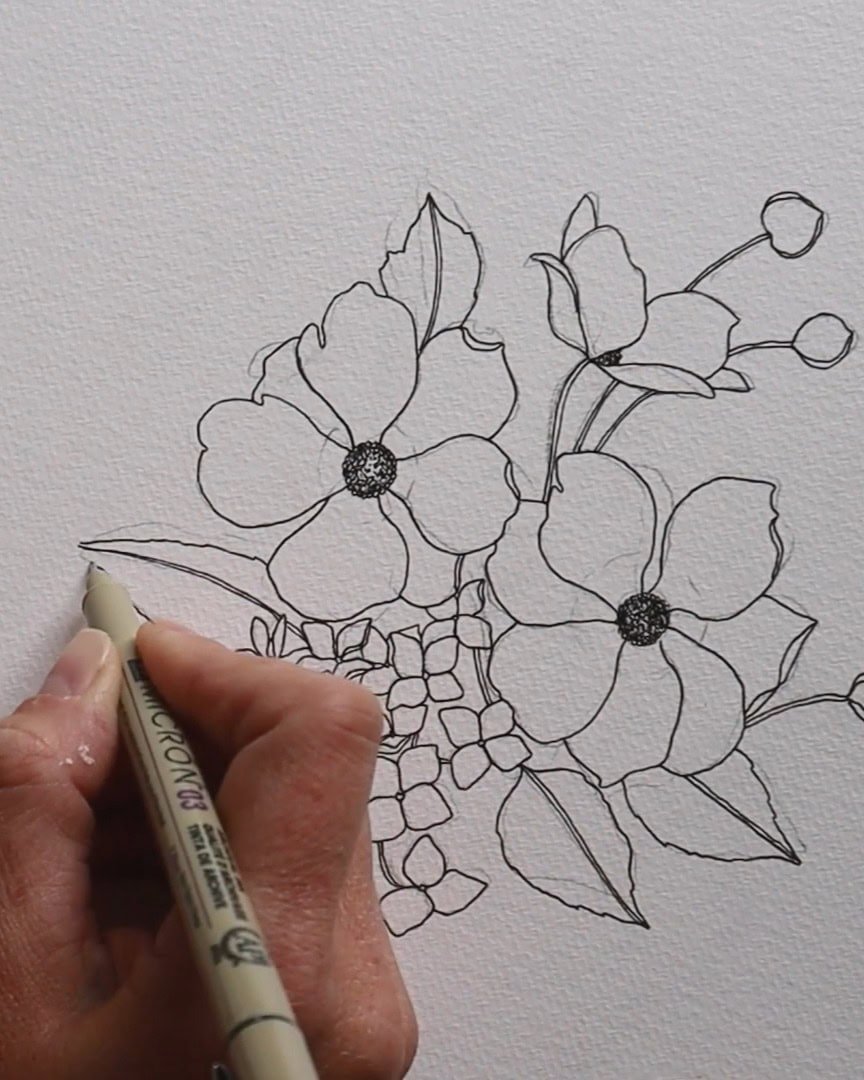
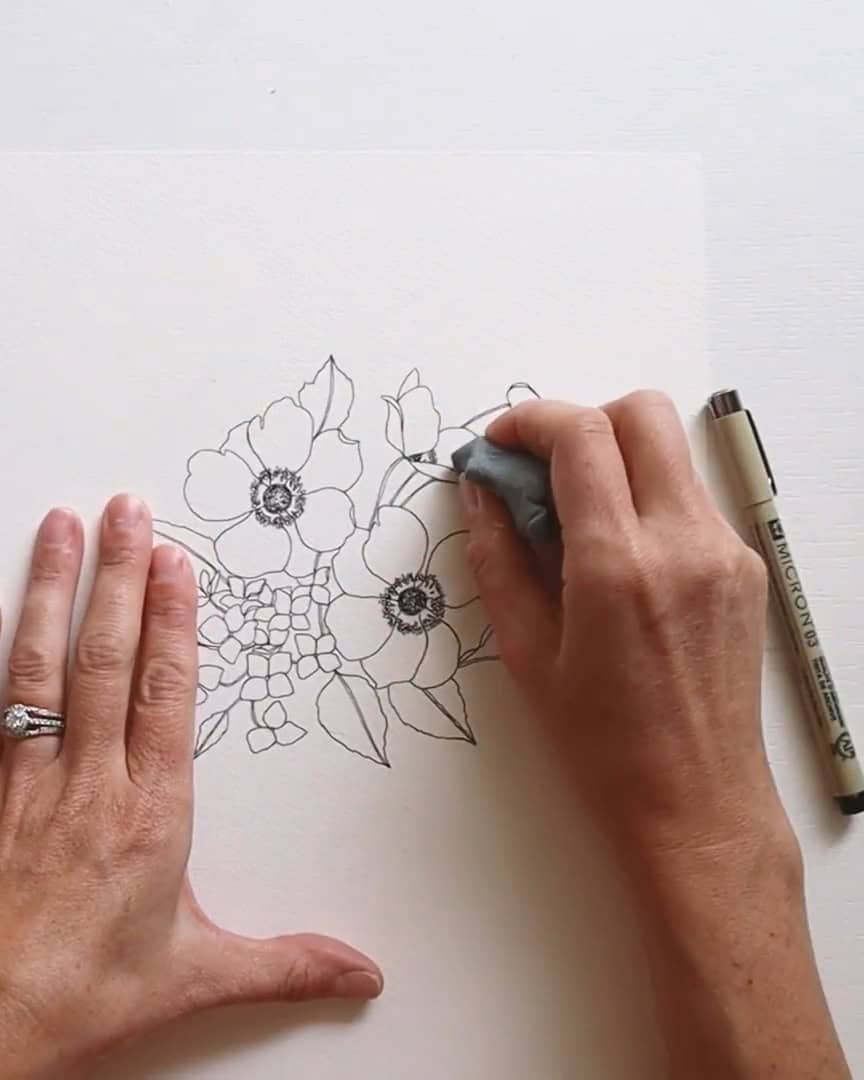
Step 5: Refining Anemone Flower Centers and Erasing Guidelines
The artist likes to slow down and focus on the details, with the main shapes complete. The artist returns to the larger circle sketched earlier and uses it as a guide to fill in tiny oval shapes for the seeds around the stamen.
The artist works around until the circle is complete.
Before moving on, the artist erases all pencil guidelines. This helps keep the ink pens from wearing out too fast.
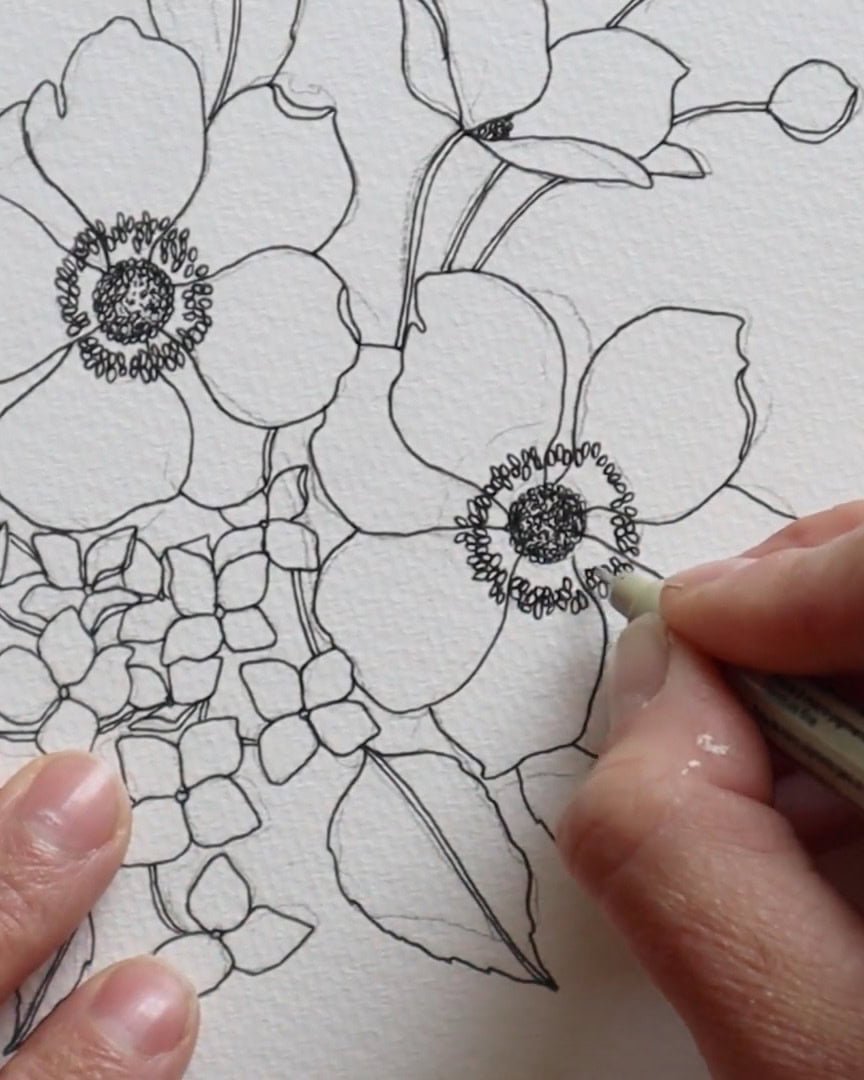
Step 6: Adding Final Details and Dimension
Now that everything is clean and the pencil lines are gone, the artist can focus on adding depth and texture.
The artist starts with the center of each bloom, drawing short, quick lines from each seed back to the stamen. This helps fill the space and makes the flower feel more realistic
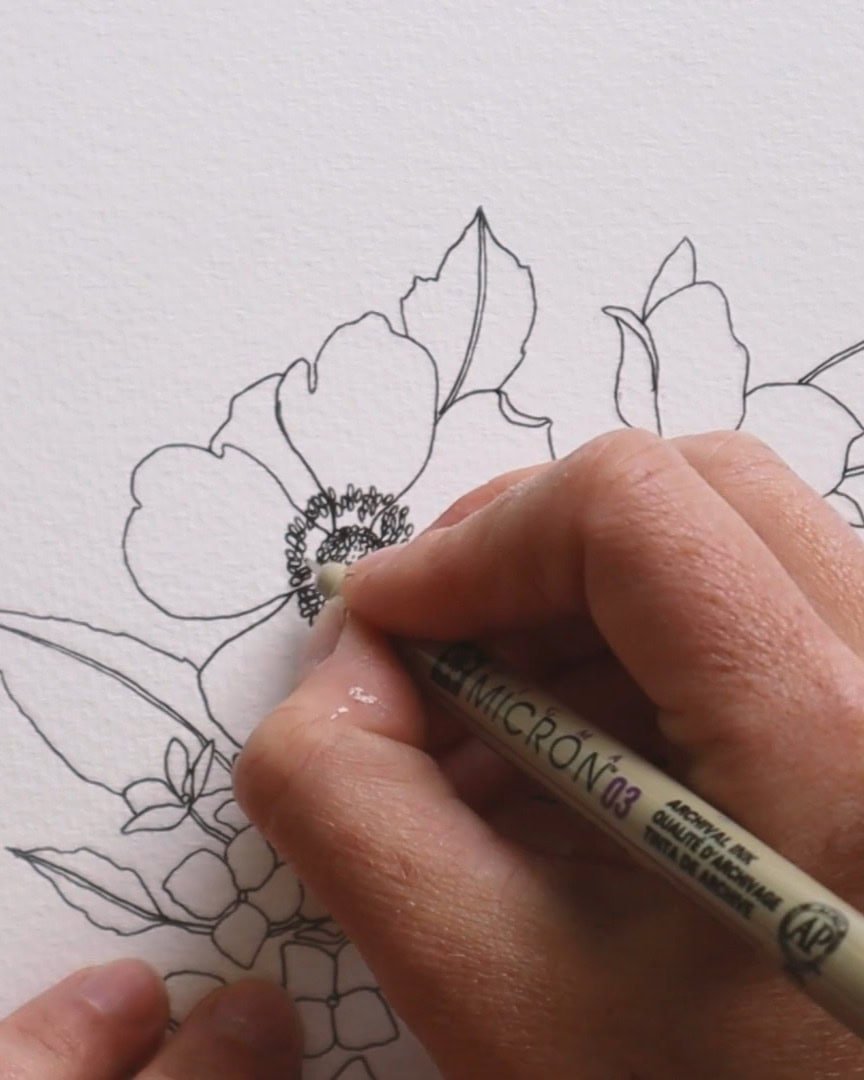
Then, the artist begins adding detail lines to the anemone petals. The artist uses light, quick strokes and concentrates most lines toward the center and edges. This creates a sense of depth and shape.
The artist adds a few lines toward the center for the angled anemone blooms. The artist also adds detail at the bottom of each bud to help them pop.
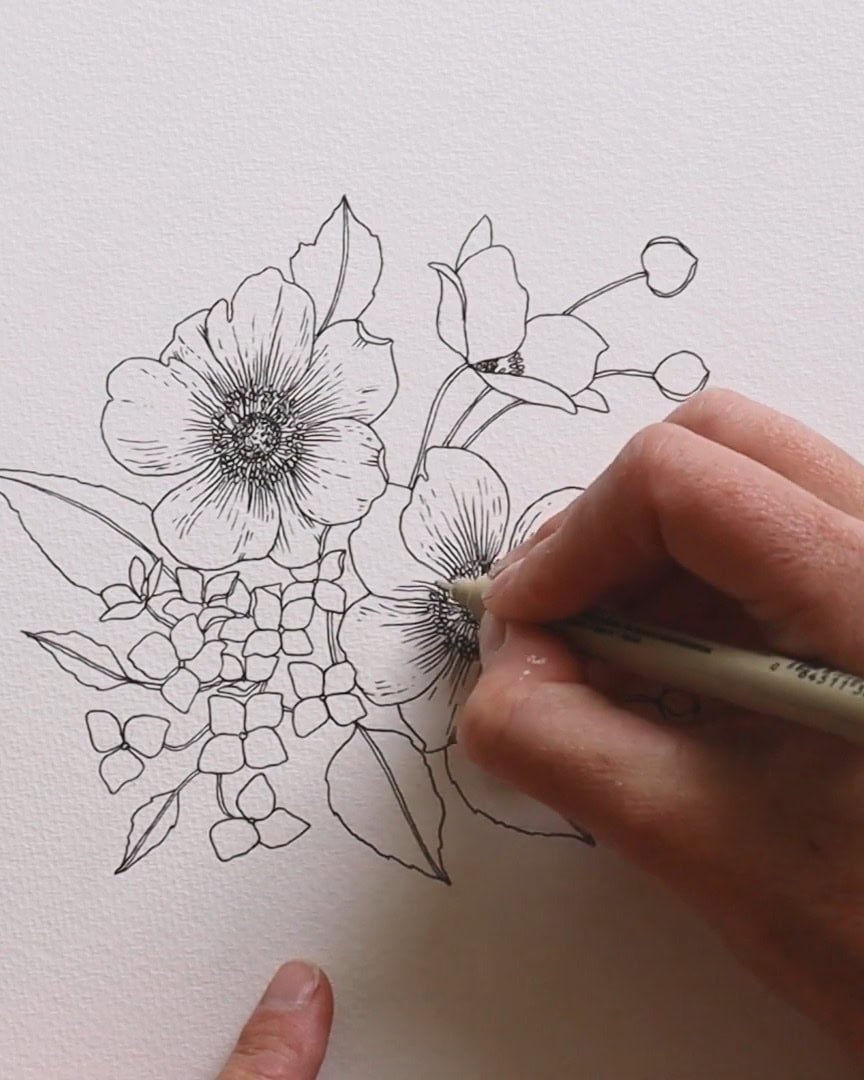
Lastly, the artist moves on to the hydrangea petals. The artist focuses on the detail lines near the center or base of each one. It’s a small step, but it adds dimension and brings the whole drawing to life.
Step 7: Finishing the Leaves with Texture
It’s time to wrap everything up by adding texture to the hydrangea leaves. This is the last step, and it brings the whole piece together.
For the large leaves, the artist draws soft S-curved lines. These curved strokes help show that the leaves have a bit of shape.
The artist doesn’t keep the lines solid, either. The artist leaves some small gaps to give the impression of light-catching parts of the surface.
When the artist moves on to the smaller leaves, the artist switches to a simple row of parallel lines on either side of the center vein. The artist keeps it subtle, nothing fancy, but it adds enough texture to make them feel real.
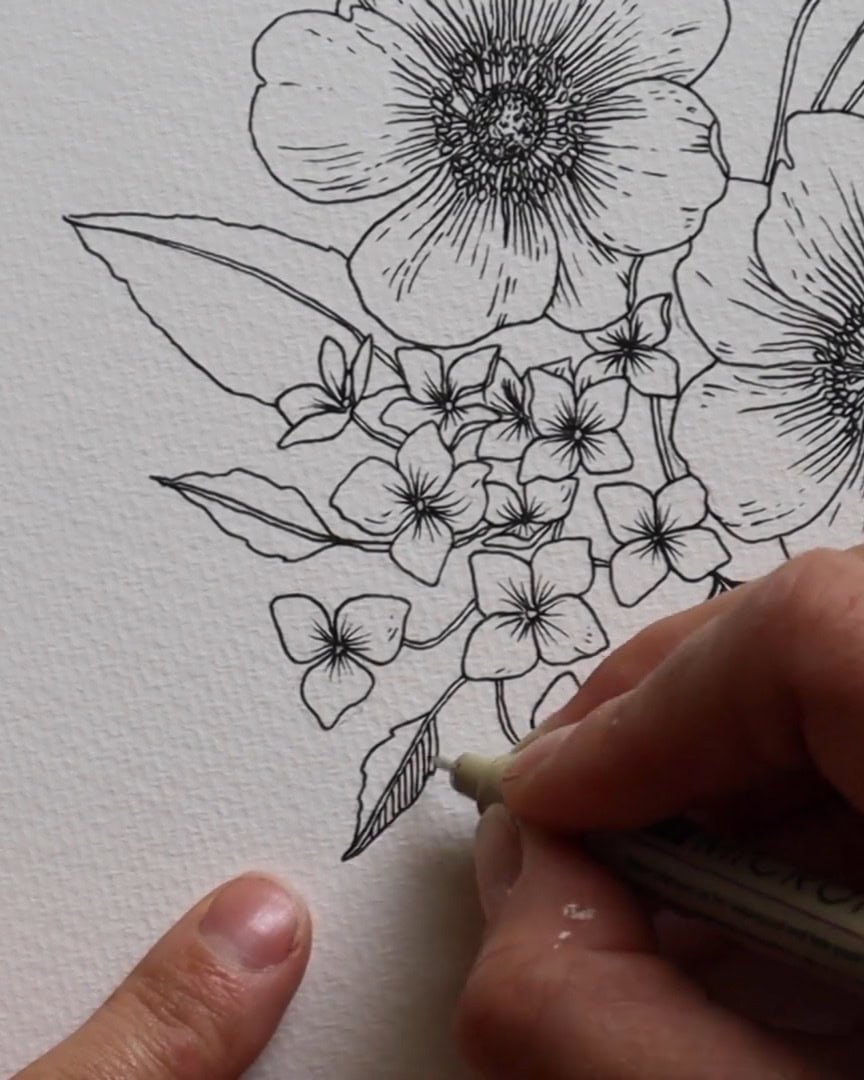
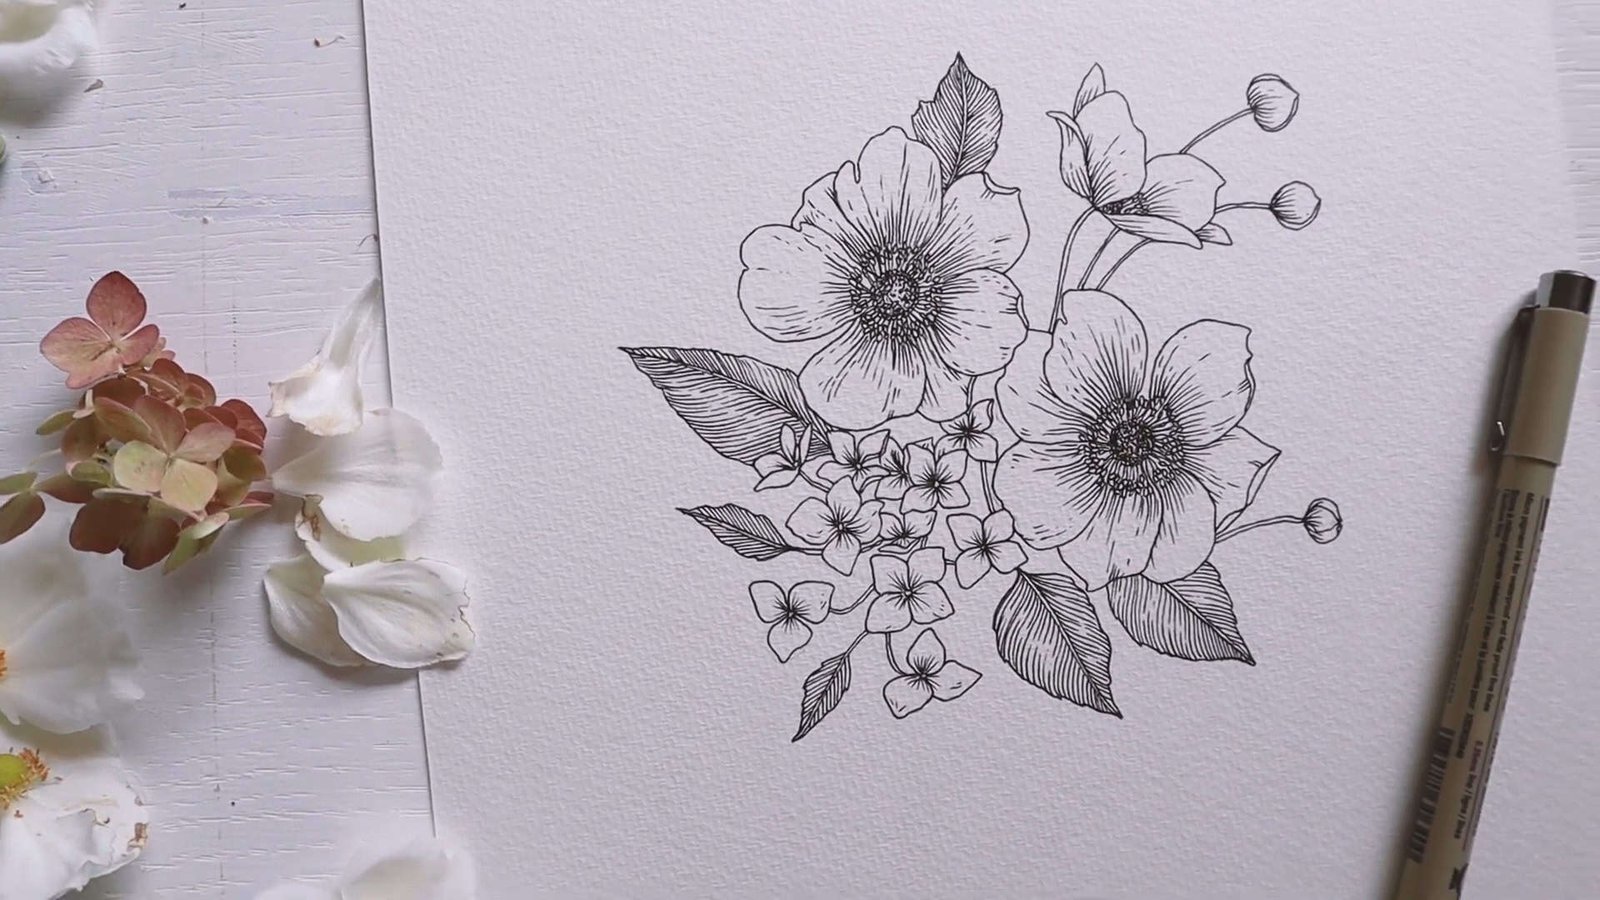
And with that, the artist’s garden anemone and hydrangea drawing is complete.
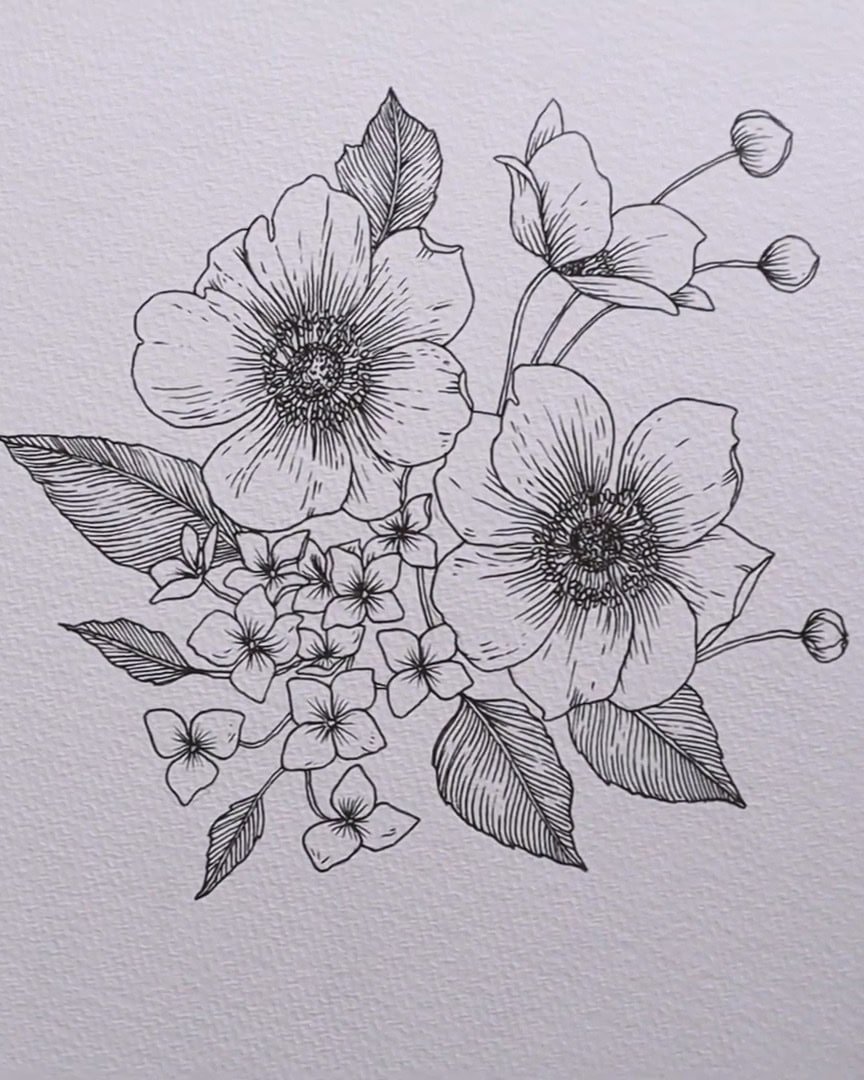
Wrapping Up
With just a few simple steps, you can create a beautiful anemone and hydrangea drawing that feels realistic and full of life. Don’t be afraid to take your time and add your personal touches along the way.
Ready to try it for yourself? Get your supplies and start drawing. The artist would love to see your results!