
Looking for a simple craft to try this Halloween? I enjoy how painting rocks brings spooky decorations right to my home.
Using just some rocks and paint, I make pumpkins, ghosts, bats, and witches that anyone can create. These ideas are perfect for beginners like me.
These 20 Halloween rock painting ideas will spark your creativity. Prepare to craft decorations that grab attention this season!
Contents
- 1 20 Halloween Rock Painting Ideas
- 1.1 Bat With Fangs
- 1.2 Black Cat
- 1.3 Cauldron With Bubbles
- 1.4 Creepy Eyeball
- 1.5 Cute Black Spider With Big Eyes
- 1.6 Frankenstein
- 1.7 Jack-o’-Lantern
- 1.8 Magic Potion Bottle
- 1.9 Mummy
- 1.10 One-Eyed Monster
- 1.11 Owl With Spooky Eyes
- 1.12 Pumpkin
- 1.13 Skeleton Head
- 1.14
- 1.15 Spell Book
- 1.16 Spider on Web
- 1.17 Tombstone
- 1.18 Vampire
- 1.19 White Ghost
- 1.20 Witch on Broom Silhouette
- 1.21 Zombie
- 2 Closing Words
20 Halloween Rock Painting Ideas
Halloween is a great time to try an easy and enjoyable craft. Painting rocks lets you make fun decorations for your home. Let’s jump into these ideas!
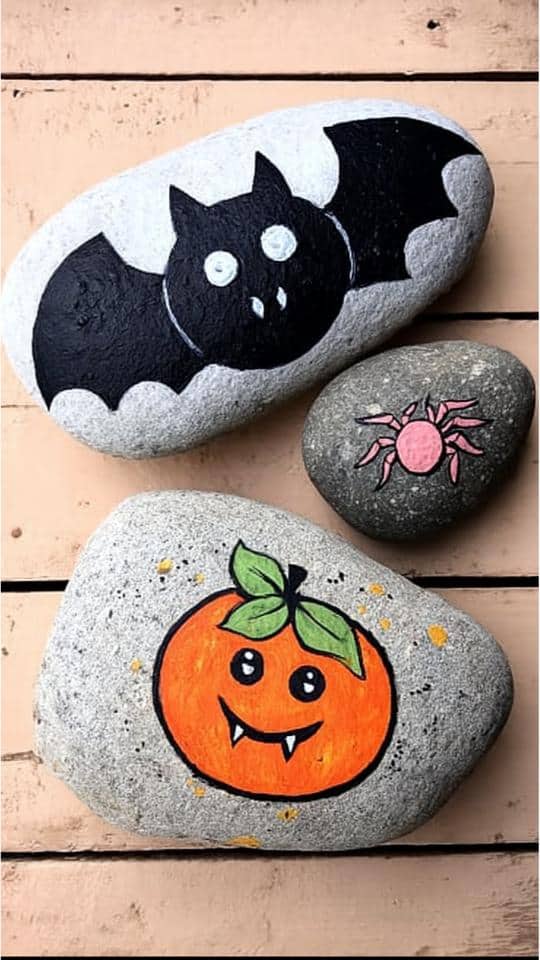
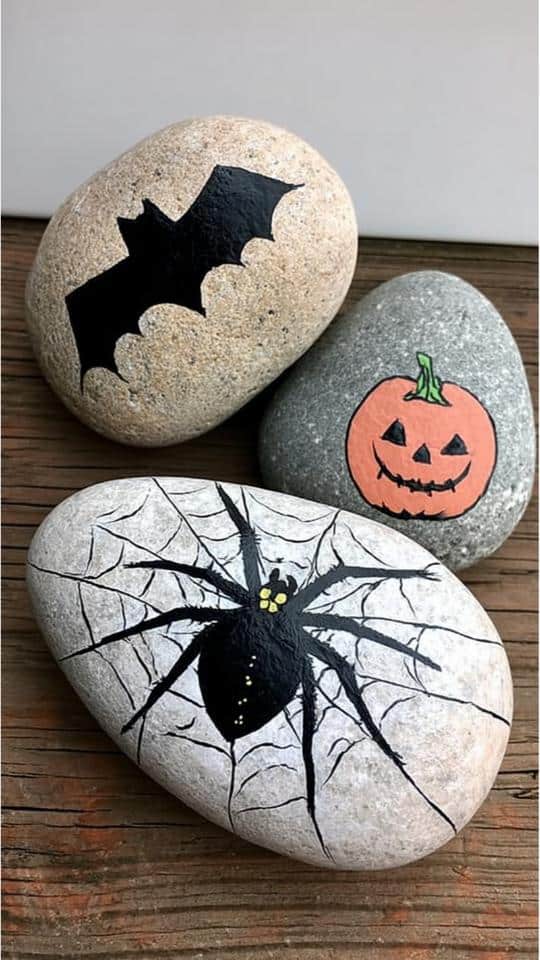
Bat With Fangs
Painting bats on rocks is one of my favorite Halloween crafts. These little creatures with big eyes and tiny fangs are easy and fun to create.
The best part is you only need black and white watercolor paint to make them stand out. I start by outlining the bat, then fill it in before adding the eyes and teeth.
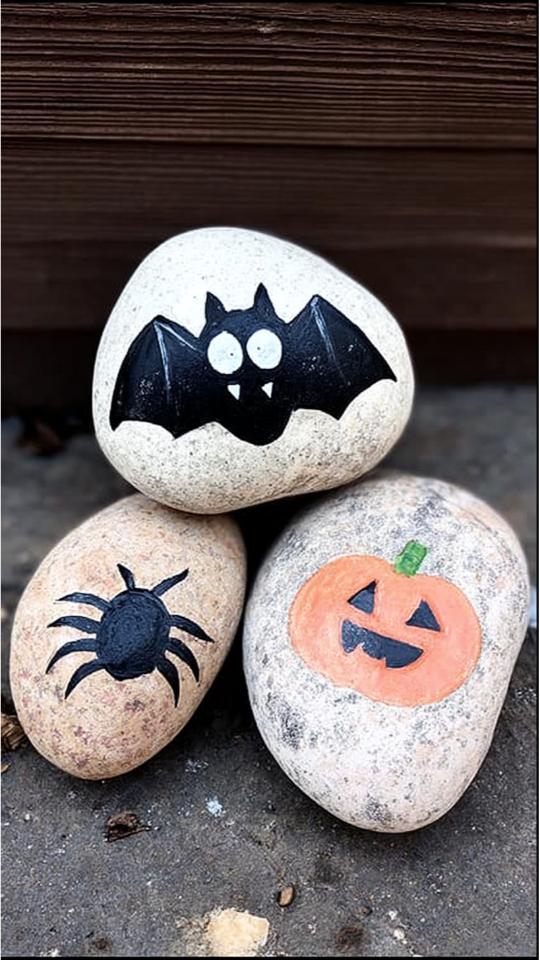
After practicing a bit, I began painting bats on rocks of all sizes. They look great when placed next to pumpkins or spiders.
I like to display mine near the front door—it creates a fun Halloween spot. If you’re new to rock painting, this design is a great place to begin.
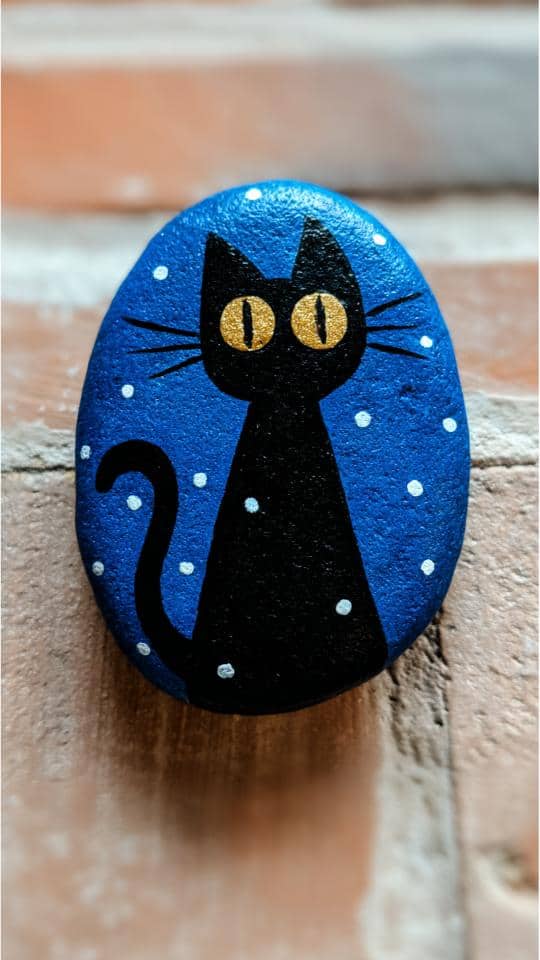
Black Cat
Painting black cats always feels fun to me. I love how simple they are, yet they look bold and cool against a blue sky.
I start with a dark shape, then add bright eyes last—it makes them pop. Using watercolor on smooth rocks helps the paint glide better.
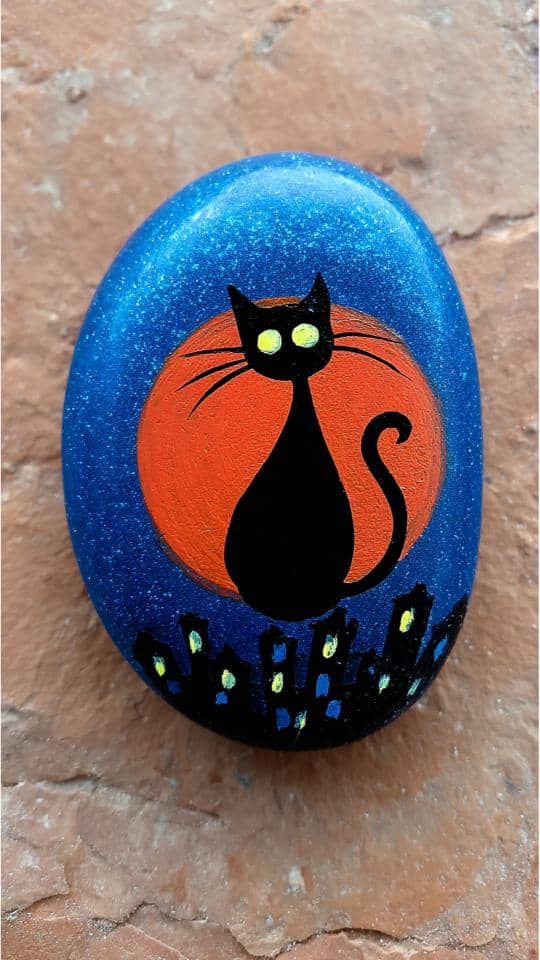
I like to give my cats long tails and sharp ears. It’s easy and doesn’t need many colors.
This is one of my favorite go-to ideas when I want something quick but eye-catching.
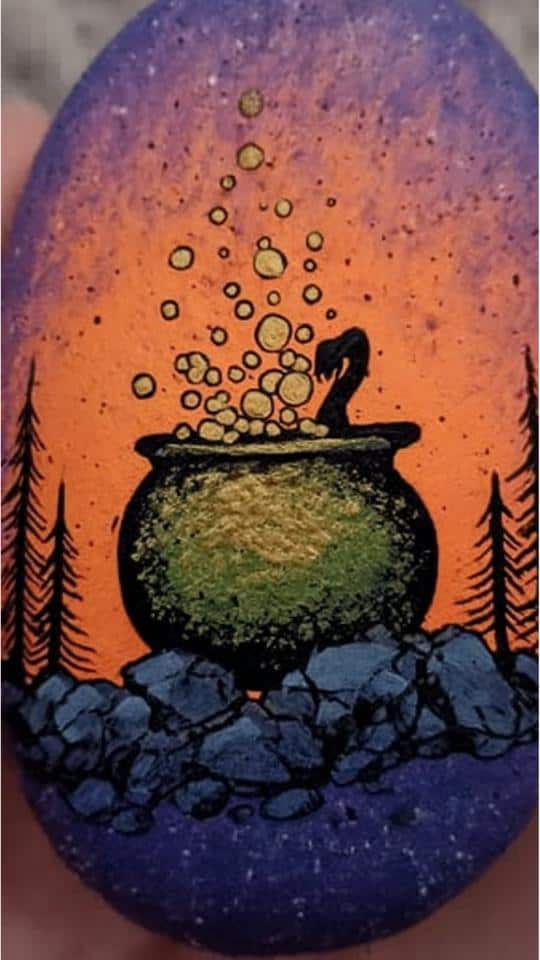
Cauldron With Bubbles
This design always makes me smile. The mix of orange, green, and gold watercolor gives the bubbling pot a glowing effect.
I just let the brush move freely for the bubbles—they don’t need to be perfect. The more uneven, the better it looks.
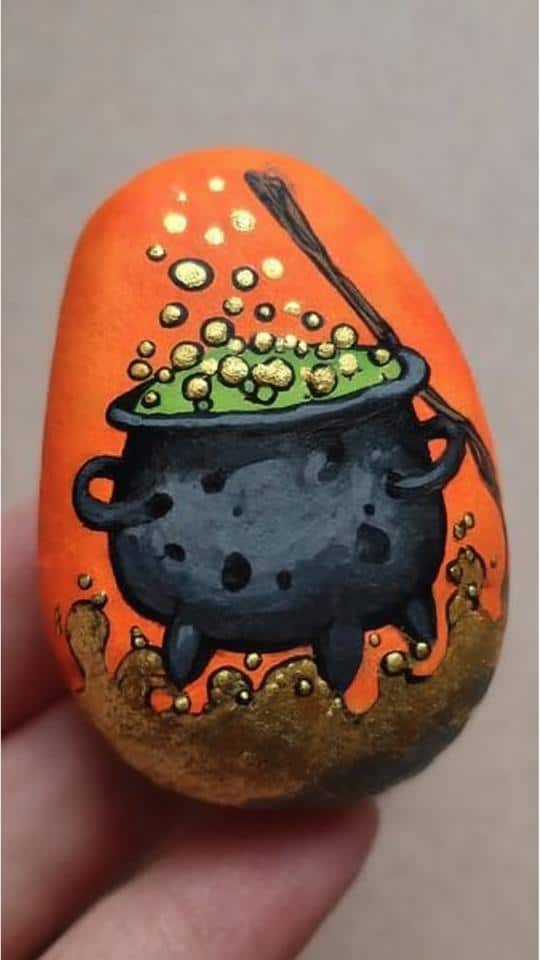
I like to add details like rocks, trees, or a wooden spoon. These small touches make the scene pop.
It’s easier than it looks, and it’s one of my favorite ideas to paint in fall.
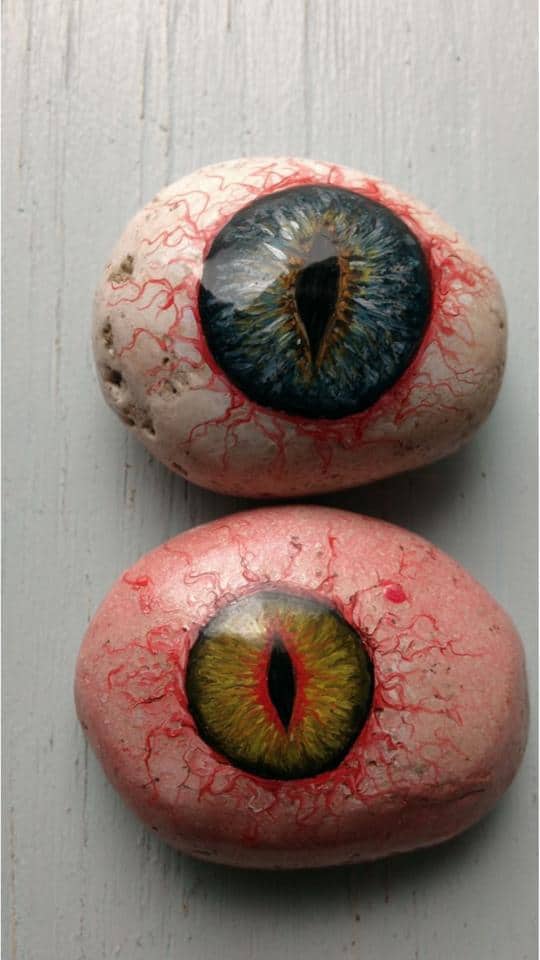
Creepy Eyeball
This eyeball idea gives me chills every time I paint it. I use bold reds and bright yellows with a fine brush to draw the tiny veins.
Adding shine in the center makes the eye look real. It’s fun to mix colors like green or orange for the iris.
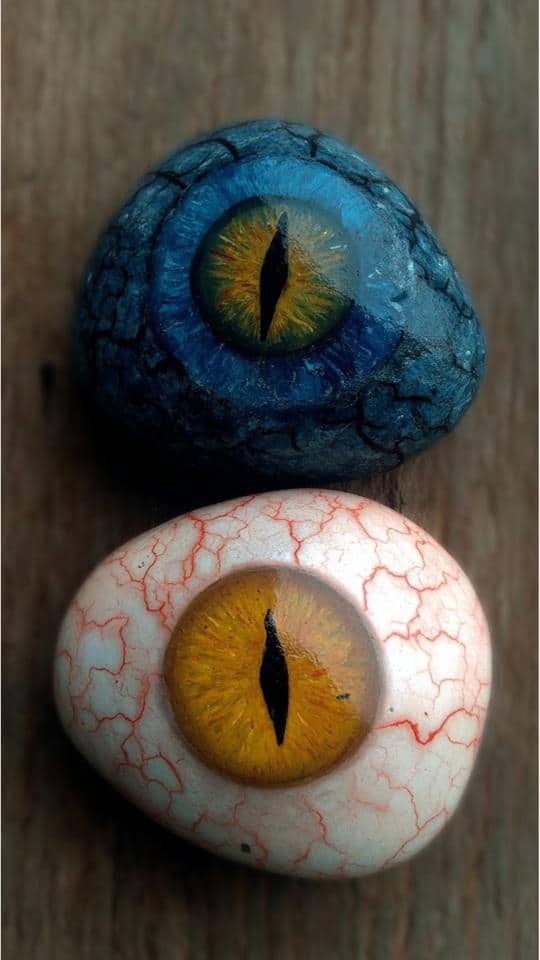
I take my time blending the lines so the eye stands out. It’s a cool project if you like bold details.
Cute Black Spider With Big Eyes
I always smile when I paint these wide-eyed black spiders. Their silly, surprised look makes them fun instead of scary.
I use bright watercolors like orange, purple, and yellow for the background.

It helps the black spider stand out. I also add tiny dots around them to make it look more playful.
These are perfect for beginners like me. The shape is easy—a simple oval for the body and lines for the legs. I love how the big eyes bring them to life!

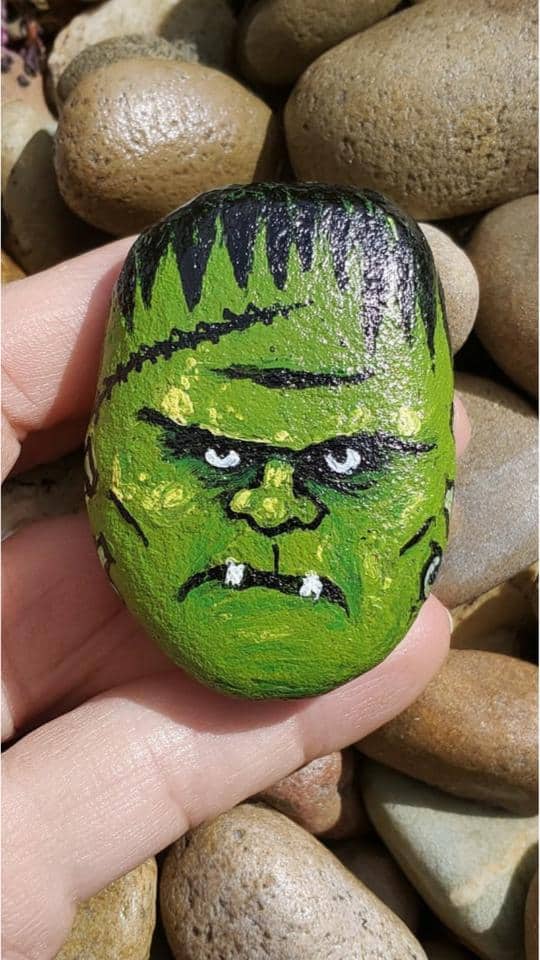
Frankenstein
Isn’t painting Frankenstein a lot of fun? His grumpy face and big eyes give him a funny look.
I use several shades of green watercolor to build up his skin. The stitches and black hair add a cool touch.
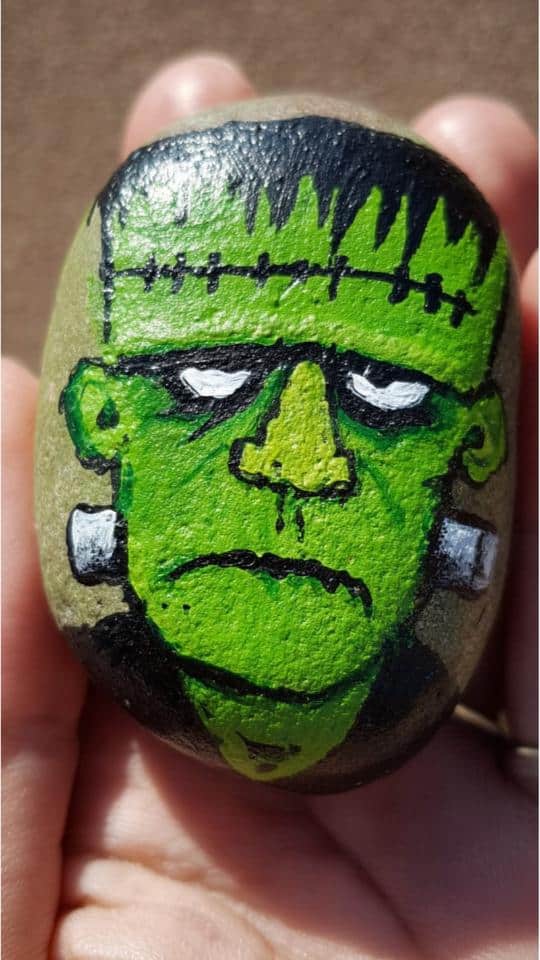
First, I sketch his face lightly, then slowly fill it in. Watercolors work well for his skin tone.
After it dries, I go over the lines in black to keep everything clear. You can let your kids work with this idea, too!
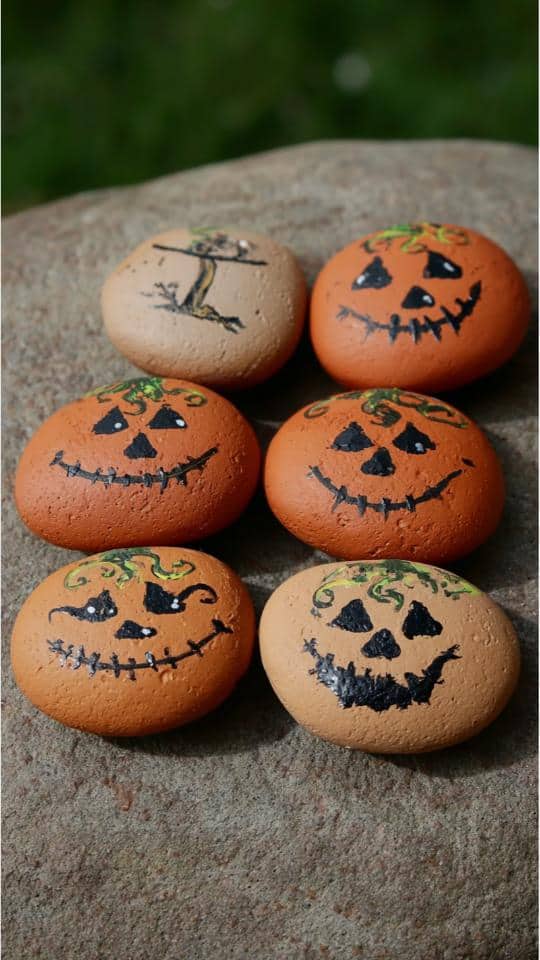
Jack-o’-Lantern
Pumpkin rocks always catch my eye first. I like using bright orange watercolor to paint them. Then I draw on simple faces with black paint.
Each one shows a different mood—happy, silly, or a little mean. It’s fun to switch it up every time.
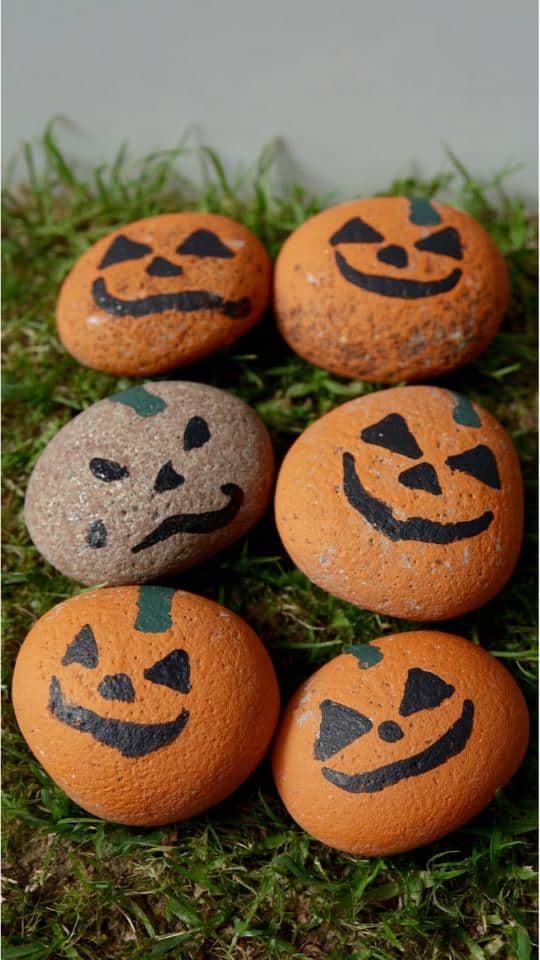
I paint a small green stem on top to finish. Some of mine have curly vines too.
These are quick to make and easy for kids. They look cute in the garden or by the door. I keep mine in a basket each year.
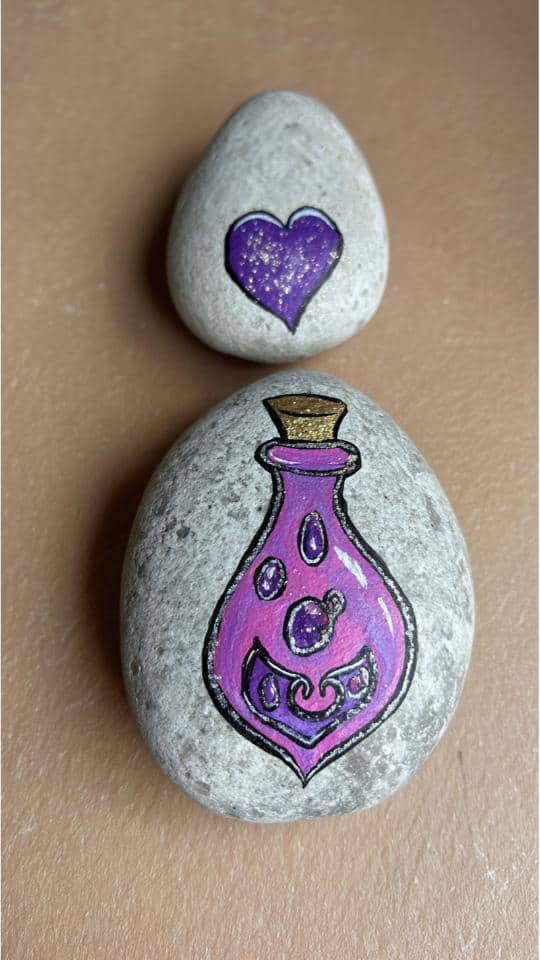
Magic Potion Bottle
These magic potion bottles are always fun for me to paint. I use soft purple watercolors and let the color fade on the sides. It makes the bottle look like it’s glowing.
I like adding dots inside to make it feel like it’s bubbling. Sometimes I add a heart or a skull to give it more Halloween style.
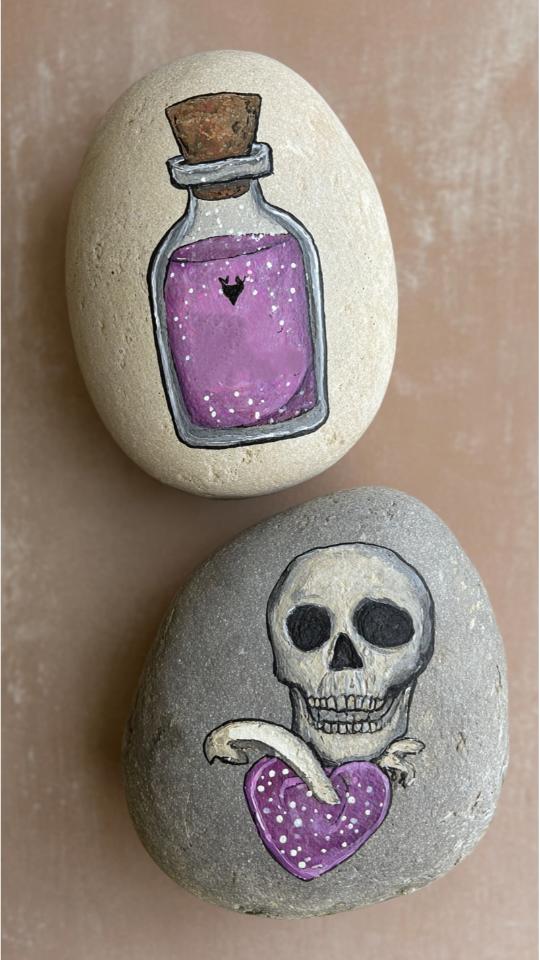
I keep the shapes simple so kids can paint them too. The cork top is easy to draw, and it finishes the bottle just right.
Mummy
These mummy rocks are so fun to paint! I like how the eyes pop out from the white bandages.
I just use black, white, and a hint of color for the eyes. It keeps things simple, especially for my children.

I let the paint dry between each layer. That helps the lines look neat.
If you’re just starting, try drawing the bandages first with a pencil—it makes painting easier.

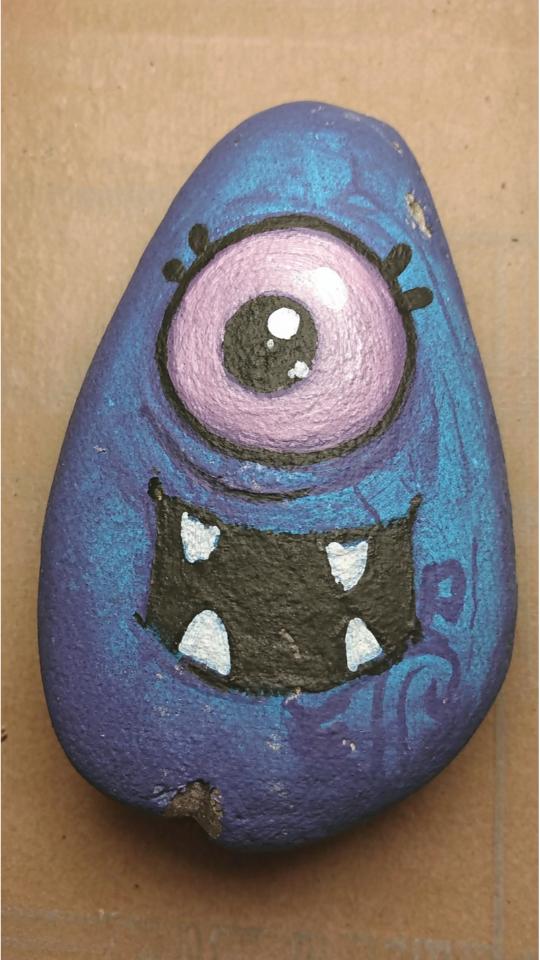
One-Eyed Monster
Isn’t the silly one-eyed monster a fun watercolor rock idea? The bright blue paint catches my eye right away, and every face seems to show a different mood.
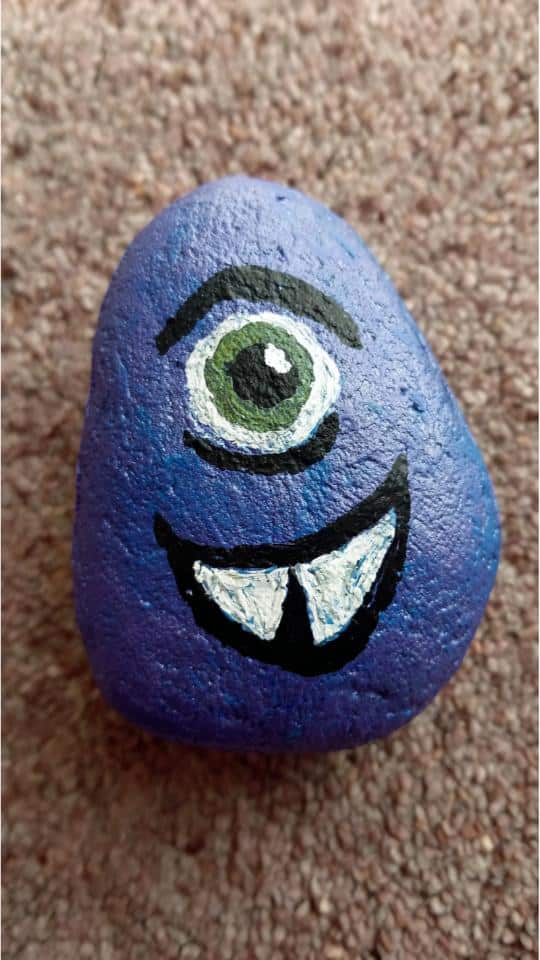
I begin by painting the big eye—it’s simple to do and brings the rock to life.
No need to aim for perfection—just enjoy the process. It’s an easy way to feel proud of your work.
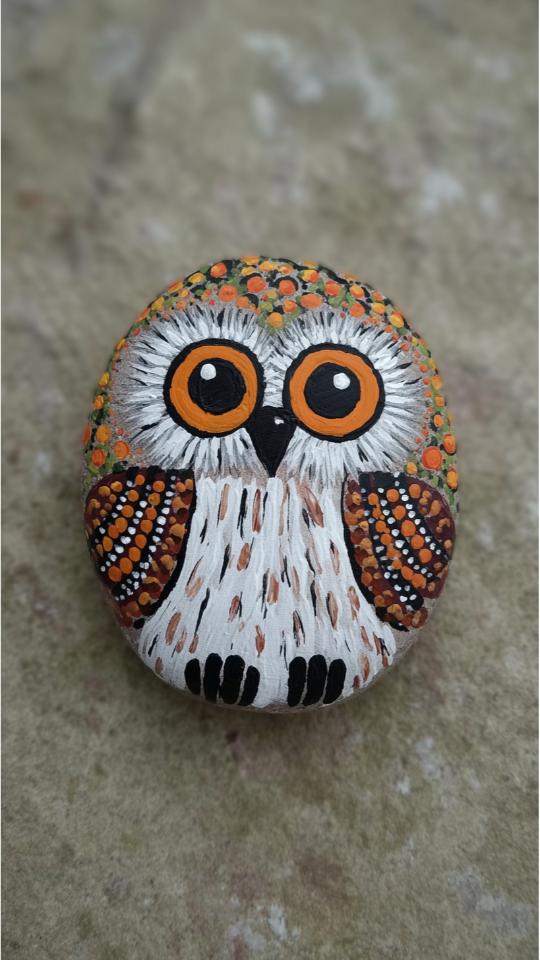
Owl With Spooky Eyes
Painting owls on rocks is a Halloween project I really enjoy. The big, bright eyes grab attention and give the owl a lively look.
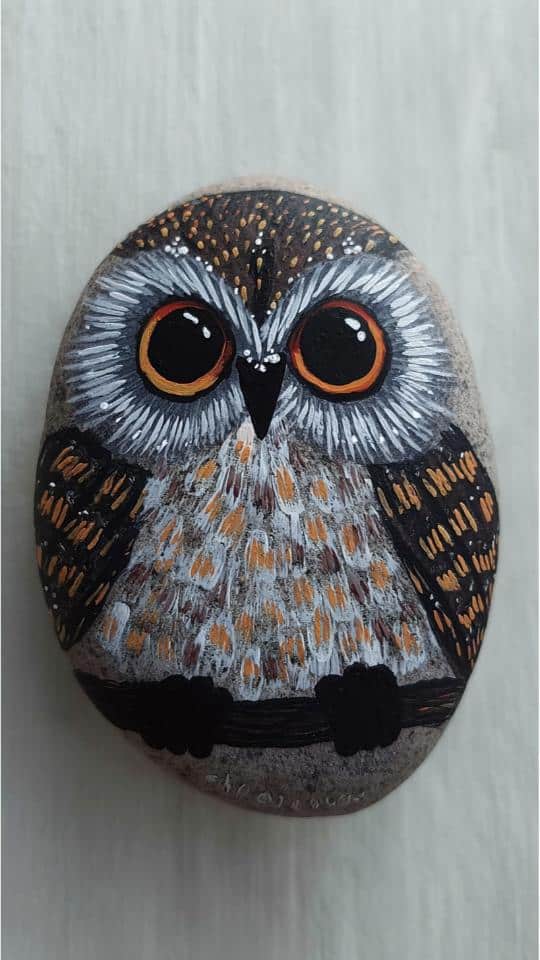
Adding tiny white dots and layers of color around the eyes helps them stand out. Using orange, black, and white creates a Halloween vibe that isn’t too scary.
These owls are simple to paint and great for beginners. They make a cute decoration with a little eerie twist.
Pumpkin
Have you tried painting pumpkins on rocks for Halloween? I enjoy how simple shapes become fun faces with just a few brush strokes.
Adding funny, scary, or silly expressions gives each rock character. Painting tiny spiders or using a grey stone as a pumpkin adds more interest.

These designs are easy and always bring a smile. They work great for beginners wanting a simple project.

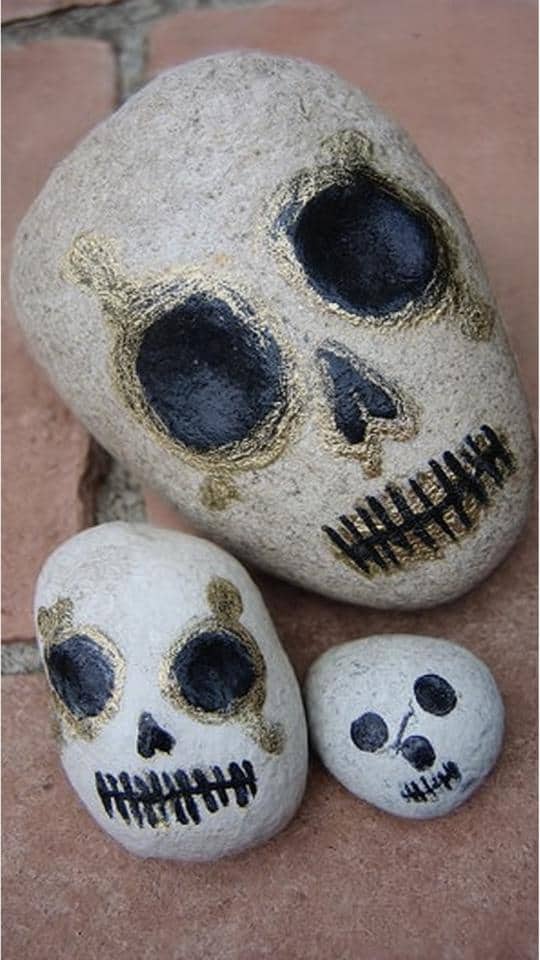
Skeleton Head
Have you seen how simple and fun skeleton head rocks can be? Painting big black eyes and a stitched mouth is easier than it seems and gives the rocks a bold, cool look.
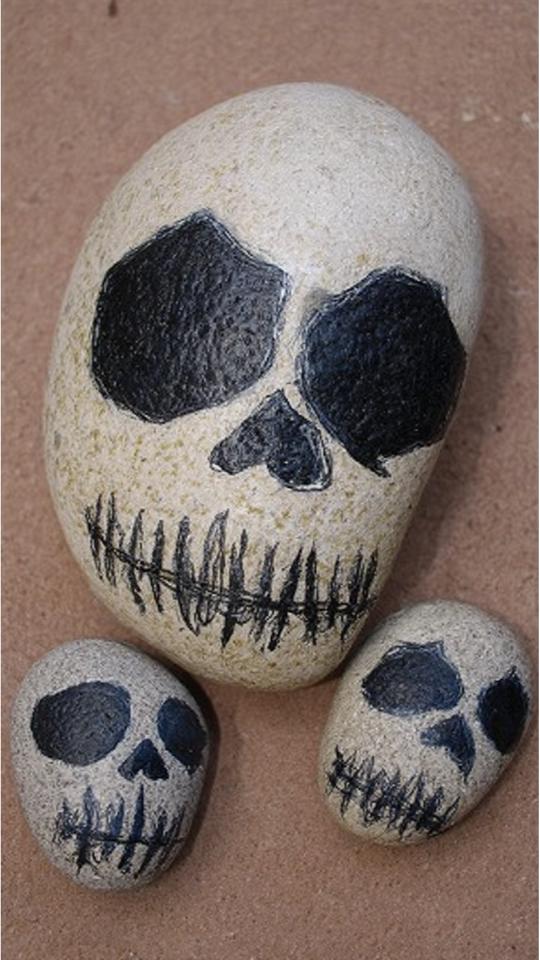
Skeleton head halloween rock painting 1
Adding a bit of gold around the eyes makes them stand out even more. These rocks offer a great chance to practice basic shapes and shading while capturing a Halloween feel that’s simple but eye-catching.
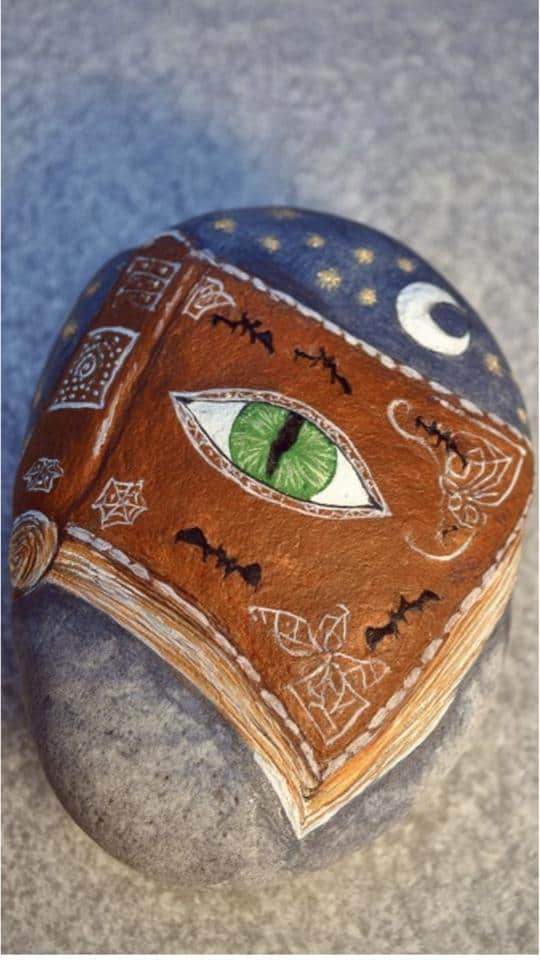
Spell Book
Looking for a Halloween project that’s both fun and manageable? Painting spell books on rocks creates a magical feel with rich brown covers and bright green eyes.
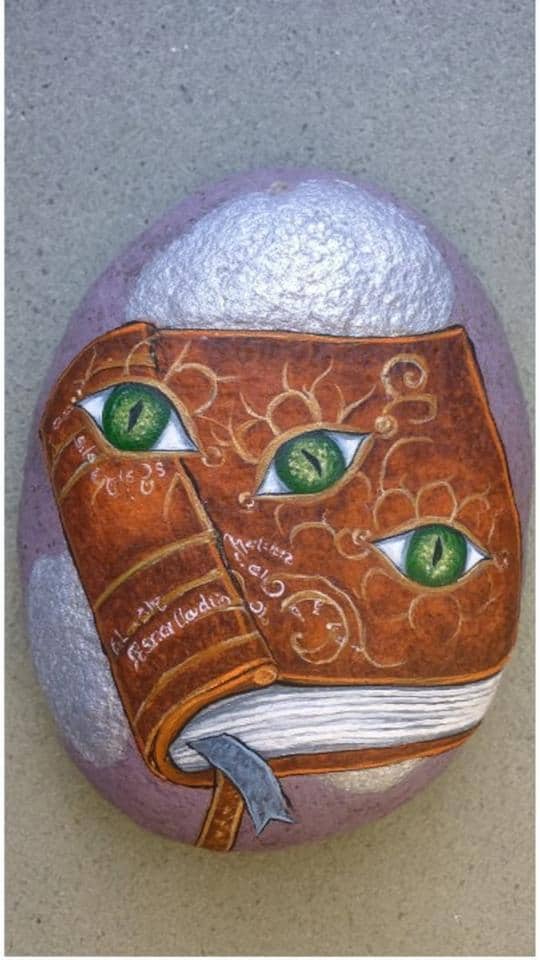
The simple shapes with small symbols make these rocks easy to paint but full of personality. Adding moons and bats gives them a lively nighttime look.
This idea suits anyone who wants a cool design without too much effort. It’s a great way to practice watercolor skills.
Spider on Web
Don’t spider designs on rocks look simple but eye-catching? Painting a spider on its web might seem tricky, but taking it step by step makes it easy.
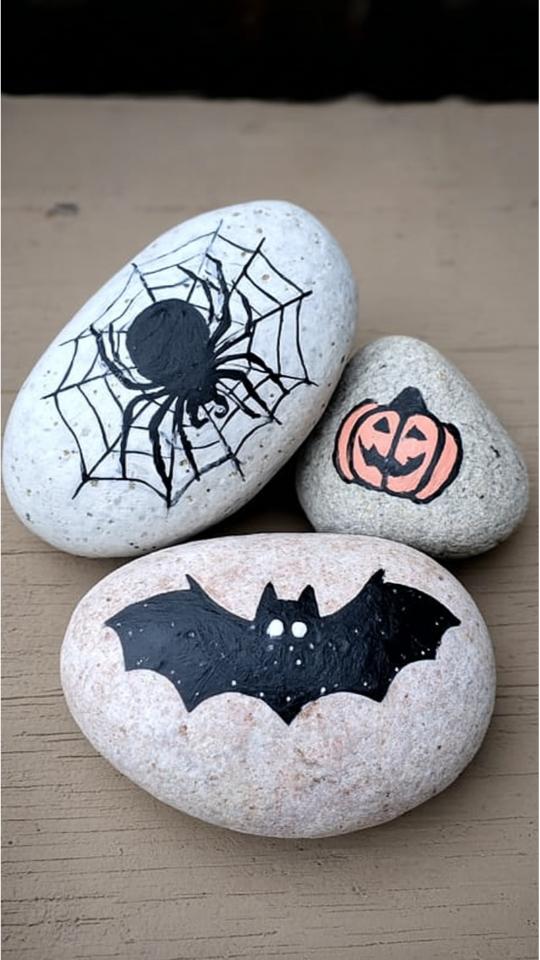
Starting with the spider’s body and then adding thin web lines works best for me.
The black spider with bright eyes really pops against the light rock and gives a cool Halloween feel.
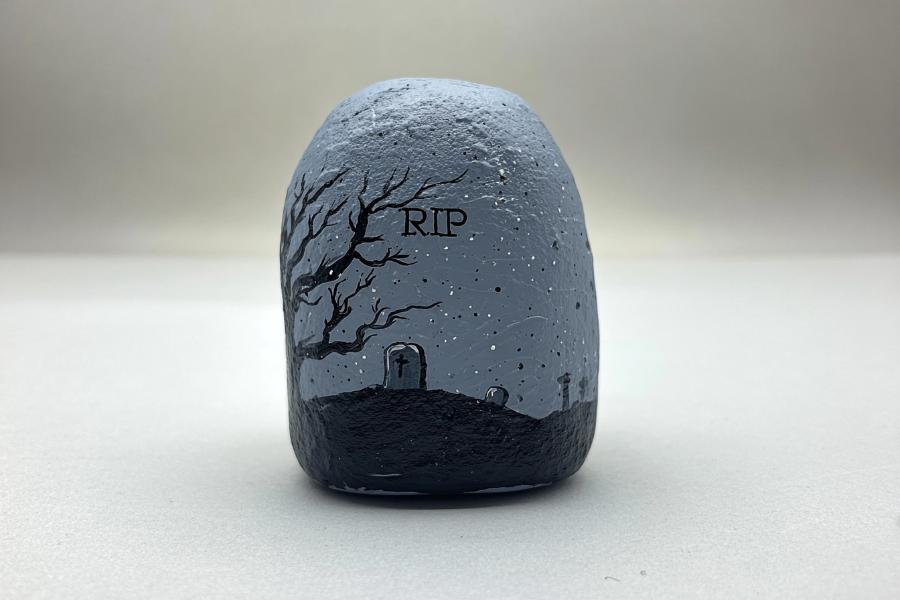
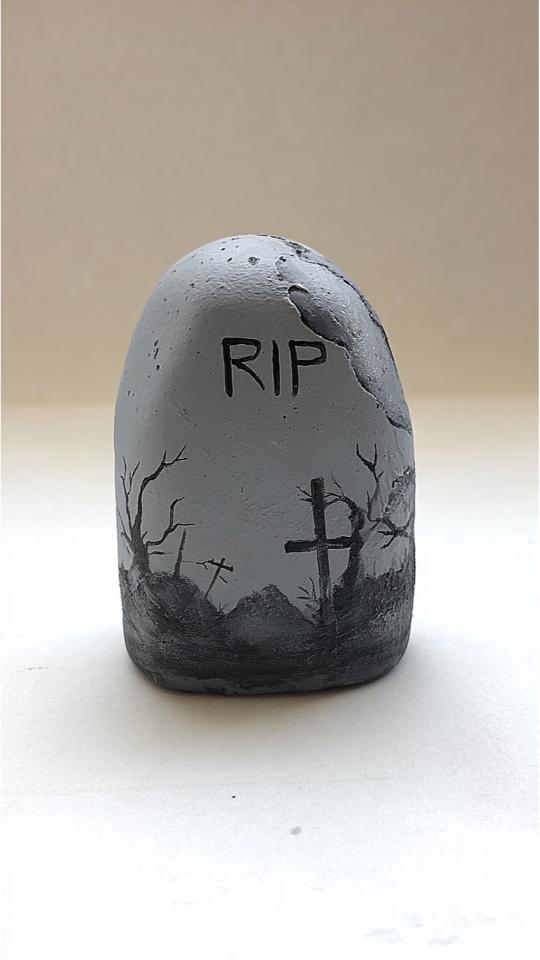
Tombstone
I really enjoy painting tombstones on rocks because they give off a cool Halloween vibe. With just a few colors, these rocks look simple but make a strong impression.
Dark trees and crosses help build a little graveyard scene. The glowing fire background on one rock adds drama without much work.
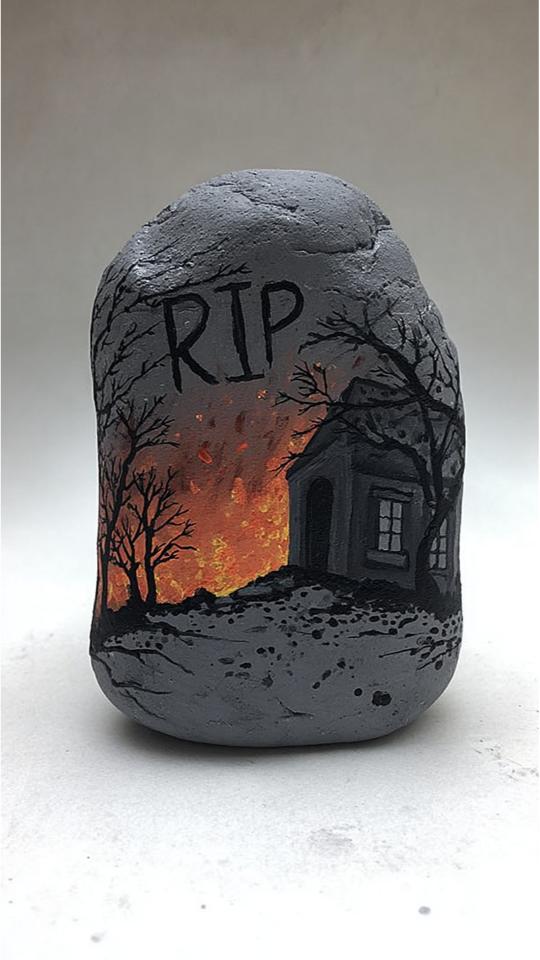
These rocks are perfect for anyone who wants an easy project that still stands out. They make eye-catching decorations for Halloween.
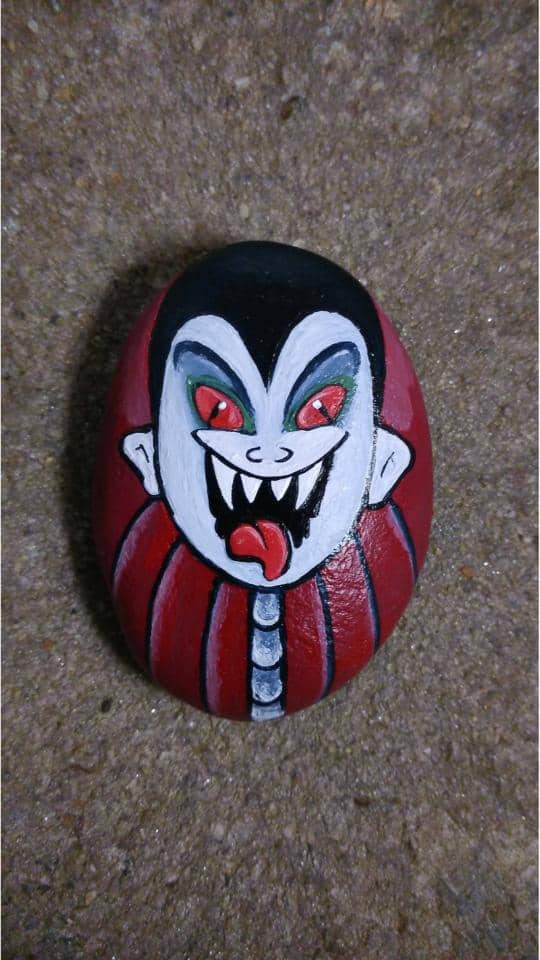
Vampire
Painting vampires on rocks adds a fun Halloween touch to any space. The sharp fangs and big eyes give them a bold, striking look.
Using simple shapes and strong colors keeps this project easy and exciting for beginners.
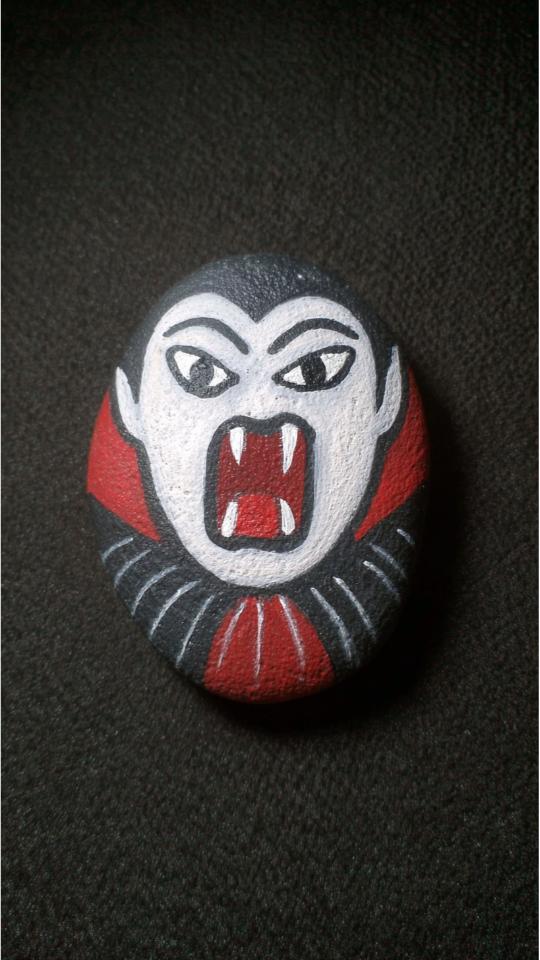
These vampire rocks bring Halloween magic quickly with just a few brush strokes.
I always enjoy how these designs come to life with little effort. They make great decorations that stand out.
White Ghost
I enjoy painting white ghosts on rocks because it’s simple and fun for Halloween.
The first set features a large ghost with wide eyes and mouth that seems to float right off the stone.

Smaller ghosts in the second set come in different shapes and expressions, giving each rock a bit of life. This idea is easy to try and great for beginners like me.
Using only white and black paint, it’s possible to create cute little ghosts that add a light Halloween feel to any space. Painting these rocks makes me feel calm and happy.

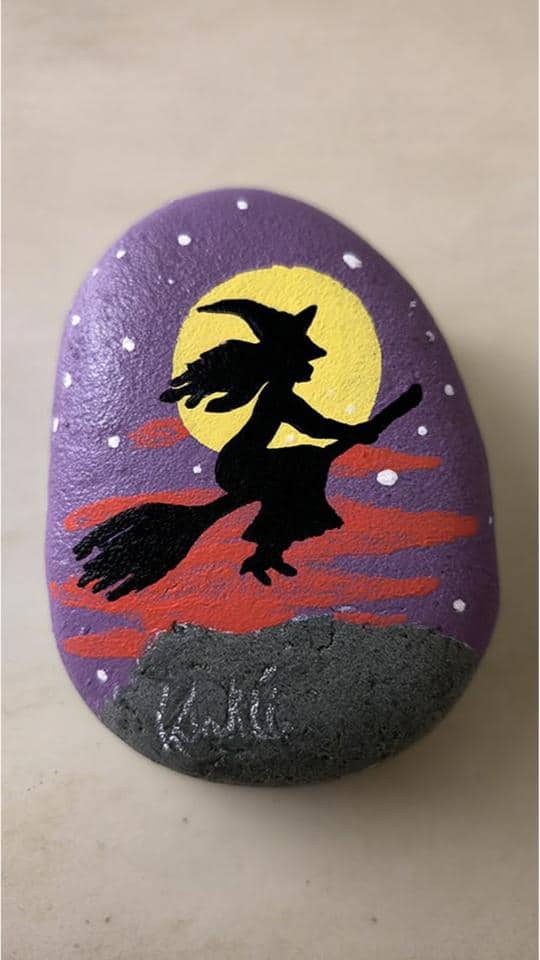
Witch on Broom Silhouette
Simple shapes can tell a story, and the witch on a broom silhouette is a great example.
Painting the witch in black against a colored background creates a contrast that draws attention.
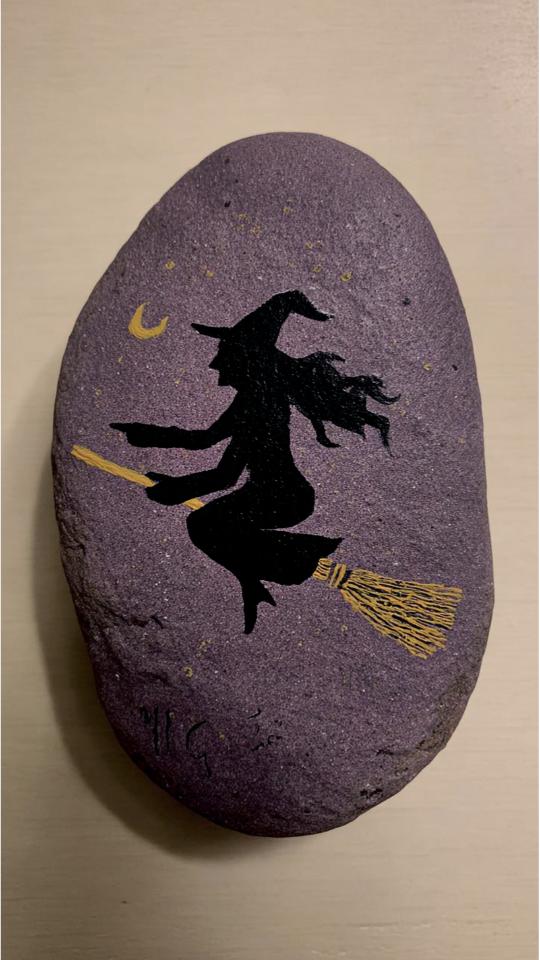
Adding a moon or stars around the silhouette adds a magical touch. Trying different background colors keeps this design fresh and fun each time.
This idea is easy to try and looks fantastic on any rock. It’s a perfect choice for beginners wanting an impressive result.
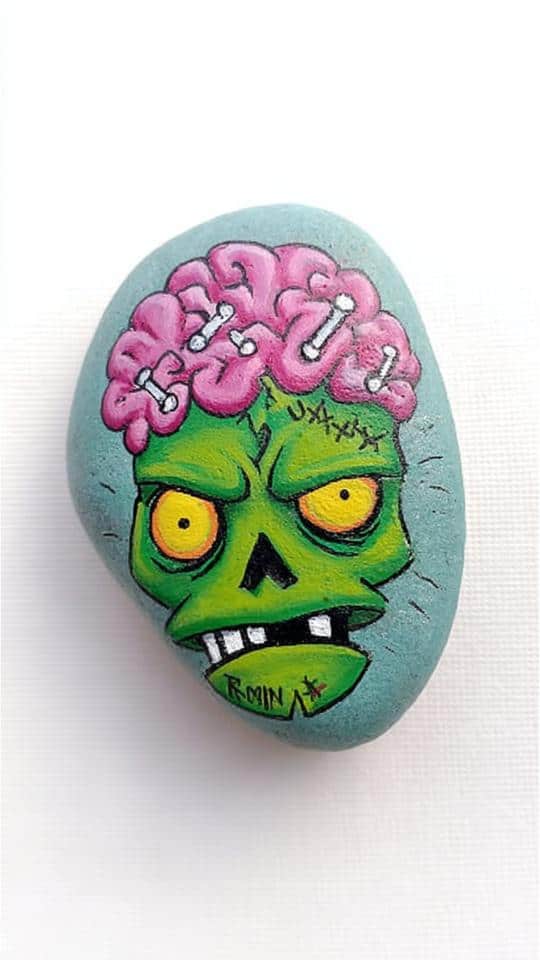
Zombie
Painting zombies on rocks is a great way to add Halloween fun. The bright yellow eyes and green faces make these little zombies really stand out.
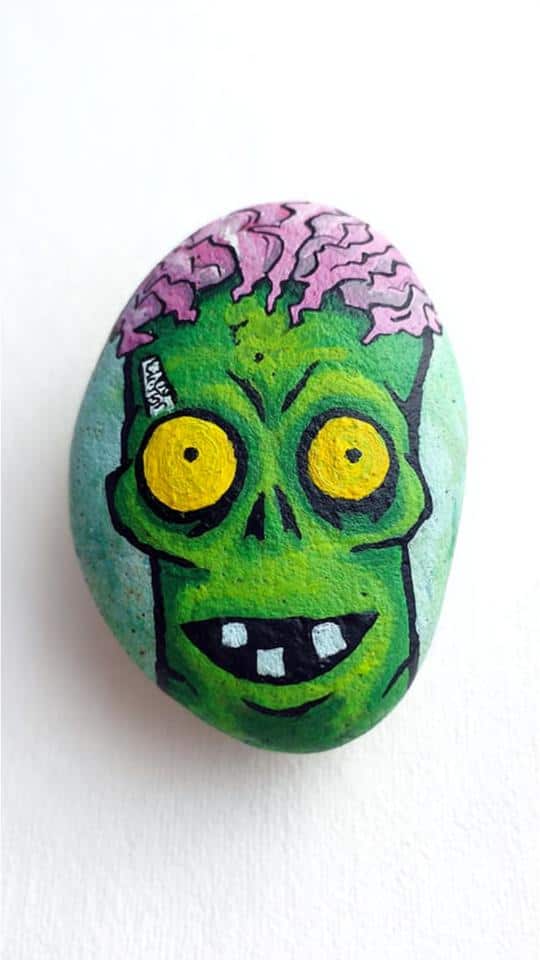
Adding pink brains and tiny bones gives them a quirky, funny look that’s simple to paint. These designs work well for beginners wanting a cool, easy project.
I like how quickly these rocks come together and how they always bring a smile. They make Halloween decorating more enjoyable.
Closing Words
Looking for a fun and easy way to celebrate Halloween? Painting rocks with simple designs lets you create eye-catching decorations that anyone can make.
Which idea will you choose to start with? Gather your paints and rocks, and add a festive touch to your space!