Adding the bokeh effect is one of the most enchanting ways to bring depth and beauty to your watercolor art.
If you want to create that soft, blurry, light-filled background, you’re in exactly the right place—and as Sandy Own Crafts often shares, it’s easier than you might think.
In this post, Sandy Own Crafts will walk you through three different techniques to achieve the bokeh effect, and by the end, you’ll be able to add this stunning detail to your paintings effortlessly.
Contents
Understanding the Bokeh Effect in Watercolor


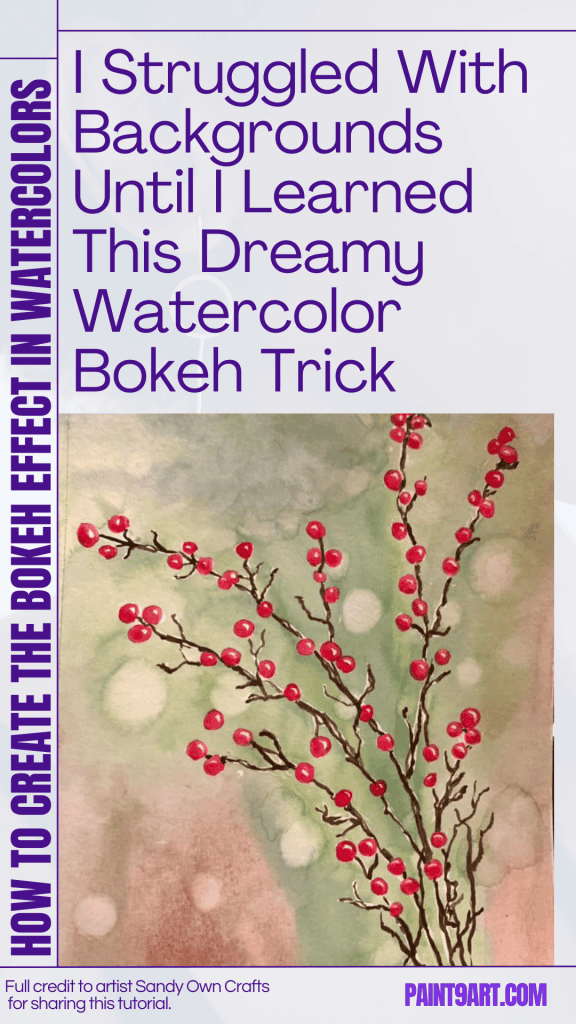
Bokeh, a term originating from Japanese, means “blur.”
In photography and painting, it refers to those beautifully diffused, out-of-focus light spots that add depth and interest to the background.
When an observer sees blurry, soft circles of light—often lighter than the surrounding background—those are examples of bokeh.
It’s a technique frequently used in Christmas-themed paintings, where twinkling lights in the background create a warm, magical atmosphere.
Key Guidelines for a Successful Bokeh Effect:
Before jumping into the techniques, here are a few key things to remember:
- The light spots should be lighter than the surrounding background.
- Edges must be soft because blurry elements are never sharp.
- Artists can randomly place or overlap the circles for a more natural feel.
- Varying the size and value of the circles adds depth—some darker, some lighter. This variation helps create a dynamic and interesting look in watercolor paintings.
Technique 1: Using Masking Fluid
The first technique the artist shares is using masking fluid, which is the method used for a Christmas painting that many people loved.
It’s simple, effective, and guarantees crisp white bokeh circles that won’t be disturbed by the paint layers.
Here’s how the artist does it:
Step 1: Draw Circles
Start by drawing the circles where the bokeh effect will appear.
A pencil is used to sketch them out lightly, so they’re not too obvious under the masking fluid later.
These circles will represent the light spots.
Step 2: Apply Masking Fluid

Now, the artist takes masking fluid (a pen is preferred, but a bottle can also be used) and carefully traces over the circles that were drawn.
This will protect them from any paint later on. If a bottle is used, it’s important to keep in mind that it can have a strong odor.
Step 3: Paint the Background

After the masking fluid has dried completely, it’s time to start painting.
The artist applies the first layer of watercolor over the entire background, covering and surrounding the masked circles.
Since the masking fluid is in place, there is no need for excessive caution—bokeh spots are protected.
This method allows the use of techniques like wet-on-wet blending, creating smooth transitions of color in the background.
For a rich, dreamy effect, the artist may experiment with different hues, such as soft blues or warm sunset tones.
Step 4: Remove the Masking Fluid

Once the painting is completely dry, the artist gently removes the masking fluid by rubbing it off with fingers or an eraser.
Underneath, crisp, untouched white circles are revealed that pop beautifully against the background.
Step 5: Adjust and Soften the Bokeh Effect

To make the bokeh look more natural, the artist softens the edges of some circles by lightly dampening them with a clean, wet brush.
A little color from the background may also be pulled in to give the circles a subtle tint.
If more variety is desired, a diluted wash of pink, blue, or any other color can be added inside some of the circles.
This step adds depth and prevents the circles from appearing too stark against the background.
Only a small hint of color is needed to make a noticeable difference.

Pros of Using Masking Fluid
- Protection: Masking fluid ensures that bokeh circles stay white, even with multiple layers of paint.
- No Smudging: The circles are fully protected from paint.
- Fun to Experiment: A great method for artists who love layering and creating soft blends.
Cons of Using Masking Fluid
- Time-Consuming: Each layer must dry before moving on. Removing masking fluid carefully also takes time.
- Requires Patience: Careless handling can smudge the masking fluid or surrounding paint.
- Drying Time: Drying cannot be rushed with a hairdryer or heat gun.
Technique 2: Painting Around the Bokeh
If a faster method is preferred, painting around the bokeh might be the right technique.
This method requires precision but saves time by eliminating the need for masking fluid.
Step 1: Draw Circles Lightly with a Pencil

The artist lightly sketches bokeh circles with a pencil. Small round objects like buttons or coins can be traced to keep the shapes neat and even.
Since there is no masking fluid protecting them, these circles must remain untouched during painting.
Step 2: Carefully Paint Around the Circles

Now, watercolor is applied carefully around the circles, leaving them white.
This step requires patience and a steady hand, because once a circle is painted over, there is no easy way to fix it.
For small circles, the artist may switch to a detail brush to navigate tight areas.
Any accidental crossing of the lines can ruin the effect—so precision is essential.
Step 3: Blend the Edges to Keep Them Soft

One downside of this technique is that it can create harder edges around the circles.
To correct this, a clean, damp brush is used to gently blend the edges into the background.
This creates a more natural, out-of-focus look.
Step 4: Add Depth by Varying the Circle Sizes and Values

Because this method relies entirely on painting skills, the circles may not turn out perfectly round.
Their shapes can be refined if they look uneven or distorted by carefully adjusting the surrounding paint.
Varying the size and brightness of the circles makes the bokeh effect feel more dynamic and realistic.
Pros of This Method
- Faster: No need to wait for masking fluid to dry.
- More Freedom: Circles can be adjusted while painting, without worrying about removing masking fluid.
Cons of This Method
- Precision is Key: A steady hand is required to avoid mistakes.
- Risk of Hard Edges: Without careful blending, edges may be too sharp.
- Difficult to Maintain Perfect Circles: Hard to keep all circles uniform without a stencil.
Technique 3: Lifting Paint
Lifting is one of the artist’s favorite techniques, and it is also one of the quickest ways to create bokeh.
Lifting removes paint from a watercolor painting, revealing the paper underneath to create soft, glowing bokeh spots.
Step 1: Paint the Background

A layer of watercolor is applied first. The lifting method will vary slightly depending on whether the paint is wet or dry.
- For wet paint: Apply a fresh, even layer of color and get ready to lift while it’s still damp.
- For dry paint: Use a wet brush to reactivate and lift the color.
Step 2: Lift Circles While the Paint is Wet
If the background is still damp, the artist can lift circles using several methods:
Using a dry brush: Press the dry brush gently onto the wet paint within a circular guide (such as a roll of tape) to lift pigment. The brush absorbs the color, revealing lighter areas. It must be kept dry by dabbing it on a paper towel between lifts.
 Lift the circles from wet paint
Using a paper towel: Lightly pressing the paper towel in a circular motion lifts paint, though edges may be softer.

Using a template (coin or button): A small flat object like a coin is placed under a paper towel and pressed firmly onto the wet paint.
This ensures a perfectly round shape.

Step 3: Lift Circles from Dry Paint
If the background has already dried, bokeh circles can still be created using water.
Wet brush: A clean brush dipped in water is used to paint circular shapes over the dry background. The water sits briefly to loosen the pigment.
 Use a wet brush
Blot the paint: Dab the wet area with a tissue or paper towel to lift the color and reveal a soft, glowing bokeh effect.

Refine the circles: A stencil can be used before lifting to ensure clean, round shapes.
Some artists use a magic eraser for an even cleaner lift—it removes watercolor pigment effortlessly.

Pros of Lifting Paint
- Quick and Easy: Lifting paint is fast and doesn’t require extra tools like masking fluid.
- Soft Edges: This method naturally creates soft edges, which is ideal for bokeh.
Cons of Lifting Paint
- Can Damage Paper: Excessive lifting or poor-quality paper may damage the texture.
- Requires Good Timing: Works best when the paint is damp but not wet.
(Bonus) Technique 4: Using Alcohol or Other Liquids
This method is simple and fun. Alcohol applied to wet watercolor paint quickly creates beautiful bokeh effects.
Step 1: Apply a Wet Layer of Paint

The background is painted and left wet. This technique works best with a fresh, damp layer of watercolor.
Step 2: Use Alcohol to Create the Bokeh Effect

A cotton swab dipped in alcohol (such as vodka or rubbing alcohol) is lightly applied to the wet paint.
The paint moves and forms soft, circular marks similar to bokeh.
Step 3: Adjust the Effect

Depending on the desired result, the circles can be left as they are or adjusted in size and shape by adding more alcohol or varying the pressure applied.
Pros of the Alcohol Method
- Quick and Easy: It’s a fun, fast way to create a bokeh effect.
- Works with Common Household Liquids: No special tools needed—alcohol or even perfume works.
Cons of the Alcohol Method
- No Pure White Bokeh: This method doesn’t work for creating crisp white bokeh circles.
- Only Works on Wet Paint: Timing is essential; it cannot be used on dry layers.
Final Thoughts
Creating the bokeh effect in watercolor paintings can elevate artwork and give it a dreamy, magical touch.
Whether the artist prefers the precision of masking fluid, the skillful approach of painting around circles, the softness of lifting, or the playful effects of alcohol, each technique has its own charm.
Trying all the methods is a great way for the artist to discover a personal favorite.