

Drawing a realistic eye might seem intimidating at first. But once you break it down into manageable steps, it becomes so much easier.
I’m here to guide you through the whole process, from simple sketch lines to adding intricate shadows and textures.
If you’ve been looking for a clear and friendly tutorial that actually helps you improve, this one’s for you.
Contents
- 1 Materials You’ll Need
- 2 Step-by-Step Process to Drawing a Realistic Eye
- 2.1 Step 1: Sketching the Basic Eye Proportions
- 2.2 Step 2: Refining the Outline
- 2.3 Step 3: Mapping Out the Shadows
- 2.4 Step 4: Lifting and Blending Midtones
- 2.5 Step 5: Deepening the Shadows and Drawing the Pupil
- 2.6 Step 6: Sketching Eyelashes and Eyelid Highlights
- 2.7 Step 7: Final Shadows and Iris Details
- 2.8 Step 8: Adding the Final Touches
- 3 Closing Words
Materials You’ll Need
Before you begin, make sure you’ve got the following tools ready:
- Drawing paper
- HB graphite pencil
- 2B and 8B graphite pencils
- Precision eraser or mono zero eraser
- Kneaded eraser
- Blending stump, tissue, or cotton bud
Step-by-Step Process to Drawing a Realistic Eye
Now that you have your materials ready, let’s dive into the fun part – sketching, shading, and bringing your eye to life with each detailed step
Step 1: Sketching the Basic Eye Proportions
Let’s begin by setting up a solid structure. This will make everything else easier later.
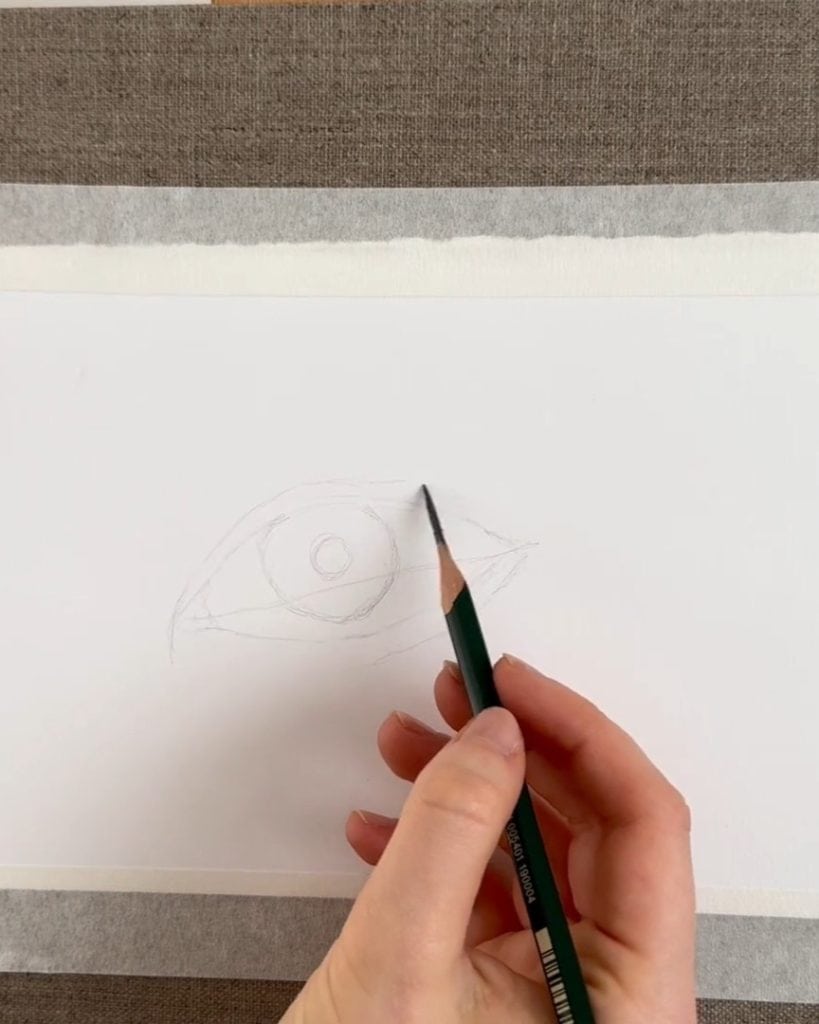
To start, I used an HB pencil and sketched lightly. That way, I could erase any mistakes along the way.
First, I drew a diagonal guideline. This stretched from the inner corner of where the eye would be to the outer edge of the eyeball.
Make sure this line is at a shallow angle, about 10 to 20 degrees, and position it right in the center of your paper. That helps keep the composition looking balanced.

Next, I sketched a rough guide for the iris. I paid attention to how it sits in relation to the diagonal line.
The diagonal line crossed the bottom quarter of the iris, and the iris itself was slightly left of the guide. I didn’t draw the top part of the iris because the eyelid would cover it later.

Once the iris was in place, I drew the pupil in the center. Keeping things light and loose helped me stay flexible during this stage.

Then, I moved on to outline the eyelids. I used the ends of the diagonal guide and the iris edges as markers.
With those, I lightly drew curved lines to connect everything and form the upper lid. I also drew a small line under the iris to show where the lower eyelid would go.
It’s essential to leave a small gap between the bottom of the iris and the lower lid.
After that, I connected the lines from the right side of the iris out to the outer corner of the eye and repeated this for the lower lid, too.

Step 2: Refining the Outline
Once the rough eye shape was there, it was time to add detail. This makes shading way easier later.
I find it helpful to break the eye down into small parts. So, I added the triangular pink park at the inner corner, near the nose — that’s called the lacrimal caruncle.
It’s a small detail, but it adds so much realism.
Next, I sketched the crease above the eye for the upper eyelid and a lighter crease under the eye for the lower one. The top crease is more curved, while the bottom crease is shallower.
Once the main lines were in place, I erased the first diagonal guideline I’d drawn. That guide had served its purpose.
Step 3: Mapping Out the Shadows
Now that we have a strong outline, it’s time to move on to shading.
To begin shading, I used my HB pencil again to mark where the darkest areas would go. I didn’t press too hard yet. I always prefer to start with lighter tones so I can adjust later.
I went over the contour of the eye to make it more visible and added some soft mid-tone shading to areas like the inner corner and under the lower lid.
These early values help guide the rest of the drawing.

I outlined where the highlights would go in the iris to ensure I didn’t shade over the brightest areas.
In this drawing, there are two rectangular reflections — one between the pupil and upper lid, and one to the left of the pupil.
Since the eye is curved, the tops of these shapes appear smaller than the bottoms. I sketched them lightly so they’d disappear into the final drawing.

Then, I continued mapping out soft shadows under the eye. Nothing has to be perfect here — we’ll blend it all later for a smooth look.

Step 4: Lifting and Blending Midtones
The next step is about slowly building up value while keeping things soft and natural-looking.
To lift out some midtones and lighten certain areas, I used a kneaded eraser. I love this tool. It removes graphite gently and doesn’t damage the paper.
I lifted some of the graphite under the bottom lid to make the lid margin stand out — this part reflects light from above, so it’s naturally brighter.

Then, I shaded the eyeball itself, using midtones to separate features and soften the transitions.
I made the corners of the eye slightly darker and paid close attention to where the sclera (white part of the eye) meets the pink triangle in the corner.

To smooth things out, I used a blending stump. You can use a cotton bud, cloth, or even your finger — whatever works!
After blending, I lifted some more highlights with my kneaded eraser to boost the contrast.

Step 5: Deepening the Shadows and Drawing the Pupil
At this point, I needed to bring in more contrast. That meant darkening the shadows.
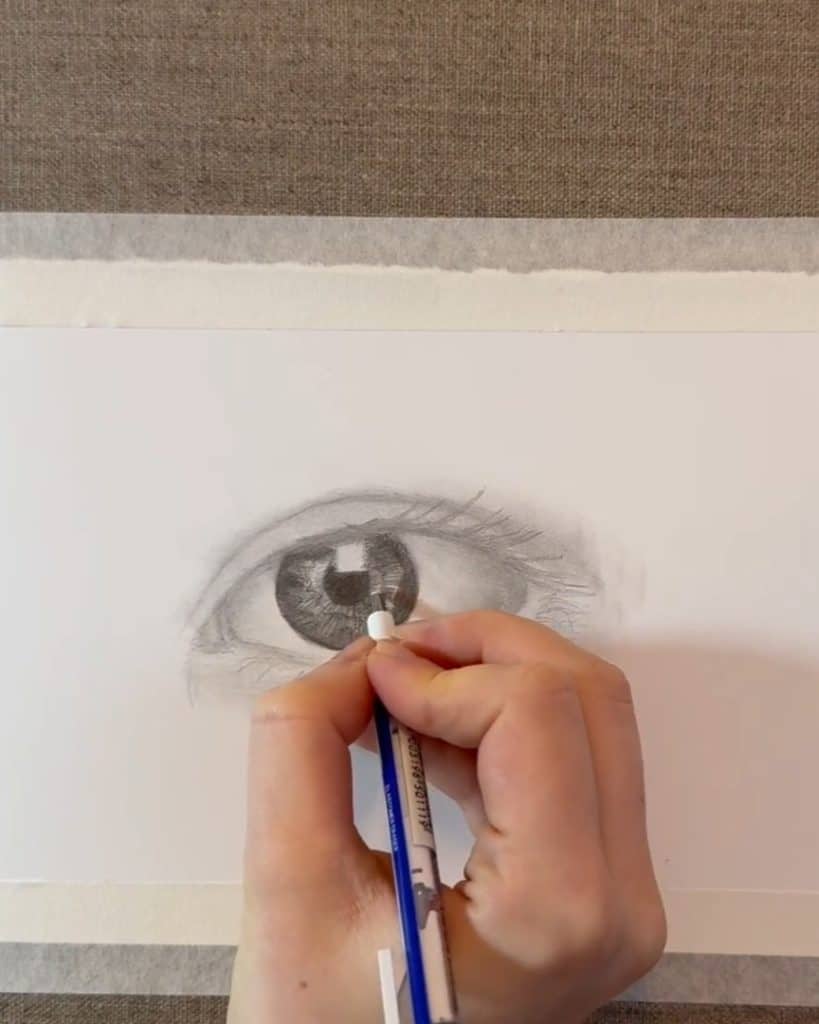
I started by working on the pupil with my HB pencil. I shaded in small circular motions to keep the edges crisp, especially where the pupil meets the iris.
Then I started shading the iris — this part is lighter than the pupil, so I used less pressure.

The iris has all these beautiful tiny details — fibers, freckles, melanin spots. That’s what makes the eye look alive.
Around the bottom center of the iris, I shaded a darker melanin patch, and I added a shadow beneath the upper eyelid.

This step is about building up a base. I started with midtones in the outer edge of the iris and added slightly more pressure in some spots.
These base tones will shine through later when we use a softer pencil for deeper shadows.

Step 6: Sketching Eyelashes and Eyelid Highlights
Now, let’s talk about eyelashes — an important detail that can make or break realism.
Because the light source in this drawing is slightly above the eye, the upper eyelid and its corner reflect light. I shaded these areas lightly to preserve that effect.

Before I drew the lashes, I marked their positions using soft lines. It’s easier to correct mistakes this way before going in with a darker pencil.
The upper lashes taper at the tip and are thickest at the base. They curve up and out to the right.
Don’t worry about being perfect — lashes look more natural when their spacing and direction vary. Some clump together and some go off in different angles.

I did the same for the lower lashes. They’re less visible and spaced out. I used light strokes and worked from the inner corner outwards.
The lashes in the middle of the eye curve slightly to the right, and again, the spacing isn’t uniform — that’s part of their charm.

Step 7: Final Shadows and Iris Details
We’re nearly at the finish line! This is where the drawing really starts to pop.
To deepen the darkest shadows and add contrast, I switched to an 8B pencil. This step is optional, but if you want your drawing to feel more dramatic and lifelike, it helps.
I used firmer pressure to darken the outer edges of the iris.
Then, I drew the pigmented ring — a squiggly line surrounding the pupil — and added tiny hatched strokes between the ring and the pupil to suggest texture.

Because we laid down midtones first, these small dark strokes sit on top and create depth. It really brings the iris to life.
For even more realism, I used a precision eraser to lift out thin lines around the iris. These create the look of natural reflections and textures.
You can do this with any eraser shaped into a point if you don’t have a precision tool.
Step 8: Adding the Final Touches
Now, it’s time to pull everything together. I darkened the lash line and the crease of the upper lid.
I followed the curves I had drawn earlier and used my 8B pencil for this. I blended the surrounding areas with a paper stump to keep transitions soft.

Then, I shaded over the outlines of the lashes I had mapped out earlier, using my softer pencil. It’s easier to make confident lines when you’ve already mapped them.

Don’t forget about the reflection in the eye. The lashes cast a shadow into the iris reflection, so I darkened those areas, too. These little marks help the eye feel real.

To finish, I traced over the lower lashes and added more shadows into the eye corners and eyelid creases.

I also used my precision eraser to lift a few more highlights, especially around the tear duct and eyelids, to give the skin a slightly dewy, lifelike quality.

Closing Words
As you can see, drawing a realistic eye takes time, patience, and attention to detail, but it’s totally worth it.
By following each step and working slowly, you can create an eye-drawing that feels lifelike and full of character.
Each eye you draw will be unique. Don’t be afraid to experiment with little variations and make the artwork your own.