
How do you draw a realistic tree without spending hours on every leaf? That question has come up countless times for many artists.
After lots of trial and error, Gio Vescovi developed an easy, fun, and satisfying method. In this tutorial, the artist demonstrates step by step how to draw an ink tree using simple tools and stress-free techniques.
Let’s start!
Contents
- 1 Gather the Materials
- 2 Step 1: Sketching the Tree Trunk
- 3 Step 2: Sketching the Foliage with Circles
- 4 Step 3: Outlining the Tree Trunk
- 5 Step 4: Creating the Illusion of Leaves
- 6 Step 5: Filling the Foliage with Texture
- 7 Step 6: Building Depth with Shadows
- 8 Step 7: Deconstructing the Circles
- 9 Step 8: Enhancing the Outer Edges
- 10 Step 9: Finalizing the Shadows
- 11 Step 10: Drawing the Tree Trunk Details
- 12 Step 11: Finishing Touches
- 13 Final Thoughts
Gather the Materials
Before the drawing begins, the artist shows precisely what is used to create a tree like this. Nothing fancy is needed—just simple tools that make a big difference.
Here’s what the artist uses:
- A good pencil
- An eraser
- A fine-line ink pen
- Drawing paper (any kind the artist likes)
That’s it! The tools are ready, and it’s time to move on to the first step.
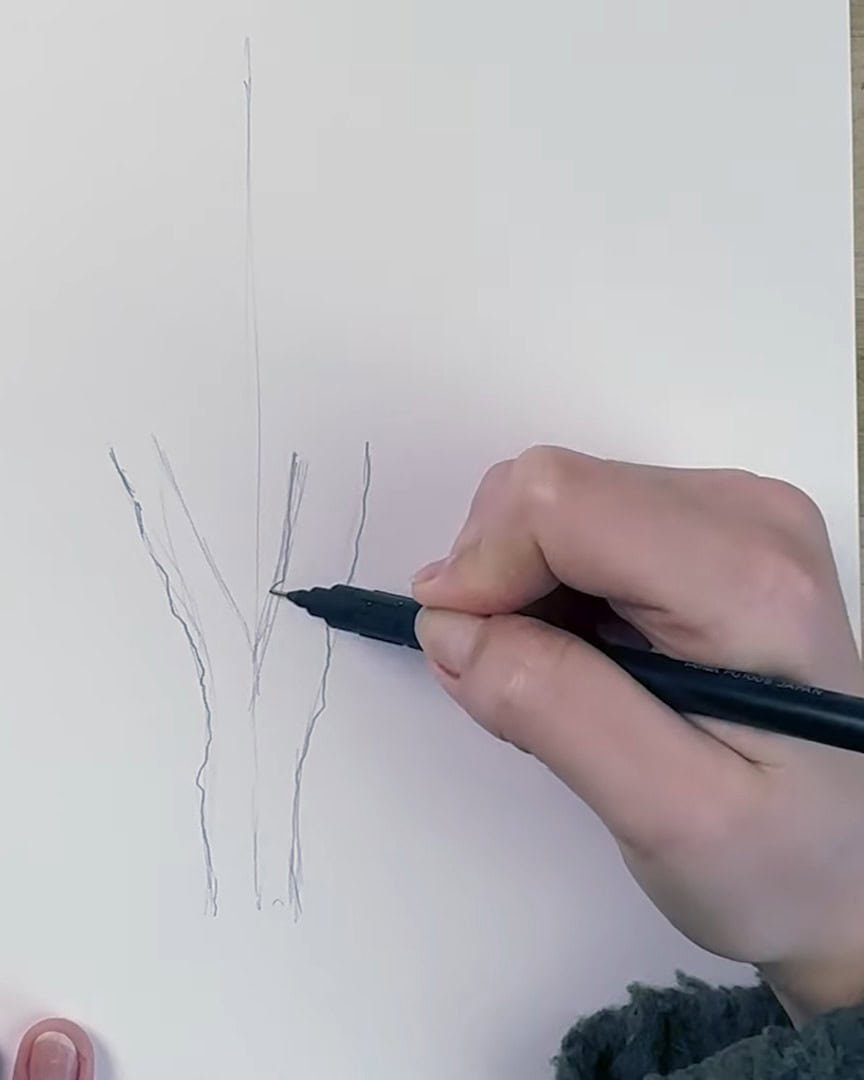
Step 1: Sketching the Tree Trunk
Now that the tools are ready, the artist begins drawing. The artist always starts with a simple guide.
The artist draws a vertical line first. This helps keep the trunk straight. Then, the artist sketches the main trunk. It can be as thick as desired, and as many branches can be added as preferred.
To keep it easy, the artist draws one trunk that splits into two parts. The outline is made a bit shaky, as if the hand is trembling. That makes it look more natural. And just like that, the base of the tree is done!
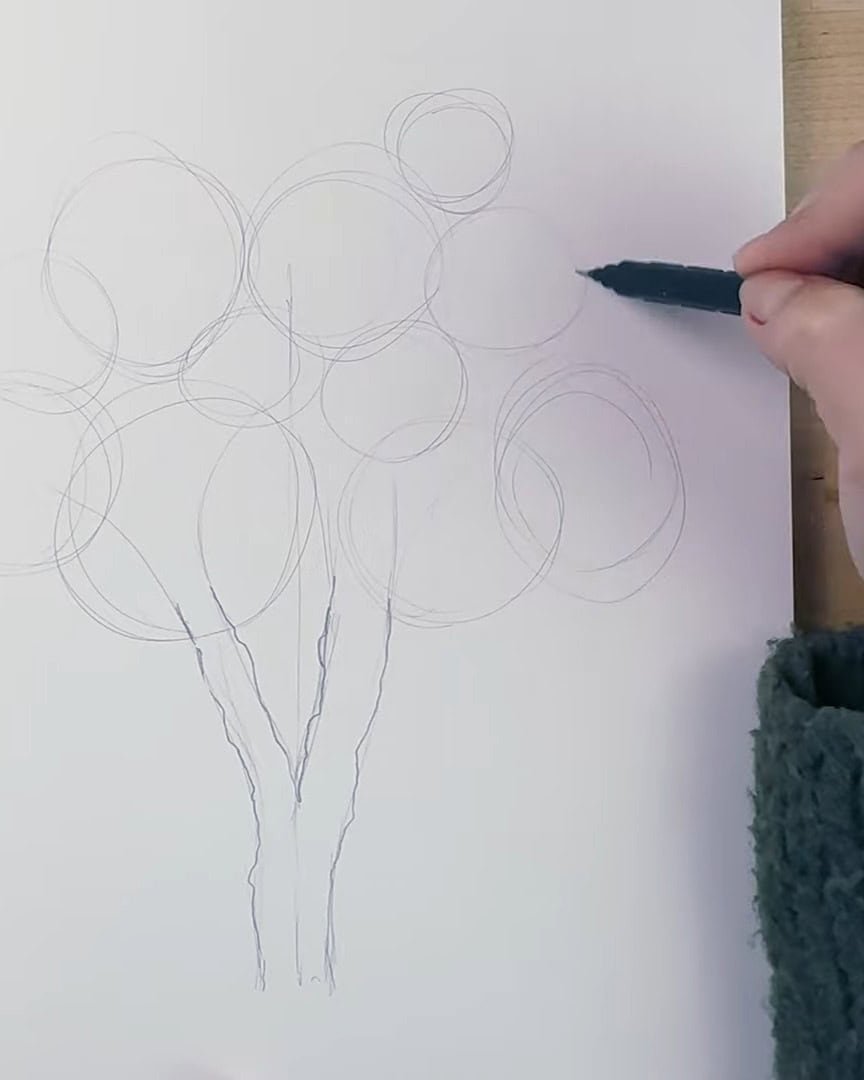
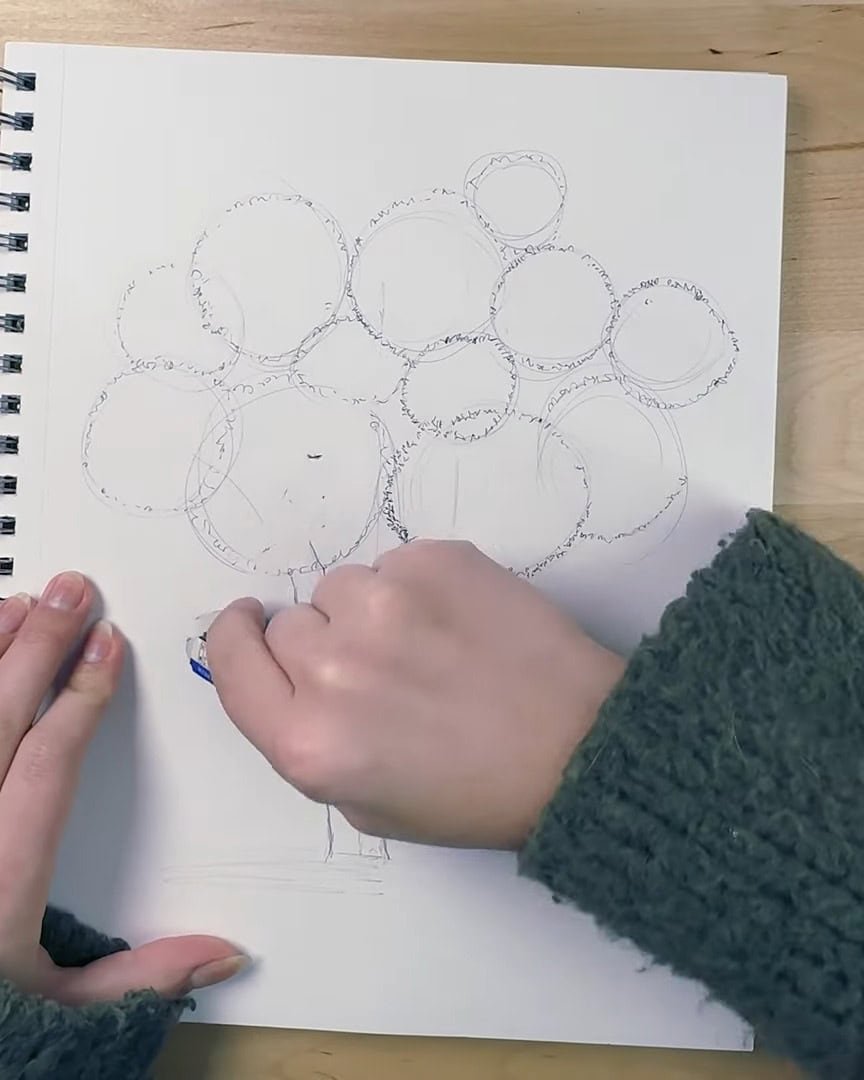
Step 2: Sketching the Foliage with Circles
This next step might seem tricky at first. Many people get nervous here, but the artist makes it simple.
The foliage may look detailed and complex to draw. It can seem tedious or even overwhelming. But it is much simpler than it seems.
The artist starts by drawing circles. Big ones and small ones—mixing the sizes. They are allowed to overlap a little. They should not be spaced too far apart.
Keeping the circles close builds the tree’s crown in a fun and easy way.
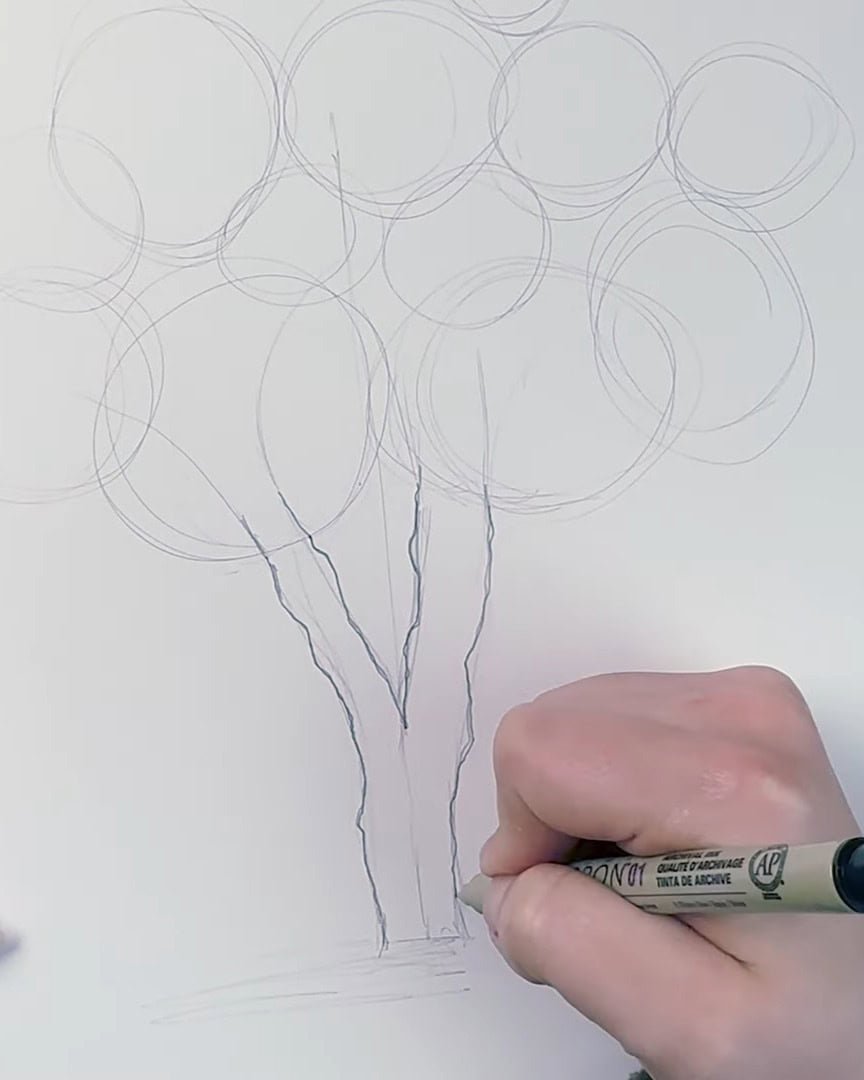
Step 3: Outlining the Tree Trunk
Now that the shape is coming together, it’s time to define it more. This part is quick and straightforward.
The artist outlines the tree trunk using the ink pen. But the circles are left as they are—just in pencil. The circles remain light and sketchy for now.
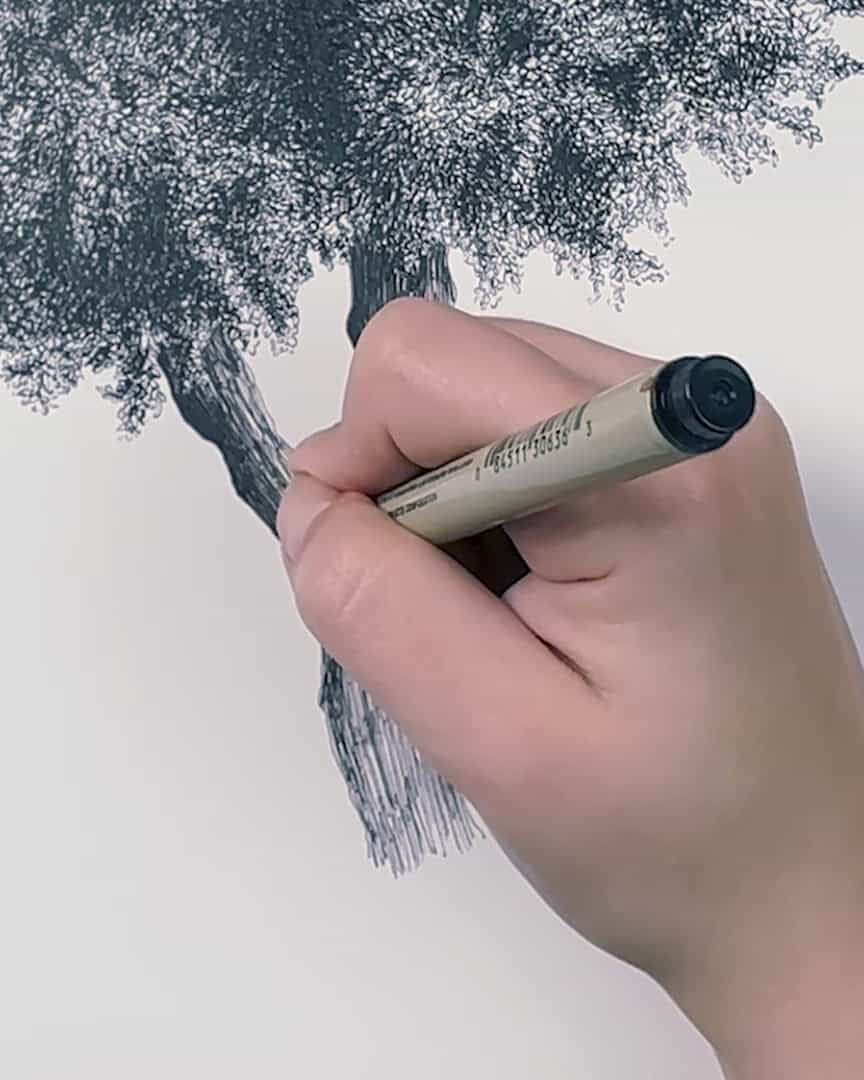
Step 4: Creating the Illusion of Leaves
Now comes the fun part—making it look like a tree without spending the rest of life drawing every leaf.
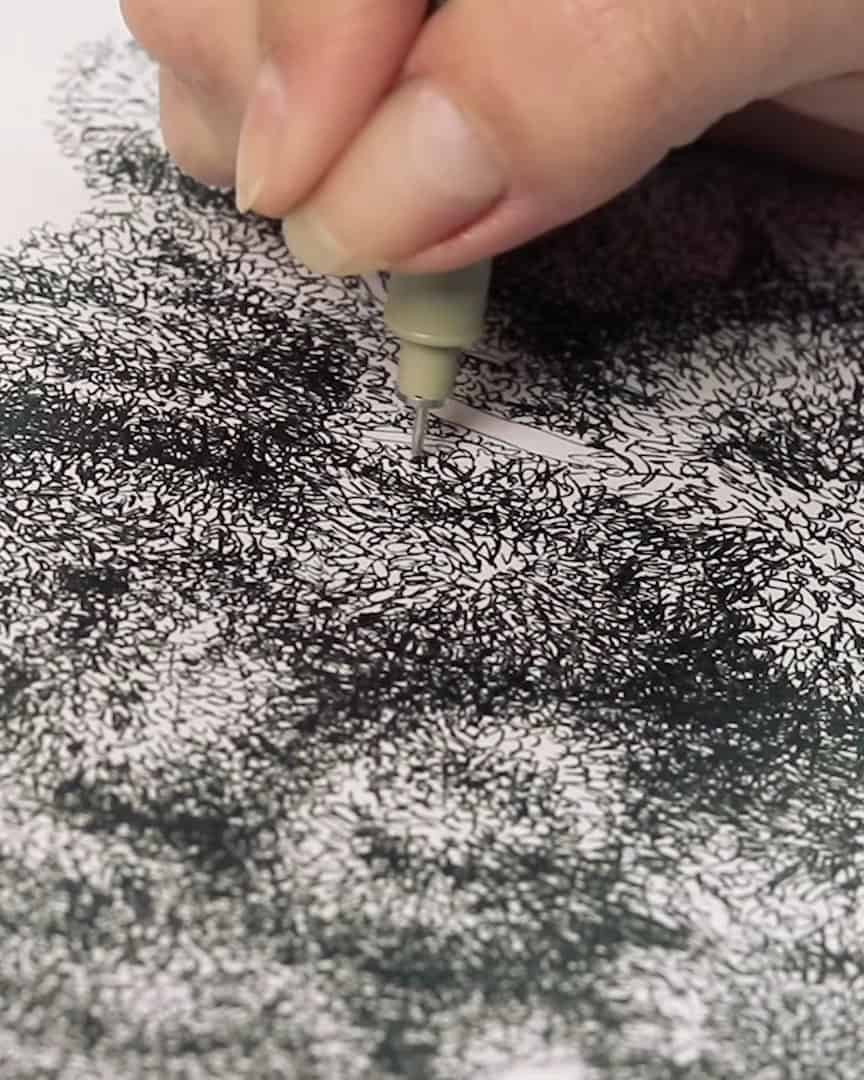
Instead of drawing each leaf one by one, the artist chooses an easier option. The artist draws small, random lines inside the circles.
These lines don’t follow any rules. They’re not straight like dashes. They’re not spirals or full circles, either. Just weird little marks—something in between.
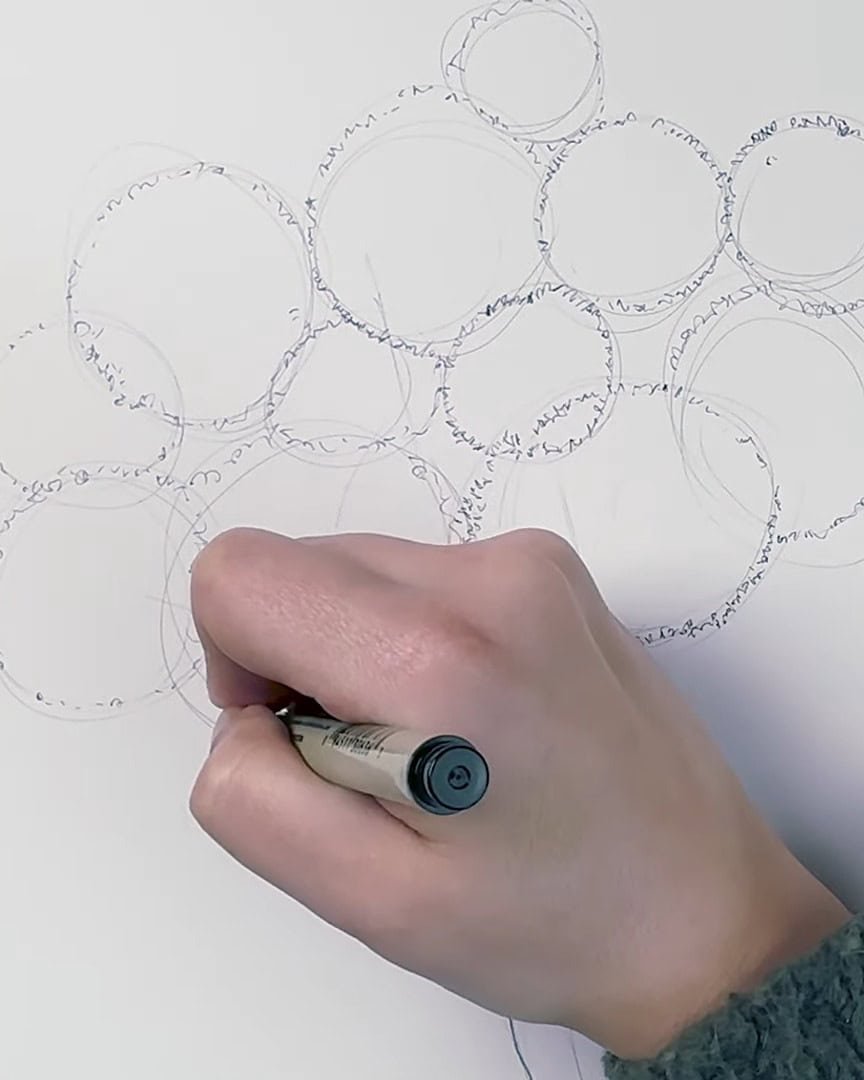
The artist goes around each circle and fills it with these tiny, irregular lines. This helps suggest the shape of the foliage without needing too much detail.
Once all the circles are filled with ink, the pencil marks are erased to keep the paper clean.
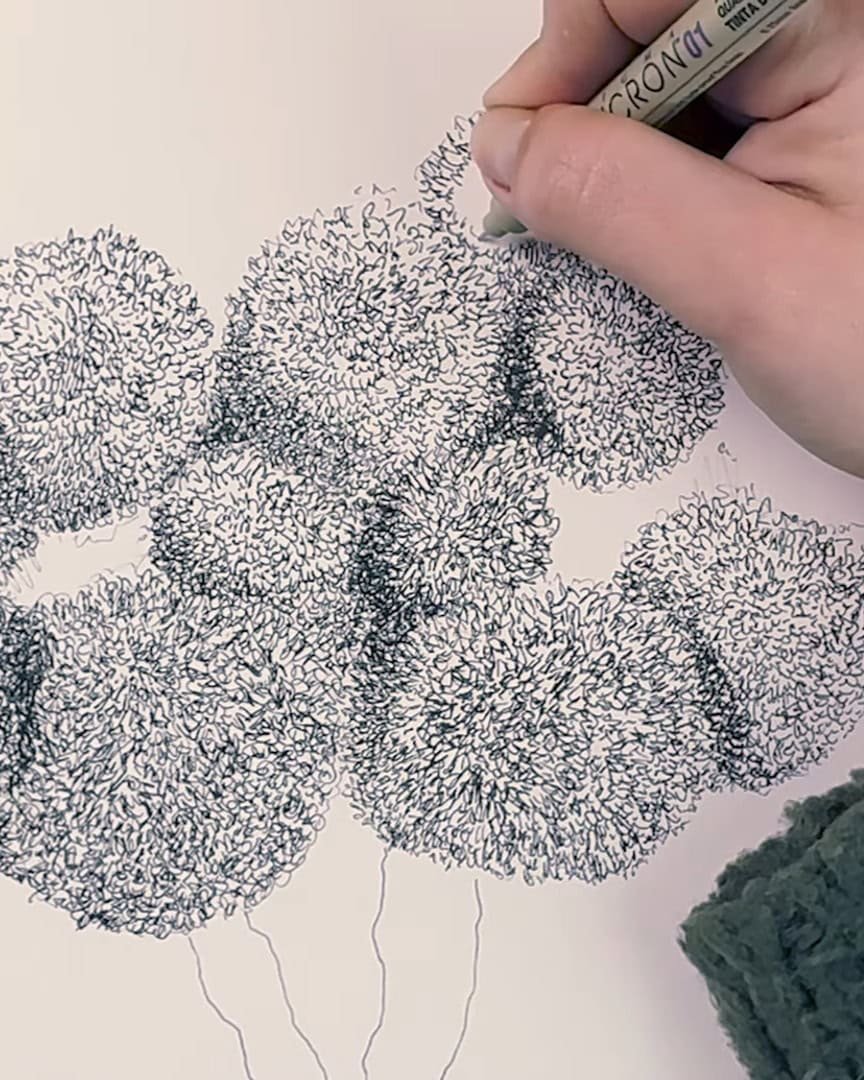
Step 5: Filling the Foliage with Texture
Now that the basic marks are down, it’s time to build up the texture and give the tree its complete leafy look.
The artist starts by filling the circles with even more of those weird lines. More lines, and more lines—continuing until each circle is packed with this pattern.
It gets boring and repetitive. But that’s part of drawing. It’s the craft.
Here’s how the artist makes it easier:
- The artist puts on a good show in the background—true crime is a favorite.
- The artist stays calm and keeps the same hand movement and speed. Rushing changes the pattern.
The goal is to make the texture consistent across the whole tree top.
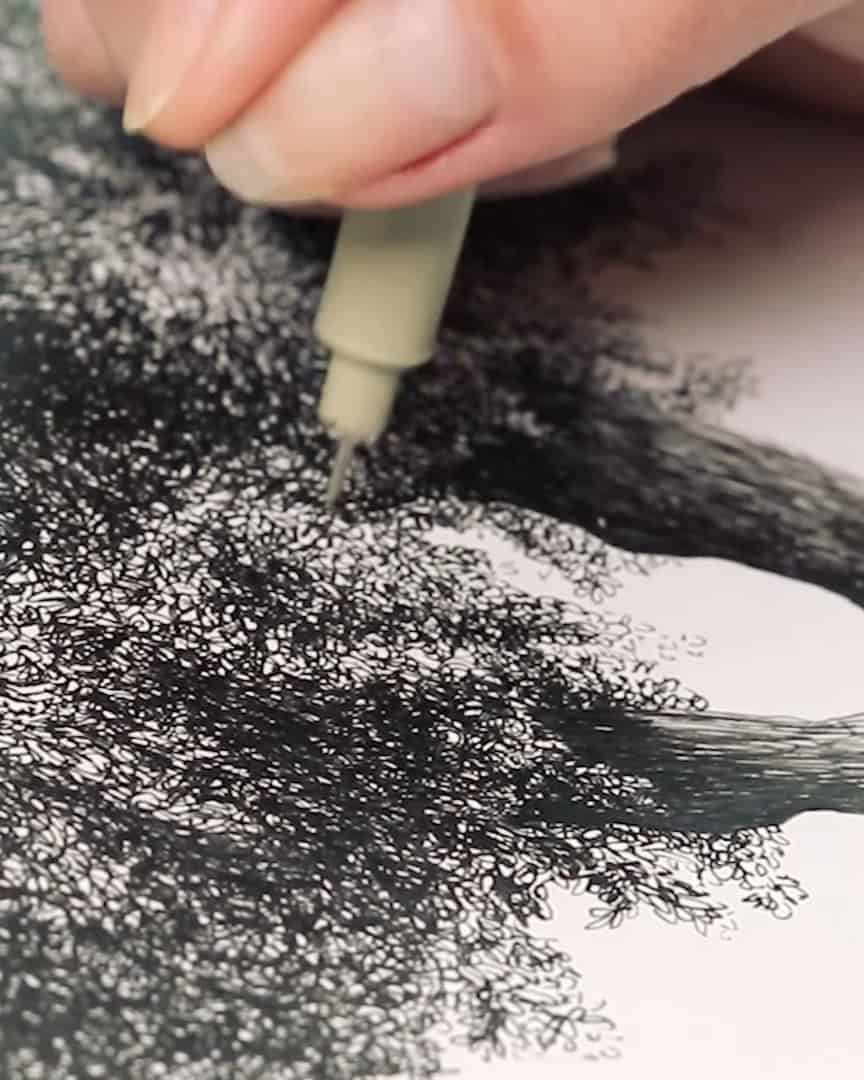
Step 6: Building Depth with Shadows
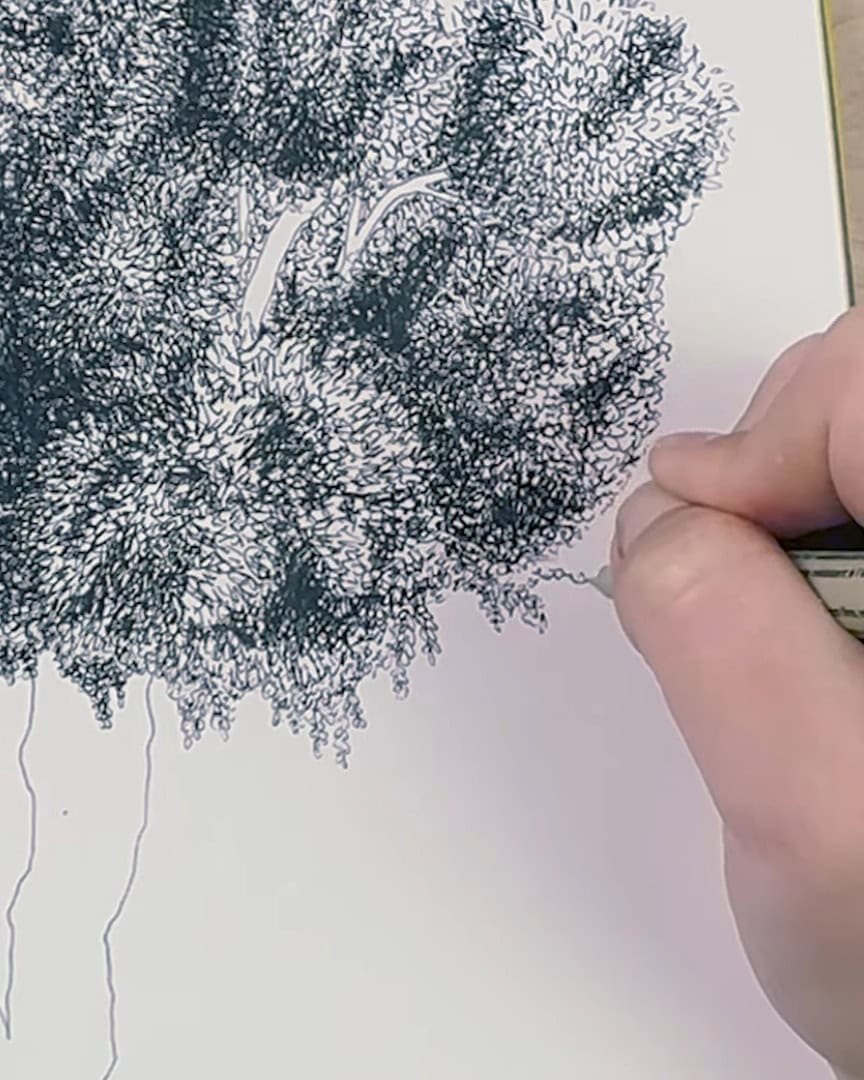
Now it’s time to bring the tree to life by adding depth and contrast. The artist starts by darkening the spaces between the circles, especially where they overlap. More lines are added there to create shadows.
The shadow spots should be dark. This is the key to making the tree look realistic.
If it seems like it could be darker, it probably can. Many people hold back, but deeper shadows transform the entire drawing.
Darker shadows add detail, make the drawing look advanced, and give it a natural 3D effect. Contrast creates depth, and that’s what makes the tree pop.
The main structure is set at this point, but the circles are still visible. No worries—they’ve done their job and will soon disappear. Keep going!
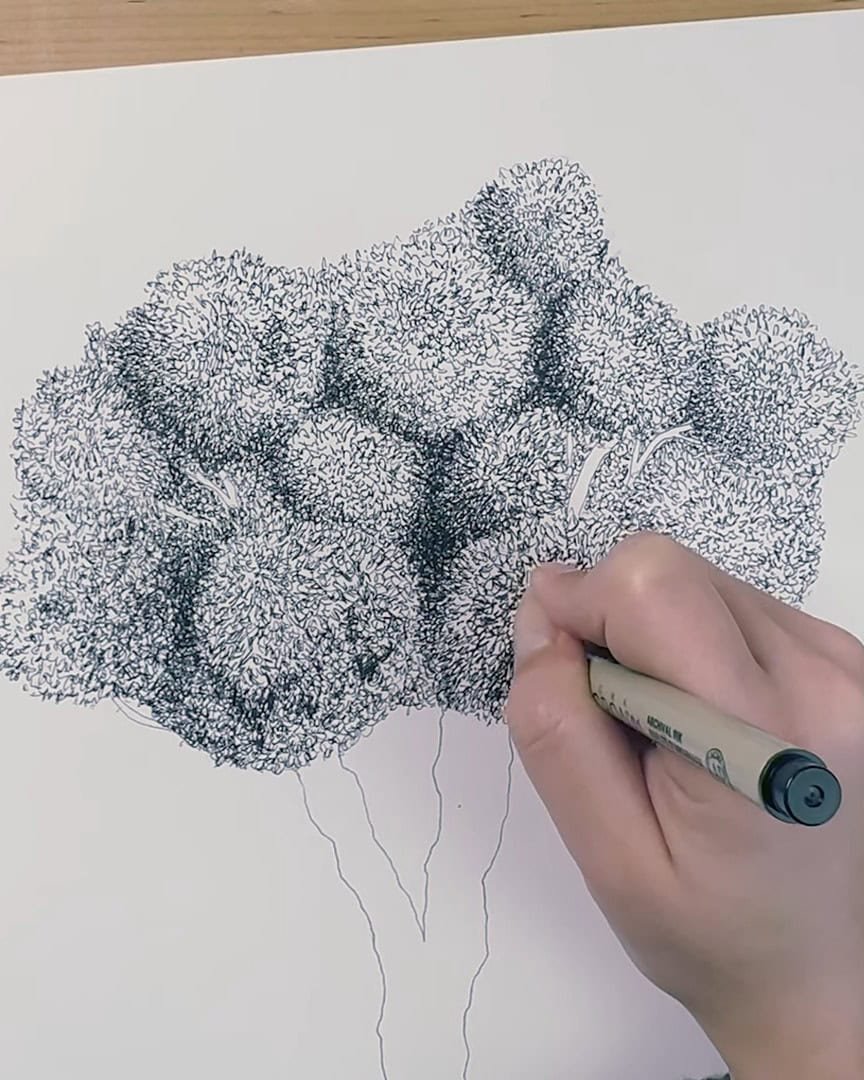
Step 7: Deconstructing the Circles
Next, the artist adds darker spots randomly to break up the circle shapes. This helps make the foliage look more natural and less like separate circles.
The artist picks one side as the light source—in this case, light comes from the right, so the left side is darker. This basic rule helps get shadows right every time.
Deciding where the light comes from is key before shading.
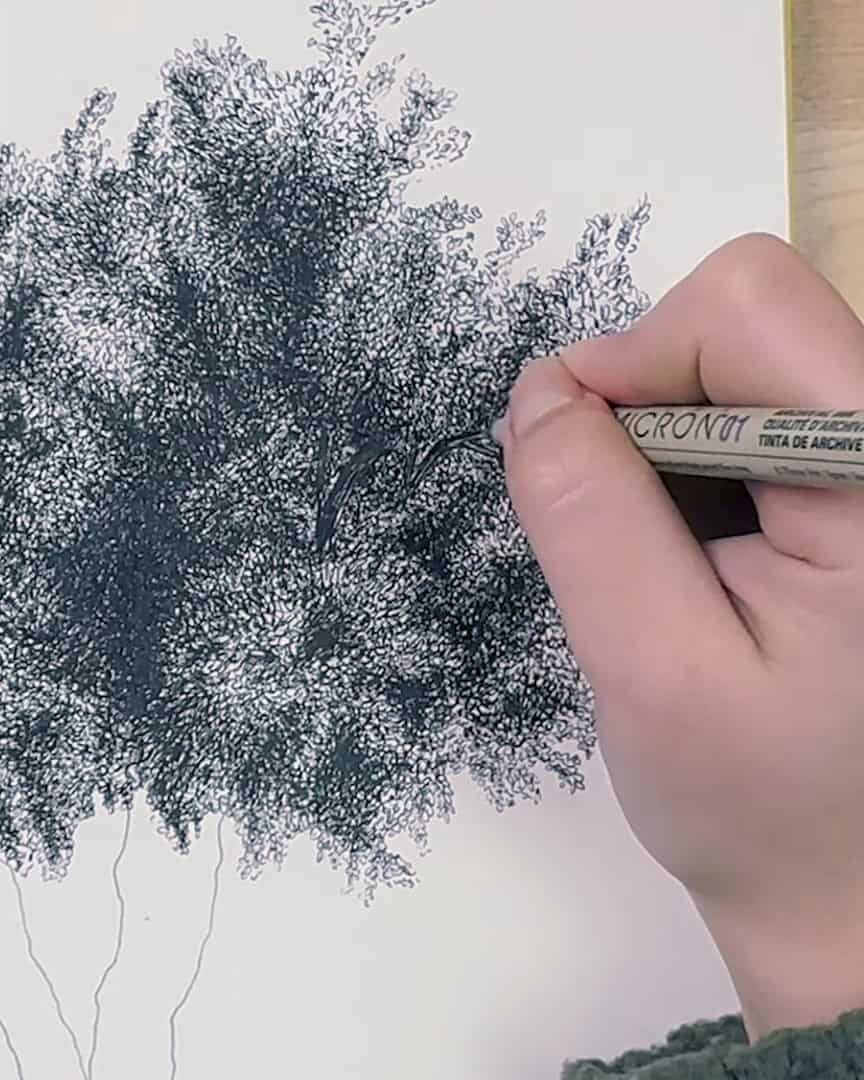
Step 8: Enhancing the Outer Edges
Now that the shadows hide the circles, the artist adds small branches and leaves to the tree. This makes it look more natural and lively. Instead of the weird line pattern, tiny leaves are drawn on the edges.
Nature isn’t perfect, so precise placement isn’t necessary. The goal is to define the outer leaves so the tree looks full and realistic while the center keeps its textured pattern. This little detail brings the drawing to life.
Step 9: Finalizing the Shadows
After adding extra leaves around the tree, the artist sees that the shadows can still be darker. The darker the shadows get, the less the weird line pattern shows underneath.
This creates an optical illusion that tricks the brain into seeing a realistic tree.
The artist makes the left side and the center super dark, almost black, and the improvement is noticeable. Darker shadows make the drawing look more advanced, impressive, and realistic.
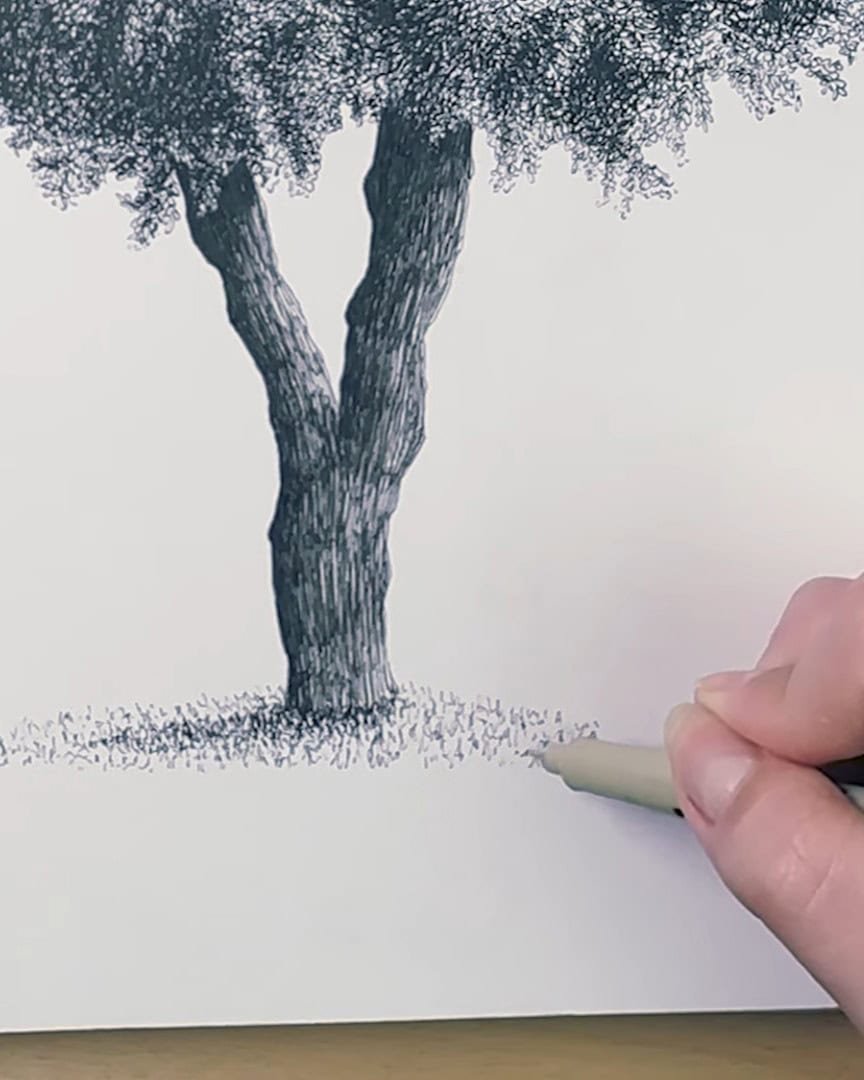
Step 10: Drawing the Tree Trunk Details
Now it’s time to work on the tree trunk. The artist finds this part easy and satisfying. Short vertical lines are drawn in different batches.
The pencil is not dragged from top to bottom—lines are kept short and parallel.
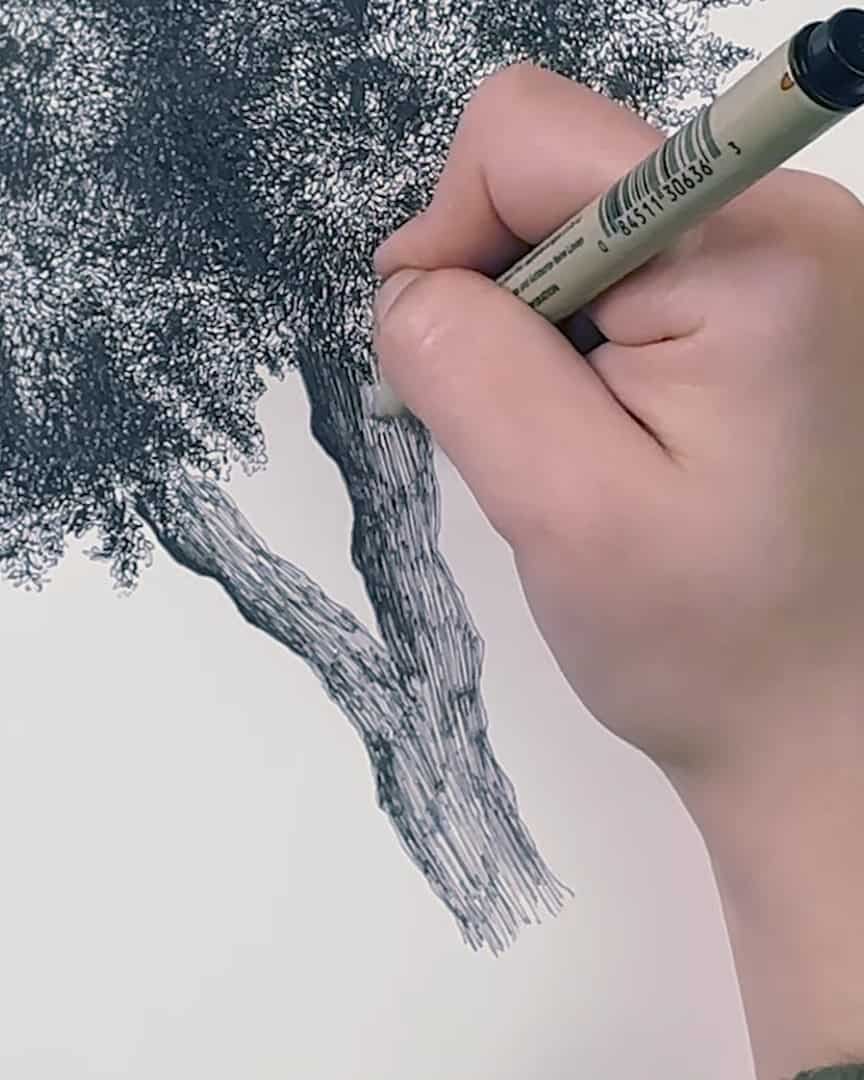
This creates a nice, realistic pattern. The artist darkens the shadow side chosen earlier and the area right under the foliage.
That contrast between the dark trunk and the bottom leaves gives a strong 3D effect. That’s why the artist always draws the leaves first, then adds the trunk.
Step 11: Finishing Touches
Now it’s time to add the final details. This part is optional, but the artist likes it because it adds a nice finishing touch. The artist makes quick little dashes at the base of the trunk to suggest some grass.
It doesn’t have to be perfect—just random and loose. More or less ground can be added. Then, to keep the shadows consistent, the artist darkens the ground more on the shadow side.
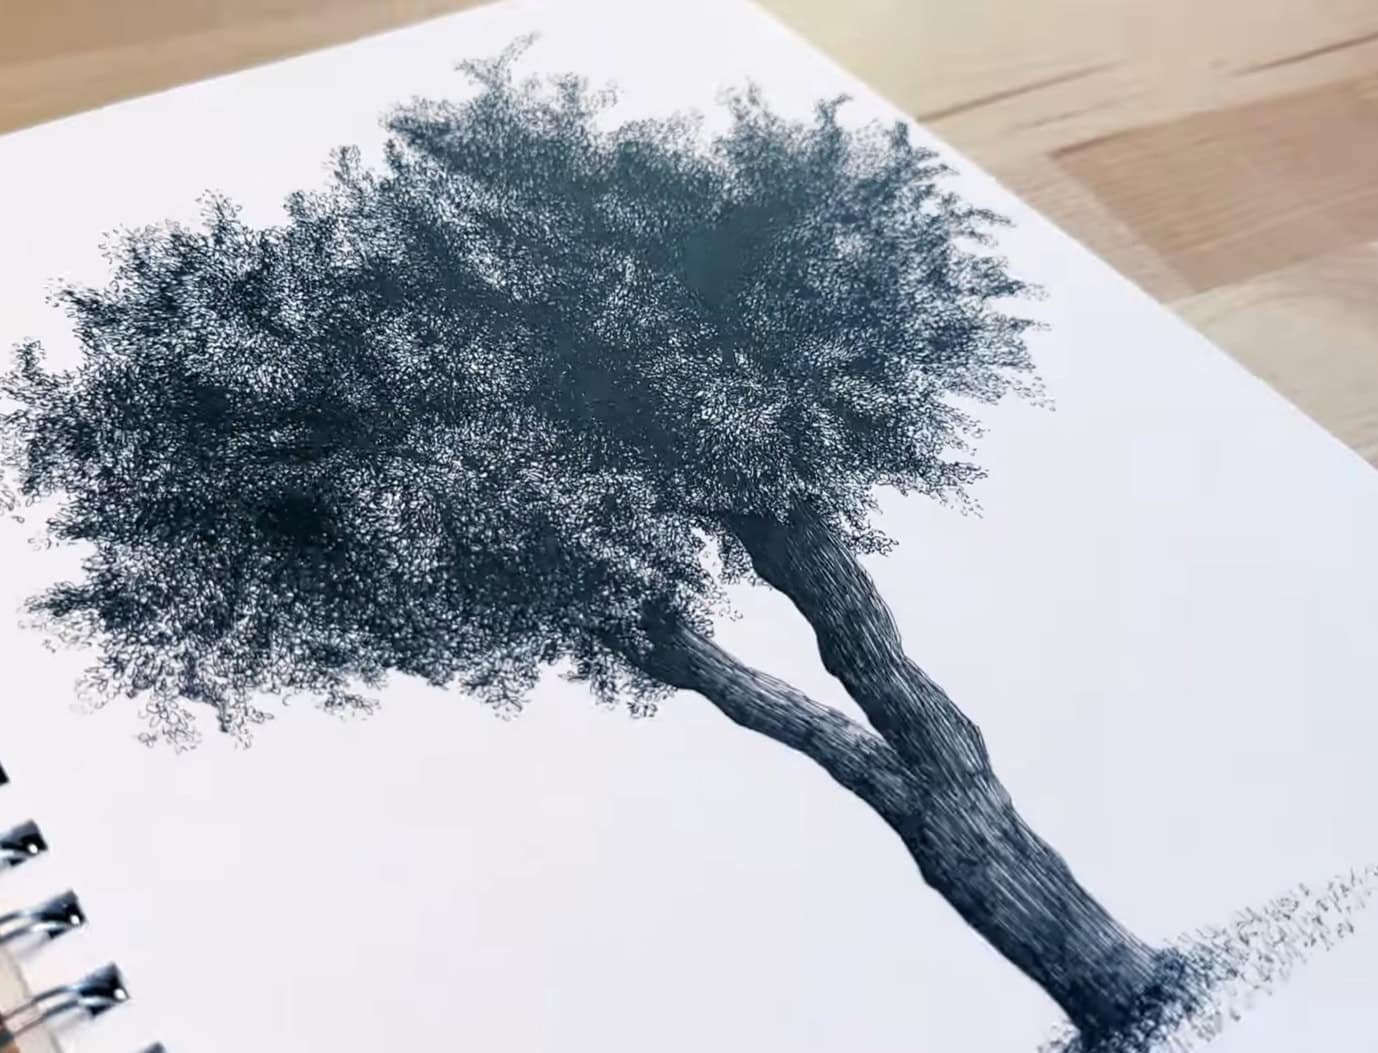
Finally, the artist also adds some details to the foliage and the trunk for a realistic look!
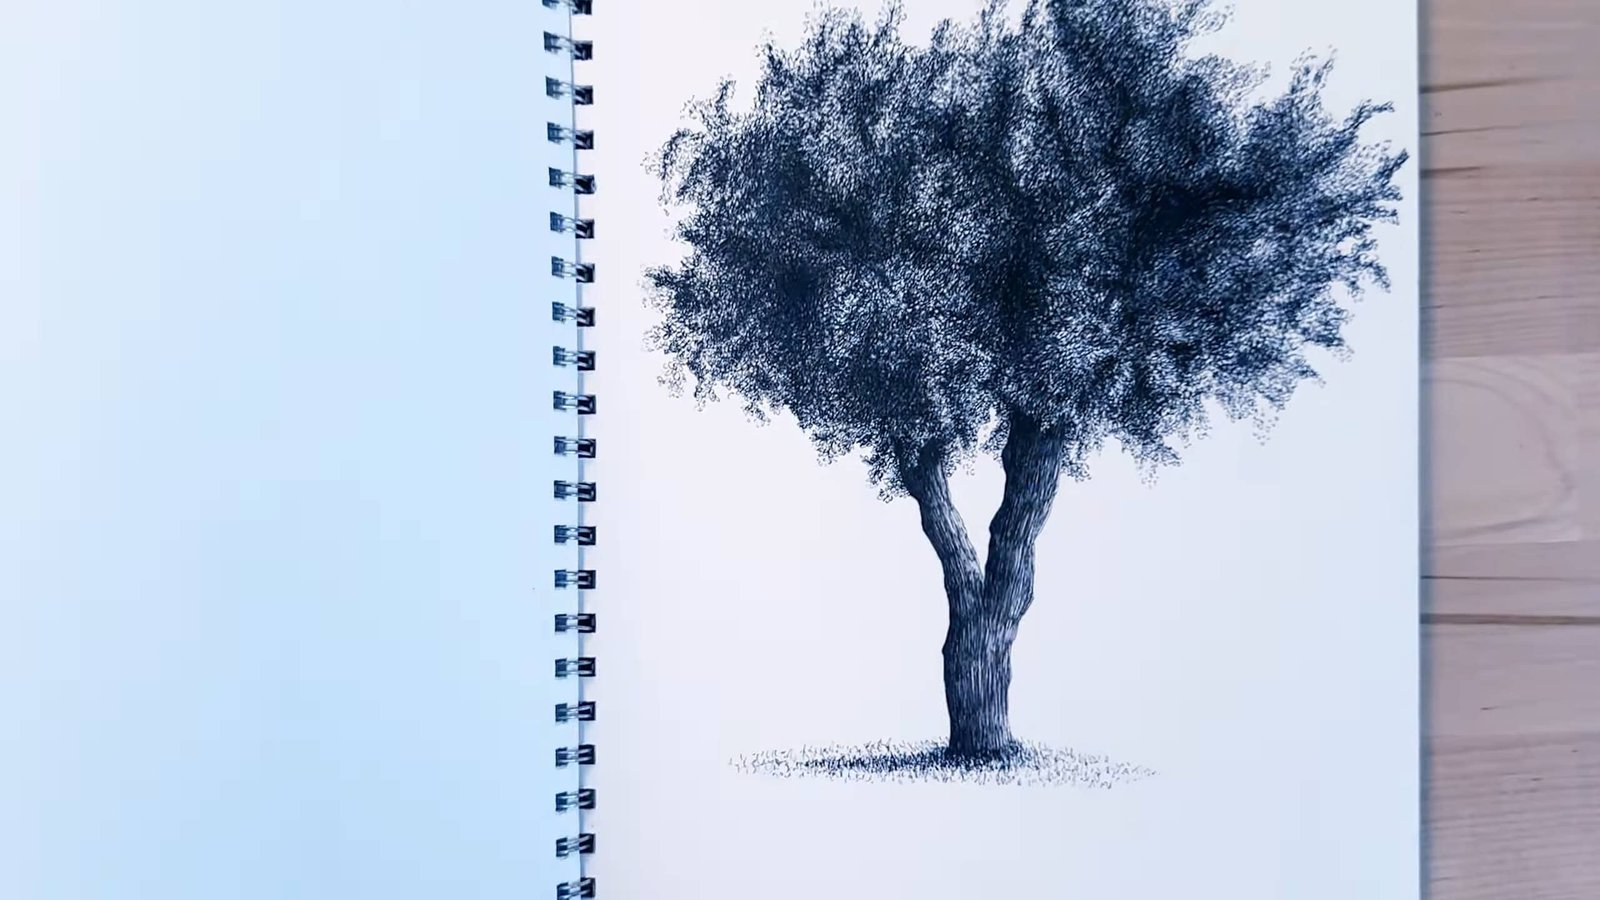
And that’s it — this is how the artist draws a beautiful, realistic tree with ink!
Final Thoughts
Why not try it yourself now? Drawing a realistic tree with ink doesn’t have to be hard. Beautiful, lifelike results can be created with a few simple steps and some patience.
The artist hopes this guide makes the process easier and more enjoyable for the viewer. Pick up a pen, follow along, and bring the tree to life today!