Some crochet techniques aren’t about fixing mistakes—they’re about finding a better option for certain situations.
In this guide, Tuula Maaria explains a simple but powerful way to crochet both sides of a starting chain without leaving gaps.
The traditional method still works perfectly fine, but this alternative creates a sturdier, cleaner result. If you’ve ever wished your bags, amigurumi, or oval shapes felt more solid, this tip is for you.

Contents
When This Crochet Situation Comes Up
This technique applies anytime a project starts with a chain and then continues by crocheting around both sides of it. Common examples include:
- Bags worked in the round
- Oval or oblong doilies
- Amigurumi pieces with oval bases
The usual approach is familiar: crochet along one side of the chain, add a few stitches at the end to turn the corner, then crochet back along the other side. It works, no question about it. But sometimes it leaves small gaps, especially in projects that need structure or stuffing. And once you notice those gaps, well… don’t ask why, but they become impossible to ignore.
Why the Traditional Method Can Cause Gaps
When stitches are worked into the standard loops of the chain, the foundation can stretch. That stretching creates little spaces, which may not matter for soft items but can be a problem for bags or stuffed projects. Filling can peek through, and the base can feel a bit flimsy.
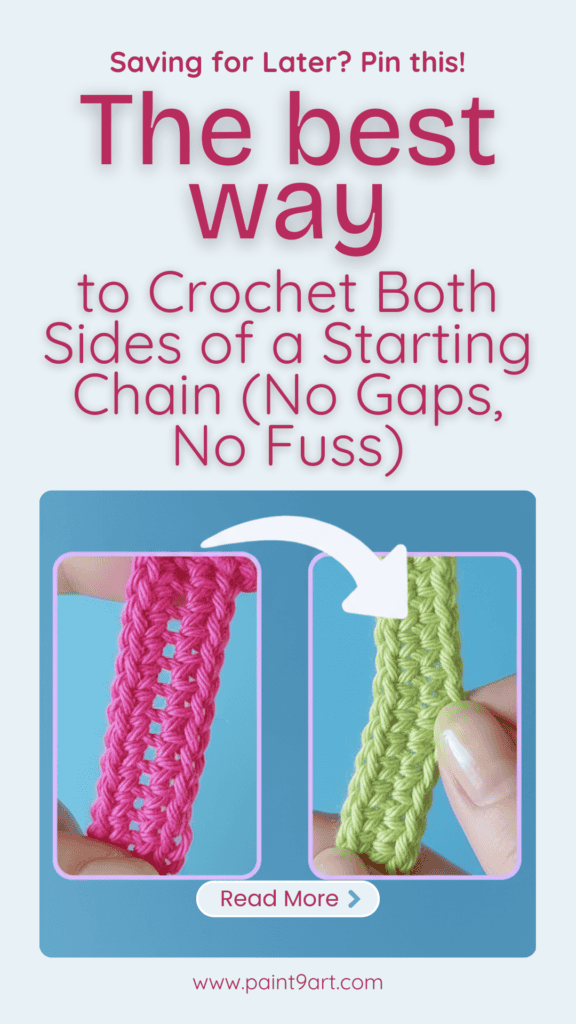
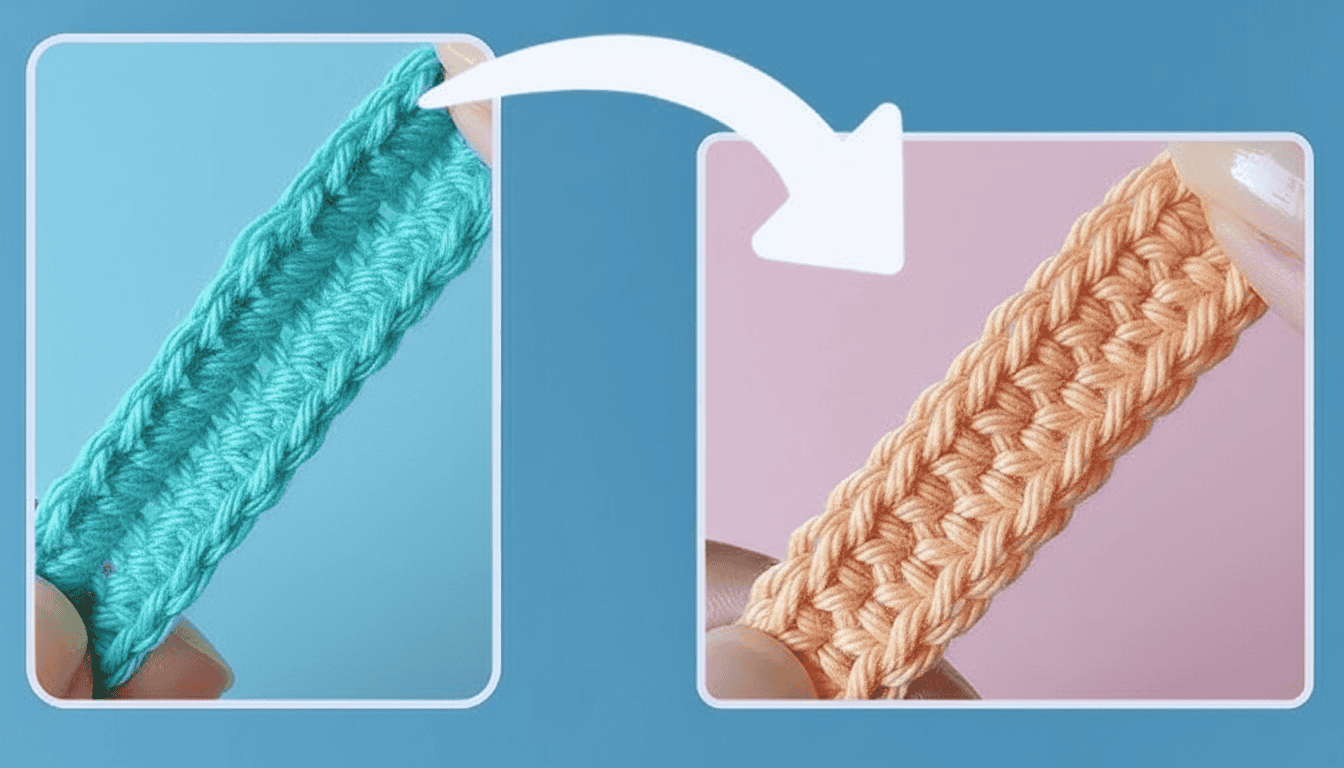
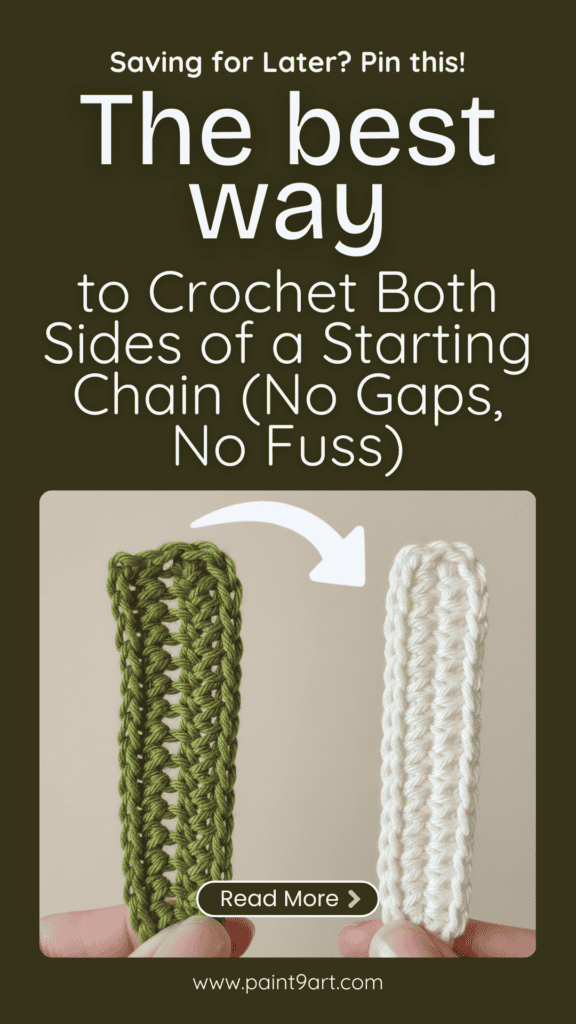
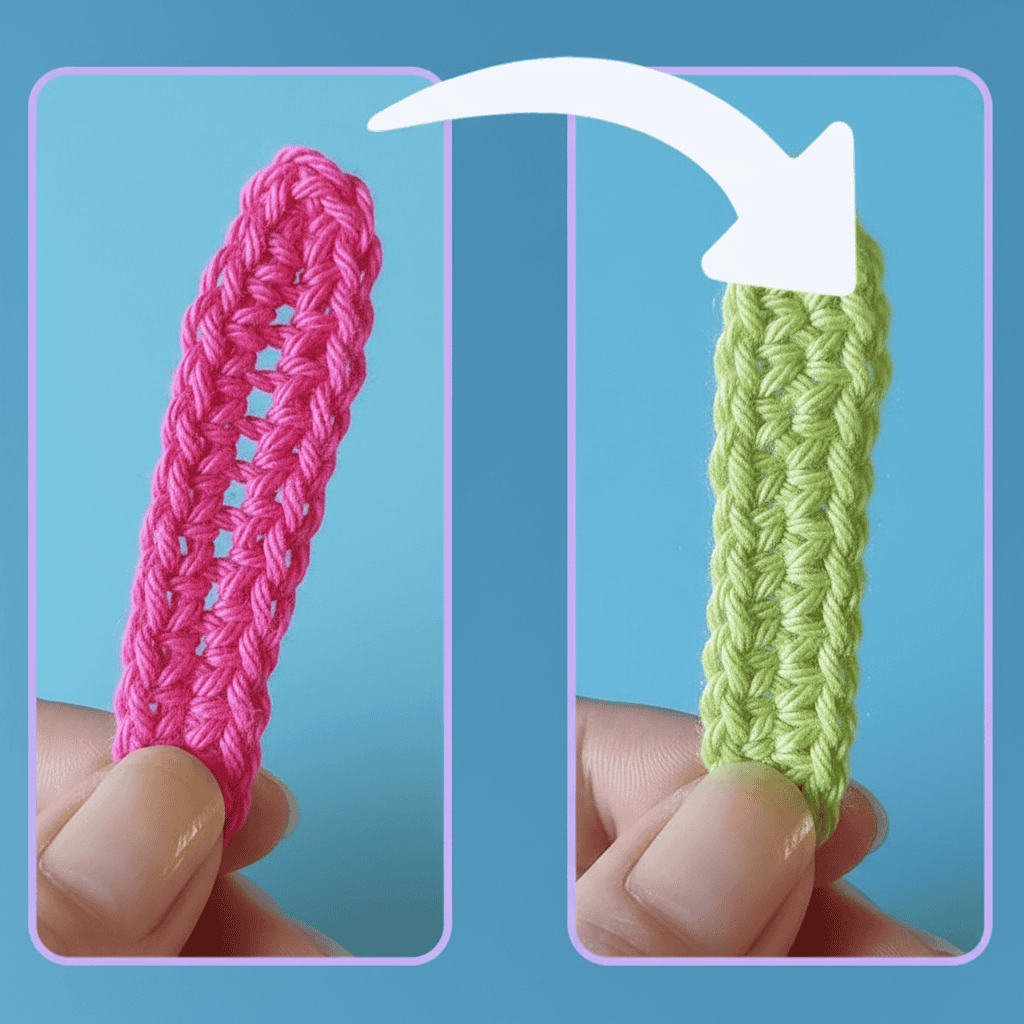
Tuula compared two samples side by side: one made the traditional way and one made using the alternative method. The difference was clear. One felt thicker, sturdier, and more polished. The other worked—but didn’t feel quite as strong. I’m just the messenger.
The No-Gaps Method: Start With the Back Bumps
The key difference in this technique is where the first stitches are placed.
Instead of crocheting into the front of the chain, the chain is gently twisted so the back bumps are visible. These back bumps become the foundation for the first round of stitches.
Step-by-Step Overview
- Create a foundation chain of any length.
- Slightly twist the chain to expose the back bumps.
- Work one single crochet into each back bump along the chain.
- At the end, place three single crochets into the last stitch to turn the corner.
- Rotate the work and crochet back along the other side, inserting the hook under both loops of each stitch, just like standard crochet.
From there, the project continues exactly as written. No pattern changes. No special math. Nothing complicated.
Why This Method Works Better
Crocheting into the back bumps creates a denser, more stable edge. When the work turns and continues along the second side, the stitches lock together more cleanly. The result is a foundation that feels solid and looks neat, without visible holes.
This makes the technique especially useful for:
- Bags and baskets
- Amigurumi and stuffed items
- Any project that needs durability
It’s a small adjustment with a big payoff.
Does This Replace the Traditional Way?
Not at all. The traditional method still works and is absolutely valid. This is simply another option—one that shines when structure and strength matter more than speed. Crochet doesn’t have a single “right” way, and that’s part of its charm.
Final Thoughts
Tuula Maaria encourages crocheters to think of this technique as a refinement, not a rule. If gaps have ever bothered you, this method may quickly become your go-to. And if you’re perfectly happy with the traditional approach, that’s great too.
Crochet is about learning, experimenting, and finding what works best for your hands and your projects. Sometimes all it takes is a small twist—literally—to make everything click.
Happy crocheting, and enjoy fine-tuning your craft.