Running out of yarn mid-project is practically a crochet and knitting rite of passage.
In this clear, approachable tutorial, Yarndrasil demonstrates the Russian join—a method that connects two yarn ends securely without knots or weaving in tails later.
It’s tidy, strong, and once you see it in action, surprisingly straightforward. If finishing ends is your least favorite part of making, this technique might feel like a small miracle.
Contents
What Is a Russian Join?
The Russian join is a way to splice two strands of yarn together by threading each yarn end back into itself. Instead of tying a knot or leaving long tails to weave in later, the yarn grips itself from the inside. The result is a smooth, durable join that won’t unravel while you’re working.
It’s especially popular for projects where clean transitions matter—think garments, blankets, or long rows where stopping to weave ends would break your rhythm. Don’t ask why it feels so satisfying, it just does.
![]()
What You’ll Need
This method doesn’t require much, which is part of the appeal:
- Two yarn ends (the old yarn and the new yarn)
- A blunt yarn needle
- Scissors
Freshly cut ends are easier to work with, so trimming before you start is a smart move.
When the Russian Join Works Best
Before diving in, there’s one important note. This technique works best with plied yarns, meaning yarns that have multiple twisted strands. It does not work well with unplied yarns like roving wool, chenille, faux fur, or anything without twist. Those fibers don’t have enough structure to hold the join securely. I’m just the messenger.
How the Russian Join Comes Together
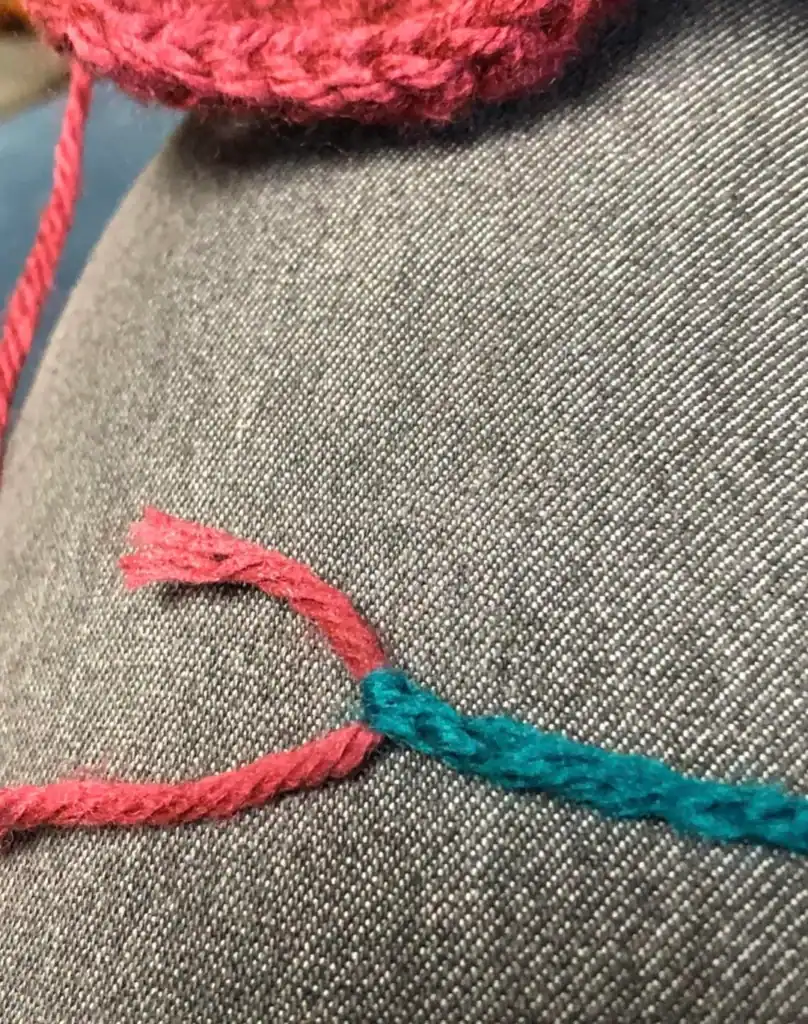
Yarndrasil begins by treating one yarn as the “working yarn” (attached to the project) and the other as the “new yarn” being added.
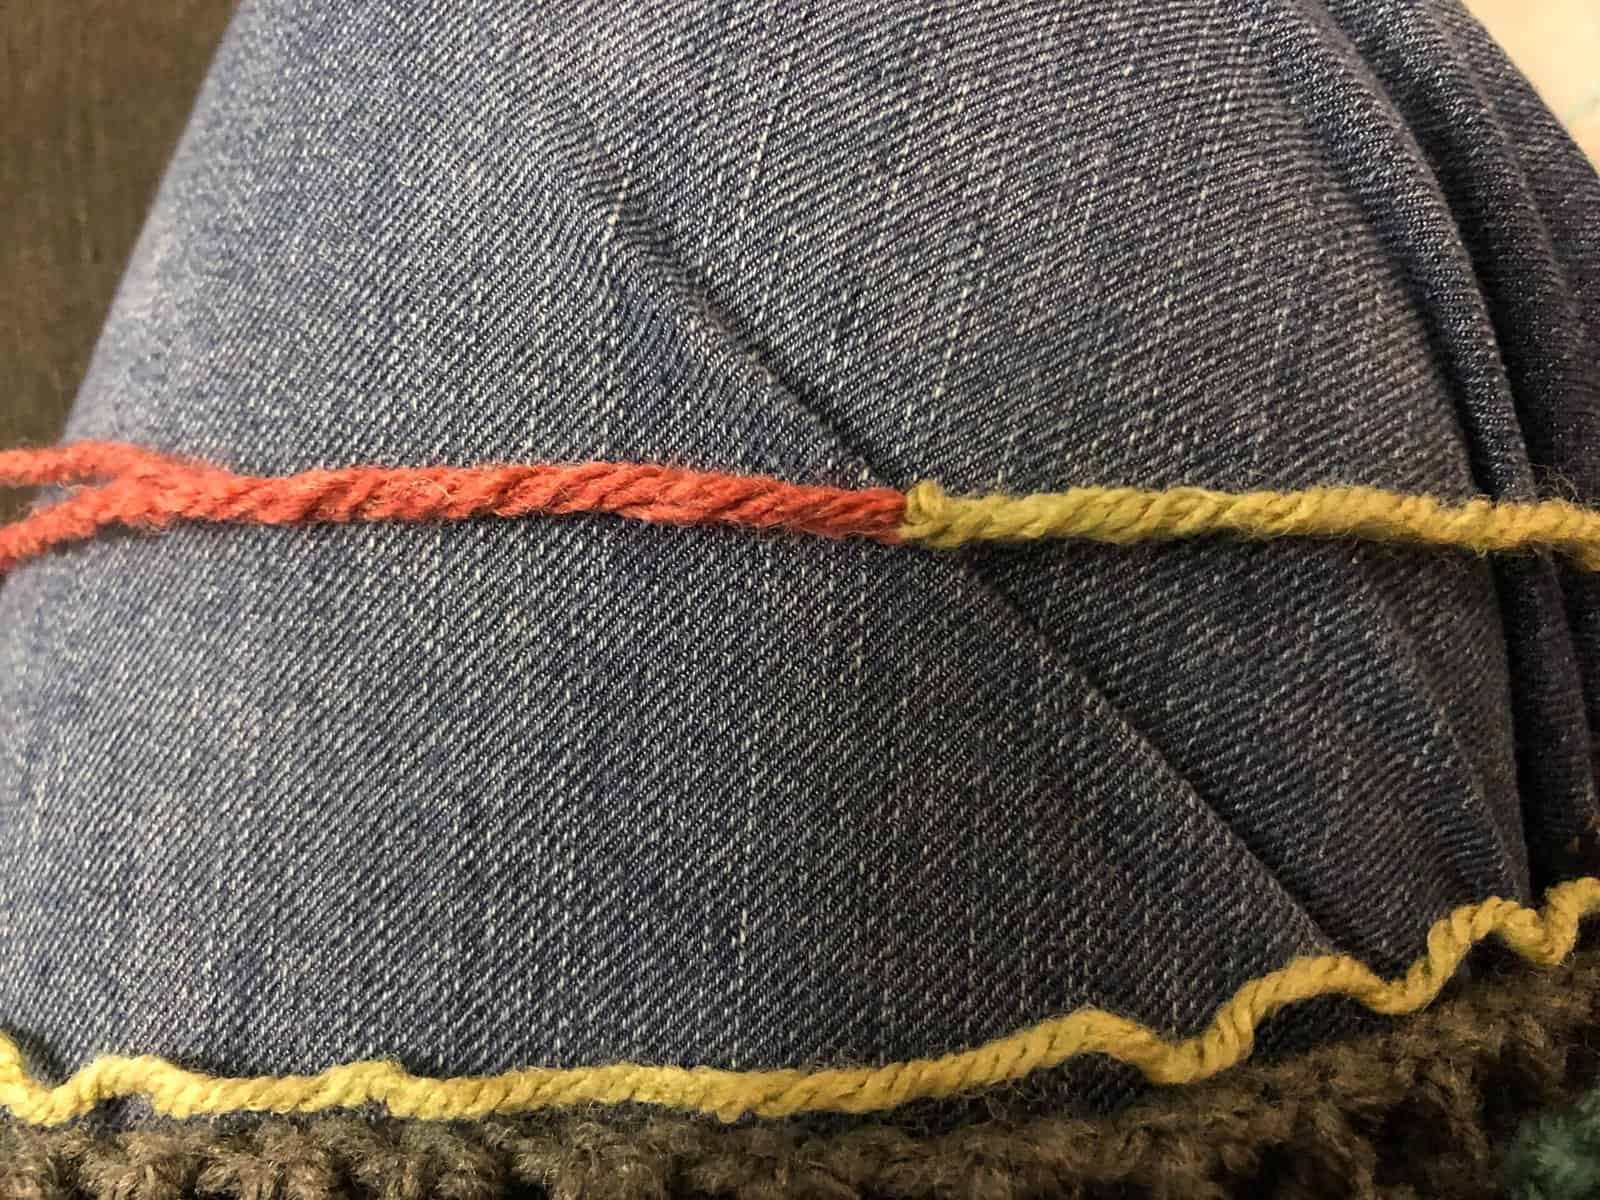
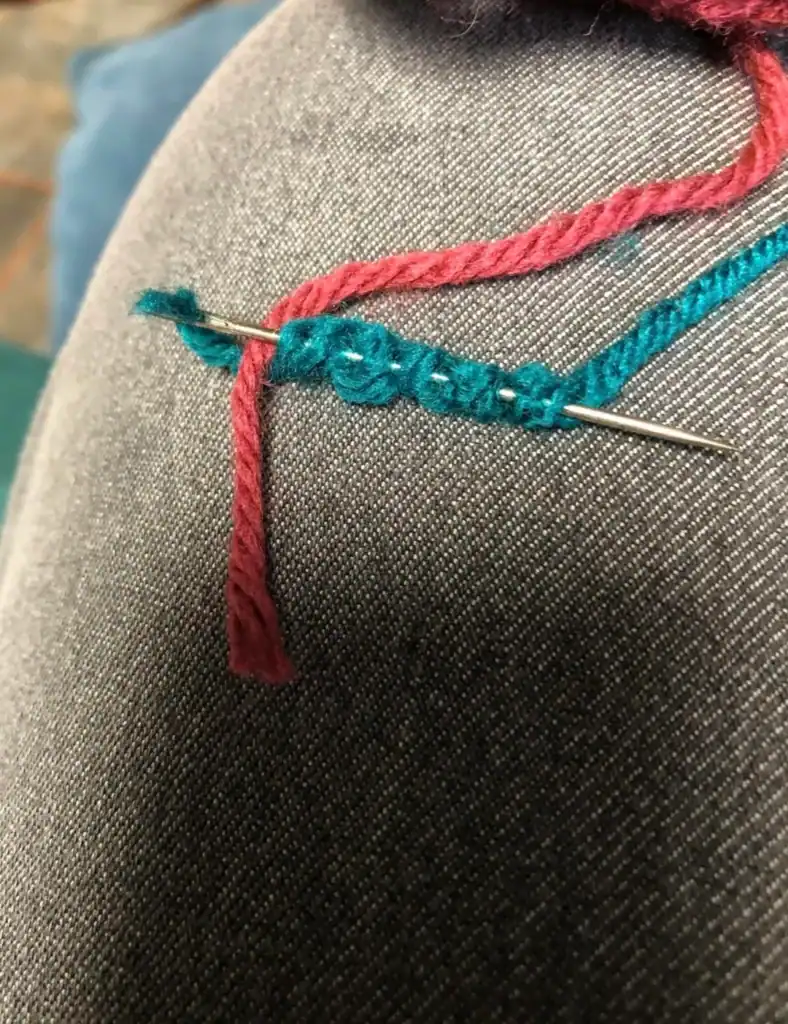
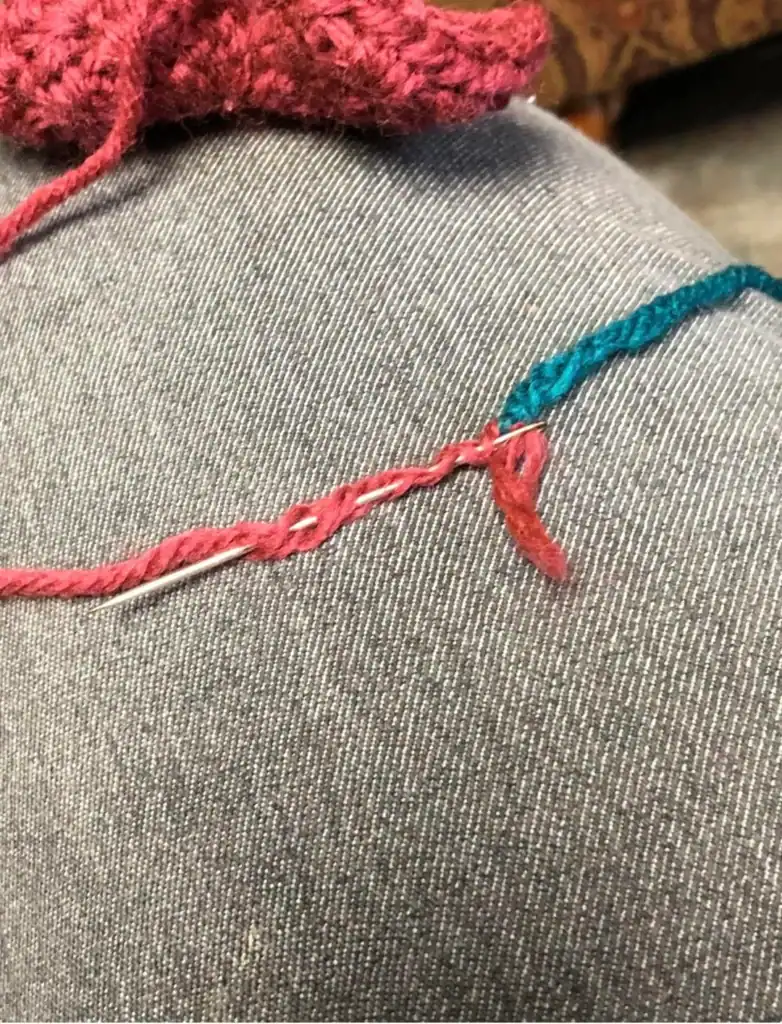
First, the working yarn is threaded onto a blunt needle. The needle is gently guided into the center of the yarn strand, sliding between the plies rather than piercing them. This creates a hidden tunnel inside the yarn. The tail is pulled through, forming a loop.
Next, the second yarn is threaded through that loop. Using the same method, the needle is inserted into the center of this second yarn, again traveling between the plies. Once the tail is pulled through, both yarn ends are gently tightened.
As the tails are pulled snug, the two yarns lock together. The join becomes compact, secure, and surprisingly neat.
Finishing the Join
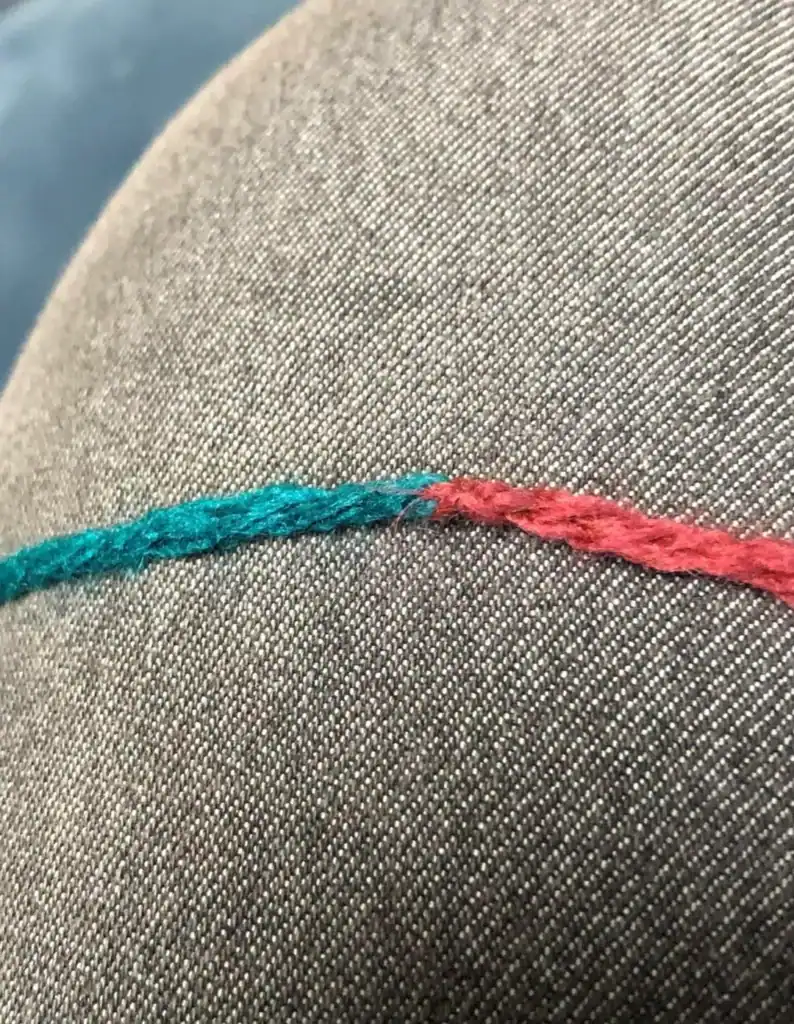
Once everything is tightened, the plies are smoothed back into place. The tail ends are trimmed close to the join—this is the bulkiest point, so careful trimming helps keep the yarn as even as possible.
The finished join is slightly thicker than the rest of the yarn, but not enough to cause issues for most projects. It won’t slip, unravel, or require any additional weaving later, which is kind of the whole point.
Why So Many Makers Love This Technique
The Russian join saves time, reduces clutter on the back of your work, and creates a strong connection that holds up beautifully. It’s especially handy for color changes, yarn substitutions, or working through large skeins without interruption.
Like many great crochet and knitting tricks, it looks more complicated than it is. After a few tries, it becomes second nature.
Final Thoughts
Yarndrasil’s Russian join tutorial proves that finishing techniques don’t have to be frustrating. With a needle, a little patience, and the right type of yarn, you can skip knots and weaving altogether. If you’ve ever sighed dramatically at a pile of yarn ends waiting to be dealt with, this method is well worth adding to your skill set.
Sometimes the best tricks are the ones that make the boring parts disappear.