
If you have ever scrolled through social media and wondered how some crocheters get their blankets to look so crisp and their lace shawls to look so open, the secret is likely “blocking.”
While it sounds like something involving construction or sports, in the crochet world, it is simply the process of shaping your finished items using water or heat. Our favorite crochet guide is here to break down the mystery of blocking, proving that even a “lazy crocheter” can achieve professional results with just a few pins and a little patience.
Whether you are a perfectionist who wants every granny square to be an identical six-inch masterpiece or you just want your summer shawl to have a bit more drape, blocking is the final “polish” your project deserves.
Contents
Why Bother Blocking?
Let’s be honest: you don’t have to block anything. I’m just the messenger, but plenty of beautiful projects live long, happy lives without ever seeing a blocking mat. However, if you are gifting or selling your work, or if you are about to join 50 squares into a blanket, here is why you might want to give it a go:
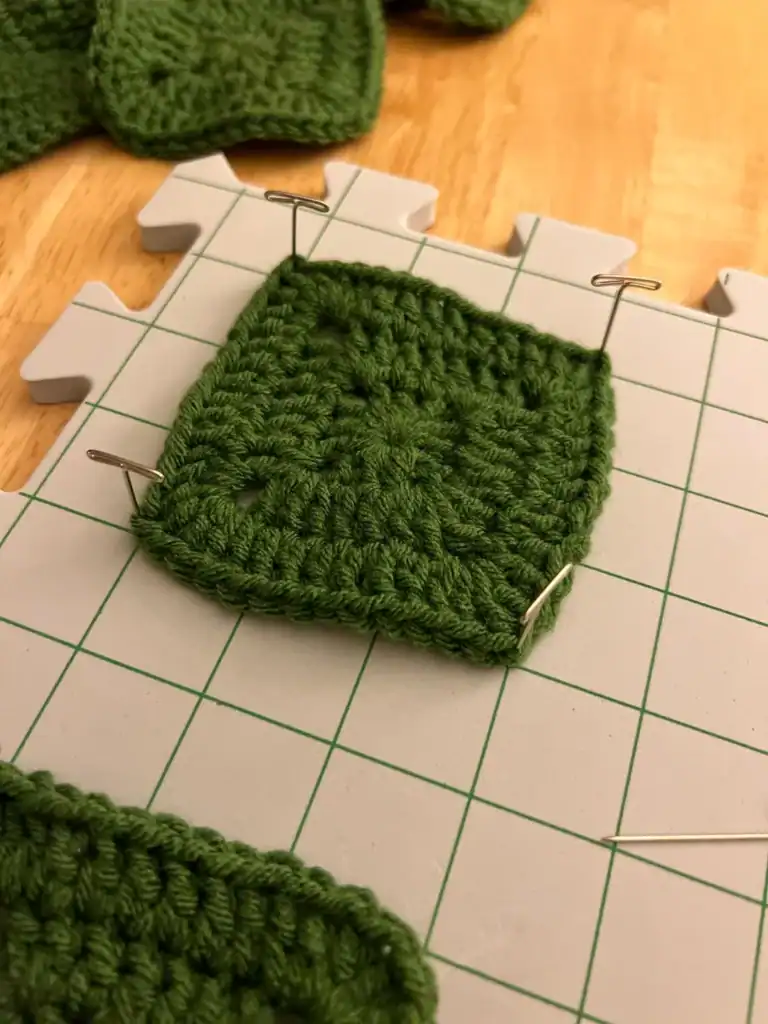
- Ease of Joining: It is much easier to stitch squares together when they are all the exact same size.
- Stitch Definition: Blocking opens up those lacy chains and makes the pattern “pop.”
- Shaping: It turns a wonky rectangle into a perfect square or gives a crochet snowflake its points.
- Drape: It relaxes the fibers, making a stiff garment feel soft and flowy.
The Essential Toolkit
Before you start, you’ll need a few basics. You can buy fancy blocking boards, but cheap jigsaw-style foam play mats work just as well—don’t ask me why, they just do!
- A Surface: Foam mats or even a clean carpet (just be careful not to get it too soggy).
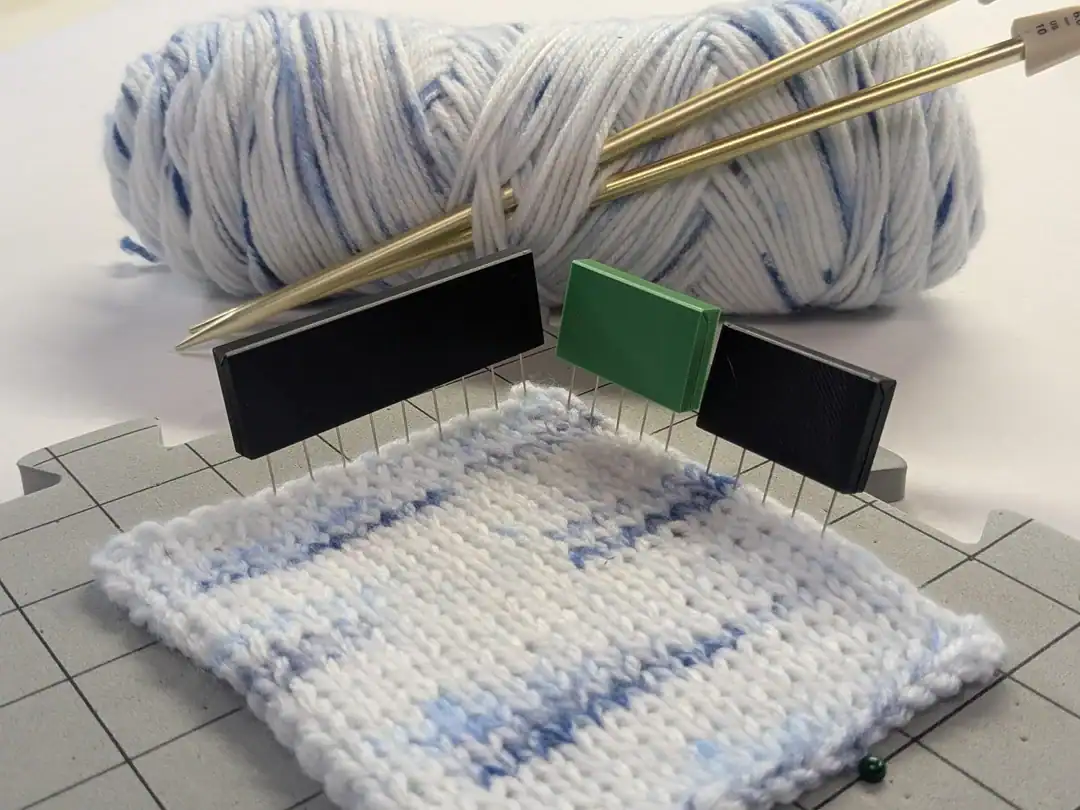
- Rust-Proof T-Pins: This is the most important part! You must use stainless steel pins so you don’t end up with rust spots on your beautiful white yarn.
- Tape Measure: To make sure your diagonals are equal and your edges are straight.
- Water or Steam: Depending on your chosen method.
Three Ways to Shape Your Style
There are three main ways to block, and the “best” one usually depends on your fiber and how much of a hurry you are in.
1. Wet Blocking (The Deep Soak)
This is the most thorough method. You dunk your project in a bowl of lukewarm water and let it soak for 15 minutes. Pro tip: Do not wring it out! You’ll crush the fibers. Instead, roll it in a towel like a burrito to squeeze out the excess moisture, then pin it into shape on your mats.
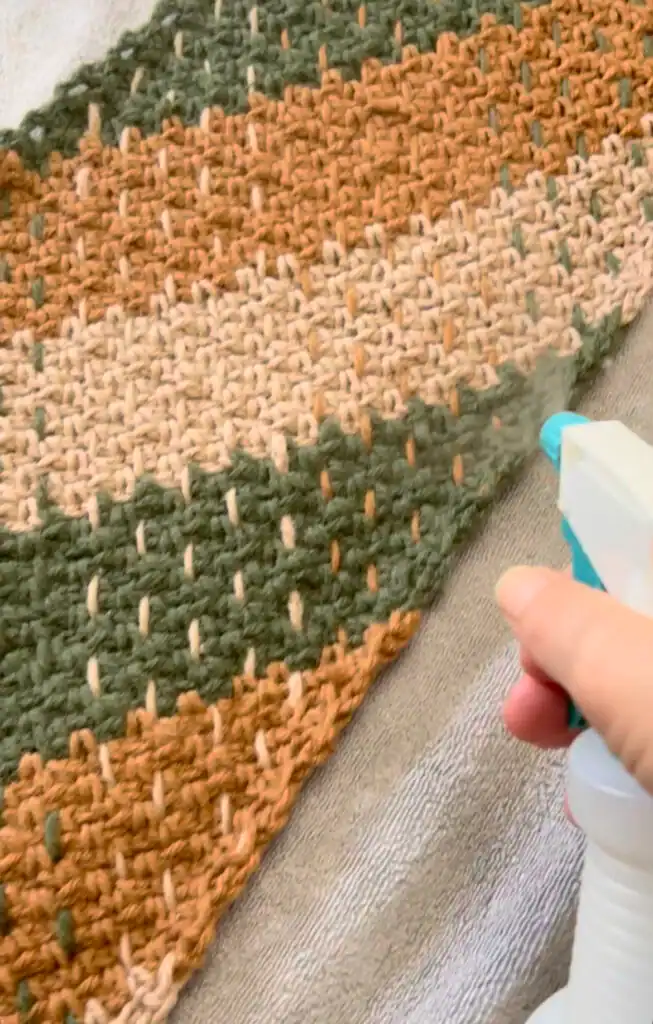
2. Spray Blocking (The Middle Ground)
If your project is already pinned out and just needs a little “convincing,” reach for a generic spray bottle. Mist the project until it is damp to the touch and let it air dry. It takes a while to dry, so you’ll need a bit of patience for this one.
3. Steam Blocking (The “Impatient” Method)
This is perfect for acrylic yarn. Pin your dry project out and use a handheld steamer or the steam function on your iron. Crucial Warning: Never, ever let the hot metal touch your yarn! Acrylic is essentially plastic, and it will melt faster than a popsicle in July. Just hover and “puff” the steam over the surface.
Note on “Killing” Acrylic: If you apply a lot of steam to acrylic, you might “kill” the fiber. This sounds dramatic, but it just means the fibers take that shape permanently and get super soft. Just be sure it’s pinned perfectly, because once you kill it, there is no going back!
Is It Permanent?
A common question is whether you have to re-block after every wash. The answer is a very helpful “yes and no.” If you “killed” your acrylic, it’s permanent. For natural fibers like cotton or wool, you might need to give it a light re-shaping after it comes out of the wash.
But honestly, if it’s a well-loved blanket being used on the sofa, nobody is going to come at it with a tape measure to see if it’s still perfectly square!
Blocking is simply a way to honor the hours of work you put into your craft. It takes a project from “homemade” to “handmade with love.”