

Painting bubbles with watercolors is such a joy! Grab some jars of different sizes to make the bubble shapes stand out.
Bright colors like yellow, magenta, and cyan can really make them pop.
Ready to create something magical? Time to get started!
Contents
Required Materials
Gather some basic supplies to start this fun project. You don’t need fancy tools, just items that help bring your bubbles to life!

Watercolor
I use Winsor and Newton watercolor paints for their bright colors. The pigments, like bright yellow, pinky magenta, and blue cyan, stand out on paper.
These paints mix smoothly and make vibrant puddles perfect for layering techniques.
The quality helps create bold yet transparent effects effortlessly.
Fresh clean water
Clean water is a must for watercolor art. I keep potable, filtered water nearby to avoid muddy colors.
Using crystal clear water helps paints stay vibrant and fresh on the paper.
Brushes
I use various sizes of paint brushes for this project. A small round brush works well for tiny details, like edges or delicate lines.
Larger flat brushes help cover wide areas quickly and smoothly.
Each brush size brings its own strength, so having a good brush collection really helps.
Paper
This 140-pound cold press watercolor paper handles wet media like a champ. Its textured surface grips paint well, creating soft edges and blending smoothly.
Being heavyweight, it stays flat and doesn’t buckle under water-heavy techniques.
Jars


I used three jars with different sizes to outline the bubbles. Their varied measurements helped create a mix of large, medium, and small circles on paper.
A pen cap was perfect for adding tiny bubble shapes, giving more detail and variety.
Each jar had its own charm. The smallest worked well for clustered designs, while the largest covered open spaces. The pen cap added those final delicate touches that made it all pop!
Step-by-Step Process of Creating Watercolor Bubbles
Grab some jars, splash on bright colors, and layer them for a dreamy bubble effect. Tiny tools like pen caps make it even more fun!
Keep reading to unleash your inner artist.
Selection of colors

Large jars make bigger puddles, while smaller ones create tiny spots. The puddles need to stay wet but must hold rich pigment.
I pick colors that pop—bright yellow, pinky magenta, and blue cyan. Sunshine yellows add warmth, while fuchsia pinks bring boldness.
Aqua blues or turquoise create calm vibes. These hues mix to make soft tones or sharp contrasts for bubbles that stand out on paper!
Transferring color onto paper and spreading it for a transparent effect


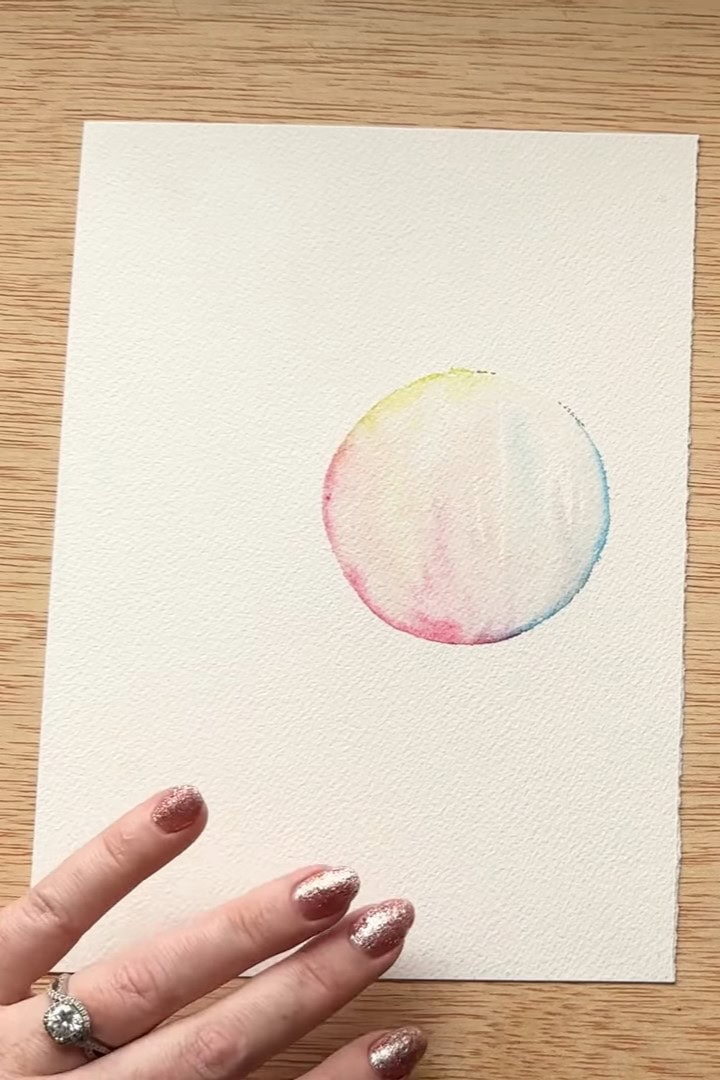
I dip the jar rim into a color puddle. Then, I press it firmly onto the paper to transfer the watercolor.
Using clean water, I spread the color from the edges toward the center for a soft, transparent look.
Layering technique and glazing for adding more bubbles

Let the first layer dry fully. Then, I paint more circles on top using a light touch and less water. This glazing method adds depth and makes the bubbles pop out more.
For smaller bubbles, I use subtle strokes with a tiny brush or tap lightly with the tip of my pen cap to create fine shapes.
Each new layer creates a translucent look that feels alive!
Using a pen cap for creating tiny bubbles


I grab a pen cap, dip its edge into the paint puddle, and press it lightly onto the paper. This makes tiny, crisp bubbles that add variety to my design.
Adjusting pressure changes bubble size slightly, helping me create more interest in the piece.
Finishing Touches


Add some fun splatters to make your bubbles pop, literally! This step brings movement and energy to your painting.
I dip my brush in watery paint and tap it gently over the paper. The splatter creates a bubble burst effect, mimicking popped bubbles perfectly.
Using bright colors like yellow or magenta makes them stand out more.
Different brushes give different splatter sizes—small ones look crisp, while bigger drops feel bold. I aim for random patterns to keep it realistic, avoiding too much control.
This splatter effect for bubbles brings life to the artwork, as if bubbles just popped!
Conclusion
Creating watercolor bubbles with jars feels so fun and creative. The colors, the layers, and the tiny details make each bubble special.
Grab your paints and jars to try it—it’s a simple way to make something beautiful!