
What makes a handmade card feel extra special? For MarenaART, it’s the joy of mixing color, water, and a touch of ink to create something simple yet beautifully meaningful.
In this tutorial, MarenaART will show you how she paints two loose watercolor designs—a butterfly and a dragonfly. Both are easy, playful, and perfect for any occasion.
Let’s get started together!
Materials You’ll Need
Before the artist starts painting, the artist makes sure everything is ready. For these two cards, the artist keeps it simple and flexible. You don’t need fancy tools—just the basics will do.
Here’s what the artist uses:
- Watercolor paper: The artist uses Canson Montval paper. It’s 24 by 32 centimeters (around 9.5 by 12.5 inches), 100% cellulose, and 300 GSM (140 lb). The artist folds the sheet in half and then again to get four quarters. The artist uses two of those for today’s cards.

- Watercolor paints: The artist mixes different ones. Some are paints the artist made personally. Others are from White Nights or maybe Sonnet. The artist just uses what feels right at the moment.

- Brushes: The artist goes with simple round brushes. If finer lines are needed, the artist might grab a detail brush later.

- Ink pen: Waterproof is excellent, but if not, that’s okay. Just don’t paint over the lines afterward.

That’s all! Let’s get started.
Card 1: Watercolor Butterfly Design
Let’s start with the first card. The artist decides to paint a butterfly using soft colors and a loose style. This design is playful and perfect for any occasion.
Step 1: Create the Butterfly Shape with Water and Color
First, the artist mixes Quinacridone Red with Phthalo Blue for a violet shade. The artist doesn’t wet the whole paper—just the area where the butterfly will be. The artist uses clean water to shape a rough outline of the butterfly wings.
Then, the artist drops the violet mix into that wet shape.
The artist lets the color bleed slightly into the water. With the brush, the artist slightly moves the color around to shape the wings. It doesn’t need to be perfect. The artist even adds a few paint sprinkles to give it more interest.
Later, the artist will add more details, so there is no need to worry about precision just yet.
 Create the butterfly shape
Step 2: Paint the Butterfly’s Body and Second Wing
The artist wants some sprinkles on the butterfly.

Next, the artist uses black to paint the butterfly’s body and add tiny details. Then, the artist also adds sprinkles.


Step 3: Add Ink Details to the First Butterfly
While the second card dries, the artist returns to the first one. The artist grabs an Etchr ink pen, which has a fine tip. The artist starts adding sketchy lines—nothing too perfect. The artist draws the outline of the wings and a few wing patterns.
Instead of one solid line, the artist makes broken, sketch-style strokes. The artist follows the butterfly shape and adds more detail where it feels needed.

Then the artist splatters some black ink and a bit of the violet paint mix.

The artist also uses a very light wash of brown and yellow on top to make it less flat. The violet feels boring, so the extra color adds interest.

Then, the artist adds some splatters.

Step 4: Add a Personal Touch with Text
To finish, the artist writes a short text on the card. You can write anything you like. It can be a greeting, a quote, or even a name. This butterfly card works for many occasions and feels special.

Card 2: Watercolor Dragonfly Design
Now, let’s move on to the second card. This one is a lovely dragonfly, and the artist keeps the style loose and playful. It’s light, dreamy, and full of charm.
Step 1: Prepare the Base
The artist starts with a sprinkle of clean water. Then the artist adds a mix of orange, Quinacridone Gold, and a touch of brown. The artist lets the paint fall into the wet paper and bleed on its own. This creates natural shapes and movement.

The artist leaves this card to dry completely before doing more.
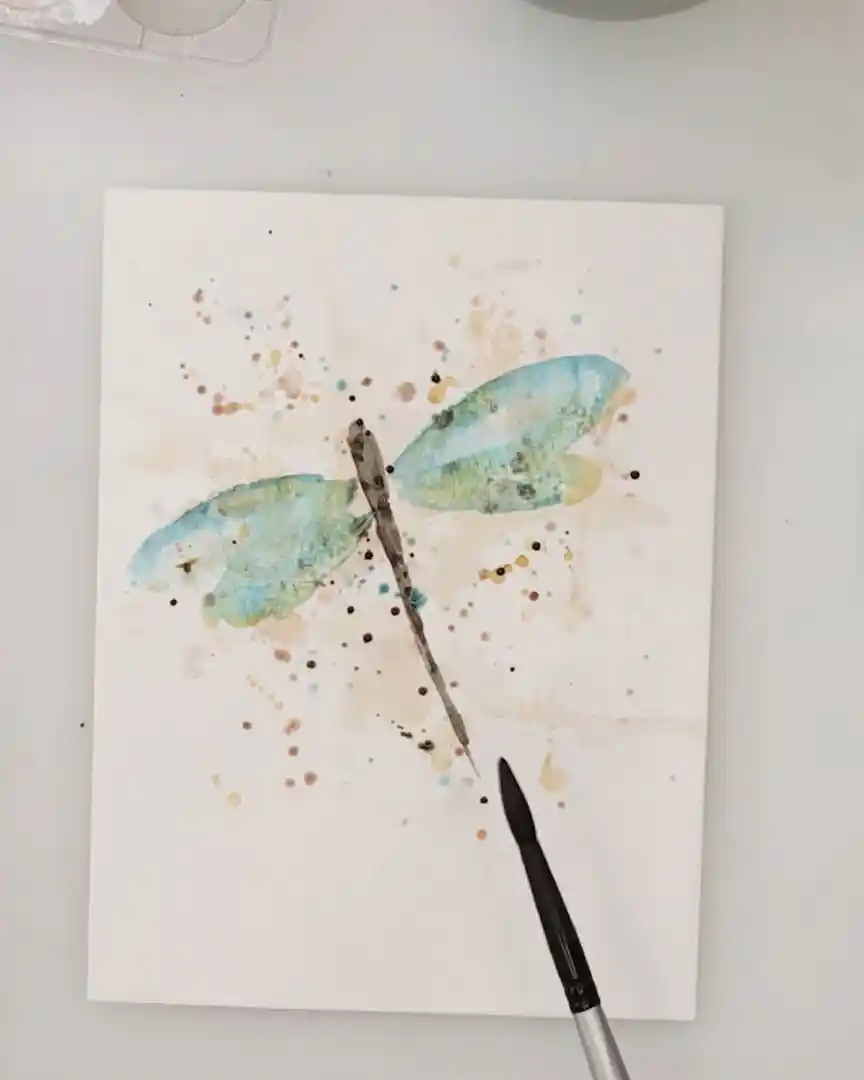
Step 2: Paint the Dragonfly Body
The artist begins with the dragonfly’s body. The artist paints a slightly thicker shape at the top and thinner at the bottom—just a simple form. The artist doesn’t worry about details yet—just getting the shape down.

Step 3: Add the Wings with a Light Wash
Next, the artist uses Phthalo Blue mixed with a bit of green. The artist makes a very light wash to paint the wings. The artist wants them to feel soft and transparent.

Then, the artist goes over the wings with more pigment to make the color darker.

The artist does the same thing for the second wing, but this one is a bit smaller. The artist also adds a hint of yellow on top. That little bit of yellow gives it more color and makes it feel brighter and more magical.

Then, the artist sprinkles some blue over the dragonfly.

Step 4: Add Splashes and Fine Details
Now, the artist sprinkles in a few black splatters.
The artist also adds some small black details to give the dragonfly more texture. But the artist keeps it loose. The artist doesn’t want anything to look too perfect. That’s part of the charm—it’s free and creative.

Step 5: Use Ink to Define Shapes
After the paint dries, the artist brings in an ink pen. The artist draws some sketchy, broken lines to outline the body and wings. The artist doesn’t make solid lines. The artist wants the lines to feel light and relaxed. That sketchy style fits perfectly with the wash.

Step 6: Finish with Text and Final Touches
The artist finishes with some text. You can add any words you like—or leave it blank for now and write something later when you give the card.

Then, the artist adds a few more black splatters and ink details.

This dragonfly card is great for birthdays, anniversaries, or any special day. It feels fresh and joyful, and the artist enjoys how it turns out.
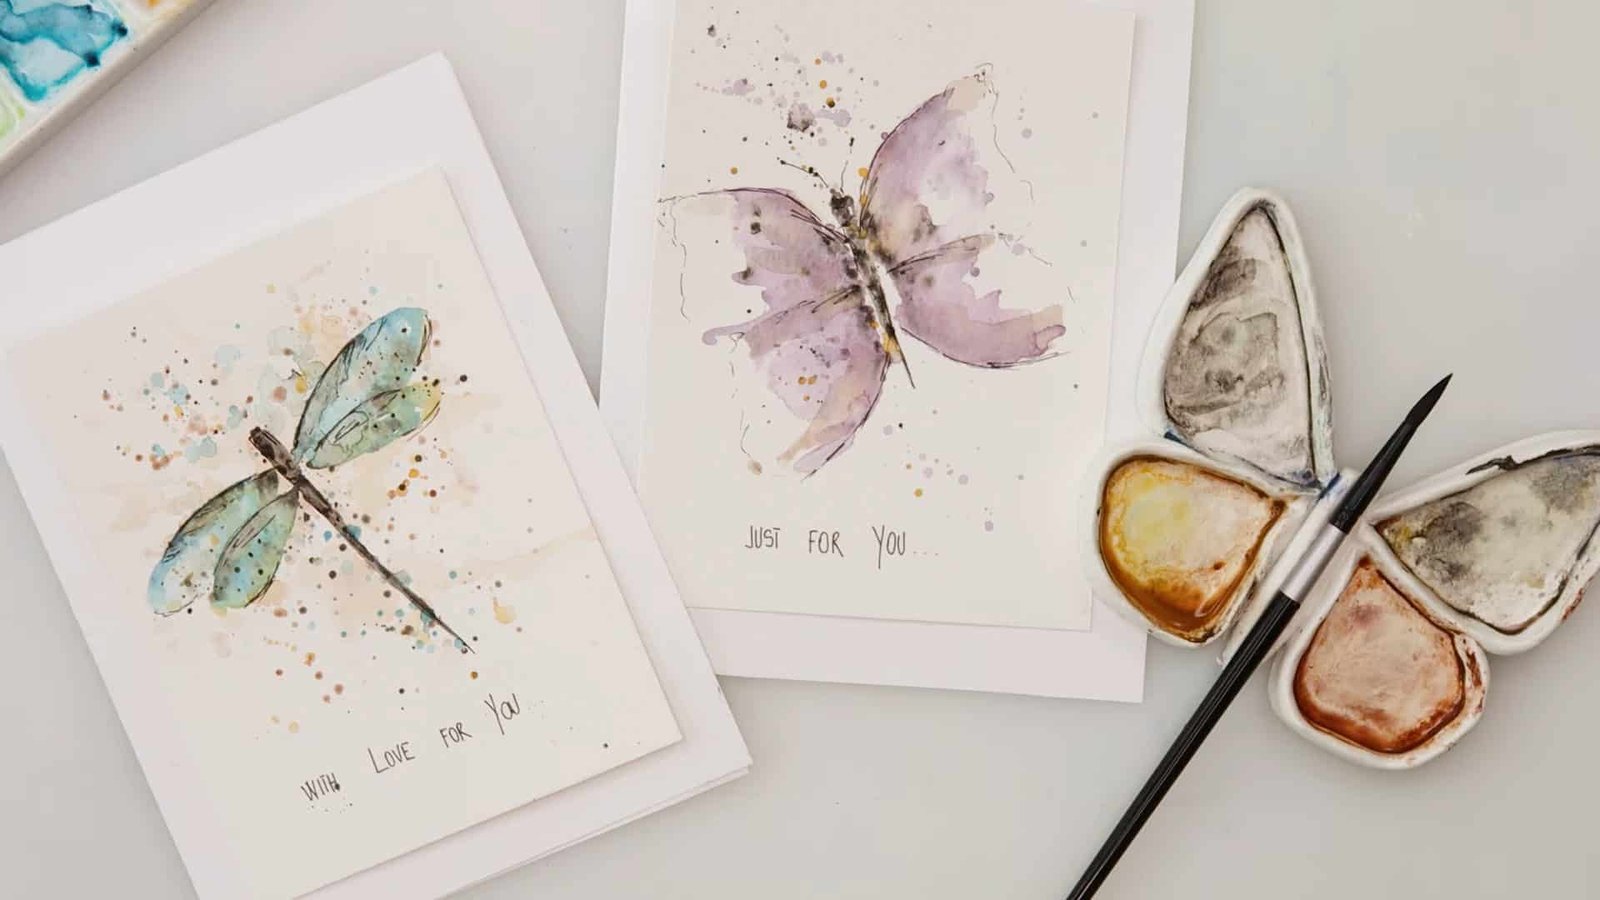
Now the artist has both cards ready — the delicate butterfly and the dreamy dragonfly side by side.

Final Thoughts
The artist enjoys painting these simple watercolor cards. They’re quick to make, but they feel personal and special. The butterfly and dragonfly designs are light, loose, and charming.
You can use them for any occasion or as a fun, creative break. The artist hopes you try them, too, and enjoy the process as much as the artist does!