
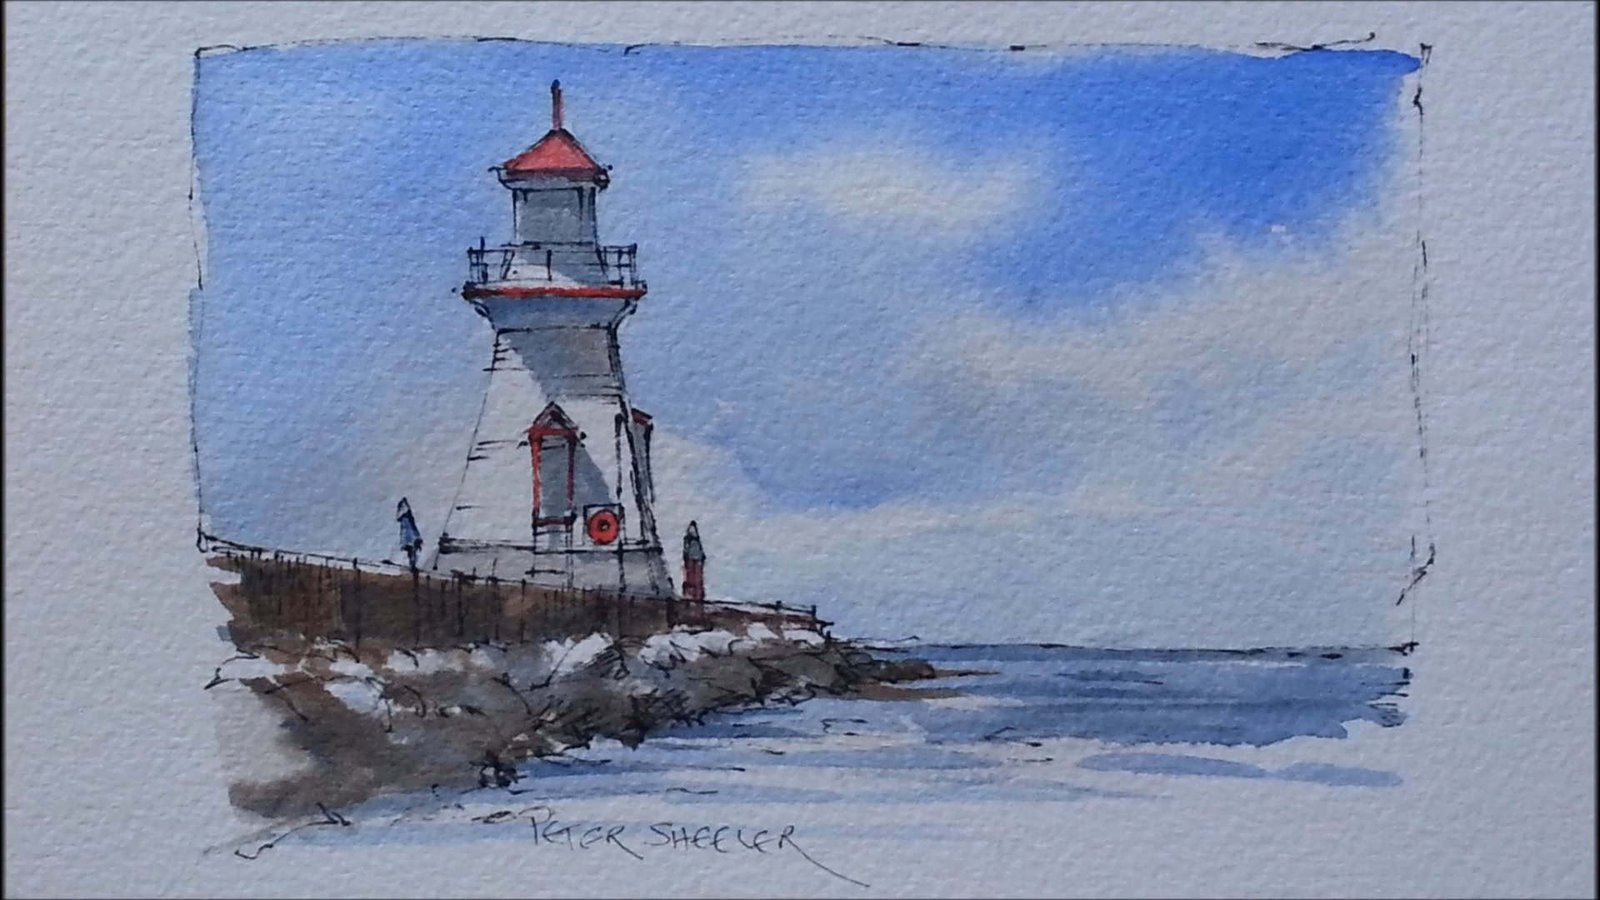
What makes a watercolor scene so peaceful? A lighthouse standing tall by the sea, with waves breaking at its base, creates a picture of calm strength.
In this tutorial, Peter Sheeler shows how to bring this image to life with watercolor. His clear teaching makes it simple for beginners. Let’s follow his process and learn how to paint a lighthouse step by step.
Contents
- 1 Materials You’ll Need
- 2 Step 1: Sketch the Lighthouse Outline
- 3 Step 2: Paint the Sky in Watercolor
- 4 Step 3: Paint the Sea with Watercolor Techniques
- 5 Step 4: Paint the Rocks at the Lighthouse Base
- 6 Step 5: Paint the Lighthouse Shadows
- 7 Step 6: Add Final Touches to the Lighthouse Painting
- 8 Final Thoughts
Materials You’ll Need
According to Peter Sheeler, having proper tools makes painting easier and more enjoyable.
Here’s what you need:
- Watercolor Paper: 140 lb cold press (Arches or Strathmore) works best for layering colors.
- Pen: Waterproof fineliner, like Micron 005, for clean outlines.
- Paints: Yellow Ochre, Sepia, Burnt Sienna, Winsor Red, Davy’s Gray, Ultramarine, Sap Green, Phthalo Blue, Quinachridone Fuchsia, Cadmium Yellow Lemon, Cadmium Yellow Deep, Davy’s Gray
- Brushes: Polar Flo 1/2 inch flat brush, #2 round brush
- Other Supplies: Water container, paper towel, and palette for mixing.
Having these materials ready ensures a smooth painting process. Let’s move to the first step: sketching the lighthouse outline.
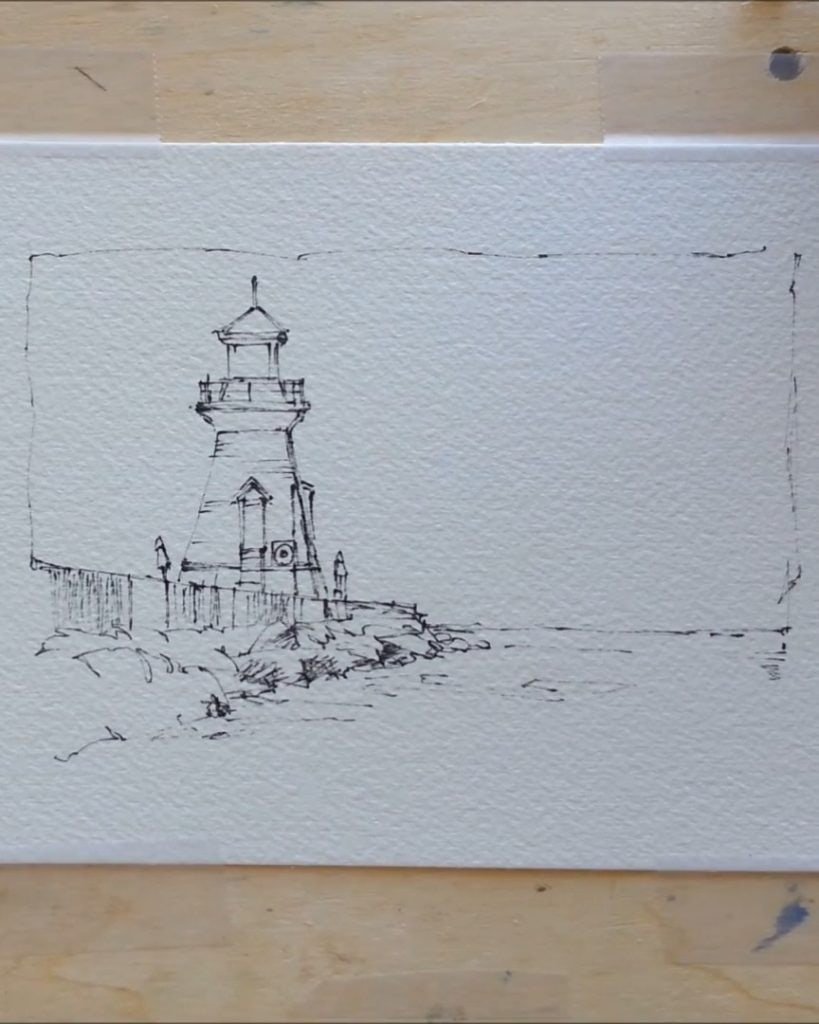
Step 1: Sketch the Lighthouse Outline
Every watercolor needs a clear foundation. Before any paint touches the paper, Peter Sheeler begins with a light sketch.
He uses a Micron 005 waterproof fineliner to outline the lighthouse, adding only essential lines. The tower, the railings, and the roof are drawn with loose but steady strokes.
He includes the rocks in the foreground and the horizon line to anchor the composition.
According to Peter Sheeler, the sketch should stay minimal. Too many lines can distract from the watercolor layers that follow.
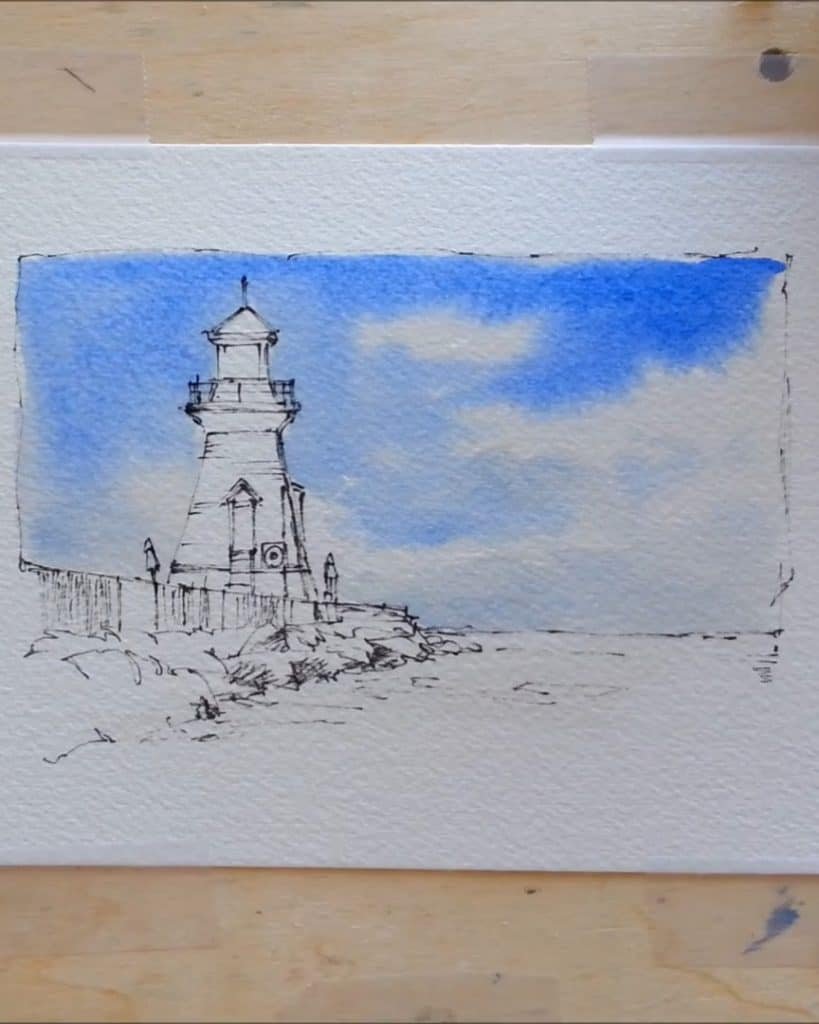
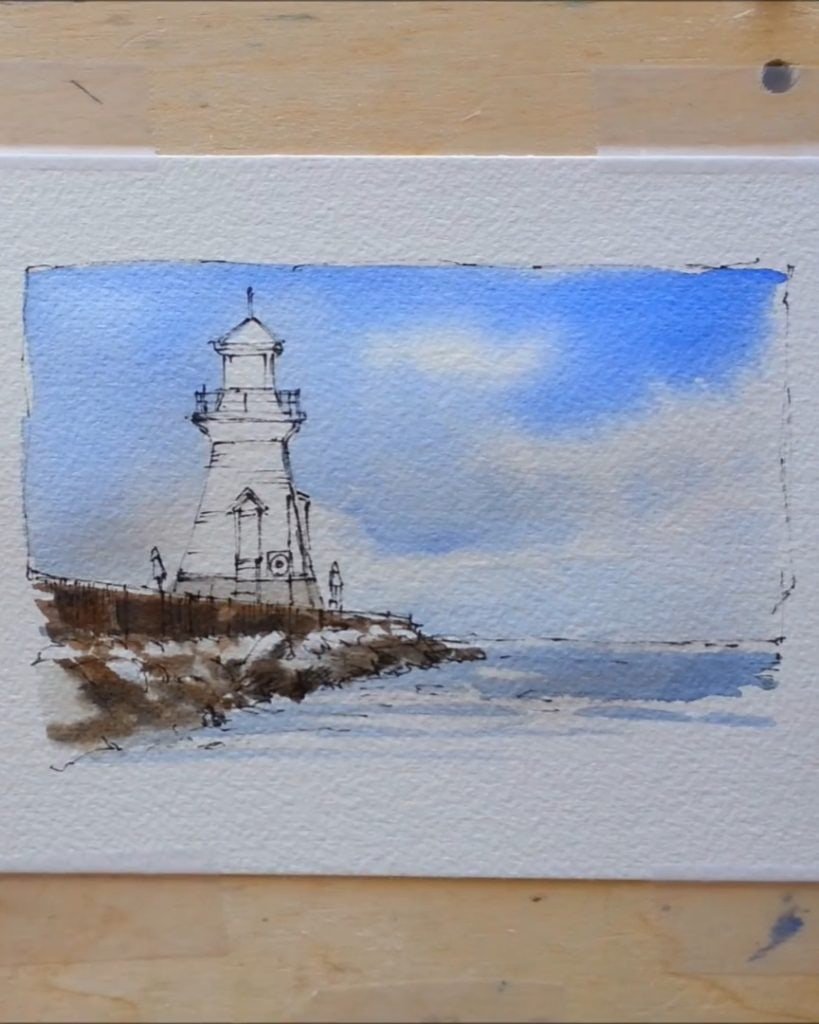
Step 2: Paint the Sky in Watercolor
With the sketch in place, the background sets the mood. Peter Sheeler starts by creating a bright blue sky.
Using a 1/2 inch flat brush, he wets the area first, then brushes in Ultramarine Blue. The paint blends softly because of the wet-on-wet technique.
To suggest clouds, he leaves patches of white paper untouched. He adds a hint of gray by mixing Burnt Sienna with blue for natural shadow tones.
The result is a sky with gentle transitions. As he points out, keeping the strokes simple prevents the background from becoming heavy.
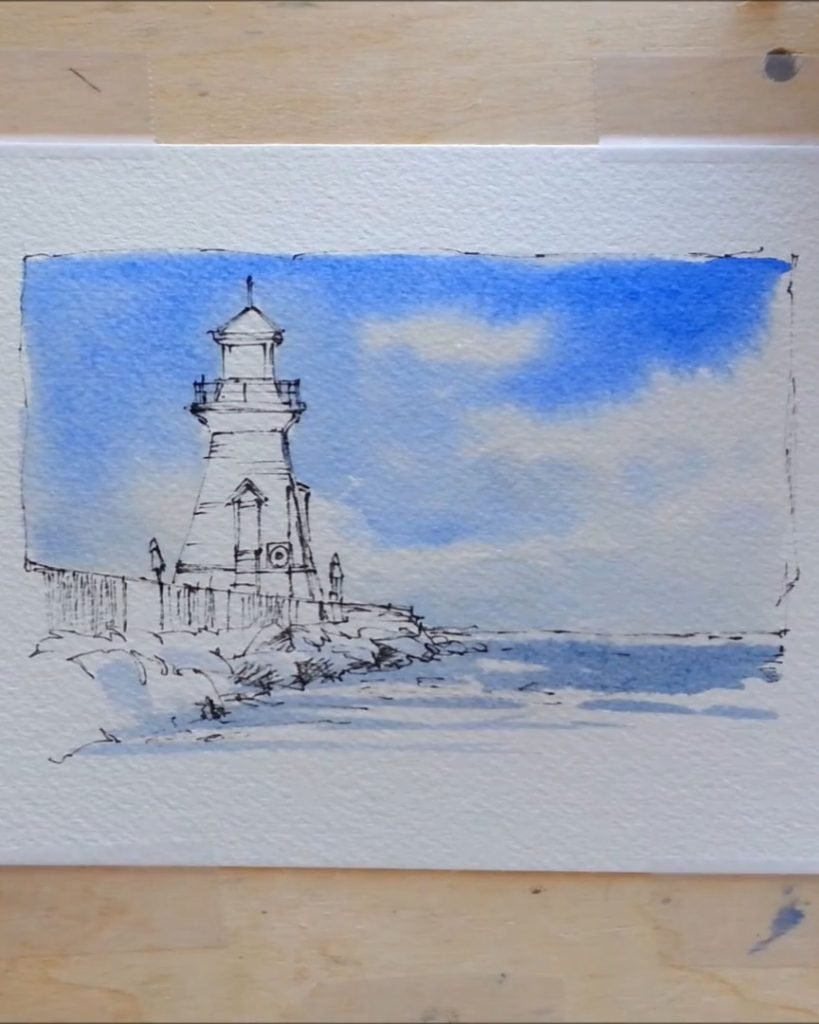
Step 3: Paint the Sea with Watercolor Techniques
The next step is to give life to the water. Peter Sheeler mixes a deeper Ultramarine Blue and paints horizontal strokes across the horizon.
Using the flat brush, he works carefully to keep the water flat and calm. Lighter areas are left untouched to suggest reflections. To avoid harsh lines, he blends the edges with a damp brush.
This approach makes the sea look distant and peaceful. According to him, less detail helps create a sense of space.
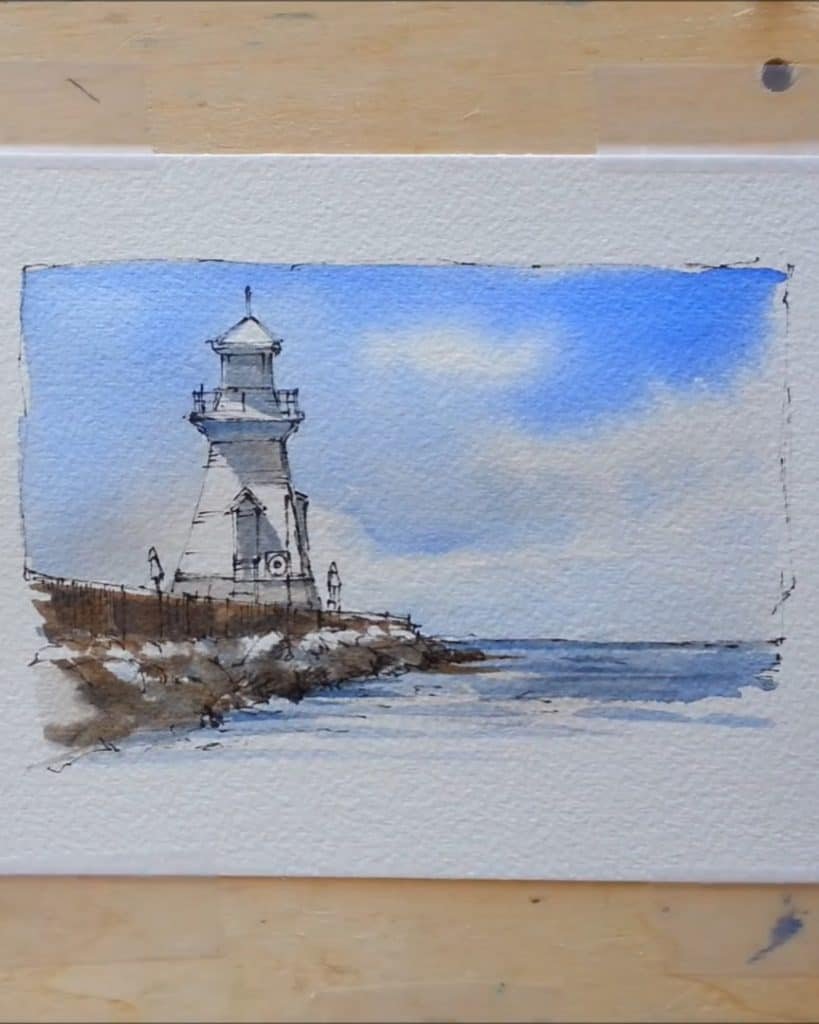
Step 4: Paint the Rocks at the Lighthouse Base
The rocky foreground adds weight to the painting. Peter Sheeler shifts to warmer tones for this step.
He mixes Burnt Sienna with touches of Ultramarine to create earthy browns and grays. With a dry brush technique, he drags color across the paper, leaving rough textures. This broken effect suggests the uneven surface of rocks.
He adds darker shades with the smaller #2 round brush along the lower edges for shadow. These contrasts give form and dimension. He highlights that rocks look more natural when colors vary slightly.
Step 5: Paint the Lighthouse Shadows
Now the lighthouse begins to take shape. Peter Sheeler shades the tower carefully.
He mixes a light gray by diluting Ultramarine Blue and Burnt Sienna. This mix goes on one side of the lighthouse, keeping the other side bright. He also adds shadow beneath the roof and around the railings.
These subtle touches give the lighthouse depth. He notes that soft tones ensure the lighthouse stays the focal point.
Step 6: Add Final Touches to the Lighthouse Painting
The painting comes together with small, deliberate details. Peter Sheeler adds Winsor Red to the top of the lighthouse, making it pop against the sky.
He deepens shadows in the rocks, adjusts tones in the sea, and carefully paints windows and railings with red mixes. Using the #2 round brush, he gives precision to the structure.
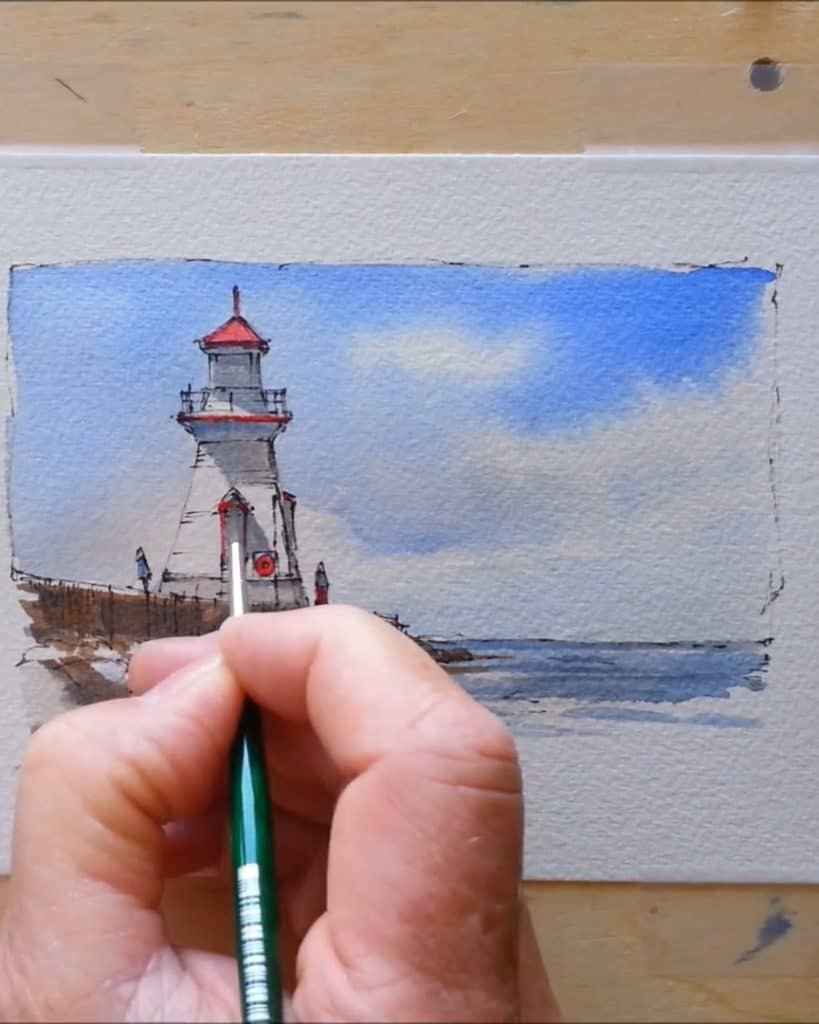
As a final step, he reviews the composition and strengthens a few pen lines for clarity. According to him, stopping before overworking is key. A fresh finish keeps the painting lively.
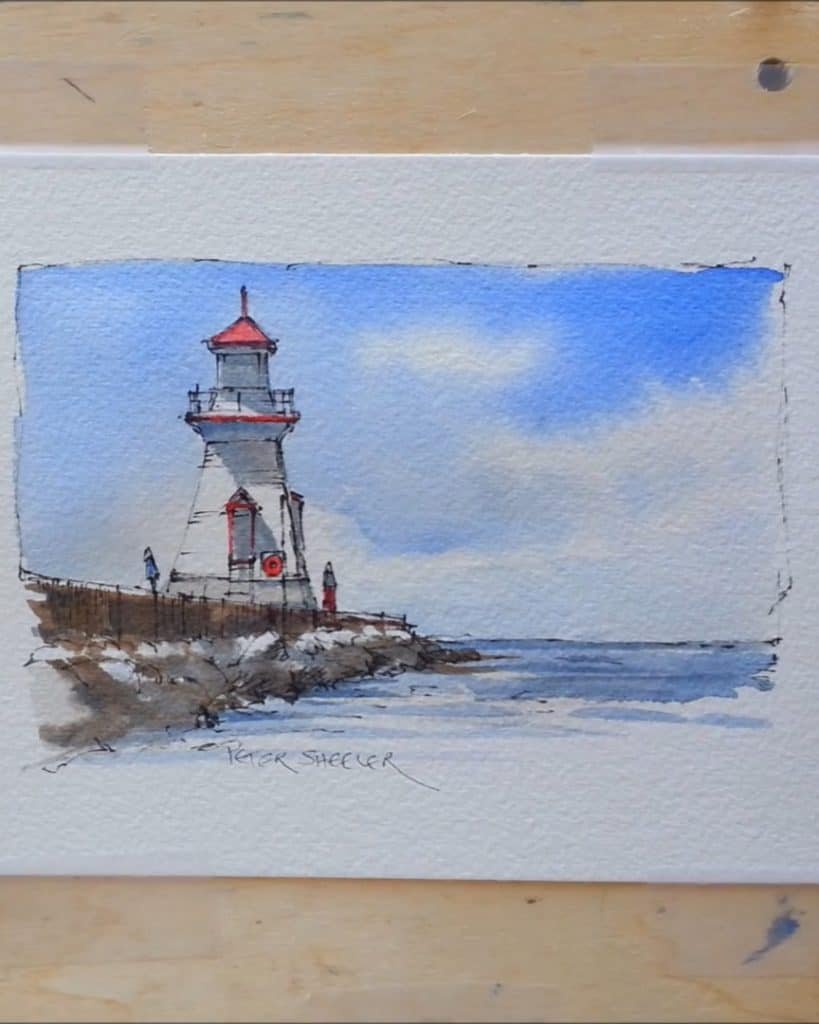
Final Thoughts
Peter Sheeler’s watercolor lighthouse tutorial shows how a simple sketch, a clear sequence, and just three colors can create a strong coastal scene.
Each step demonstrates that watercolor works best when kept simple and fresh. Why not gather your paper, brushes, and paints today and try painting your own lighthouse?