

Have you ever wanted to paint beautiful ocean animals with watercolor? What if I told you there’s a simple trick to make them look even more magical?
As Beala Art loves to demonstrate, using sea salt with watercolor can create stunning textures that mimic ocean waves, shimmering fish scales, and underwater bubbles.
In this guide, Beala Art will walk you through everything—from materials to step-by-step techniques—so you can create your own breathtaking ocean creatures with ease.
Let’s get started!
Contents
Materials Needed
Before the painting begins, it’s important to gather all essential materials. Using the right tools helps achieve the best results with the salt texture technique.
Essential Watercolor Supplies
To create a vibrant ocean scene, the artist uses:
- Watercolor paper: Cold press paper works best because its textured surface absorbs water well, allowing the salt effect to develop beautifully.
- Watercolor paints: A high-quality set with blues, greens, and ocean-inspired colors.
- Paintbrushes: A mix of round brushes for washes and fine detail brushes for precision.


Additional Tools for the Sea Salt Effect
Sea salt is the key ingredient that adds natural texture to the painting. The materials include:
- Sea salt: Coarse sea salt works best, though table salt or rock salt can also create interesting effects.
- Masking tape: For keeping the paper in place and creating clean edges.
- Water container and paper towels: For cleaning brushes and controlling excess water.
With materials ready, it’s time to understand how sea salt interacts with watercolor.

How the Sea Salt Effect Works in Watercolor
Salt is a simple yet powerful tool in watercolor. When used correctly, it creates organic textures reminiscent of underwater patterns.
The Science Behind Salt and Watercolor
Salt absorbs water. When sprinkled onto wet watercolor, it pulls the pigment outward, leaving lighter spots where it touches.
This results in organic textures resembling bubbles, coral, or fish scales.
The effect depends on a few key factors:
- How wet the paint is: Too dry, and the salt won’t work. Too wet, and the effect will be too soft.
- The type of salt used: Coarse salt creates bold, large patterns, while fine salt gives a softer texture.
- The colors chosen : Darker colors show the salt effect more clearly than lighter ones.

Best Practices for Using Salt in Watercolor
To get the best results, follow these tips:
- Sprinkle salt at the right time: Wait until the paper is damp, not soaking wet.
- Experiment with different salts: Try mixing coarse and fine salt to see how they react.
- Let it dry completely: Don’t remove the salt until the paint is fully dry to get the best effect.
Best practices for using salt in watercolor, let’s move on to the step-by-step painting process.

Step-by-Step Guide to Painting Ocean Animals
In this section, the artist guides the process of creating a watercolor sea creature, from sketching to final details.
Step 1: Sketching the Ocean Animal
Lightly sketch the outline of the chosen creature—such as a fish, sea turtle, or jellyfish. Keep the lines simple and soft.


Step 2: Painting the First Wash of Color
Start with a light base layer using the wet-on-wet technique:
- Lightly wet the area.
- Add the first wash of blues or greens.
- Let the colors blend freely for an underwater effect.


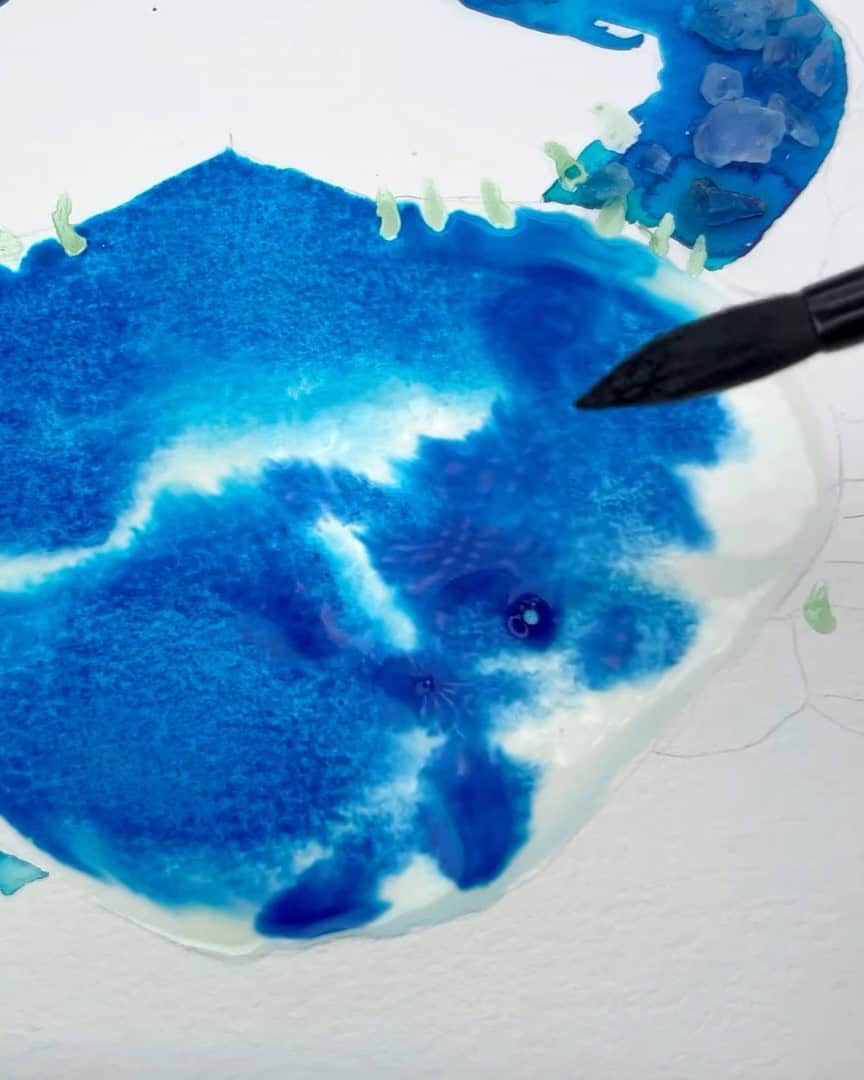
Step 3: Adding the Sea Salt for Texture
While the paint is still damp:
- Sprinkle a small amount of salt where texture is desired.
- Allow the salt to absorb pigment and form patterns.
- Avoid touching the salt while it dries.


Step 4: Letting the Painting Dry
Allow the painting to dry completely before brushing off the salt. Once dry, the salt can be gently removed to reveal the unique patterns.


Step 5: Adding Details and Highlights
Once texture is revealed:
- Use a fine brush for small details such as fins, scales, or eyes.
- Deepen shadows for contrast.
- Add highlights with white gouache or a gel pen.
Your sea creature is now complete.


Common Mistakes and How to Avoid Them
Even with practice, it’s easy for an artist to make mistakes when using salt in watercolor. Here’s how to fix the most common ones:
- Sprinkling salt too early or too late: If the paint is too wet, the salt effect will be too soft. If it’s too dry, the salt won’t react. The artist should wait until the paper is damp for the best results.
- Using too much or too little water: Too much water can dilute the color and make the salt effect less visible. Too little water can cause uneven drying.
- Not waiting long enough before removing salt: If the salt is brushed off too soon, it might ruin the texture. The artist should always let the painting dry completely.
- Overworking details: They should keep a balance between smooth washes and textured areas. Too many details can take away from the natural salt effect.
By avoiding these mistakes, watercolor paintings will improve, and the textures will look more refined.

Creative Variations to Try
Once an artist has mastered the basic technique, why not experiment with new ideas?
#1. Painting Different Ocean Animals
Try using the salt effect on different sea creatures:
- Jellyfish: The salt technique is perfect for creating the illusion of floating tentacles.
- Sea turtles: Use salt to add texture to the turtle’s shell.
- Whales: Dark blue watercolor with salt creates a stunning underwater scene.
#2. Mixing Watercolor with Other Media
Watercolor can be combined with:
- Ink: Outline the painting with fine black ink for contrast.
- Gouache: Add highlights or details with opaque gouache.
- Colored pencils: Use them for extra details on dry watercolor.
#3. Experimenting with Backgrounds
Instead of a plain white background, try:
- A deep blue ocean: effect using multiple layers of watercolor.
- A coral reef scene: with splashes of red, orange, and yellow.
- A soft gradient: to create a dreamy underwater atmosphere.
The more the artist experiments, the more unique and creative the paintings will become!

Wrapping Up
Now that the process of painting ocean animals using watercolor and sea salt is understood, it’s time to start creating.
This technique adds a beautiful, organic texture that makes the artwork come to life.
Give it a try, and don’t be afraid to experiment with different salt types and colors.
The artist would love to see your artwork—feel free to share creations in the comments.
Have fun painting, and let’s keep exploring new techniques together!