
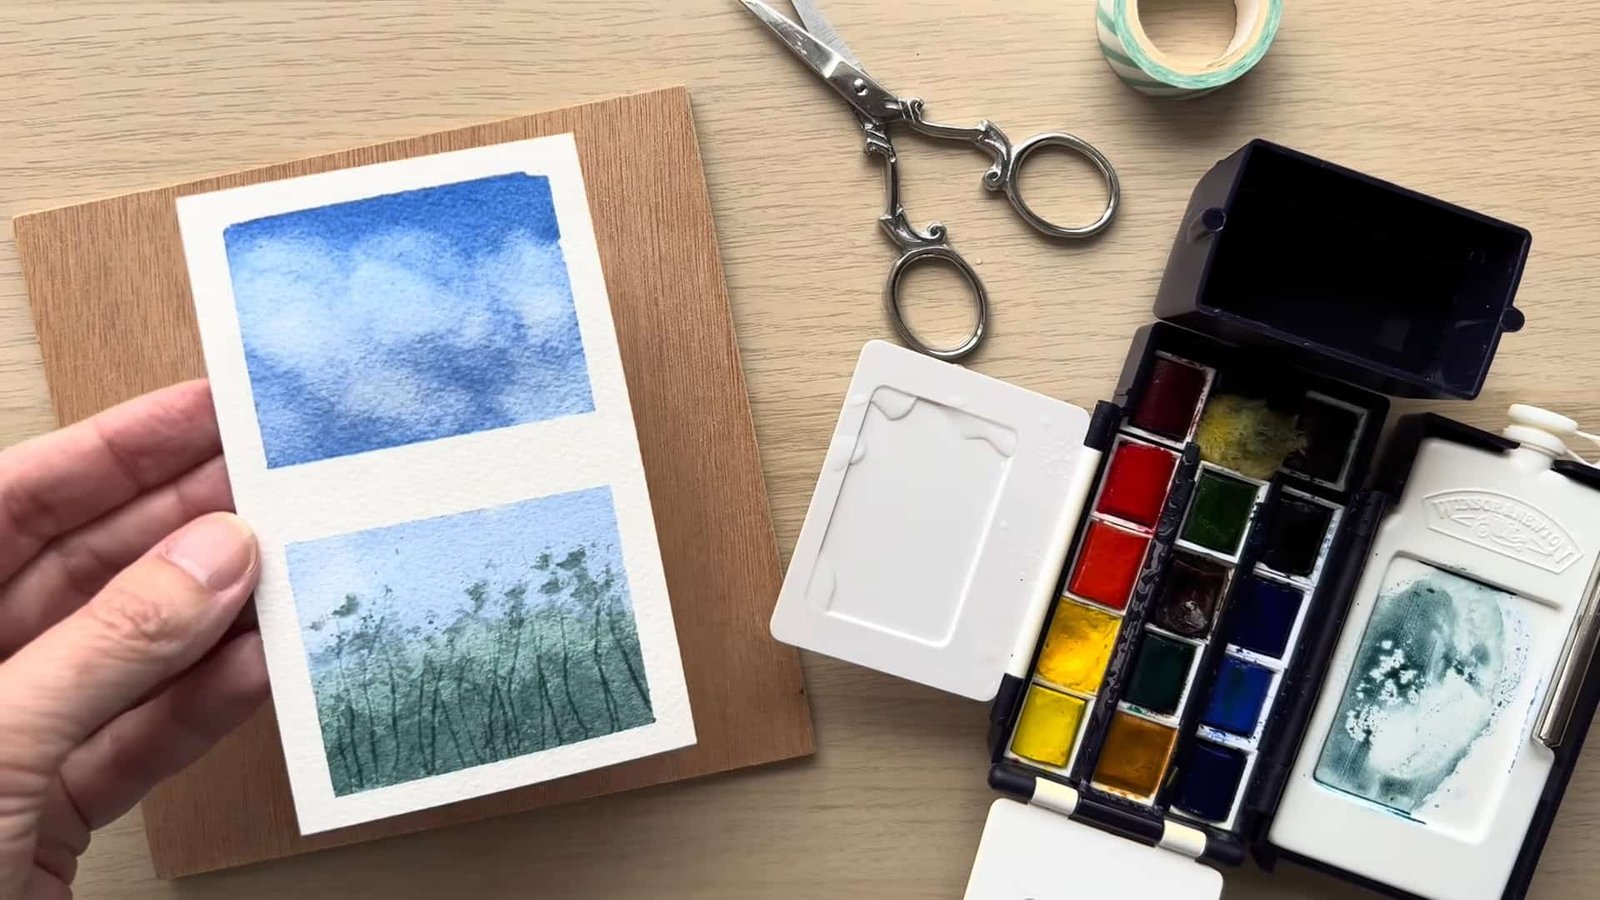
Which watercolor habits can save your painting process and make your colors shine? Leslie Stroz, an Art Professor, shares her most practical advice. She highlights the top five watercolor tips that thousands of artists watch and share.
How does she prepare paper, fix pans and tubes, save fallen cakes, and even use a sponge creatively? Let’s explore her process step by step.
Contents
Tip 1: How to Fix Beading on Watercolor Paper
When you start painting, one of the most common frustrations is water beading on the surface.
What Is Beading and Why It Happens
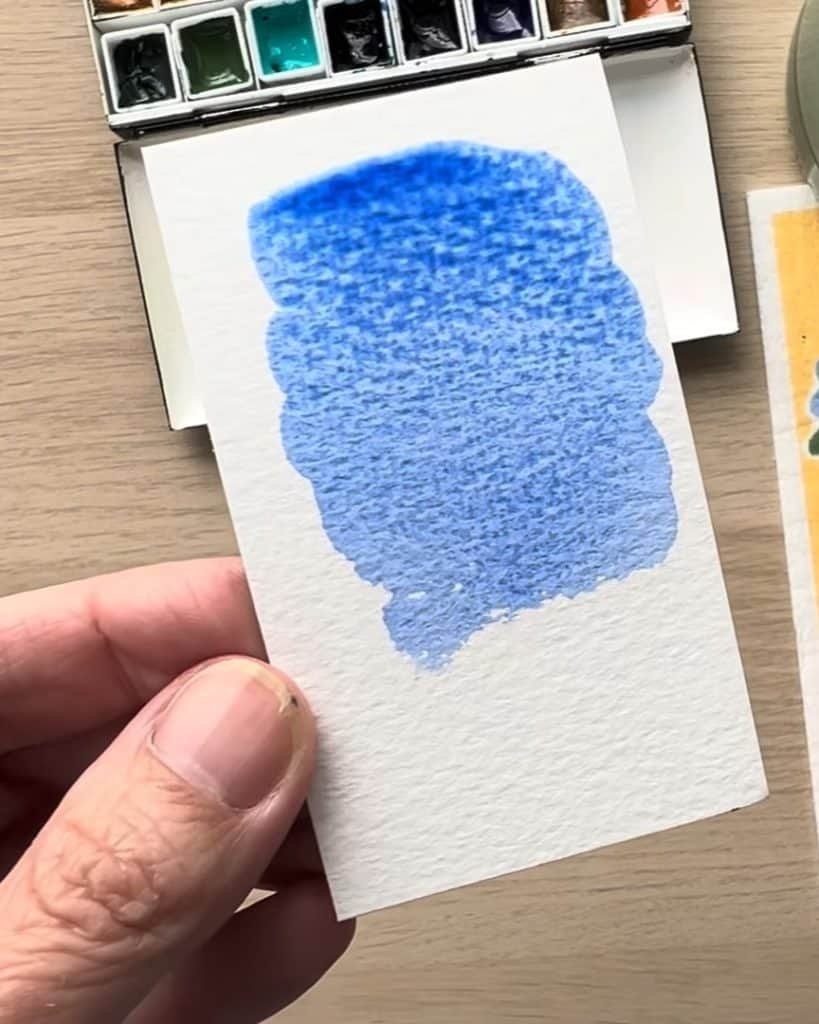
According to Leslie Stroz, beading happens when water sits on top of watercolor paper instead of sinking in. This makes layering, mixing, and drying inconsistent.
Paper has sizing, which helps it absorb water slowly. But if the surface is not prepared, colors pool, dry unevenly, and even turn muddy or streaky.
What to do if the paint is completely hard
Traditional Paper Preparation Method
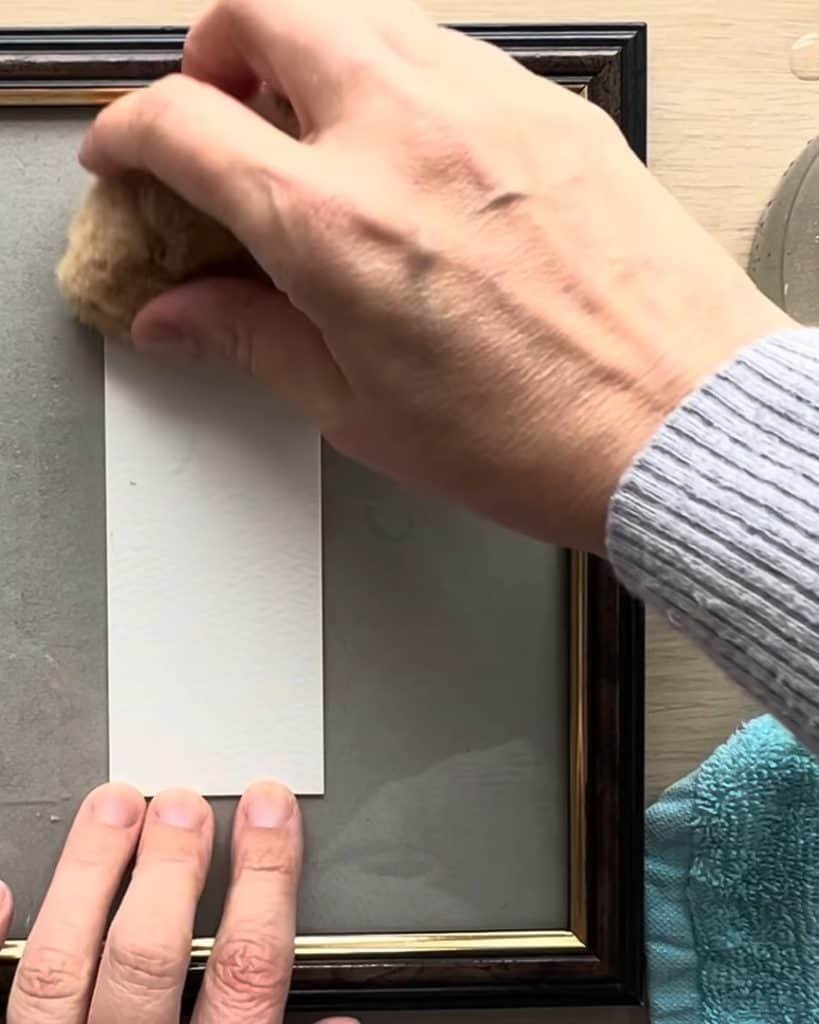
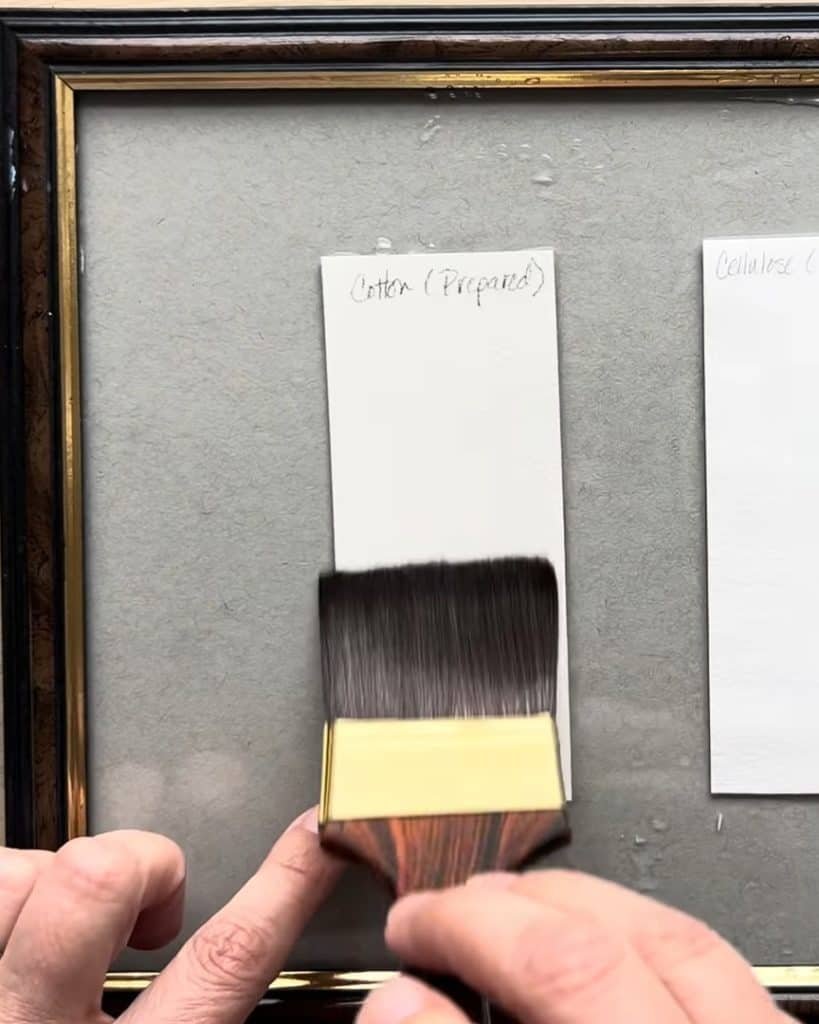
She suggests preparing watercolor paper before painting. One traditional way is to soak the paper in warm water for 5–10 minutes.
After soaking, she places it on a glass from an old picture frame or on wood. Then she uses a wet sponge to lightly brush over the surface.
Leslie warns not to scrub because scrubbing can damage the sizing or surface of the paper. The goal is only to remove the extra external sizing that manufacturers apply for transport. Once the paper dries, it is ready to use.
Simple Paper Preparation Method
Leslie Stroz also shares a faster method. You can wet both sides of the paper with a large brush. She wets the back, places the paper on glass or wood, then wets the front with a soft brush.
For sketchbooks, she prepares each page by placing waterproof material underneath, such as a plastic bag or acetate sheet. Then she wets the page and sets it aside to dry.
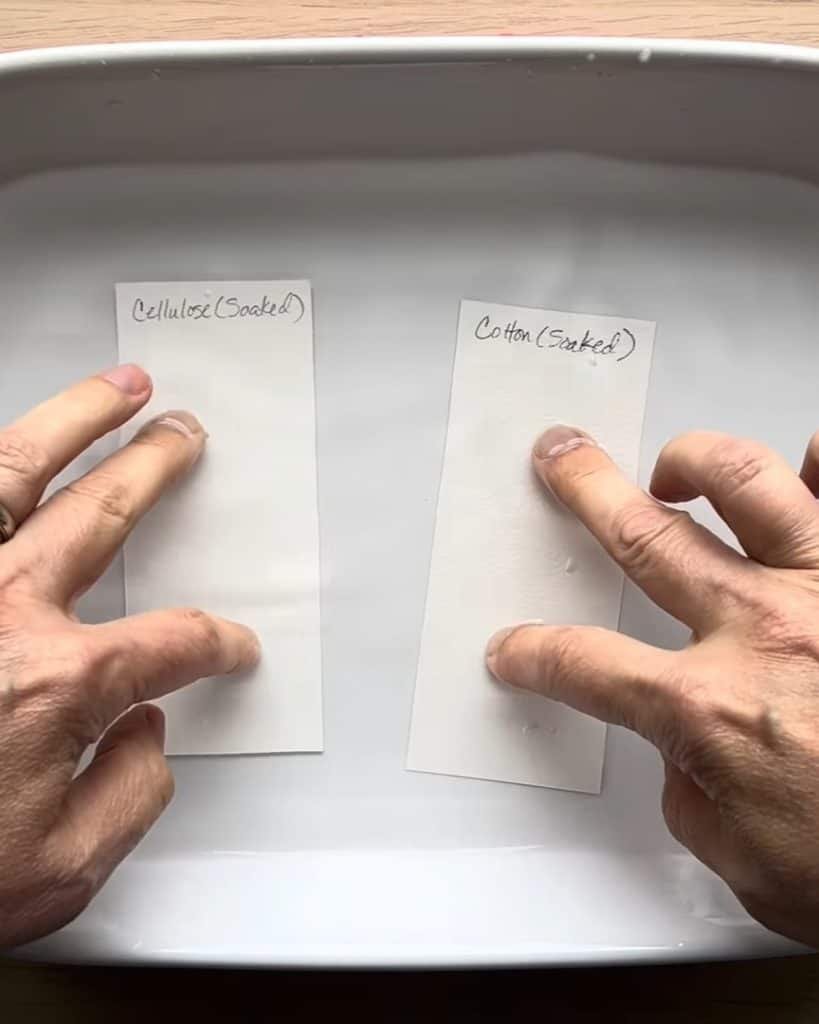
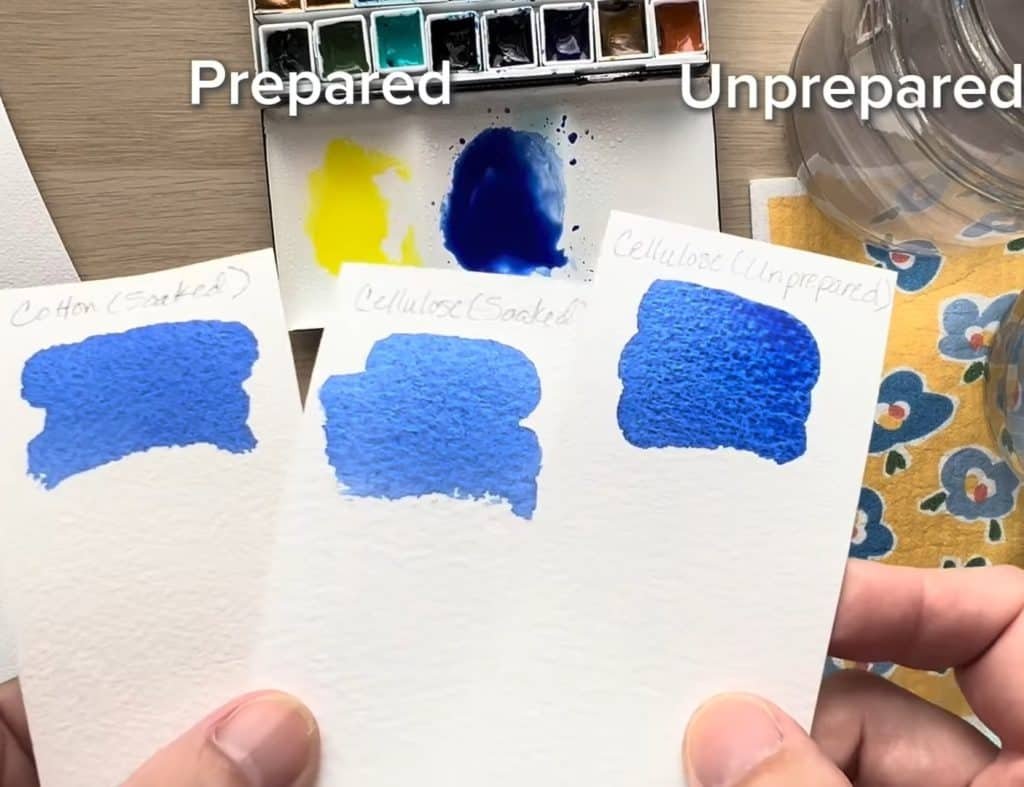
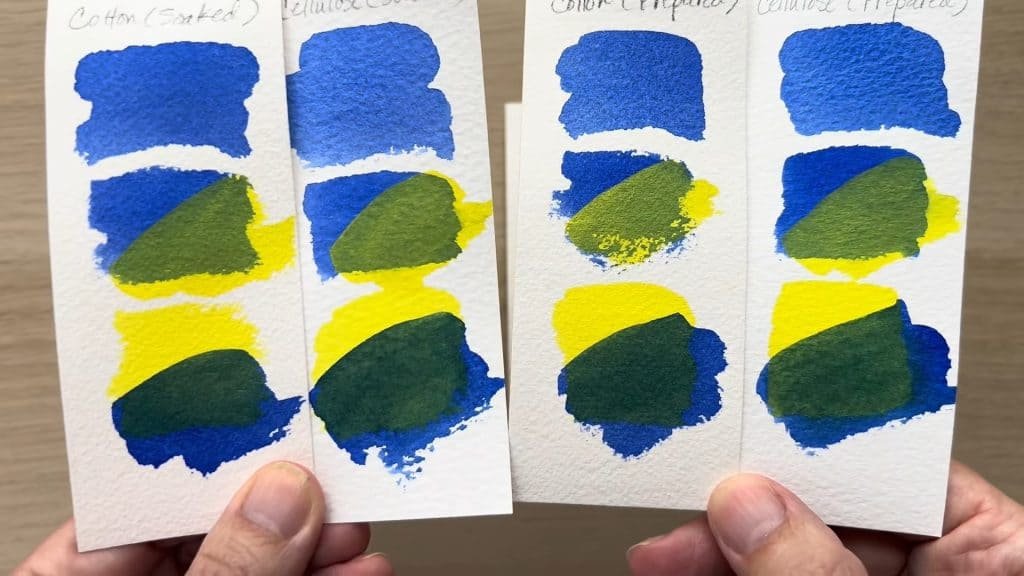
Comparing Cotton vs. Cellulose Paper
To show the difference, Leslie compares cotton and cellulose papers. She explains that untreated cellulose paper causes streaky, dull washes.
Prepared cellulose paper accepts more layers with brighter results. On cotton paper, glazing looks smoother and cleaner once prepared.
According to her, the differences prove that paper preparation improves results on both types.
Why Preparing Paper Matters
Leslie Stroz highlights that this small step makes a big difference. Prepared paper helps avoid blotches, streaks, and uneven drying.
It allows transparent layers to shine through, which is one of watercolor’s strongest qualities. She feels that the few extra minutes of preparation are always worth the effort.
Tip 2: How to Fix Cracked or Shrinking Watercolor Pans
Once your paper is ready, another issue may come from your paint pans.
Why Pans Crack or Shrink
As Leslie points out, many pigments shrink when they dry. This leads to cracks or pans pulling away from their container.
While it might look minor, cracked pans make brush loading uneven, and shrunken pans can even fall out.
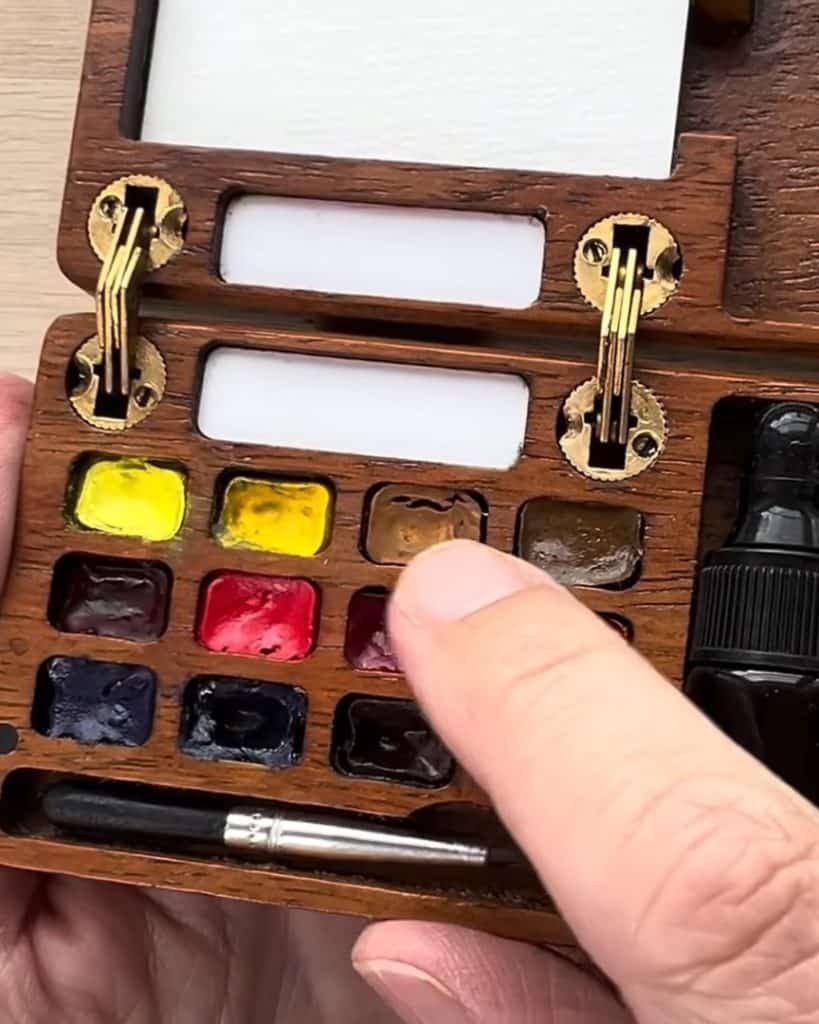
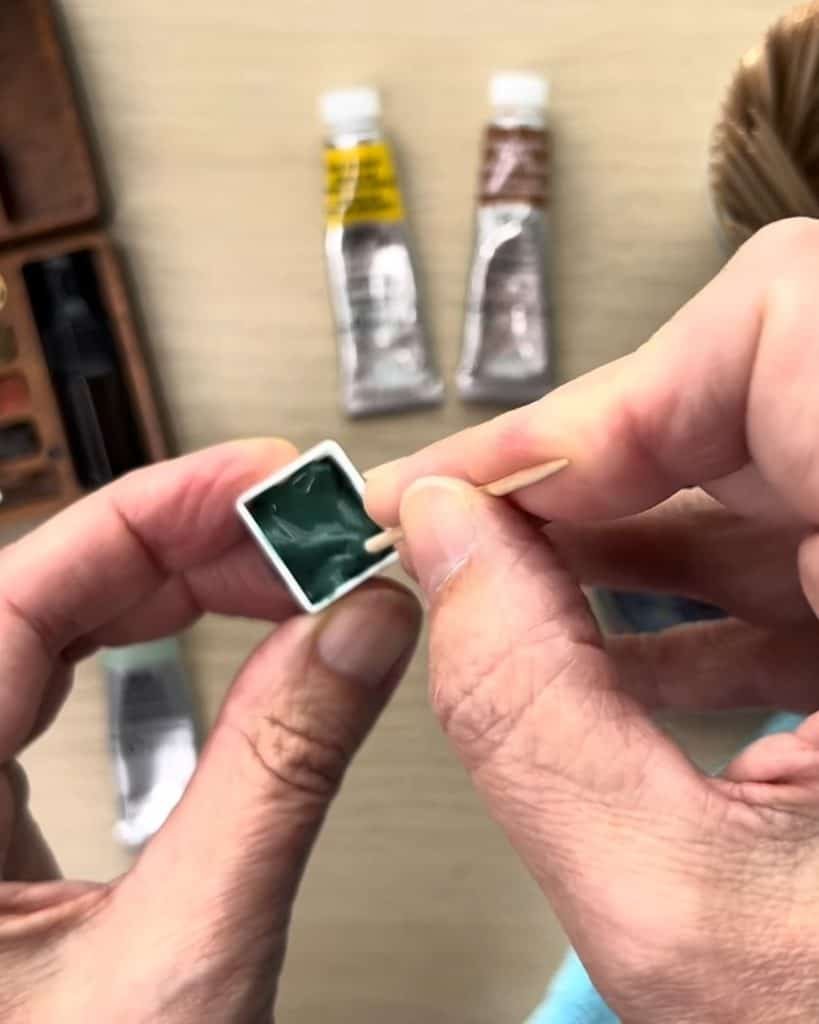
Preventing Cracks When Filling Pans
What does Leslie do to prevent the problem? She stirs fresh paint with a toothpick as she fills the pans. The method can help minimize shrinking and keep the surface smoother.
Fixing Cracks with Gum Arabic
When cracks appear, she adds a drop of gum arabic. Gum arabic is the binder used in most watercolor paints. Leslie uses a toothpick to guide it into the gaps and then stirs more paint into the pan.
She tops up colors like raw sienna and burnt umber in this way. Adding gum arabic helps bind the paint layers together and close the cracks.
Refilling and Maintaining Pans
Once stirred, Leslie lets the pans dry for a few hours. Afterward, the pans are ready to use again, and the colors flow smoothly.
She notes that taking this small step saves her from losing paint in the long run.
Tip 3: How to Save Hard or Dried Watercolor Tubes
Next, Leslie shares a money-saving tip. Instead of throwing away hard paint tubes, she finds ways to save them.
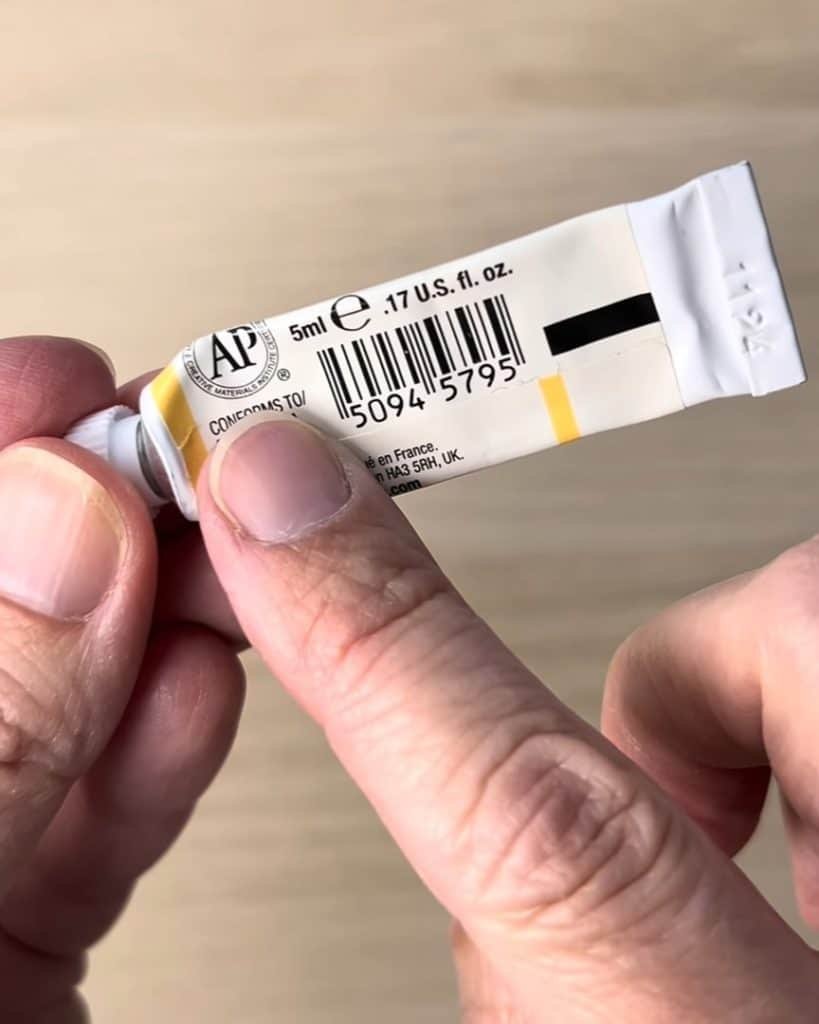
Identifying Toxic vs. Non-Toxic Tubes
Leslie always checks safety first. She explains that tubes with the AP symbol are safe to use. If the tube only lists a pigment code, she looks it up in the Color of Art Pigment Database.
She warns that if the code shows B or C toxicity levels, she avoids using it. Some old paints can release harmful dust when dry. She chooses to stay safe rather than take risks.
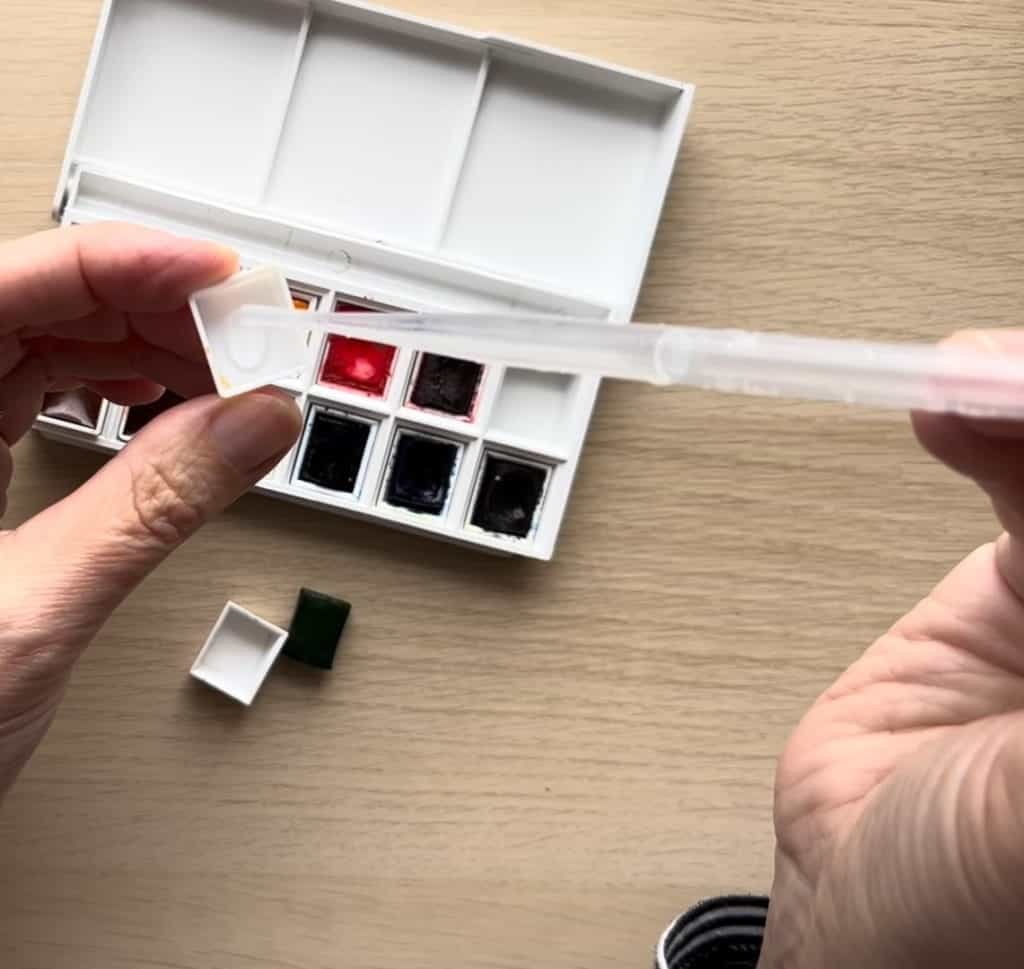
Reviving Stiff Paint in Tubes
If a tube still has some give, Leslie cuts near the bottom and opens it carefully. She squeezes the pigment upward and adds drops of gum arabic with a pipette. She stirs with a skewer to push the binder deep inside.
Leslie seals the tube again by folding the bottom and crimping it with pliers. She kneads the tube gently so the gum arabic mixes well. According to her, this prevents the paint from drying out again.
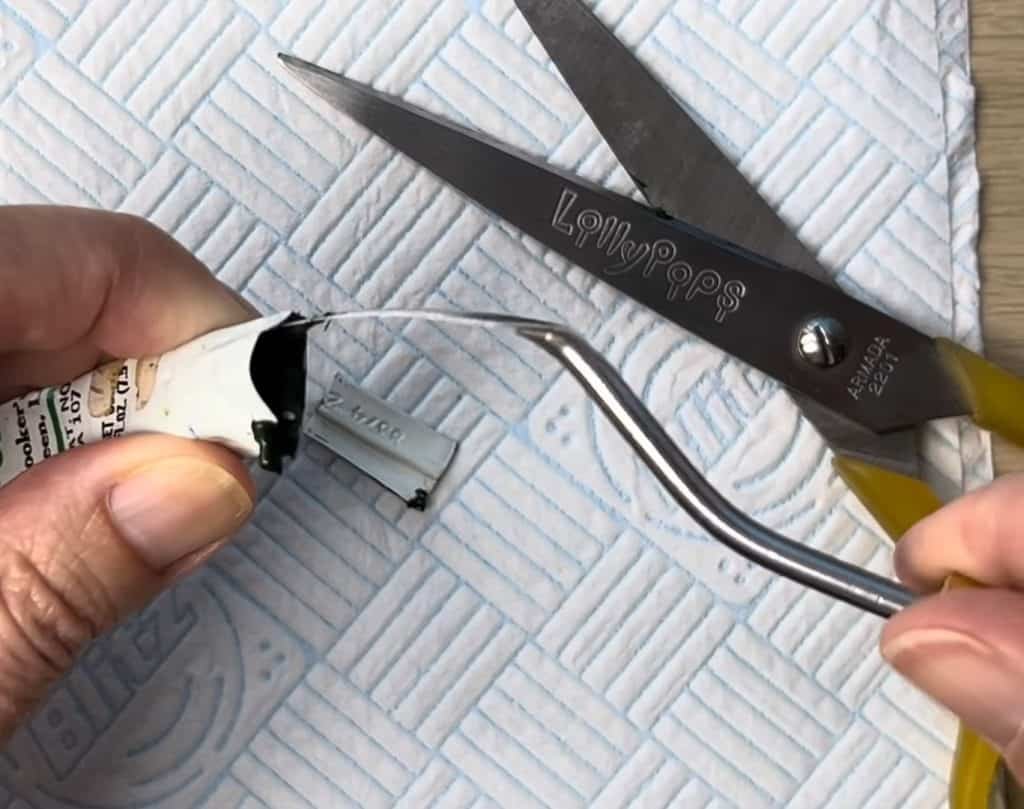
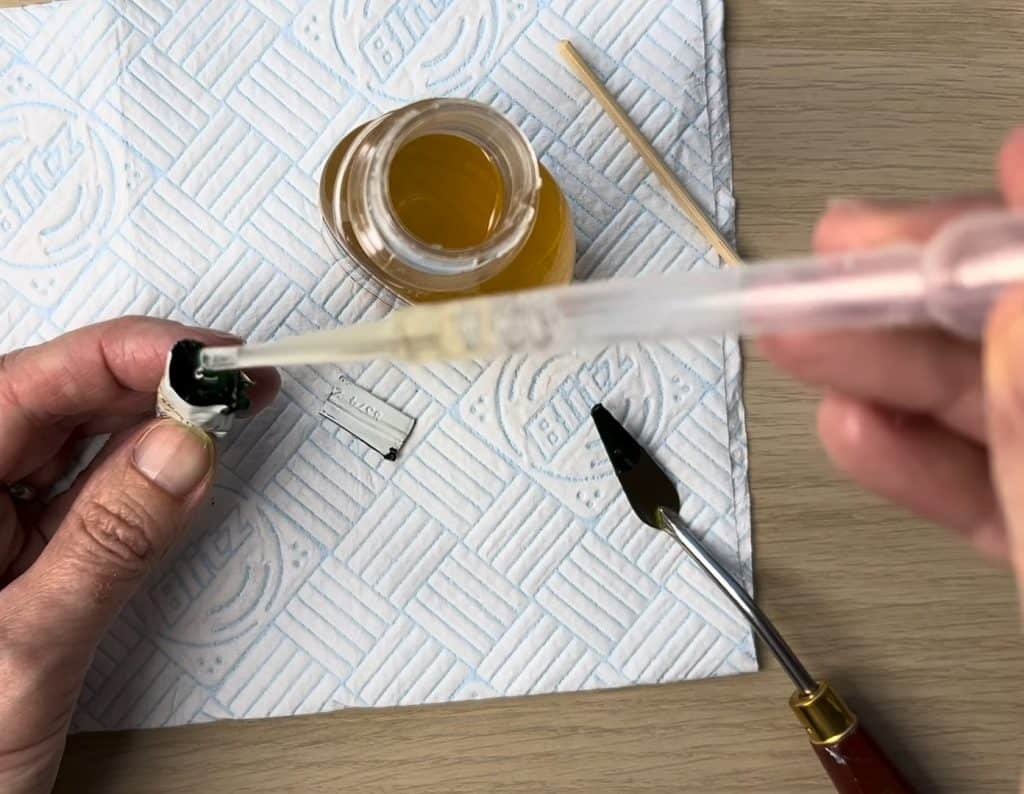
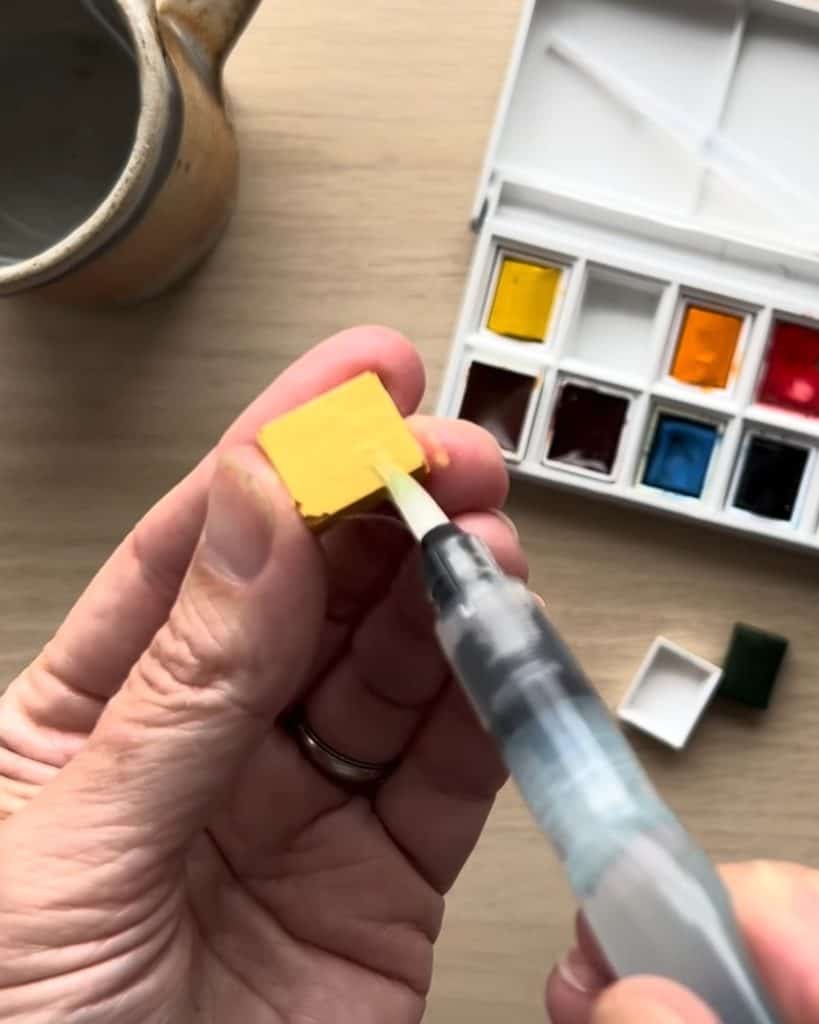
When Paint Is Completely Hard
For completely solid tubes, Leslie uses scissors to cut lengthwise. She shows how dry pigment falls out like powder. In that case, she stresses again to only attempt it with safe, non-toxic paints.
If usable, she scrapes the pigment into a pan. She then adds gum arabic or even honey to make a workable cake.
Sometimes she mixes it with a muller, then stores it in a pan or a small lidded container.
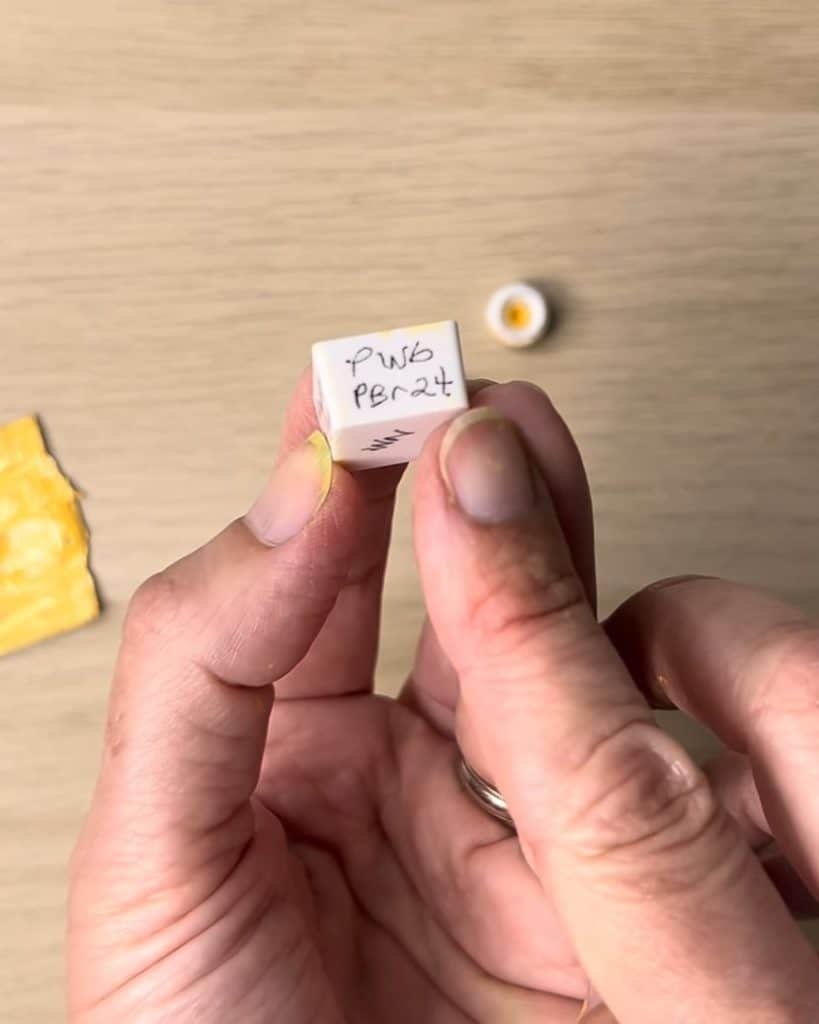
Maximizing Paint Usage
Leslie often saves leftover paint by scraping it into pans, labeling them with pigment codes and brand names. Once dry, they work just like commercial pans.

She encourages artists to reuse as much as possible, since tubes often hold more paint than we think. This habit reduces waste and saves money.
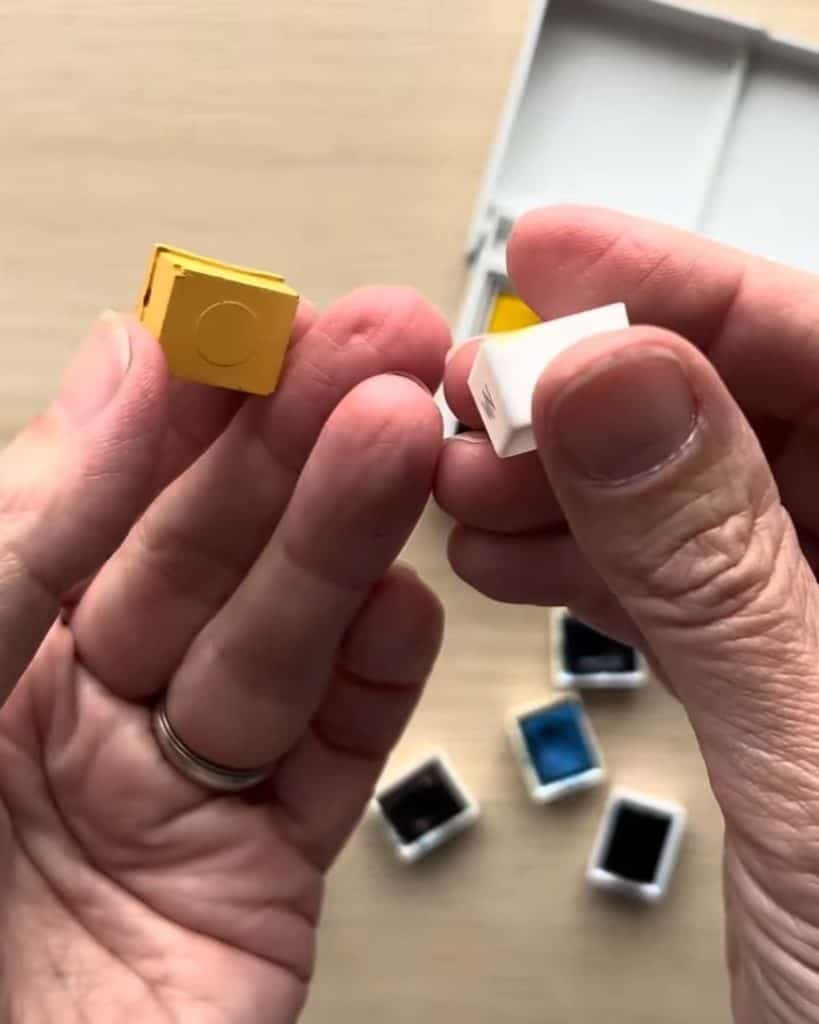
Tip 4: How to Fix Paint Cakes That Fall Out of Pans
Now Leslie addresses another common frustration: loose paint cakes. She shares that gluing them in is not the solution.
Why Paint Cakes Fall Out
She explains that cakes shrink over time, which makes them loose in the pan. If the palette tips over, several cakes may fall out at once. This can be confusing when colors are hard to tell apart.
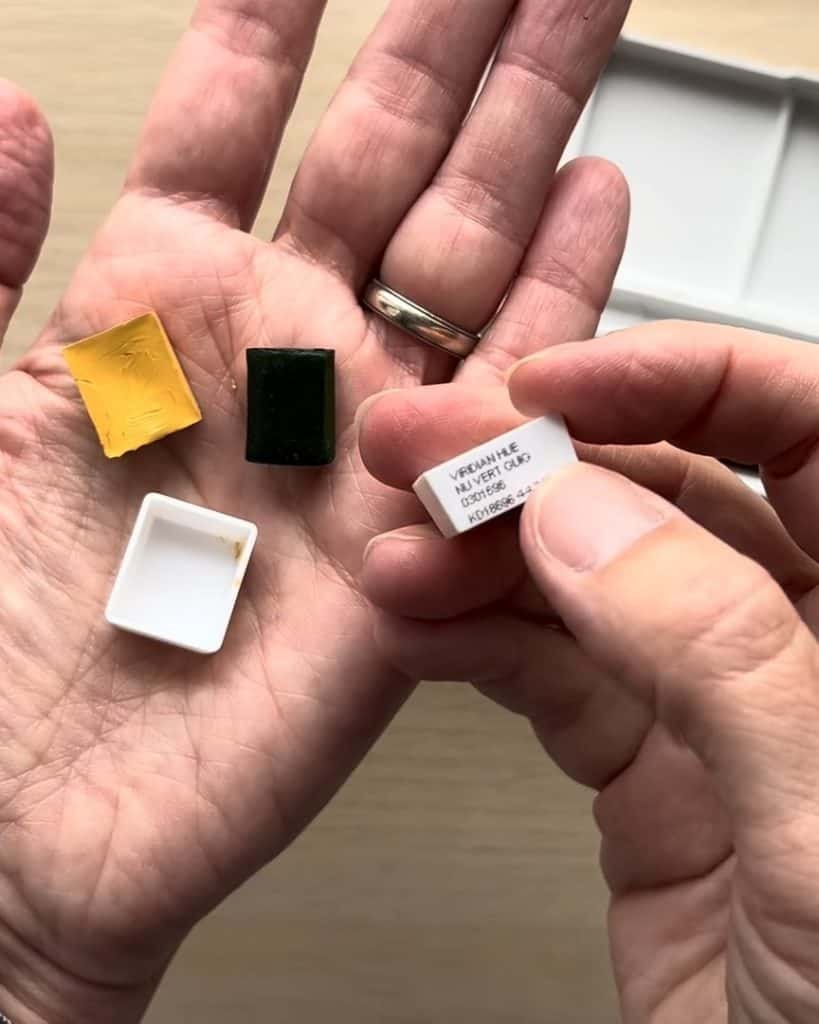
Identifying Paint Colors When Cakes Fall Out
Leslie suggests checking the labels on the pans. If the cakes are too dark to identify, she makes a quick mark on paper. Dry swatches act like a code to tell the colors apart.
Reattaching Paint Cakes Without Glue
Instead of glue, Leslie uses water. She adds a few drops to the empty pan and wets the bottom of the cake with her brush. Then she presses the cake into the pan, creating a natural seal.
She finds it safer because glue can affect the paint near the end. With water, the binder reactivates, and the cake sticks firmly.
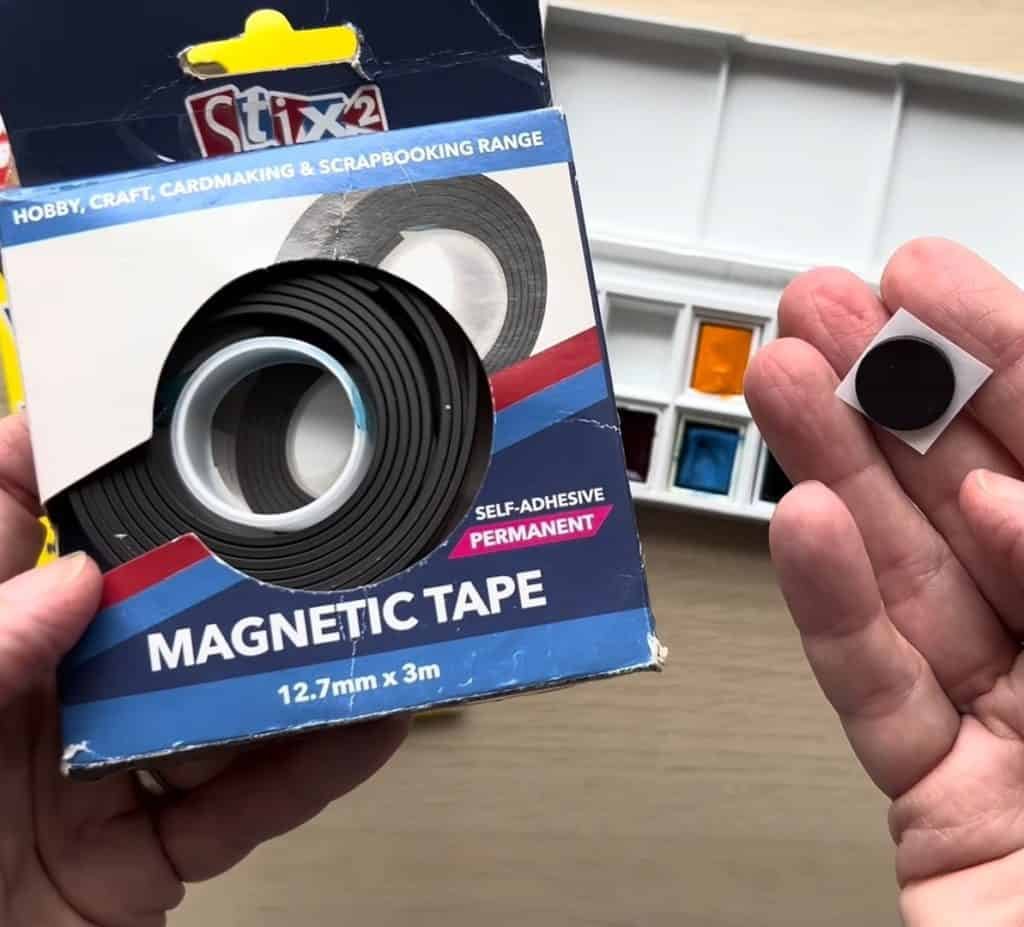
Extra Security for Traveling Artists
For extra security, Leslie uses magnetic strips in metal palettes. She sticks them under the pans so they lock in place. For plastic or aluminum palettes, she uses a tiny piece of tack.
This prevents accidents, especially outdoors. Leslie enjoys plein air painting, and she values having a stable palette when working on location.
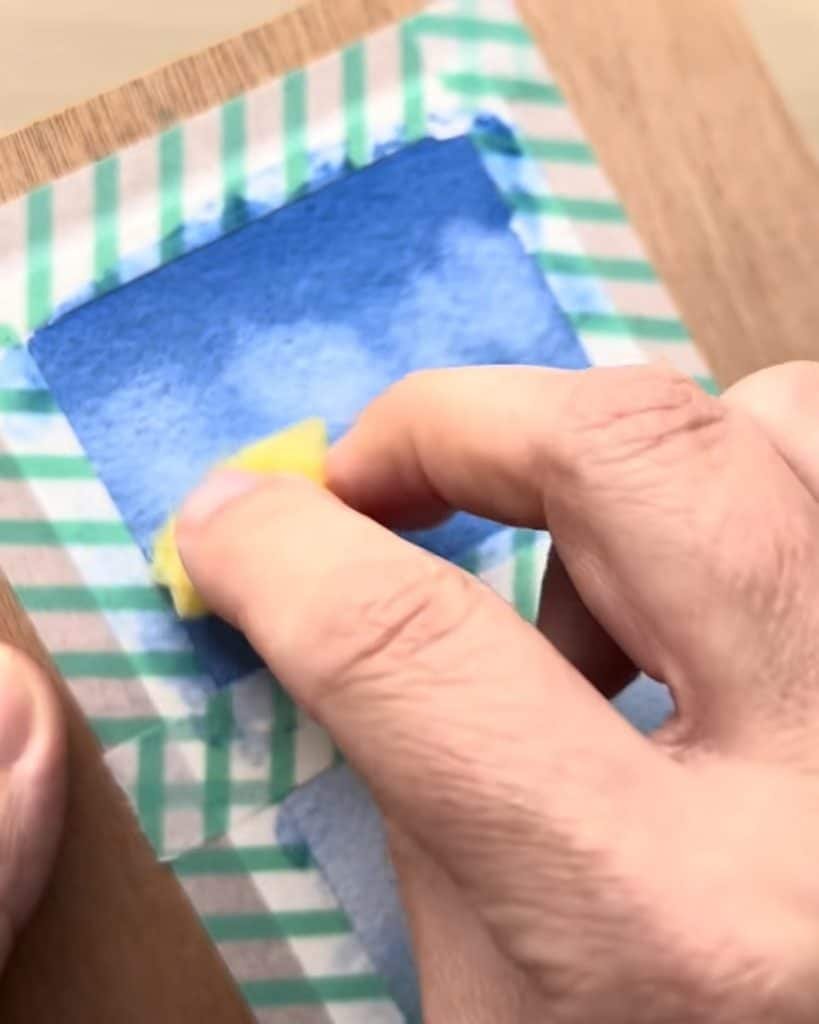
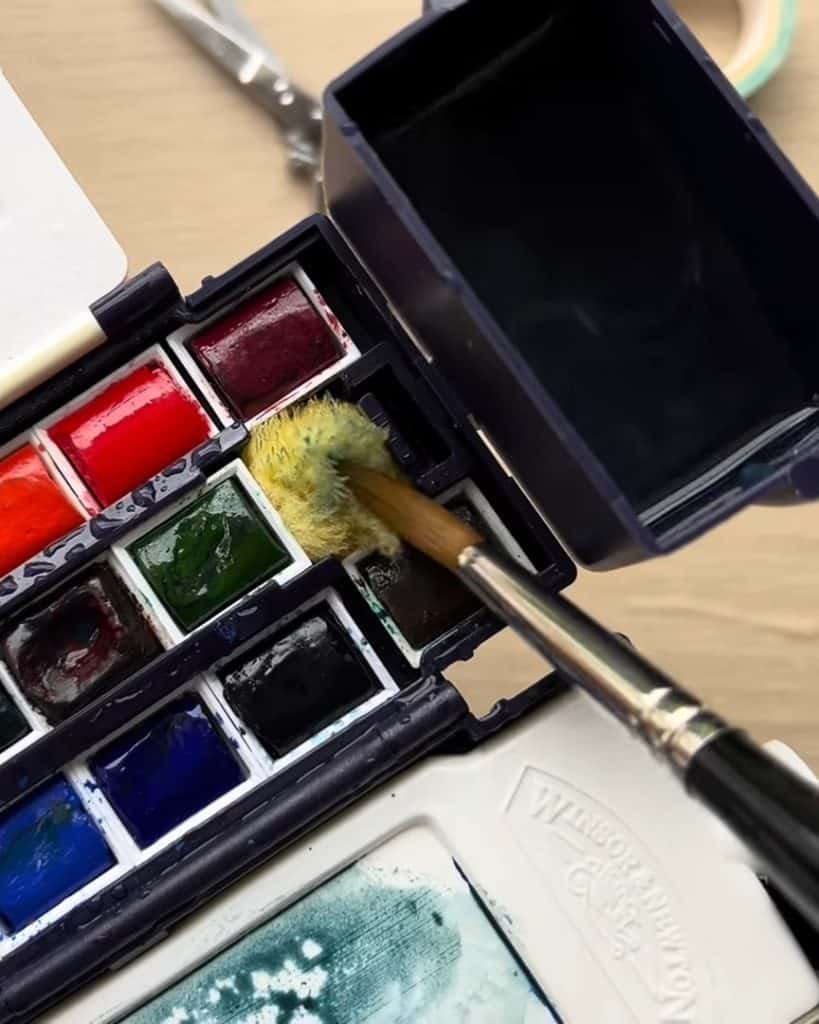
Tip 5: How to Use a Watercolor Sponge
Finally, Leslie discusses a small but useful tool: the watercolor sponge. She shares four creative ways she uses it in her work.
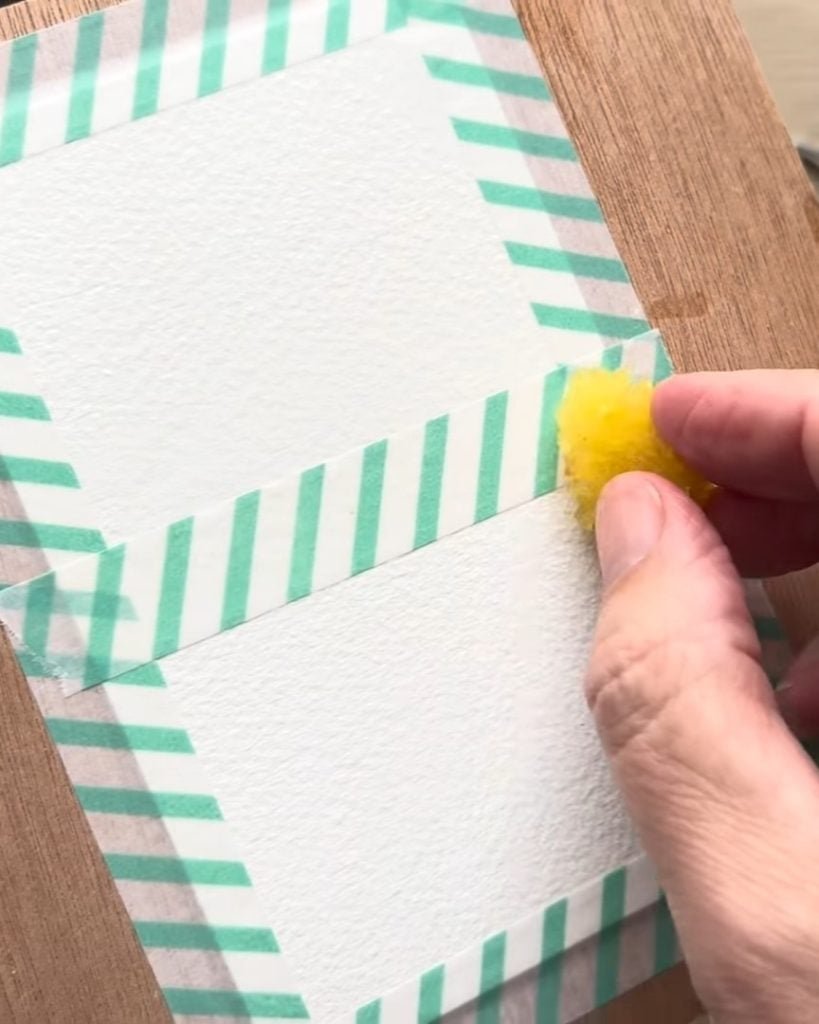
Preparing Paper with a Sponge
She wets a clean sponge and runs it across her paper. This evenly prepares the surface for painting. According to her, it works well for normal washes and wet-on-wet techniques.
Creating Textures and Effects
Leslie also uses a damp sponge to lift paint. She shows how to create soft clouds with this method. The sponge makes the edges look fluffy and natural.
She also dips the sponge in paint and dabs it on the paper. This makes convincing textures for trees and foliage. She notes that sponges can add many textures with little effort.
Correcting Mistakes with a Sponge
If she makes a mistake, Leslie gently dabs with the sponge. It lifts unwanted paint easily, especially with non-staining colors. She says this method works best on cotton paper.
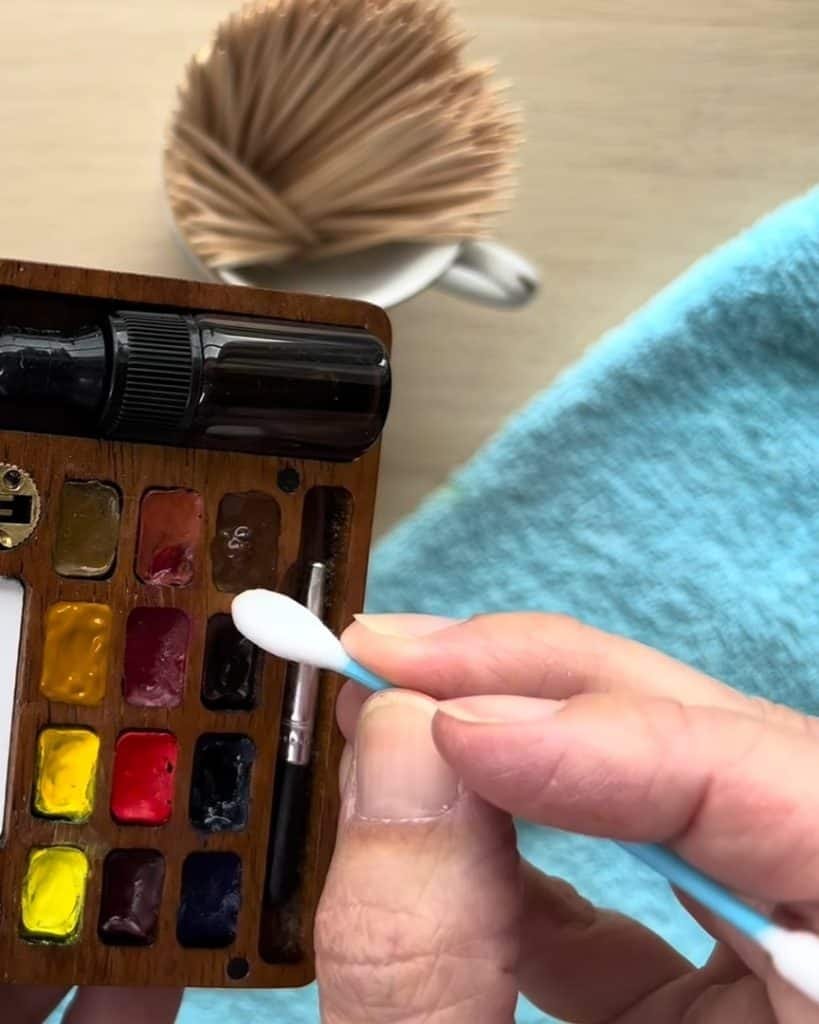
Cleaning and Controlling Water
Leslie also blots extra water from her brush on the sponge. A sea sponge is her favorite because of its natural texture and absorbency. But she explains that any sponge can do the job.
She concludes that this small tool can help you add variety and control in watercolor.
In A Nutshell
Watercolor can feel unpredictable, but small adjustments make a big difference. Leslie Stroz shares five tips that solve real problems: preparing paper, fixing pans, saving tubes, reattaching cakes, and using a sponge for effects. Each tip saves time, paint, and frustration.
Which of these methods will you try in your next painting? Share your results and see how these tricks improve your watercolor practice.