
What makes tree bark so fascinating to paint in watercolor? For Beala Art, it’s all about capturing natural texture and depth through simple, approachable steps.
In this article, Beala Art walks you through four different trunk styles—from soft birch bark to rough, textured trees—using tools and layering techniques that bring your trees to life.
Let’s dive in and make your bark pop!
Contents
Understanding Tree Bark Texture in Watercolor
Let’s start with why painting bark is important in watercolor art.
Adding bark texture brings life to trees. It helps them look more real and also builds skill in brush control, water management, and pigment handling. This technique can be as simple or as detailed as the artist wants.
There are many ways to paint bark, and in this tutorial, the artist follows one preferred method. It gives a natural, organic look with simple steps.
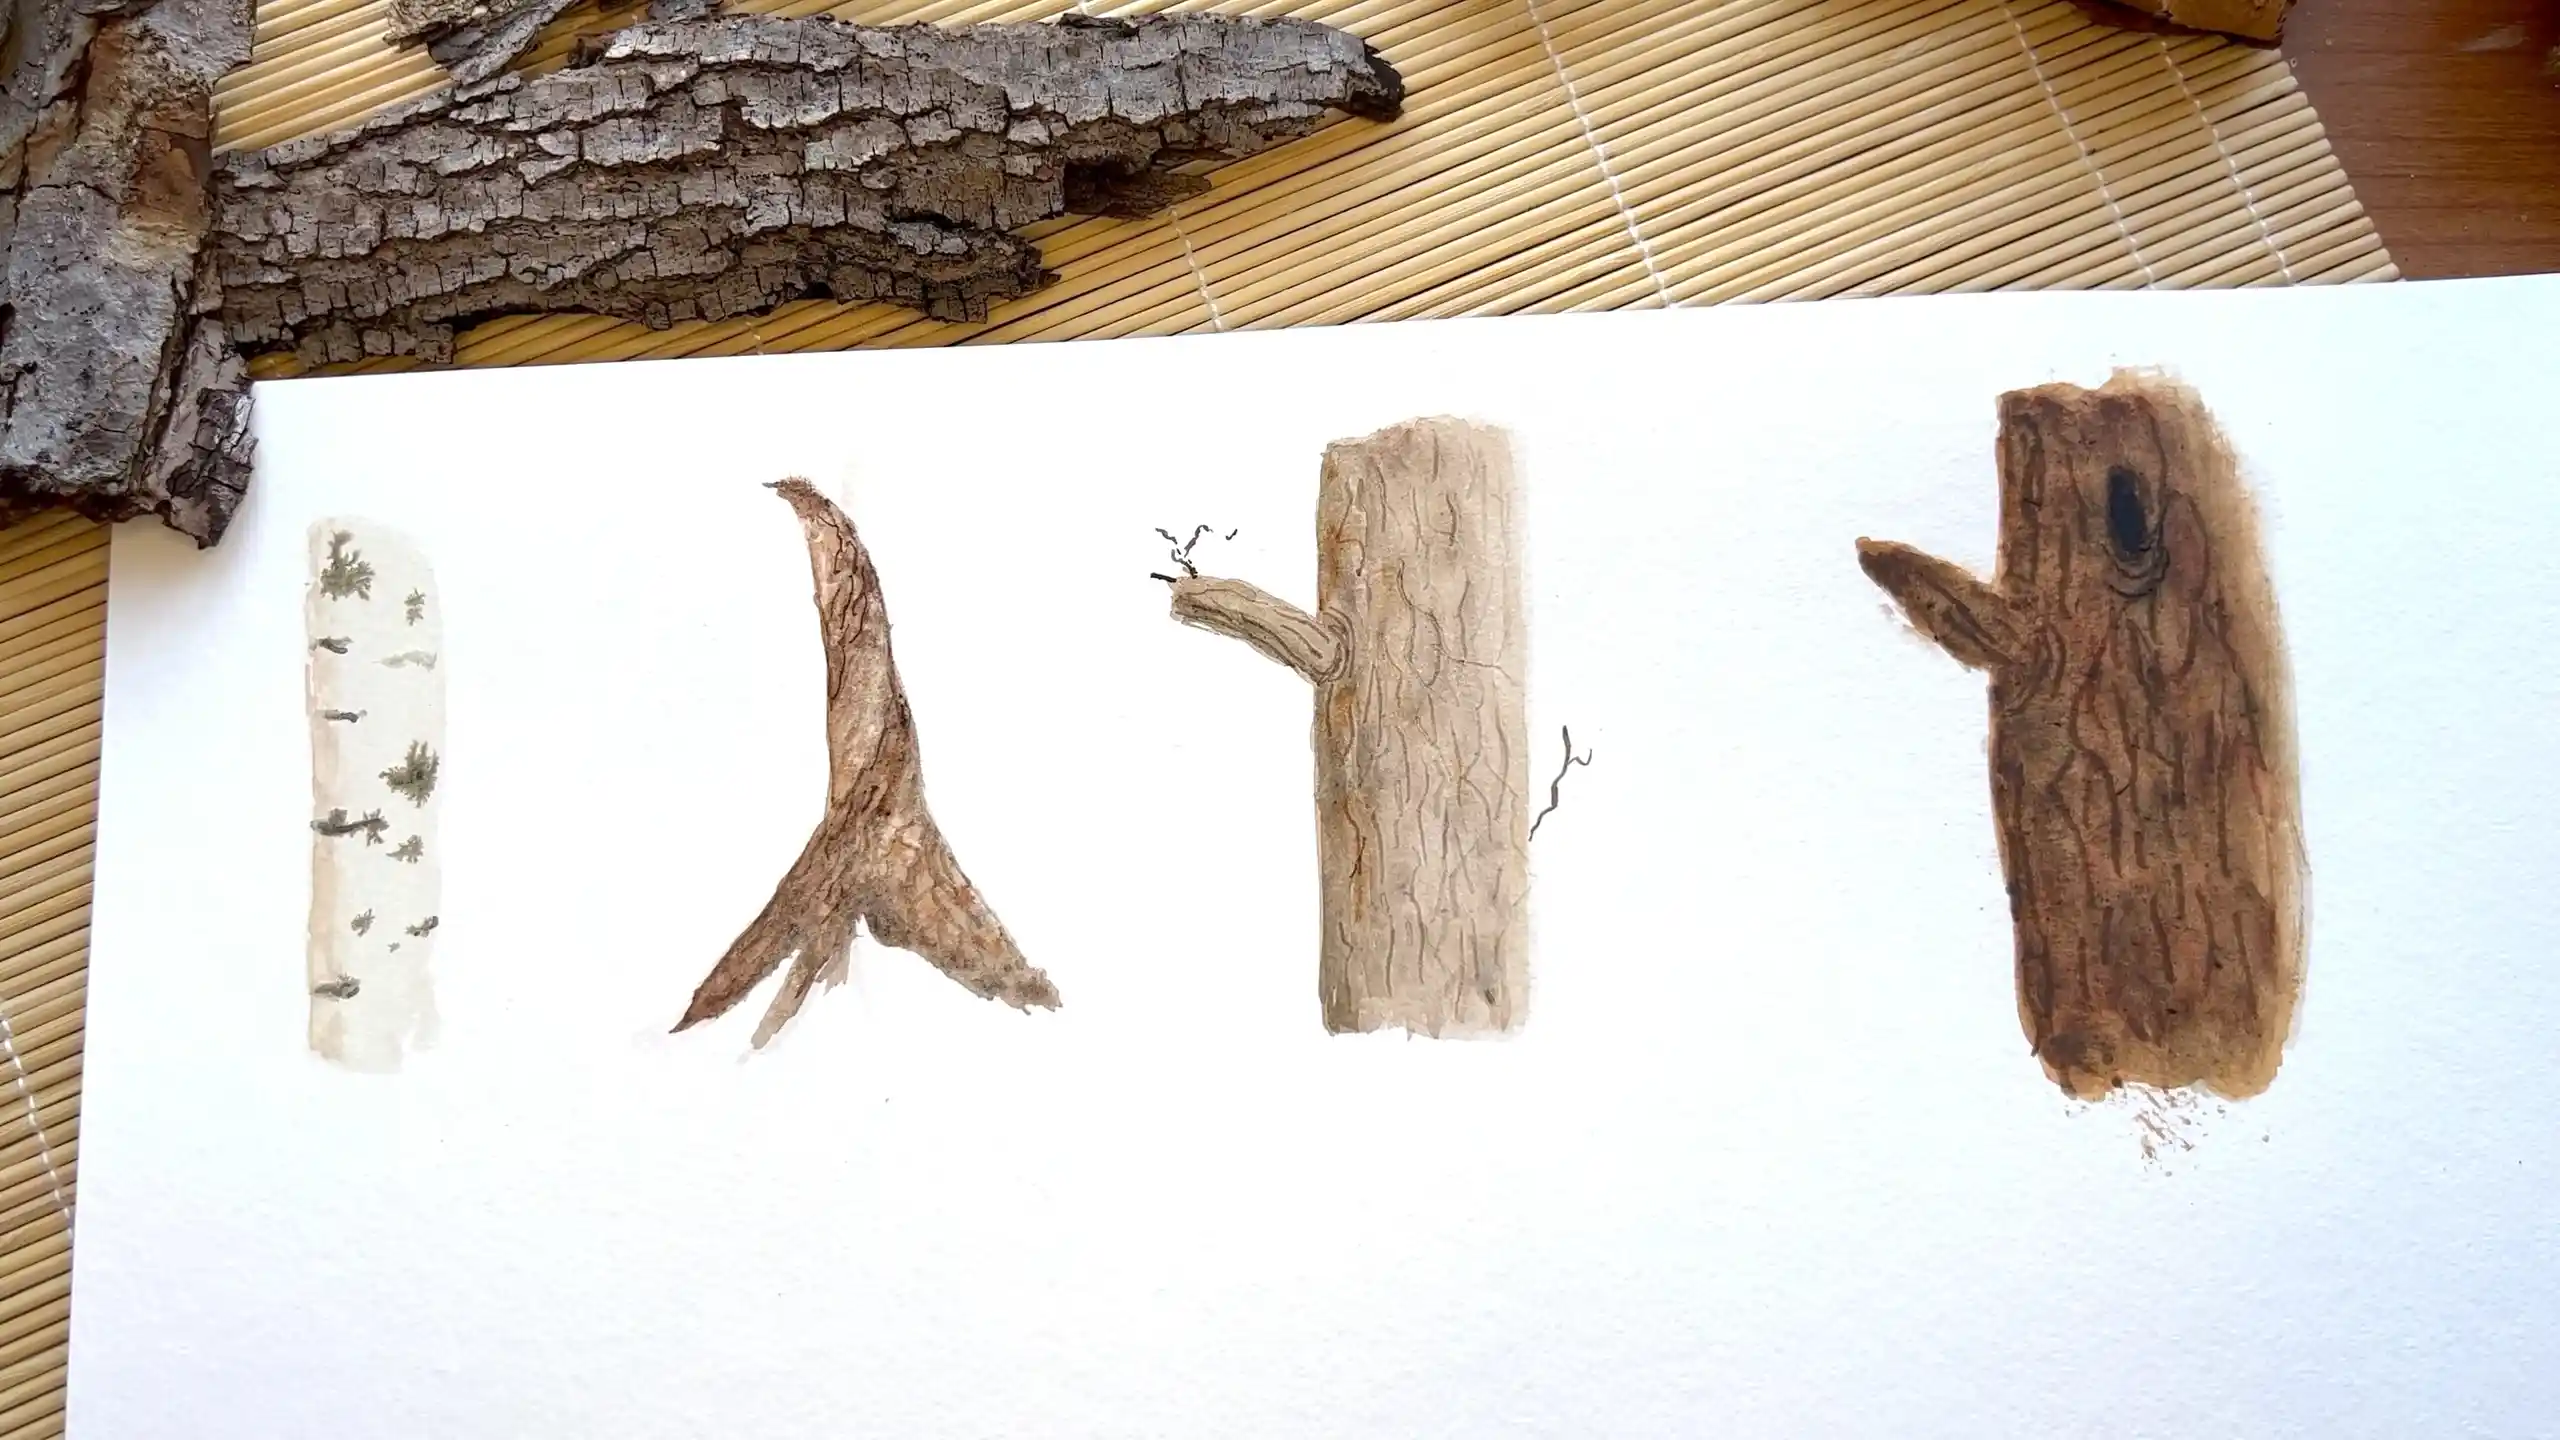
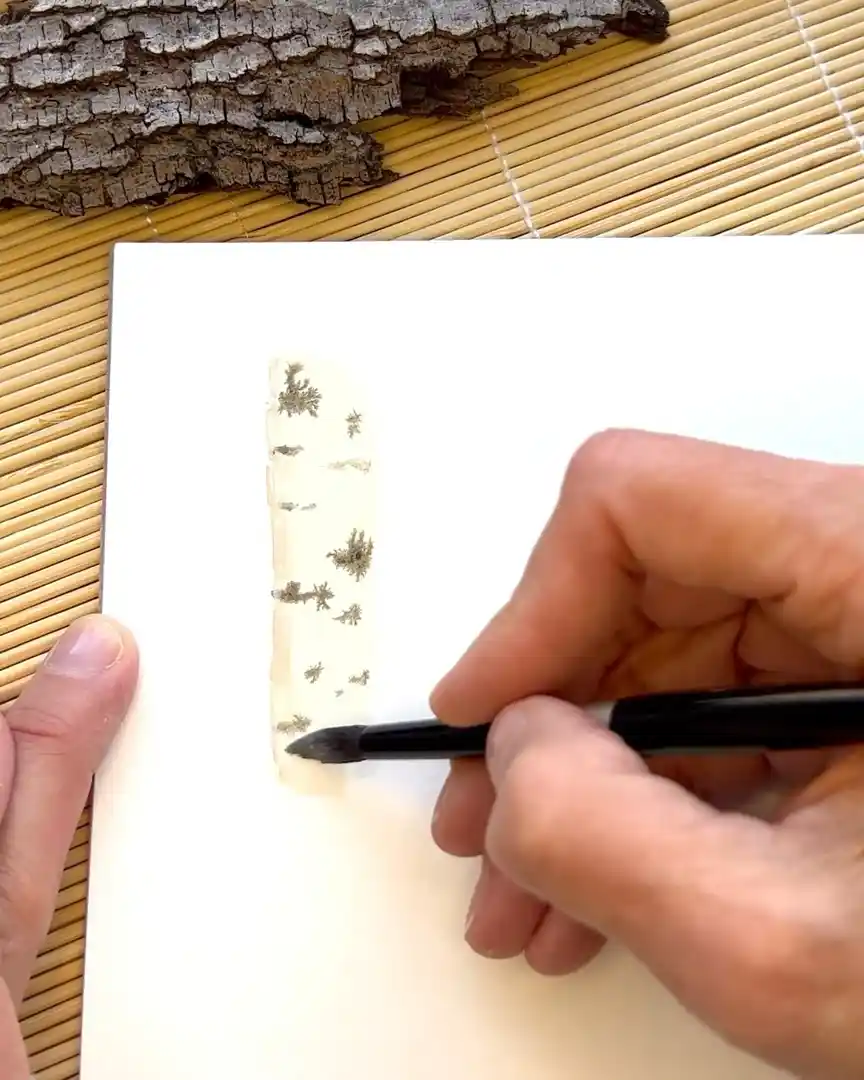
Tree #1: Painting a White Birch Trunk
A classic choice—white birch. Birch bark has soft tones and gentle textures, and this approach uses simple watercolor techniques to recreate it.
Only the trunk is painted here so the focus stays on texture.
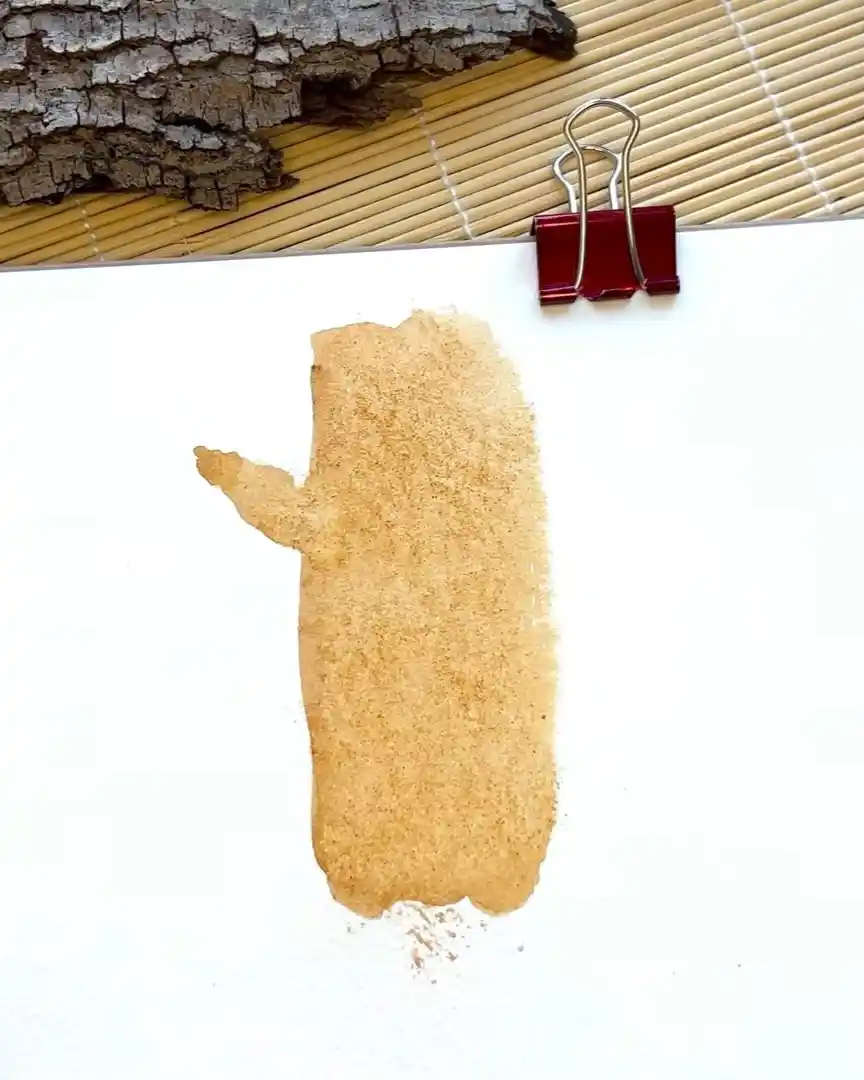
Step 1: Painting the Light Base Layer
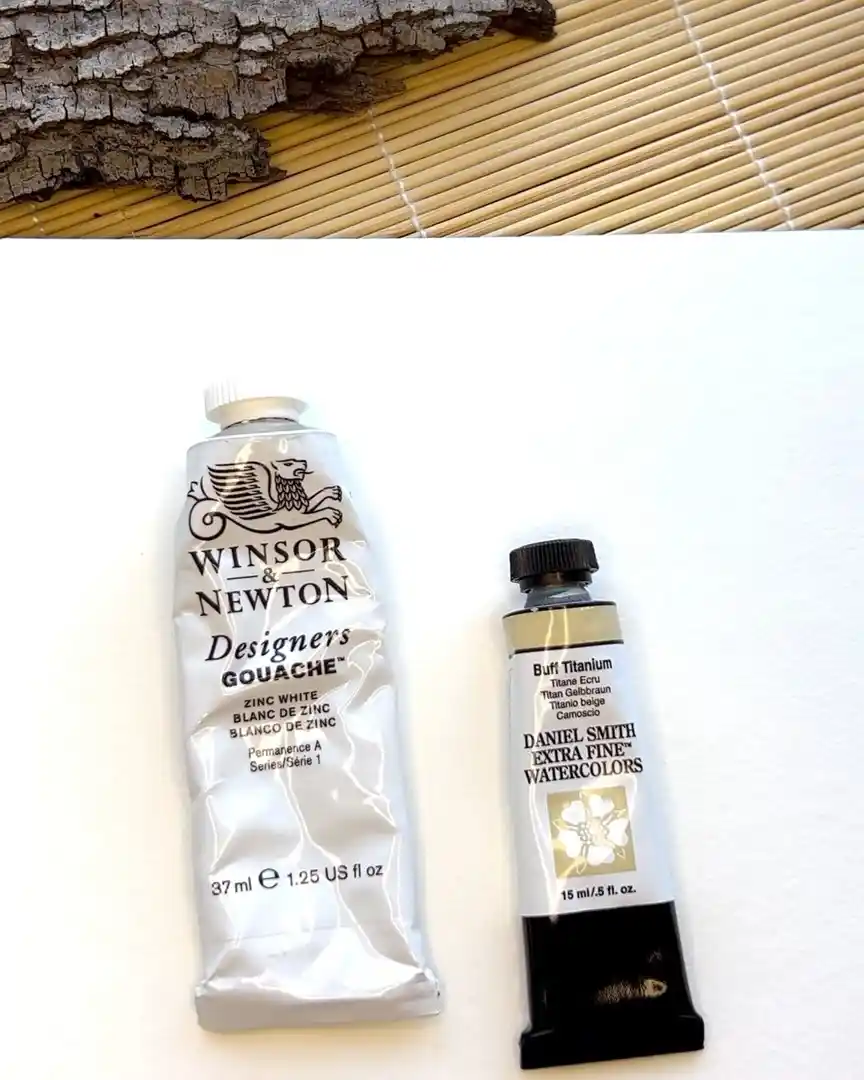
To achieve that pale birch look, the artist mixes buff titanium with zinc white. Zinc white is preferred because it is more transparent and allows subtle undertones to show through.
With a loaded brush, the artist drags the mixture downward to form the trunk. The paint is kept wet and generous so it stays workable for a few minutes.
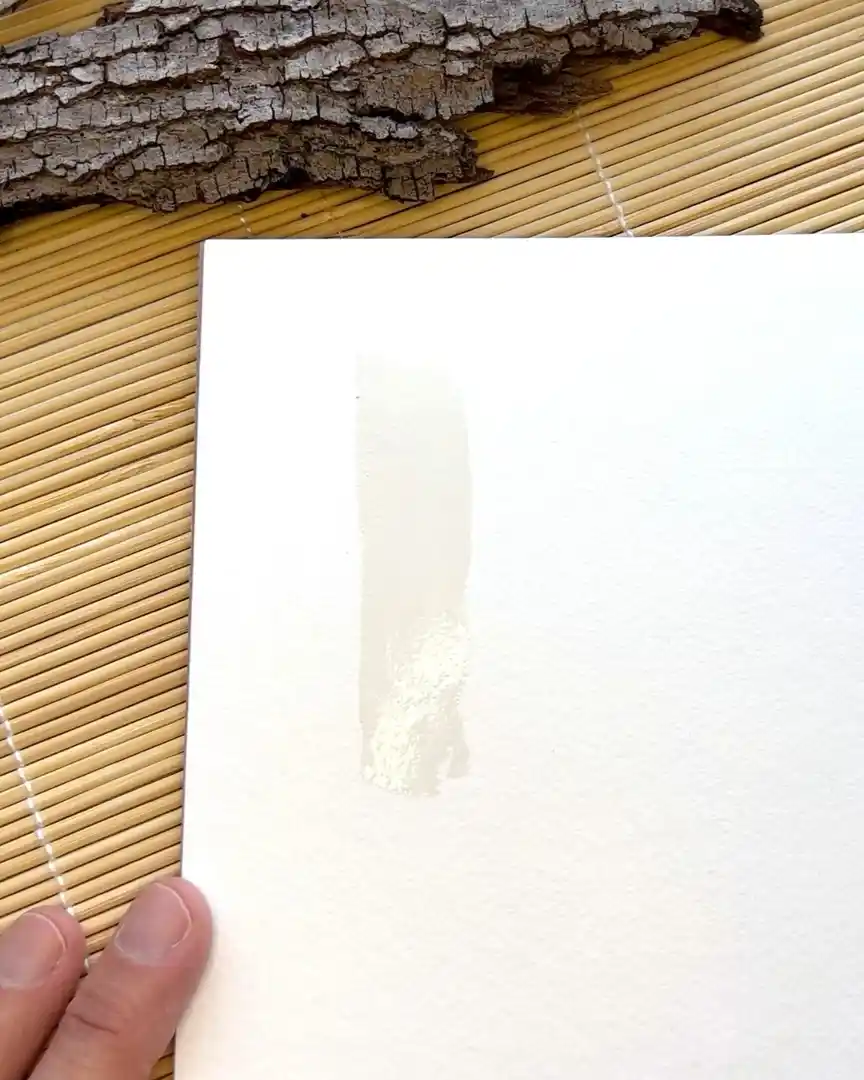
Remember, this tutorial is all about tree texture, so the artist is only painting the trunks, not the entire trees.
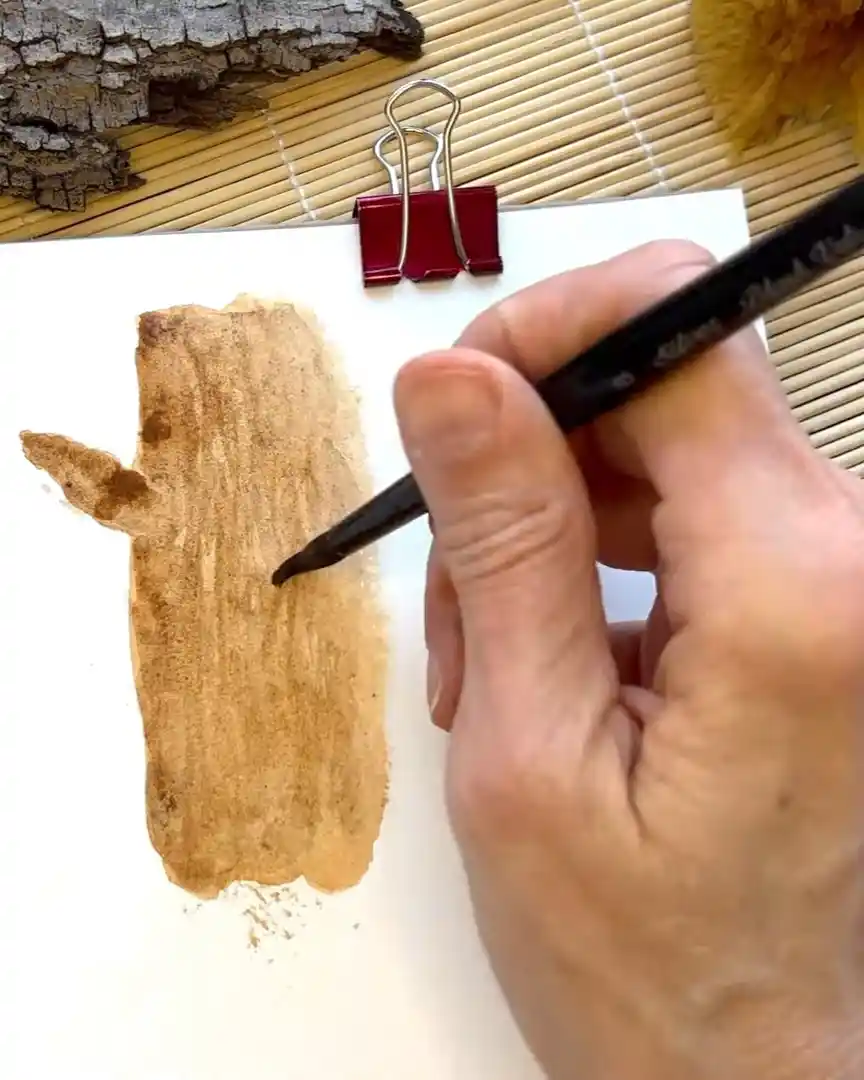
Step 2: Adding Bark Texture While Wet
Next, the artist mixes a darker color for the bark marks. Birch bark can have gray or brown tones, so the mixture includes:
- Burnt umber
- Sepia
- A hint of green (the exact name isn’t recalled, but any earthy green works)
It looks like a muddy brown—ugly but perfect for bark. Using this mix, the artist dabs a few horizontal marks across the trunk.
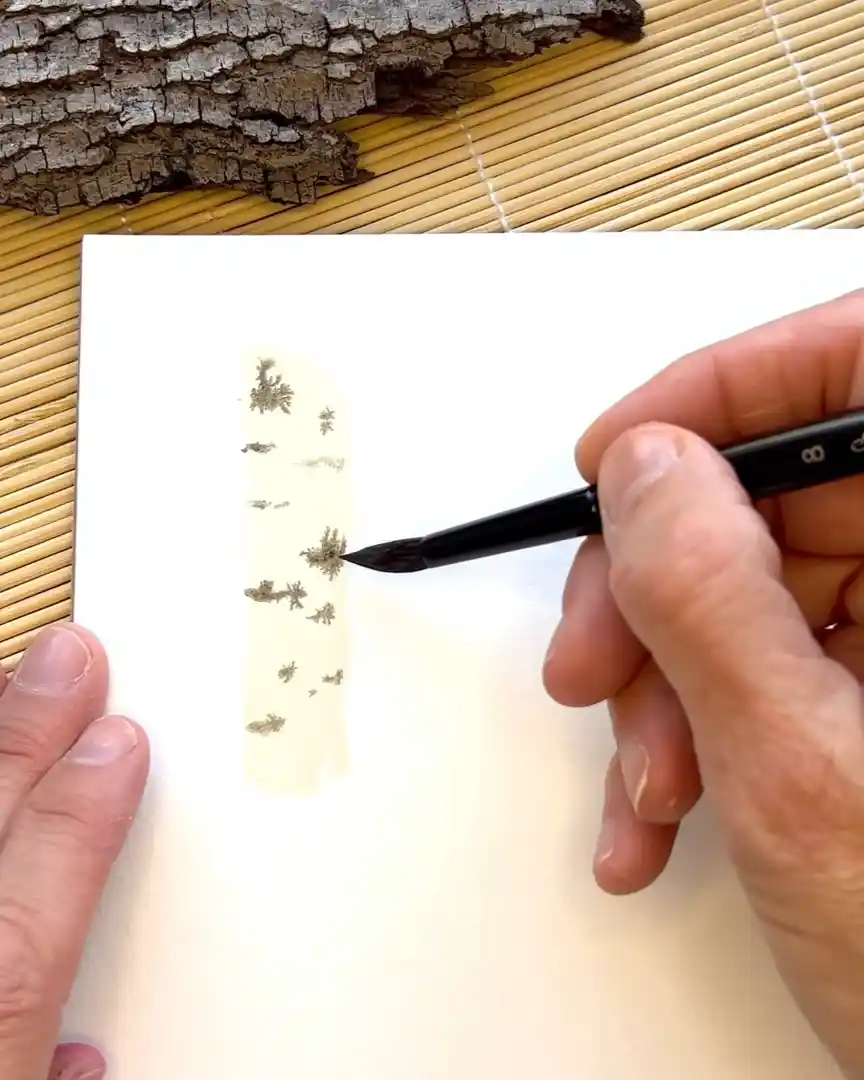
The goal is for the paint to bleed out into the wet surface. That soft bleeding effect mimics real birch bark. Not too much is added—just enough to suggest texture.
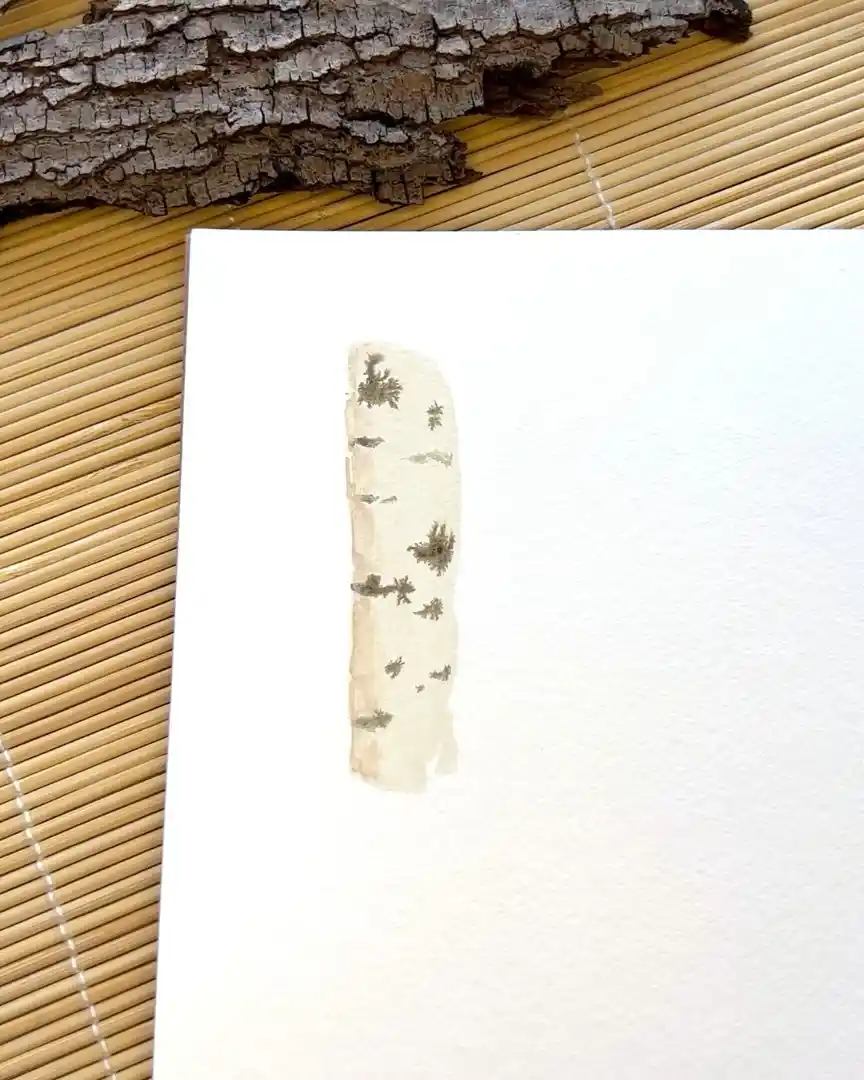
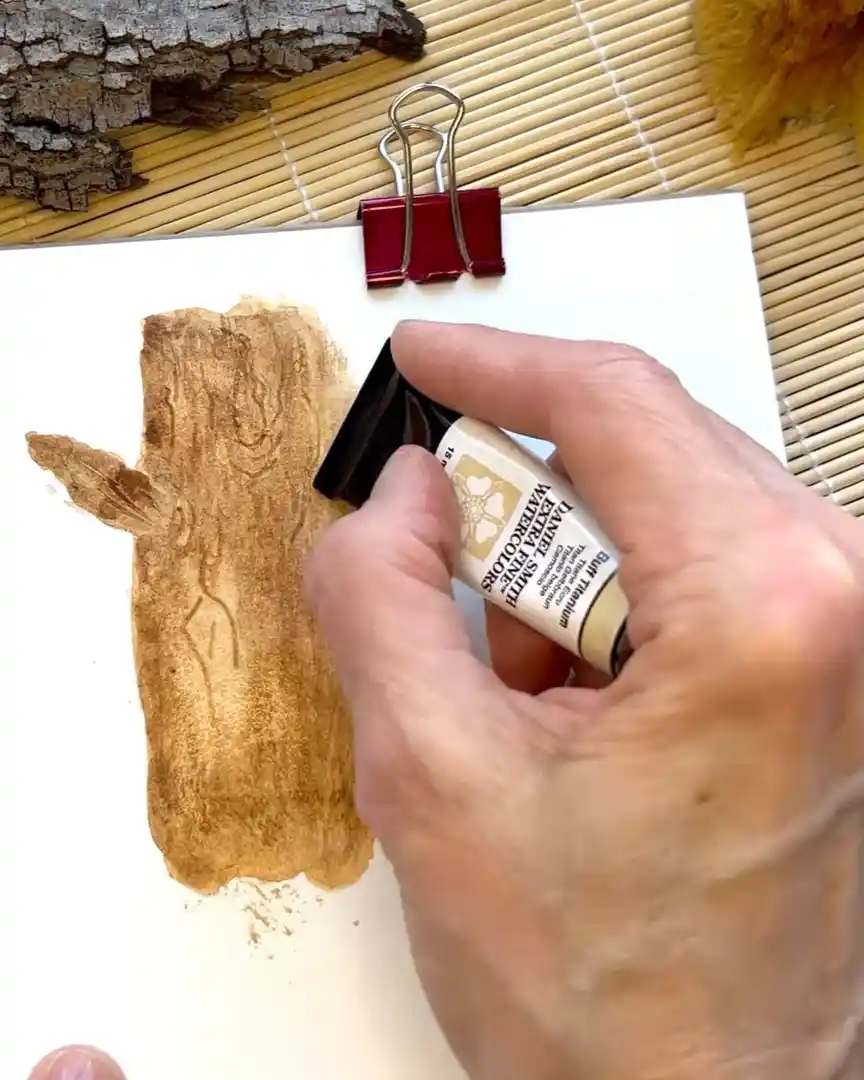
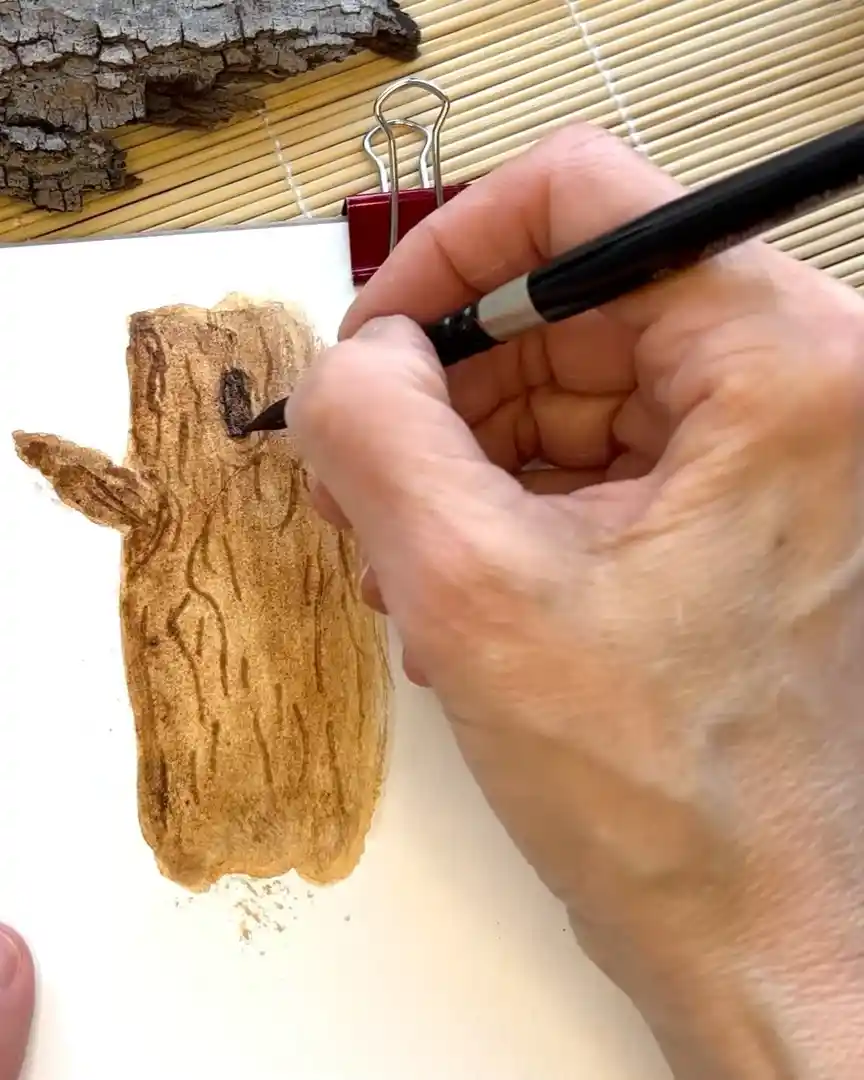
Step 3: Creating a Soft Shadow
A soft shadow is added once the first layer is dry to give the trunk depth. A bit more burnt umber is mixed into the earlier bark mixture.
The artist paints a shadow down one side of the trunk, then dries the brush on a towel and uses it to feather the edge—starting from the outside and working back into the shadow. This softens the look.
A light, simple look can stop here. But for more realism, additional layers can be added. The more layers built, the more depth and texture the trunk will have.
And that’s it for the birch trunk!
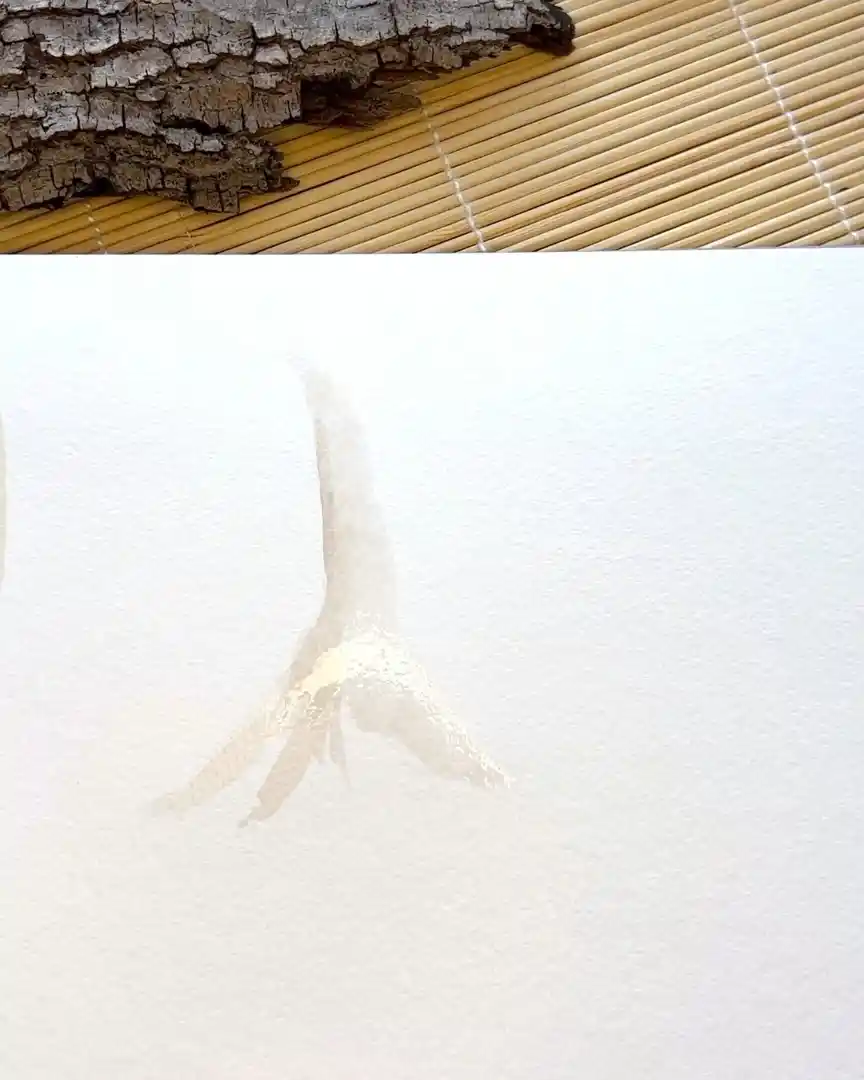
Tree #2: Twisted Trunk Technique
Now, a twisted trunk is painted. This style adds a lot of character and is also an excellent way to practice layering dark tones.
Step 1: Start with a Wide Base
For a twisted tree, the artist begins with a wider base at the bottom of the trunk. The basic shape is laid out using light brown.
The trunk shape rises with a gentle spiral, and the paper is kept slightly wet so the colors can move a little.
Step 2: Add Darker Spirals
Now comes the fun part. The artist starts adding darker tones in that spiraling layout. Short strokes are made to mimic the twist.
The paint is still damp, so the colors bleed softly into each other. This helps create that fuzzy texture that many trees have.
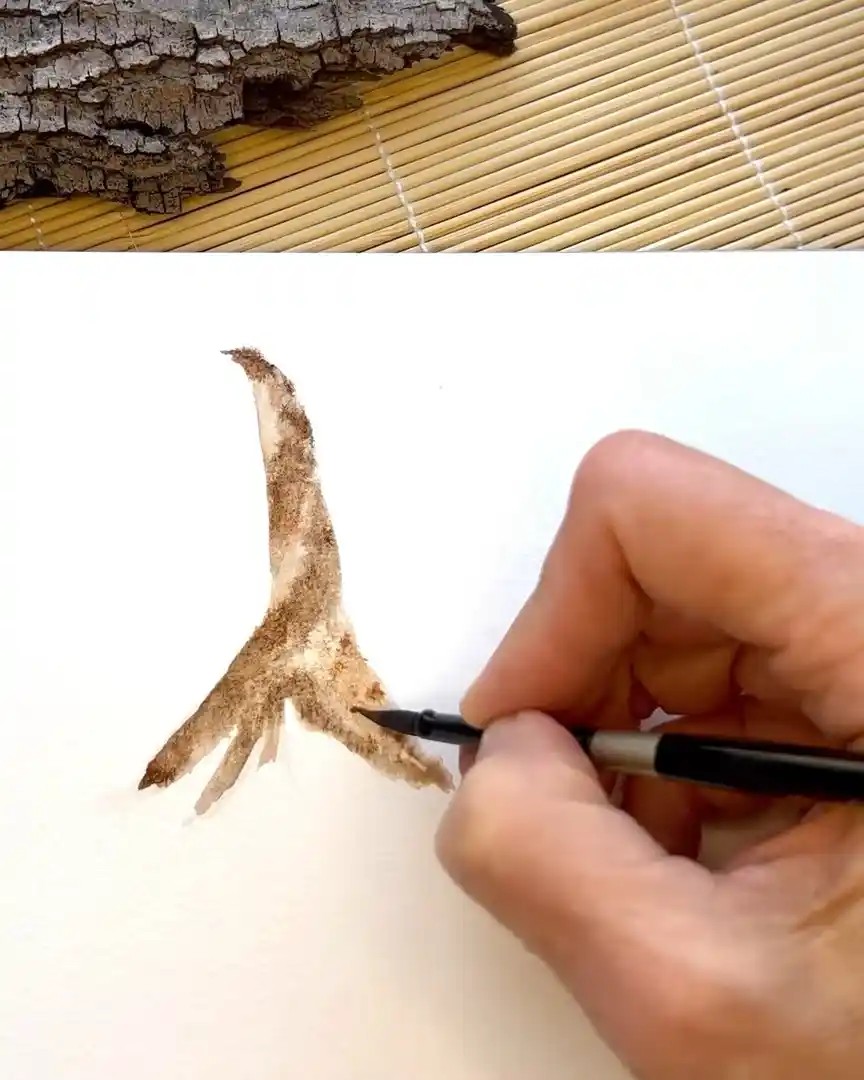
Step 3: Use a Mix of Browns
The artist uses several shades of brown for this tree. Any browns can be used. That mix of colors gives the trunk a variegated look, which makes it feel more real.
The artist keeps layering darker and darker tones, slowly building up the texture. Small cracks and crevices are refined by deepening the shadows. This extra detail brings out the twisted texture.
You can stop at any point, depending on how much detail is desired.

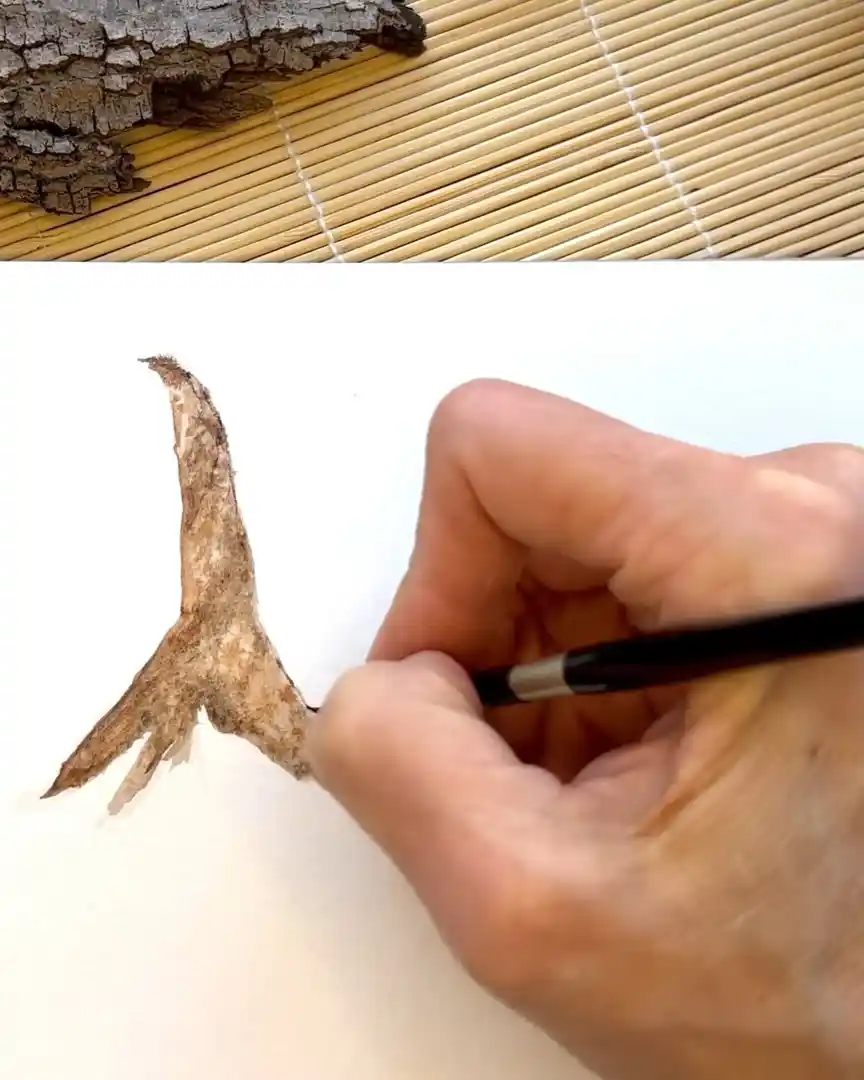
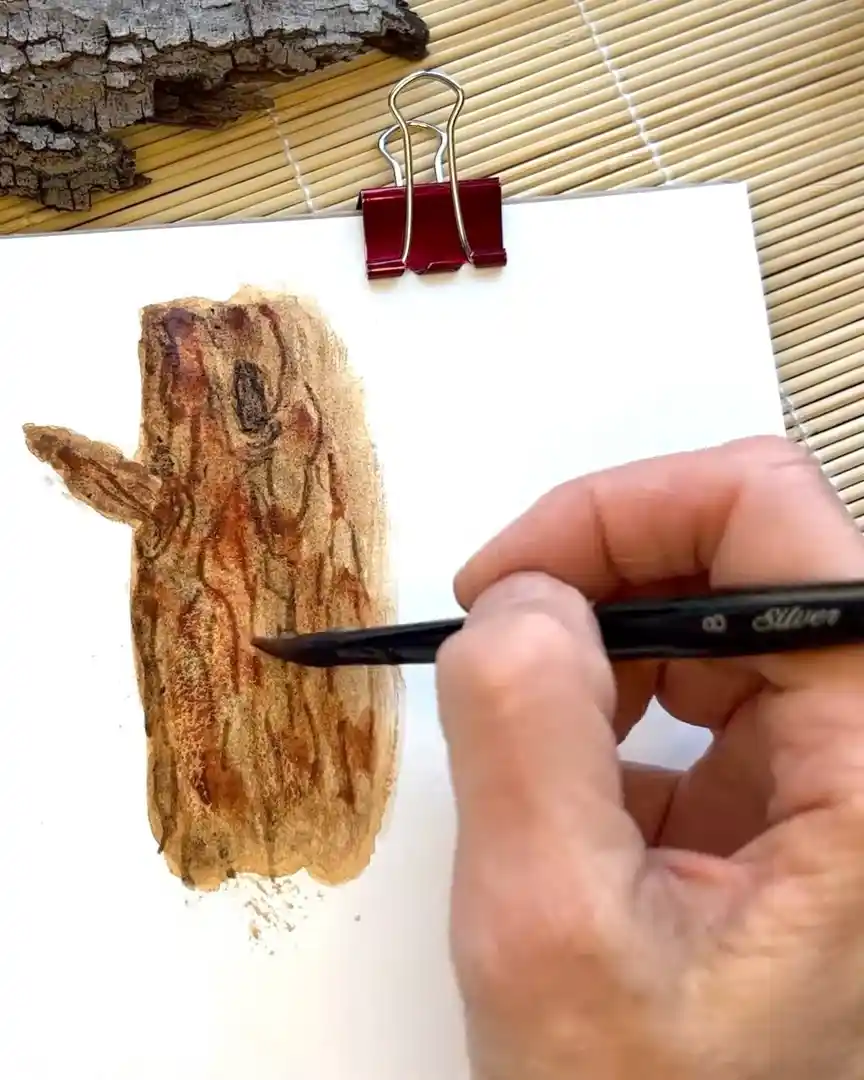
Tree #3: Large Trunk with Added Texture
Now, let’s move on to a bigger tree. This one uses Van Dyke Brown and a few extra tricks to build up a textured, realistic bark.
Step 1: Start with a Thick Base
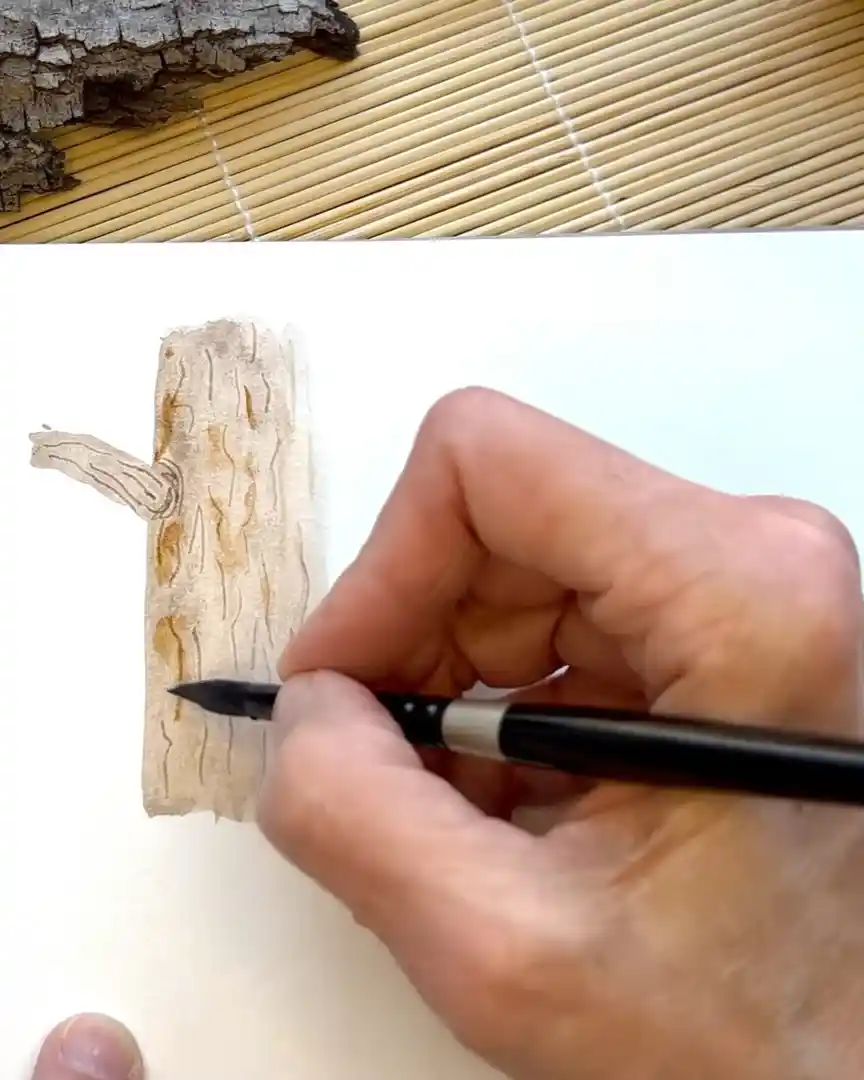
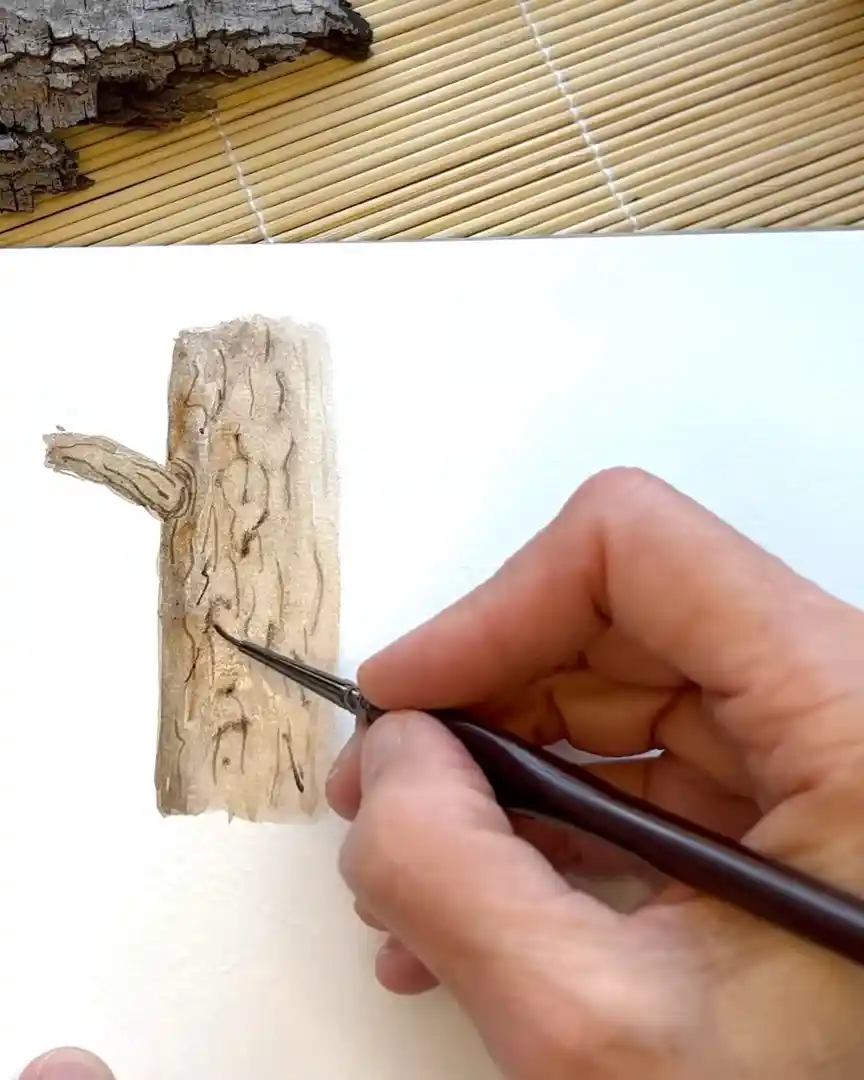
The artist starts by dragging down a thick trunk using Van Dyke Brown, one of the artist’s favorite browns. This trunk is made wide and solid. Then, a small limb is added to the side.
In that spot where the limb joins the trunk, more pigment is allowed to build up. That’s how it usually looks in real trees, so the artist keeps it natural.
Next, the artist begins darkening the trunk. Only one side is focused on to create a shadow. The shadow isn’t dragged down—because that never looks natural—so only parts of the trunk are darkened.
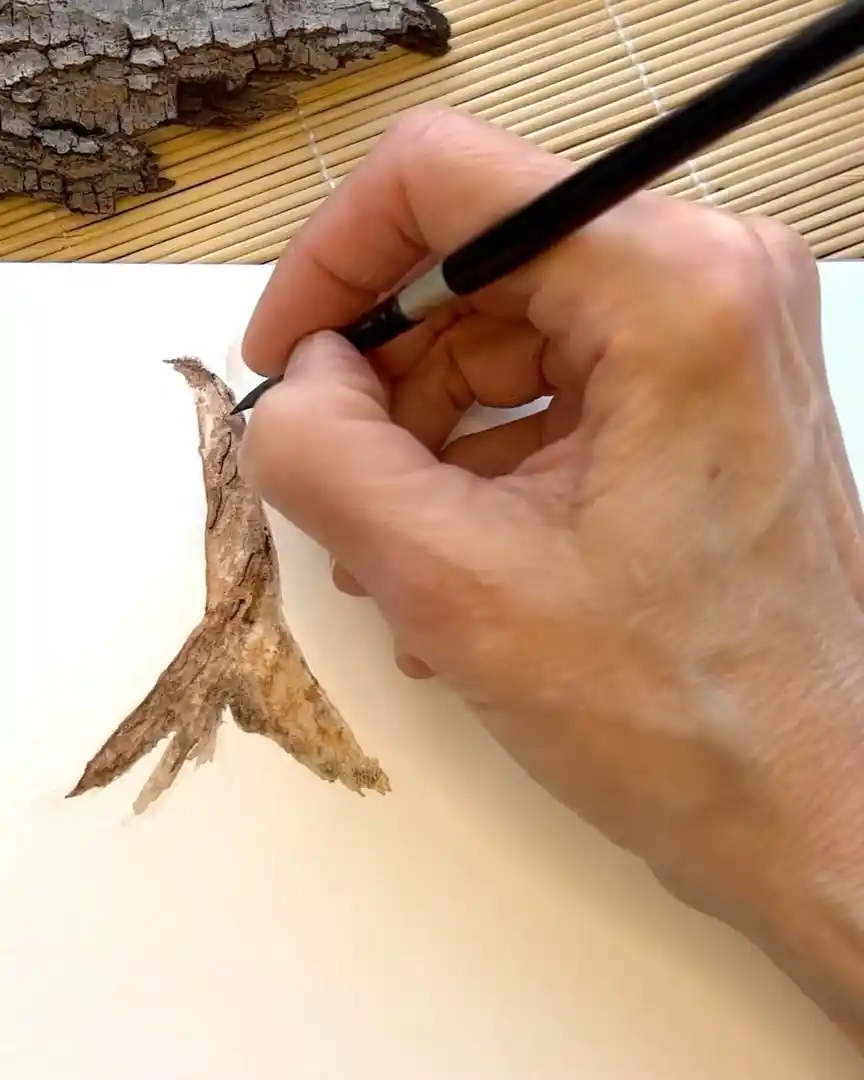
Step 2: Add Texture While Wet
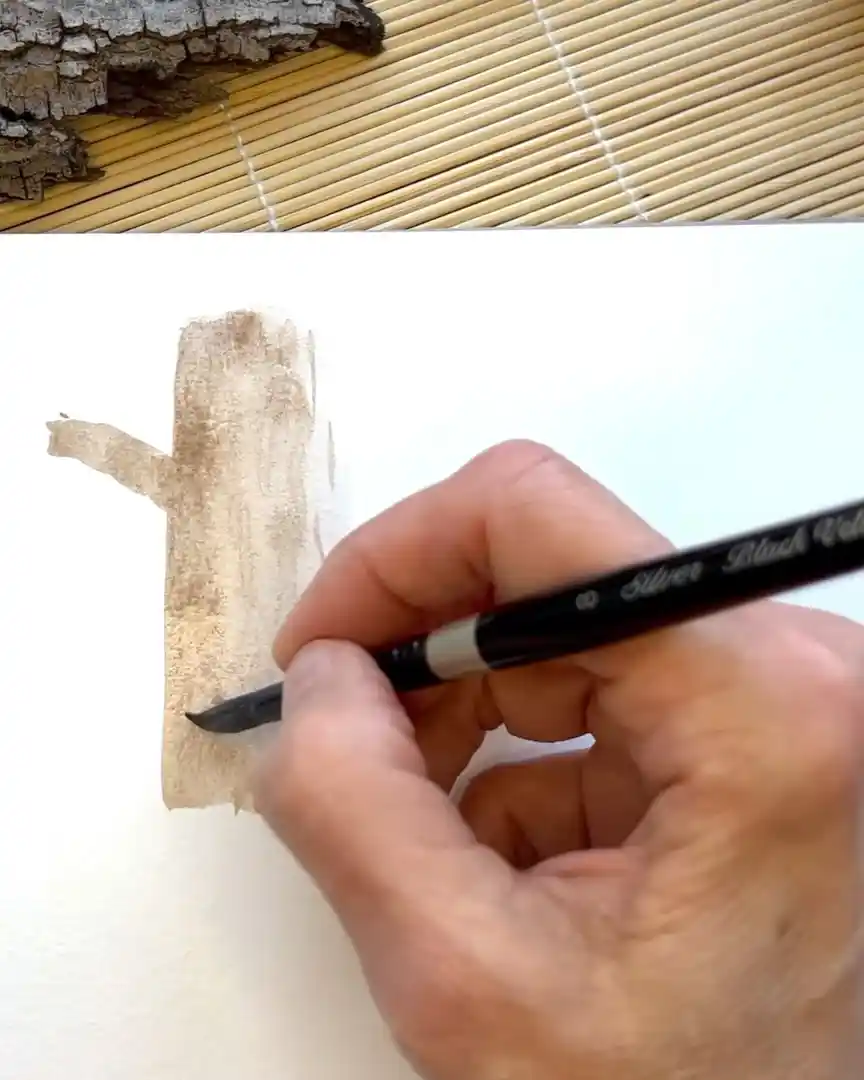
Since the paint dries quickly, the artist jumps in with a favorite texture trick. While the trunk is still damp, the end of a paint tube is used to scratch in small squiggly bark lines. This creates a nice bark texture.
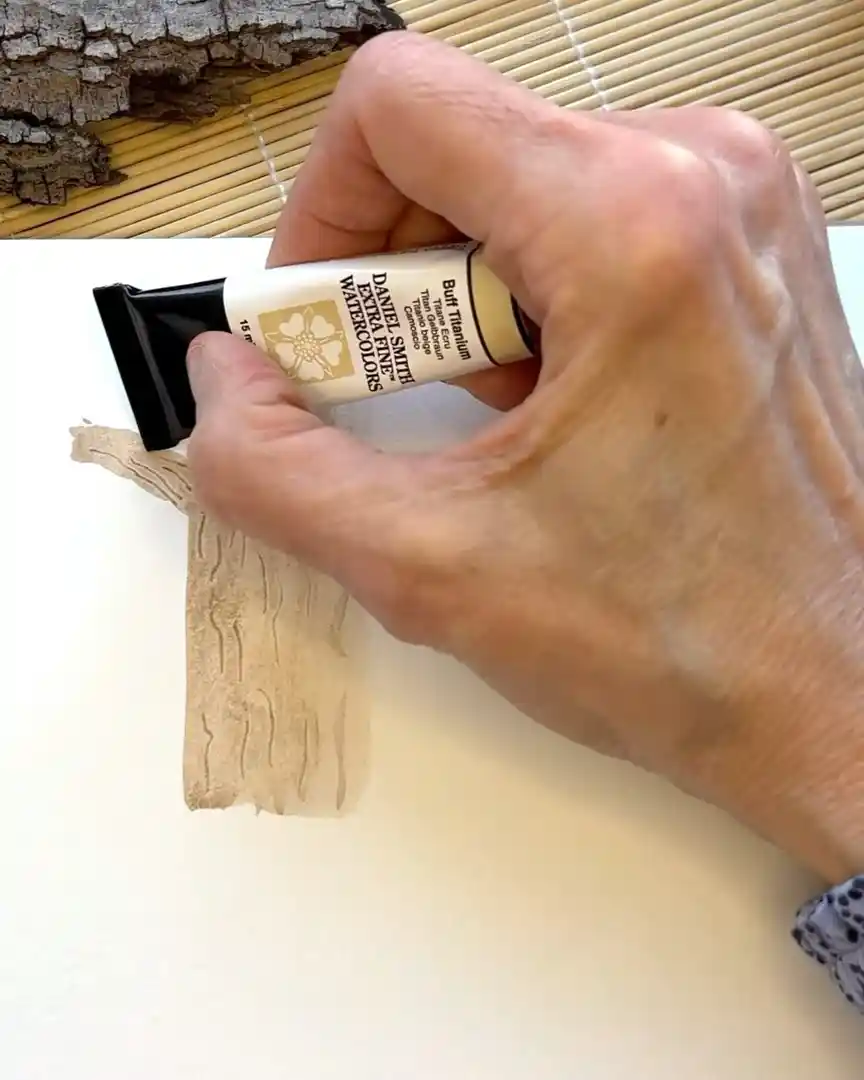
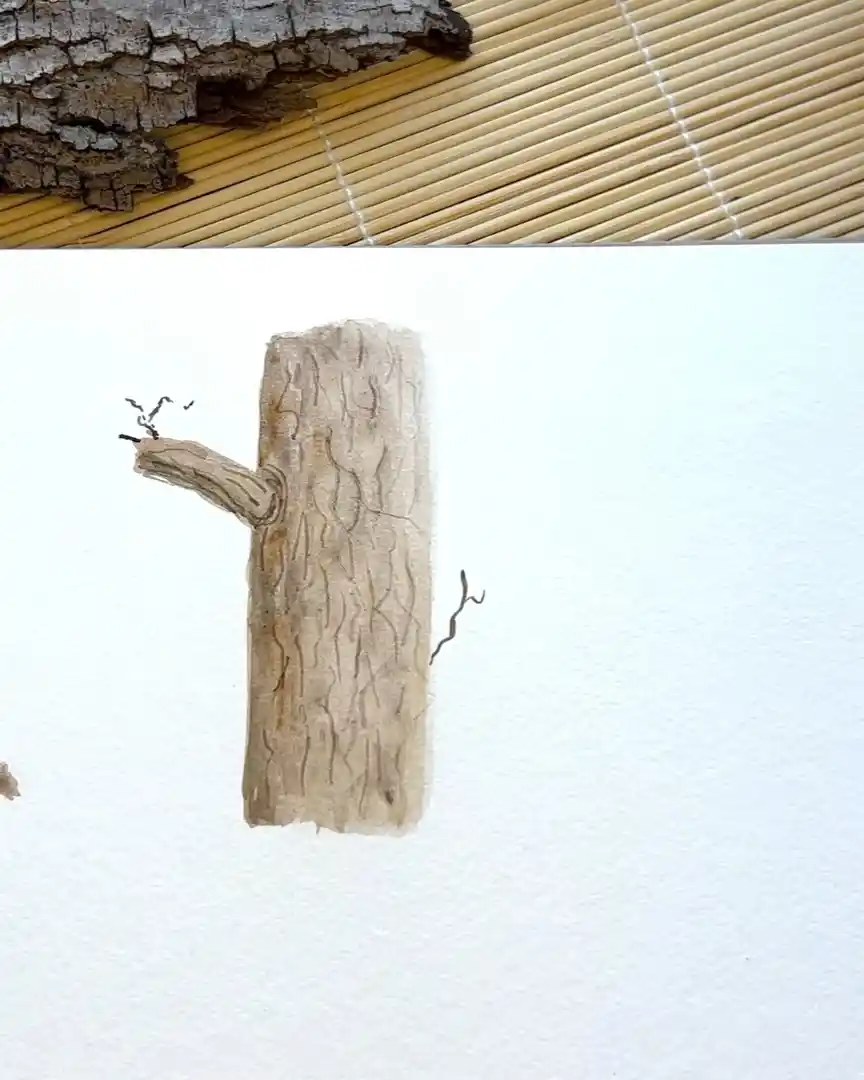
Once that dries, the artist returns with clean water to re-wet the surface. Then darker tones are dropped in at selected spots—not everywhere. That kind of spotty texture feels more realistic.
Step 3: Layer and Build Shadows
Now, the artist uses the sepia mixture prepared earlier. It has a bit of green, which often appears in real bark tones. This color is applied to the darker areas and allowed to dry again.
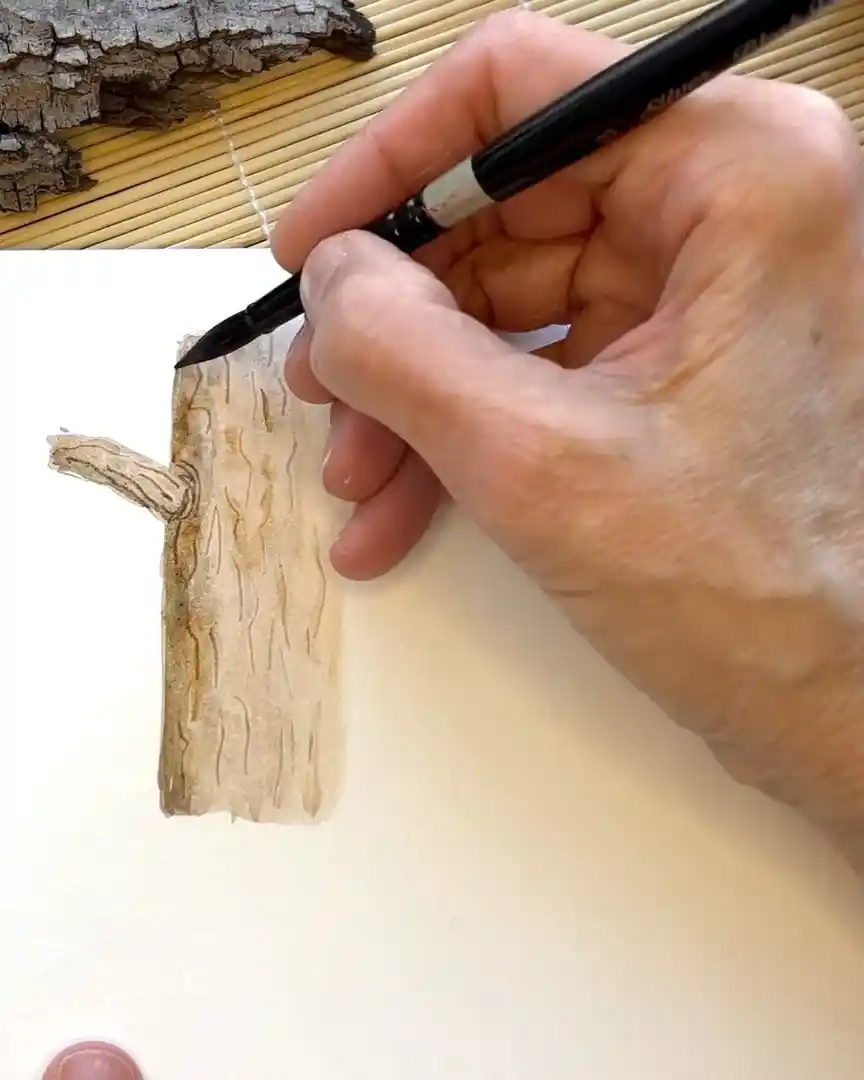
Once dry, the artist softens the edges with water and adds more of the dark sepia mixture in the crevices created earlier.
These dark parts against the lighter and mid tones help the tree stand out from the page. The trunk even starts to look slightly 3D.
The more layers added, the deeper the texture becomes. Unlike the twisted tree, which is painted wet-on-wet for softness, this large tree needs time to dry between layers.
It’s easier to handle that way, especially with the bigger size.
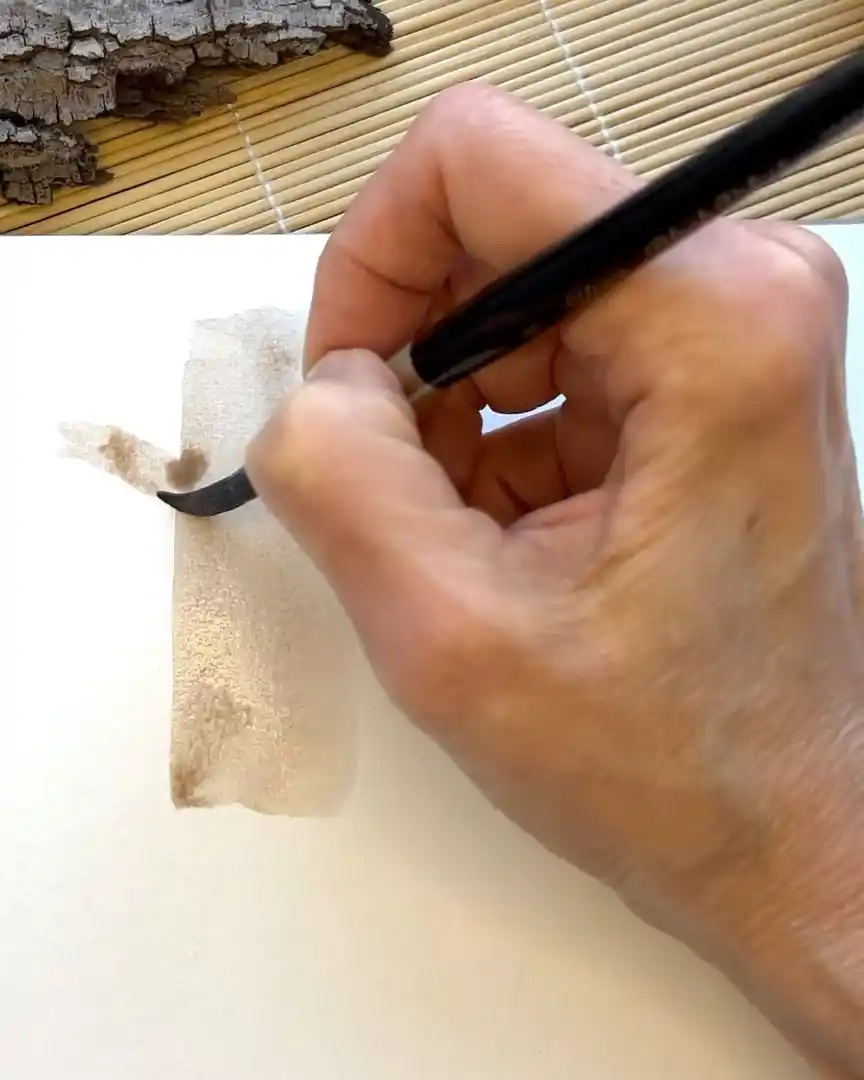
Tree #4: Enhancing with Sponge and Detail
Now, the tutorial moves on to a darker tree and introduces fun texture tools like a sponge and a paint tube. These simple tools can bring a lot of life to the painting.
Step 1: Base Color and Structure
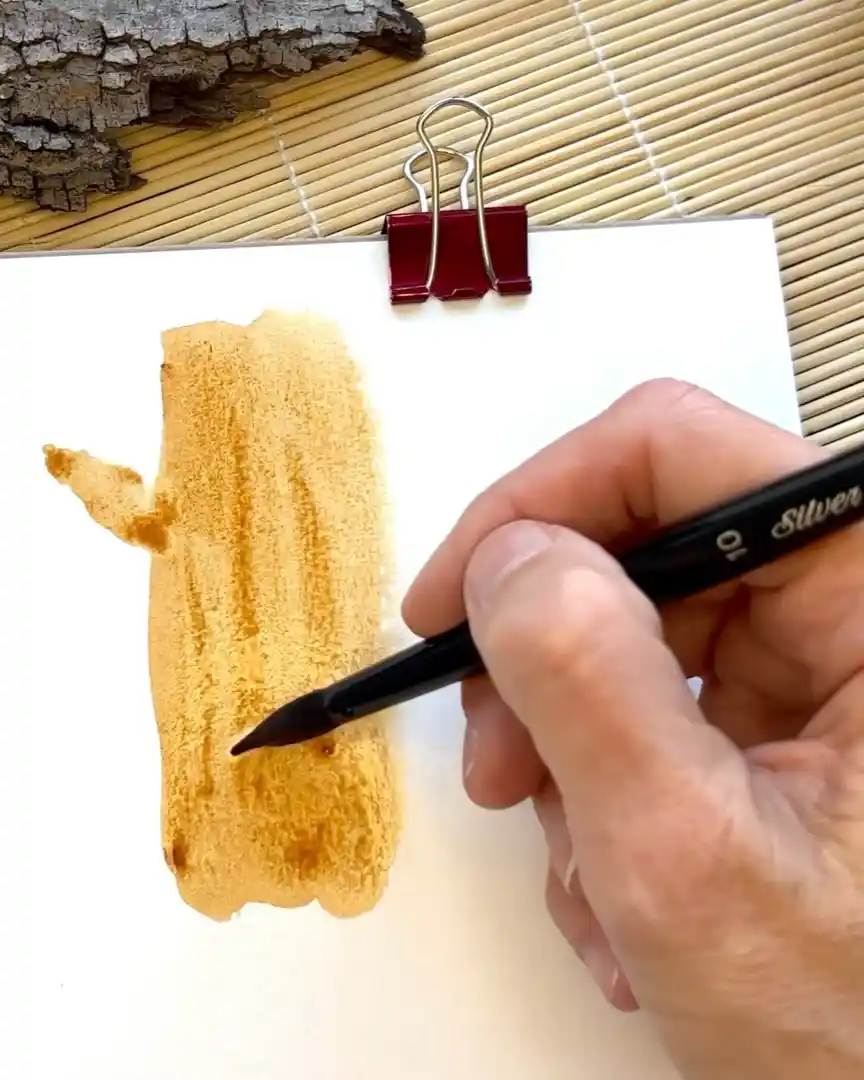
The artist begins this tree with Burnt Umber, which provides a nice, deep brown to work from. A limb is added reaching out to the side, just like in the previous tree.
That extra shape makes the tree feel more complete.
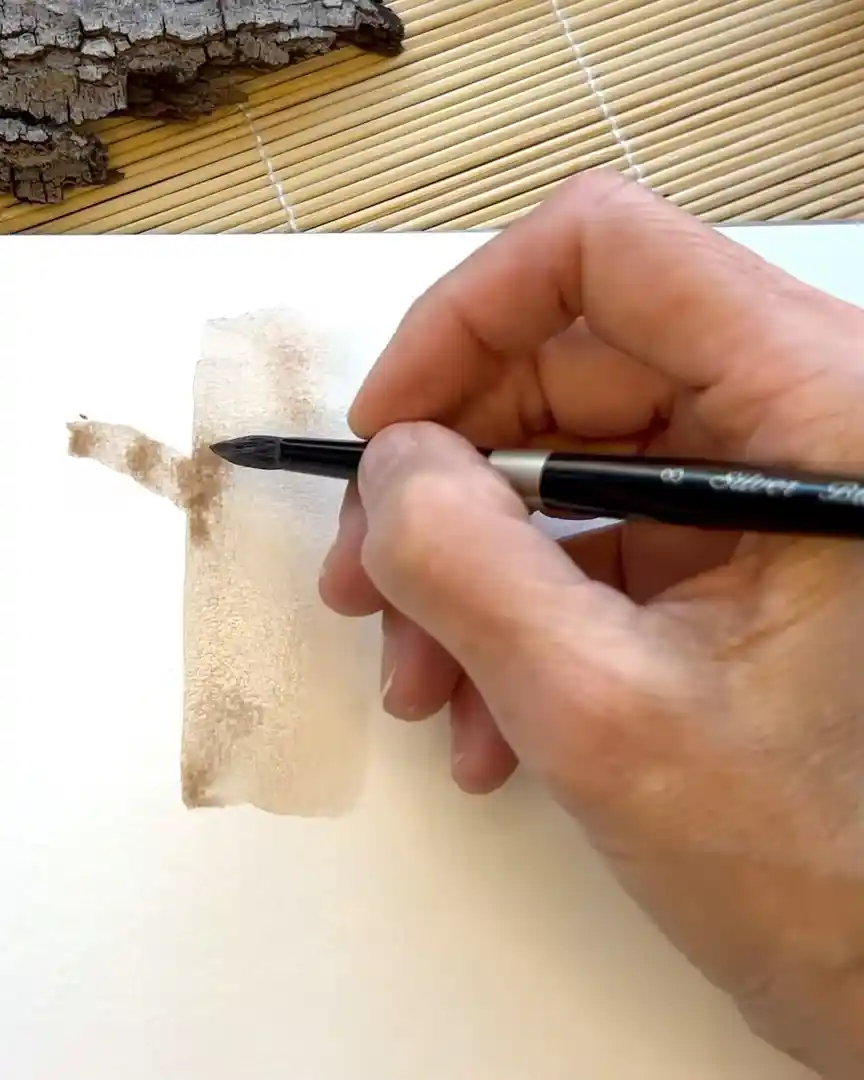
Step 2: Add Texture with a Sea Sponge
Before the paint dries, the artist dabs over the trunk with a sea sponge. This helps build some underlying texture that will show through later layers.
If this step is done in a real painting, it’s important not to sponge outside the tree shape.
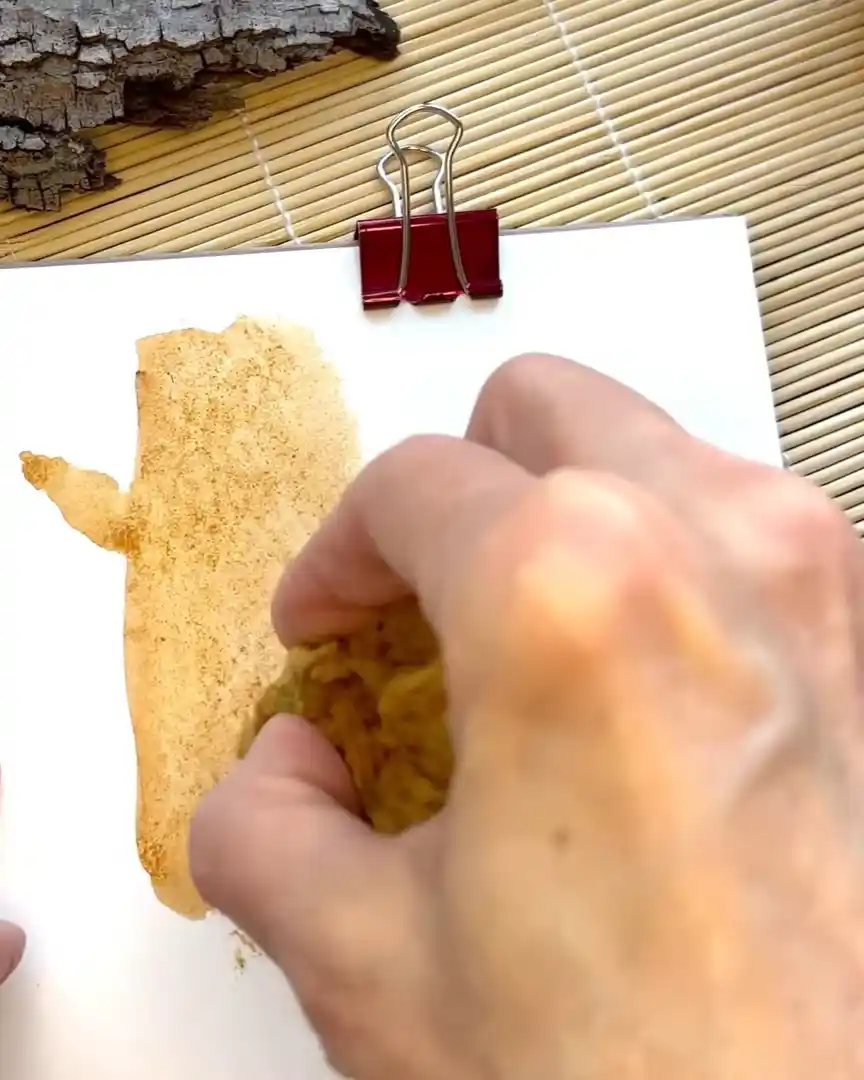
The sponge can be used at any stage, but here, it is applied on the first layer. That way, the texture will peek through from underneath.
Additional sponge work may be added later—it just depends on how the tree develops.
Step 3: Build Shadows and Scratch In Details
Next, the artist continues like before—layering darker tones mostly on the left side to suggest a shadow. The artist avoids dragging the lines straight from top to bottom. Real bark doesn’t grow that way, so the lines are kept slightly jagged.
The artist goes in again with the paint tube, scratching in little bark textures. The sponge is even used again to add more visual interest.
The artist also adds a tiny squirrel hole this time—just for fun.
More darker tones are added to the trunk. The viewer can play with different colors and tools to get that real bark effect.
Some other tools that could be tried:
- Cellophane
- Crumpled foil
But for the artist, the paint tube and sponge give the best results. Working in layers is what makes the bark stand out.

Final Thoughts
Painting tree bark in watercolor is a rewarding way to add life and depth to the artwork. The artist hopes these techniques inspire the viewer to experiment with different textures and layers.
Which trunk style will the viewer try first? Keep practicing, have fun with the tools, and watch the trees grow more realistic with each brushstroke!