
Do you want to create a peaceful winter lake painting with beautiful icy textures? Olga Koelsch will guide you step by step, sharing how she prepares her materials, paints soft skies and bold reflections, and even creates a frozen lake effect using plastic foil.
Whether you’re new to watercolor or already experienced, this easy and enjoyable process makes painting winter scenes feel fun and deeply rewarding.
Let’s get started together!
Contents
- 1 Step 1: Prepare the Tools and Materials
- 2 Step 2: Sketch the Landscape Layout
- 3 Step 3: Paint the Sky with a Wet-in-Wet Technique
- 4 Step 4: Add the Mountain and Forest Details
- 5 Step 5: Paint the Lake Reflection
- 6 Step 6: Paint the Lake Area with Bold Strokes
- 7 Step 7: Use Plastic Foil to Create Ice Texture
- 8 Step 8: Reveal the Frozen Lake Effect
- 9 Final Thoughts
Step 1: Prepare the Tools and Materials
Everything begins with careful preparation. Having the right tools laid out in advance makes the painting process smoother and more enjoyable.
For this winter lake painting, the artist uses:
- Cold-press watercolor paper: Holds water well and provides a pleasant texture.
- A wide brush: Used for large washes across the paper.
- Soft brushes and small synthetic brushes: Reserved for finer details later on.
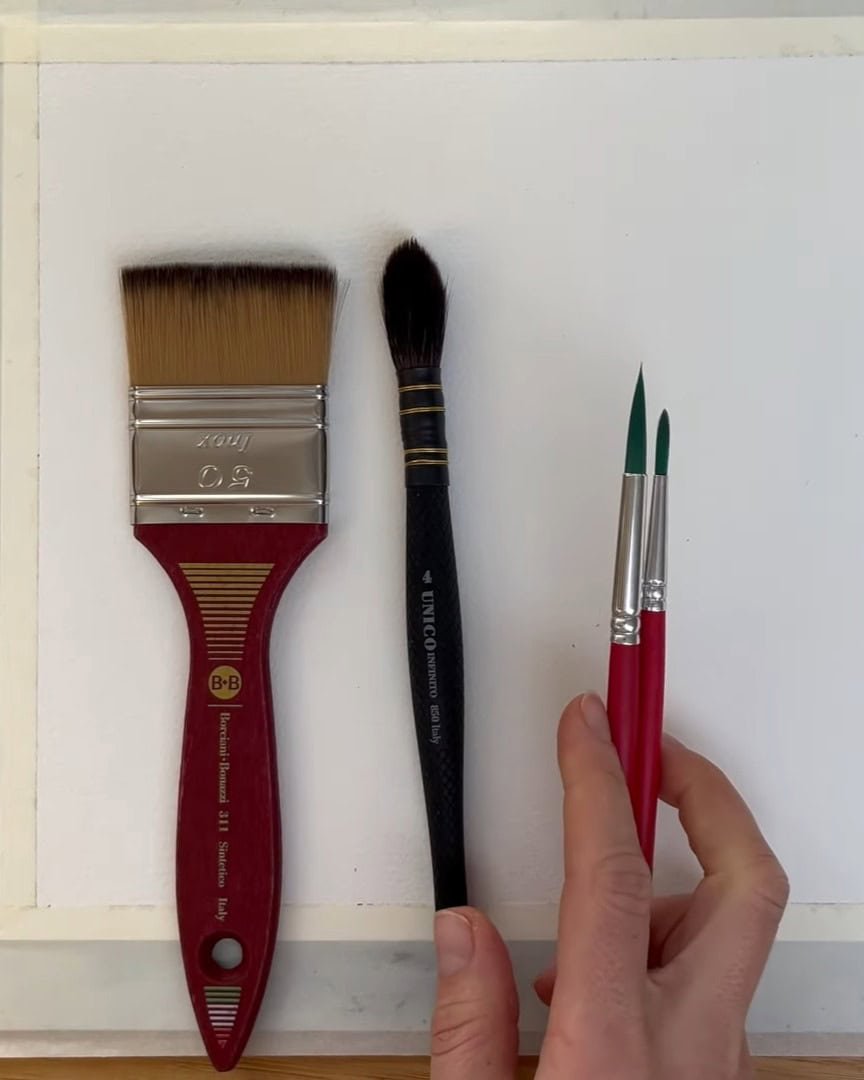
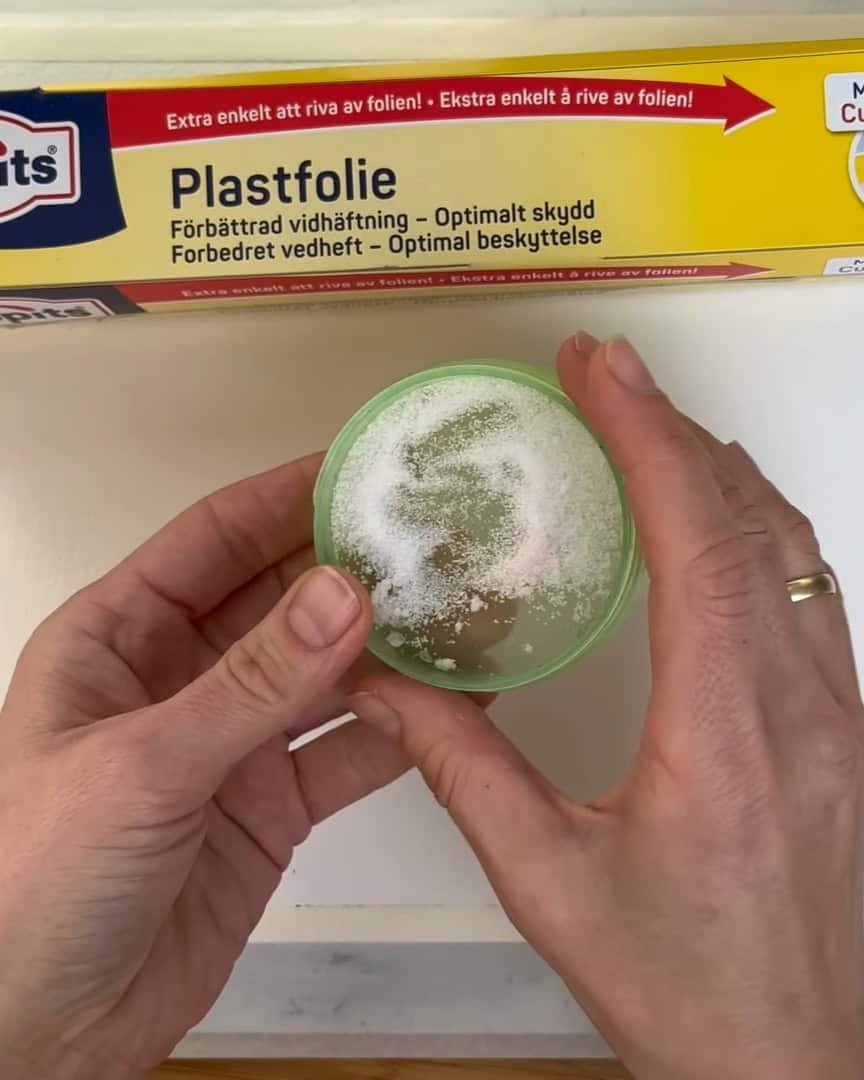
- Plastic foil: A key tool in this painting, used to create an ice-like texture on the lake.
- Salt: Applied selectively to add texture in specific areas.
Before any paint is applied, some composition decisions are made. The horizon line is lifted slightly above the center of the page so the lake becomes the main focal point.
Fewer trees are planned in the composition so they do not crowd the scene or compete with the lake.
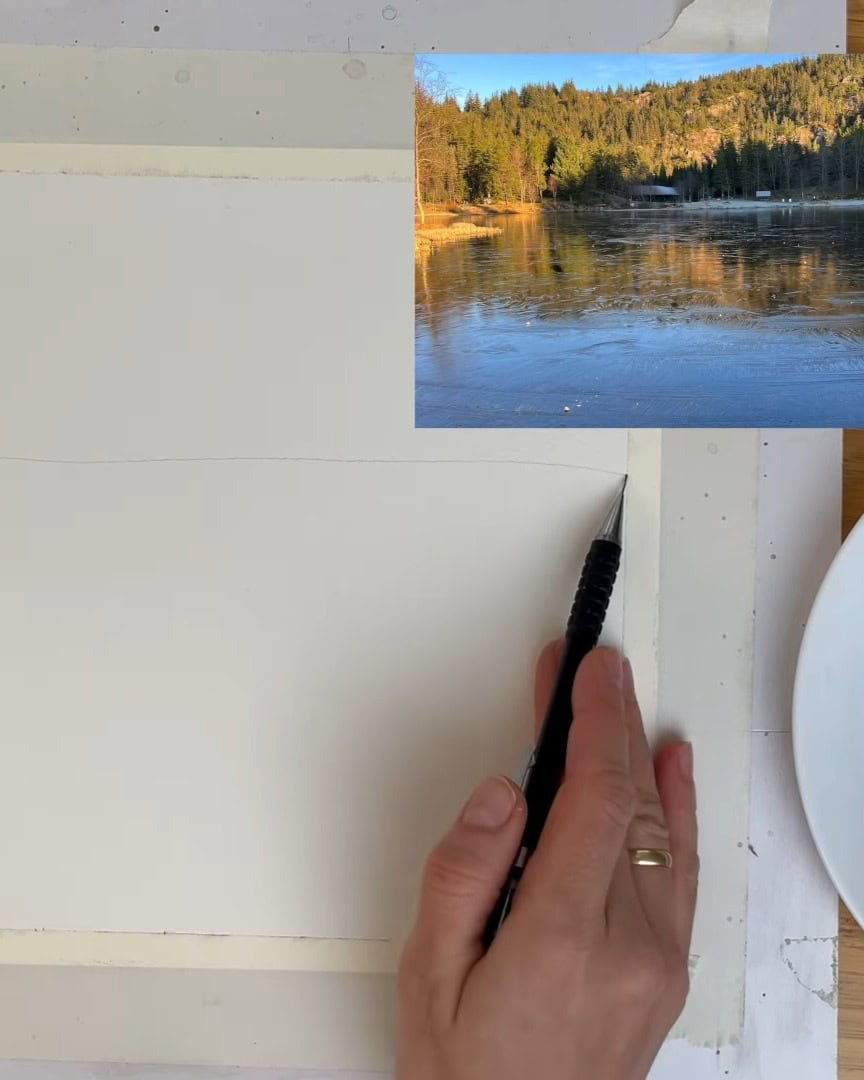
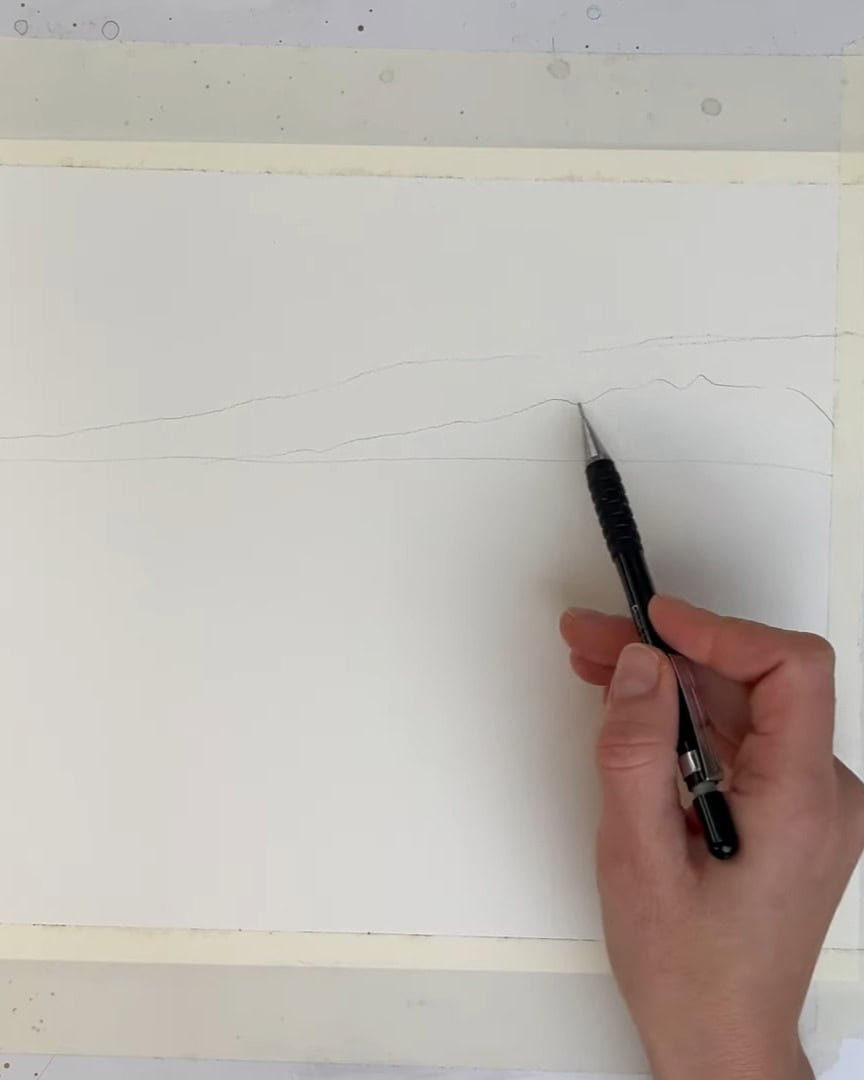
Step 2: Sketch the Landscape Layout
With materials ready, the artist plans the layout with a simple sketch to stay on track during painting.
A small line is drawn to suggest a forest along the mountain. The sunny side and the shady side of the mountain are also marked.
This quick indication ensures that the light direction is not forgotten later: one side will receive sunlight, and the other will remain in shadow. It is a small step that makes a big difference in the final result.
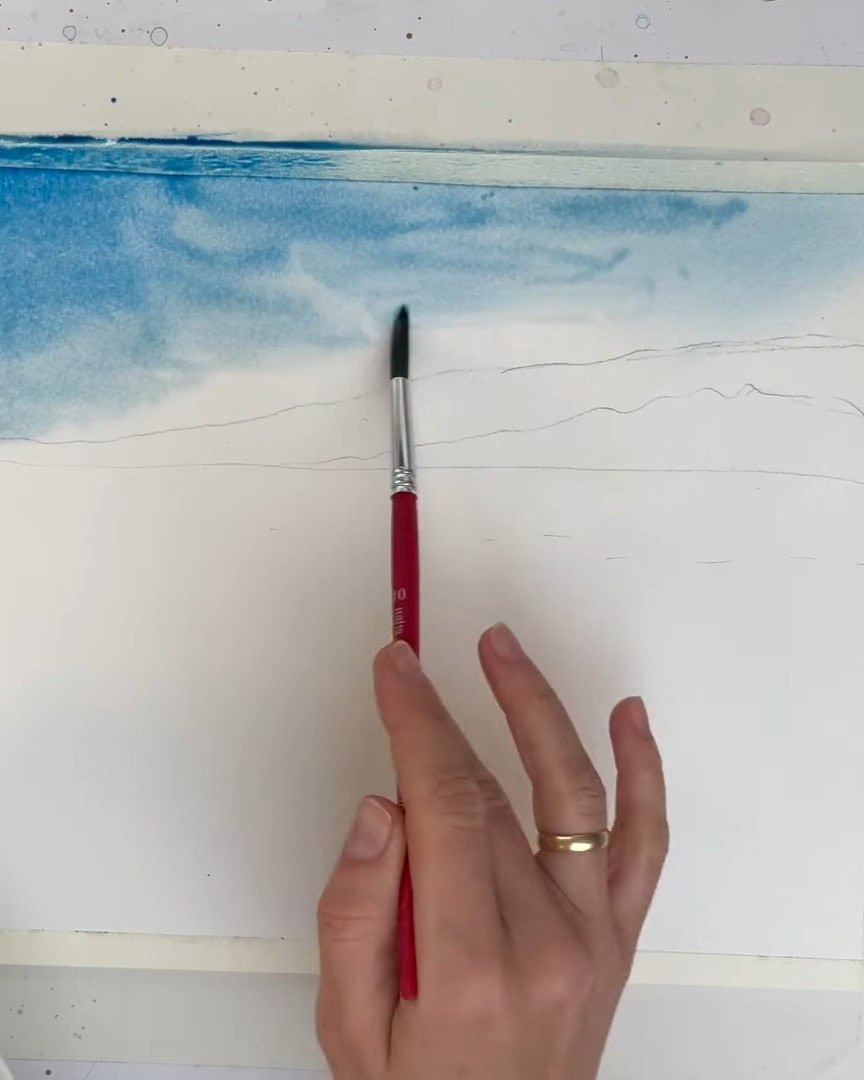
Step 3: Paint the Sky with a Wet-in-Wet Technique
The next stage is to bring the sky to life using a wet-in-wet technique, creating a soft, peaceful background that does not distract from the lake.
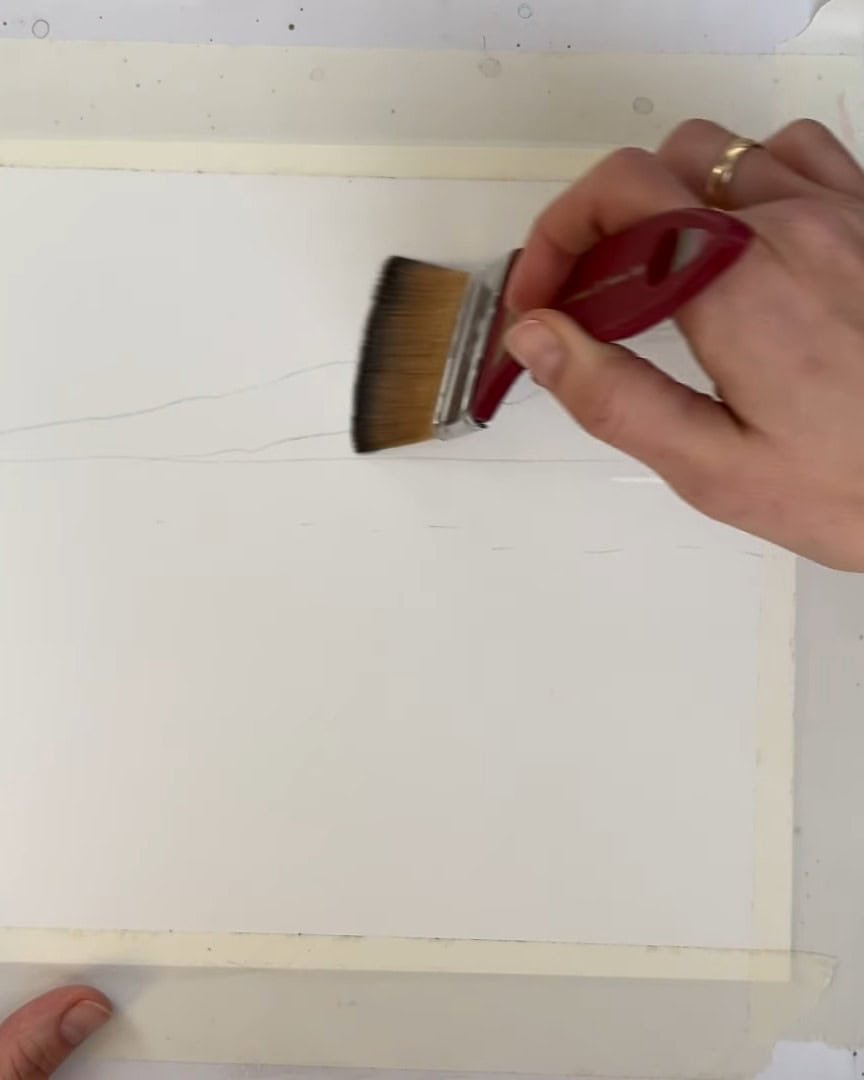
Glaze the Paper First
Only the upper part of the paper is glazed with clean water. All puddles are removed, and the water is spread evenly.
The surface is then left for a minute or two so the water can soak into the paper fibers. The waiting time depends on the room conditions—long enough to prepare the surface, but not so long that it begins to dry.
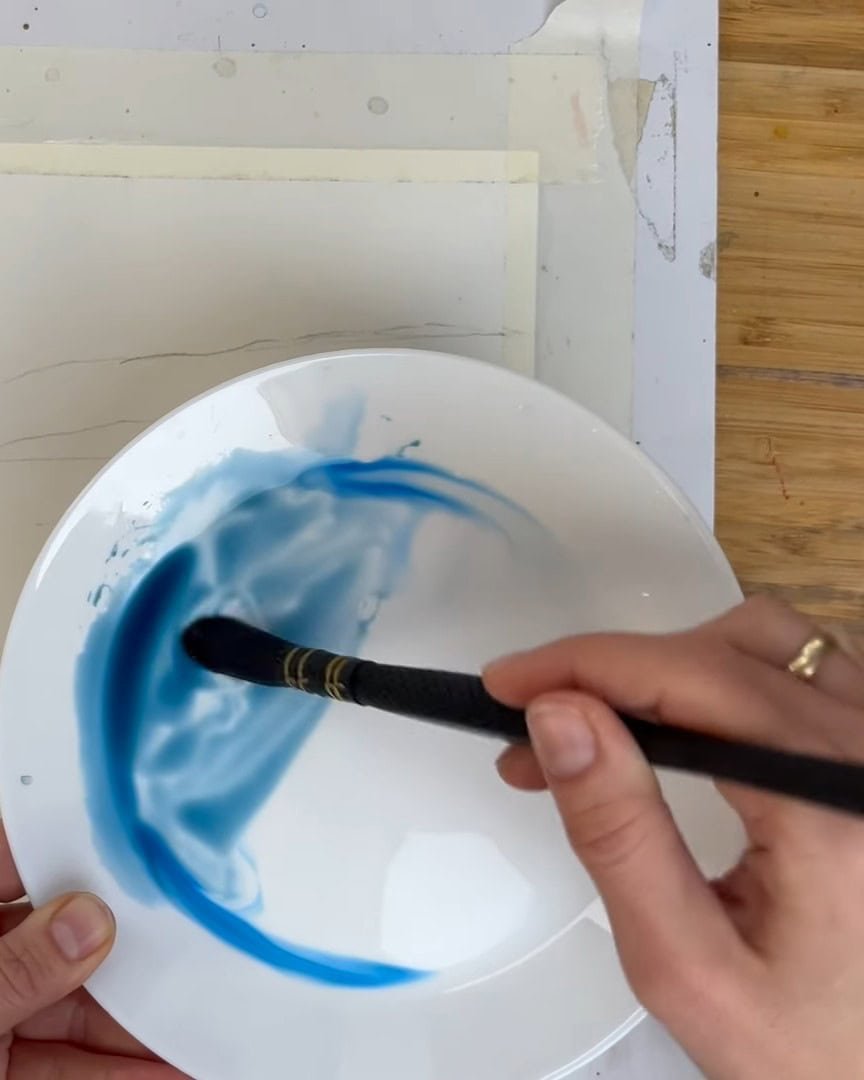
Mix Calm Colors for the Sky and Mountain
While the paper settles, the colors are prepared.
- For the sky: A mix of phthalo blue with a tiny amount of sepia is used. This combination tones down the brightness of the blue, making the sky calm and interesting.
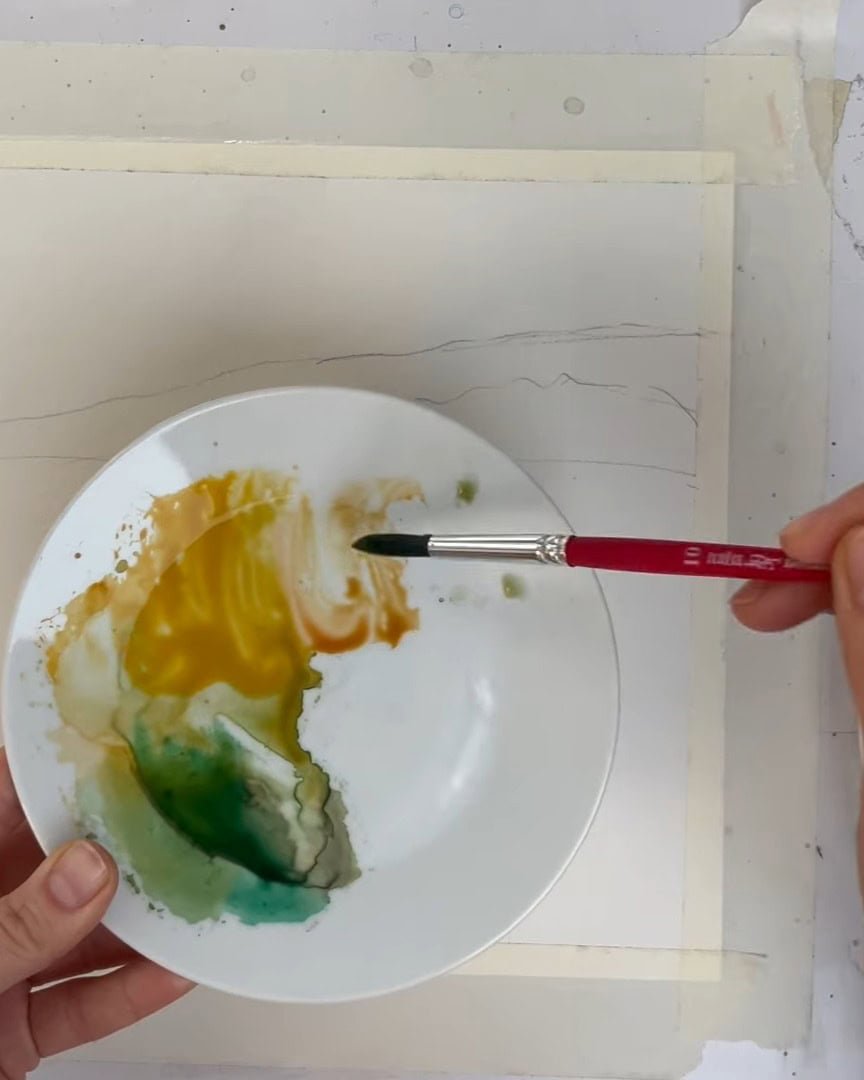
- For the mountain area: Separate mixes are prepared with raw sienna, burnt sienna, and a touch of phthalo green.
Paint the Sky Soft and Loose
The sky is then painted. The upper part is kept brighter than the lower portion because it sits farther away in atmospheric perspective.
This entire area is painted soft, loose, and wet, using gentle strokes. The intent is to keep the sky slightly out of focus, similar to a softly blurred background in a photograph.
The paint is spread gently to create a smooth and subtle sky layer.
Step 4: Add the Mountain and Forest Details
Once the sky is in place, work shifts to the mountain and forest area. Colors are built up step by step, keeping the shapes soft and natural.
Paint the Sunny and Shady Parts
A bright raw sienna is used first to indicate the sunny side of the mountain. Burnt sienna is added for more depth, and sepia is used for darker accents.
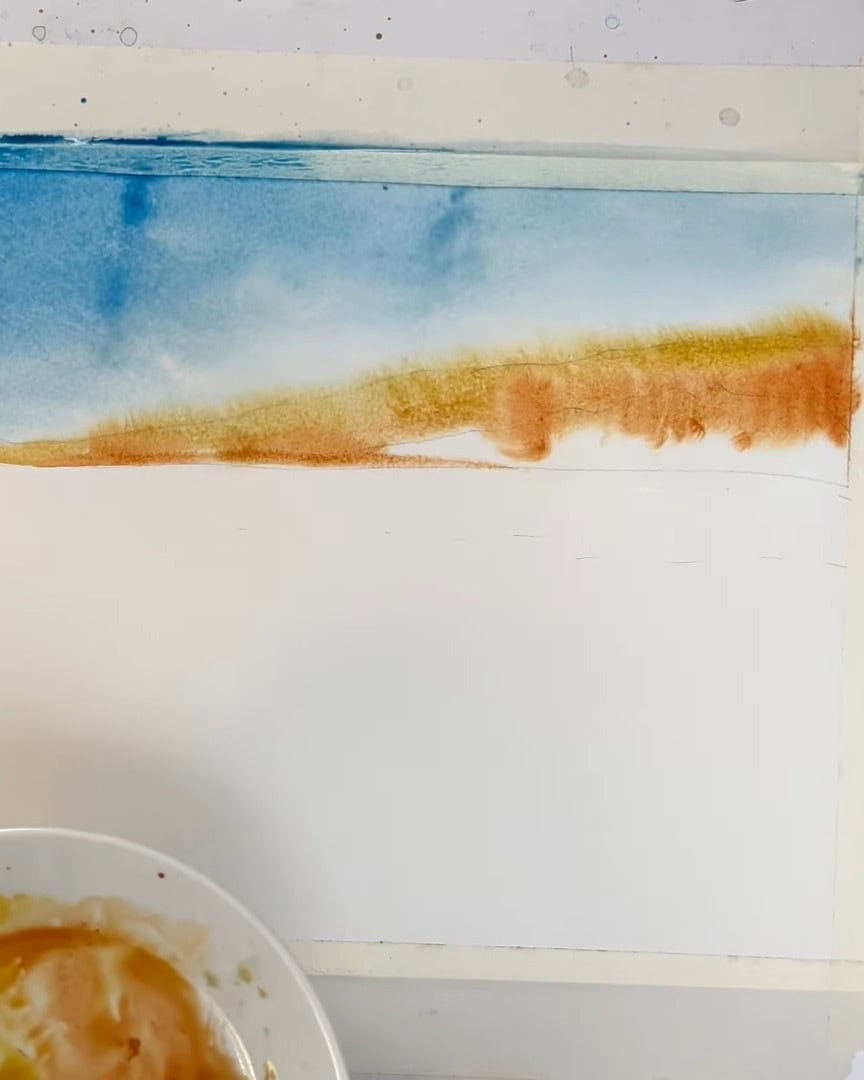
Next, sepia is mixed with phthalo green to create a deep olive green. This rich mixture is used to paint the shady clusters of trees. The shapes are kept irregular and uneven so they do not form a straight, artificial-looking line, avoiding the appearance of a rigid fence.
Create Texture and Natural Flow
Sometimes, the artist lifts the paper slightly, allowing the paint to flow downward. This helps create soft strokes and a sense of growth in the landscape.
If any puddles appear, the brush is dried with a paper towel and the paint is gently spread.
This is done only while the sky is still wet—blending on a dry sky can cause unwanted edges.
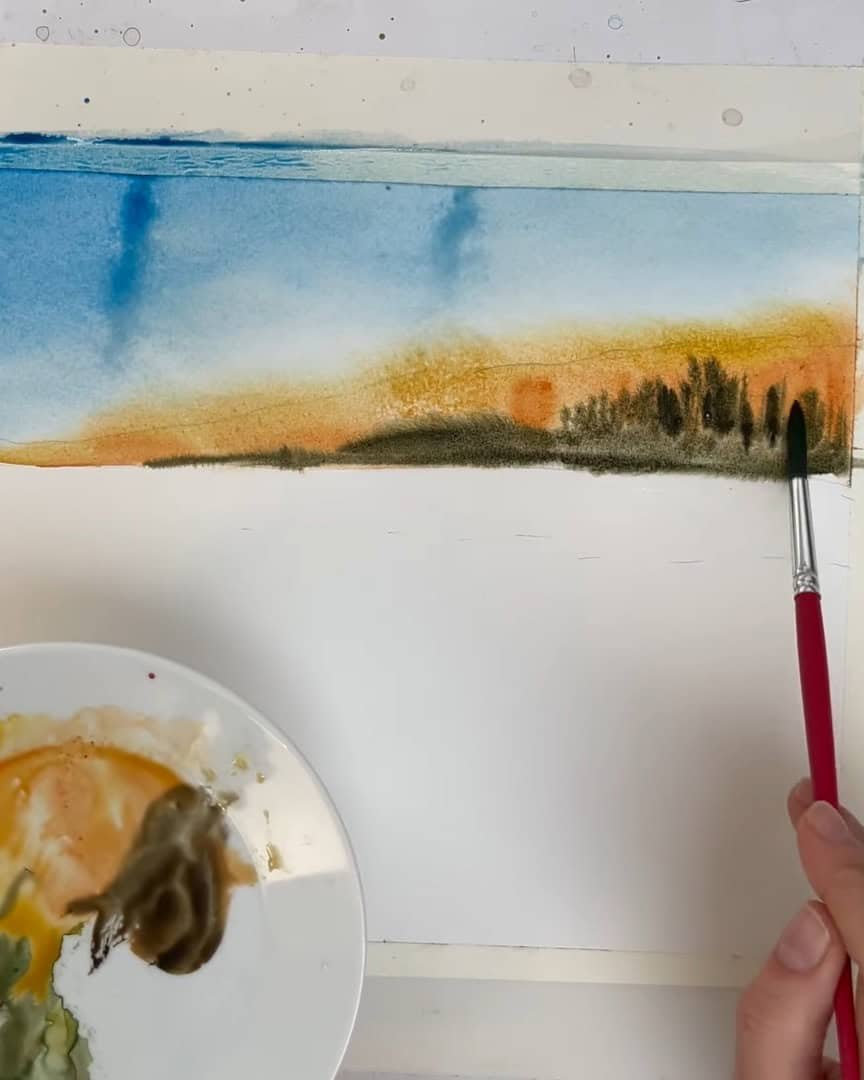
Add Small Details
A wooden toothpick is used to scratch in a few small tree shapes.
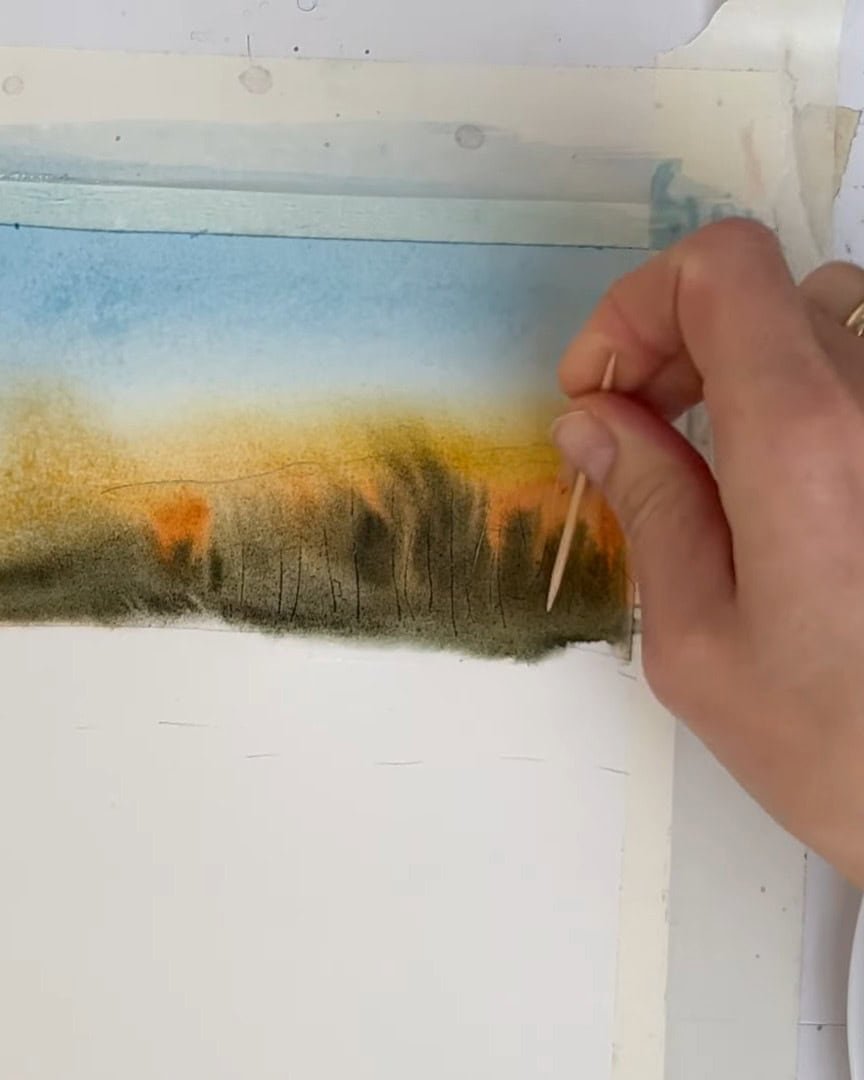
A light sprinkle of salt is added only to the shady part of the mountain, never on the sunny side.

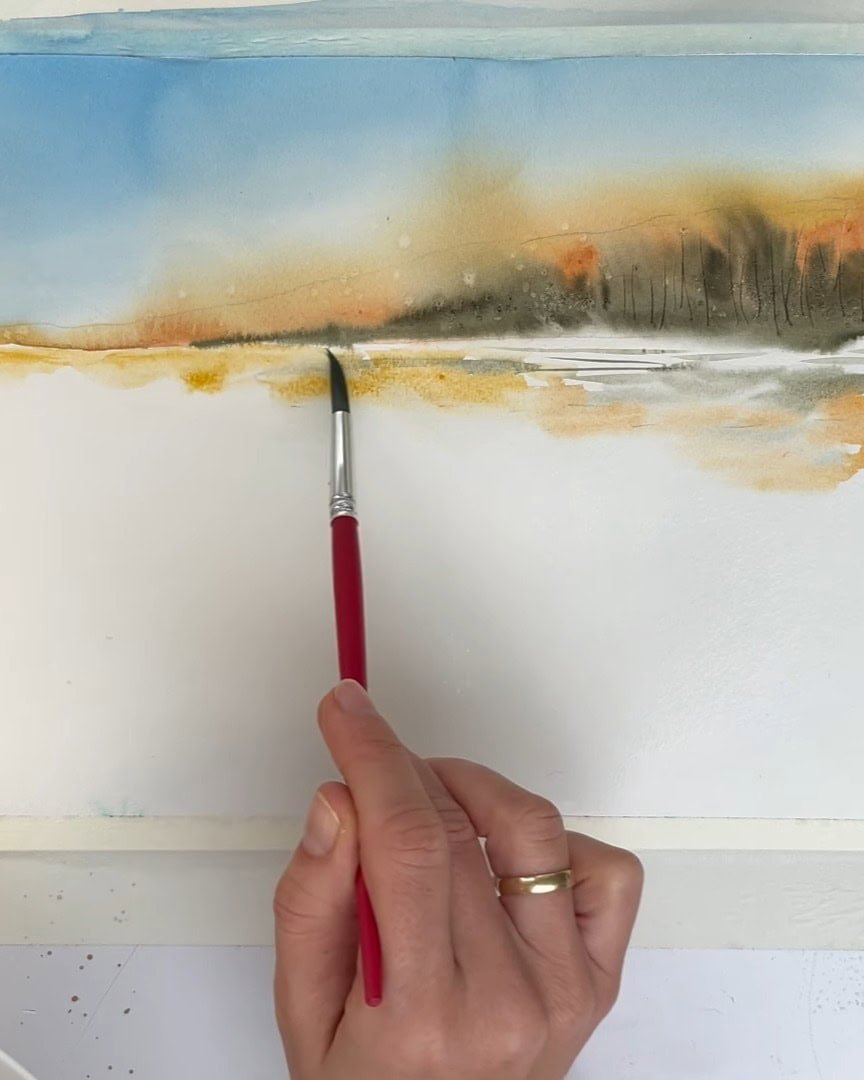
Step 5: Paint the Lake Reflection
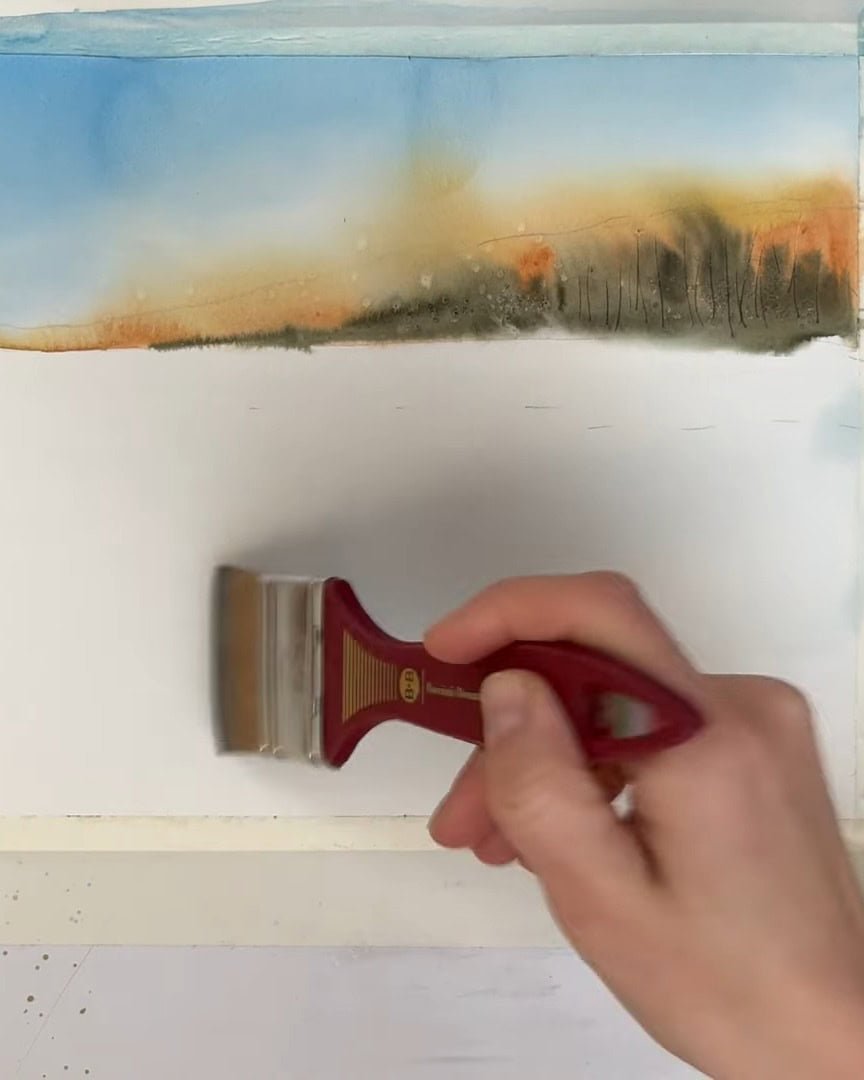
Once the top part is dry, the focus shifts to the lake—this is where bold colors and soft reflections bring the scene to life.
Glaze the Lake Area
The bottom part of the paper is glazed with clean water, taking care not to touch the upper area near the horizon line.
If a small white stripe appears between the sky and the lake, it will be corrected later with a fine brush. Water is applied boldly and evenly across the rest of the lake area.
Mix and Apply Rich Colors
While the paper absorbs the water, the lake colors are mixed. A generous amount of phthalo blue is combined with sepia to create a deep, bold turquoise—rich, dark, and perfect for a dramatic lake.
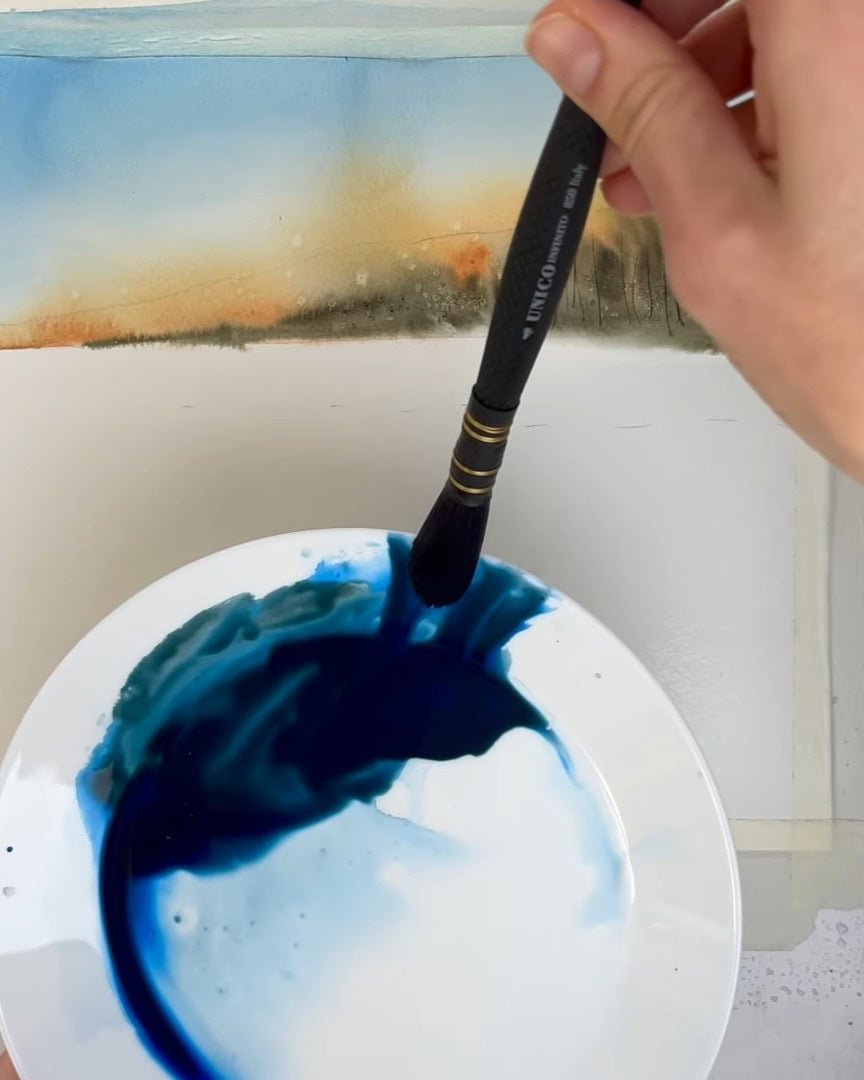
Paint on the brush is saved by squeezing out the excess before switching to a smaller tool.
Add Reflections
Mountain colors are mirrored loosely across the lake. For example, if a red-orange area appears on one part of the mountain, the same tone is reflected directly beneath it.
These reflections are added intuitively; anything that looks slightly off often blends away naturally.
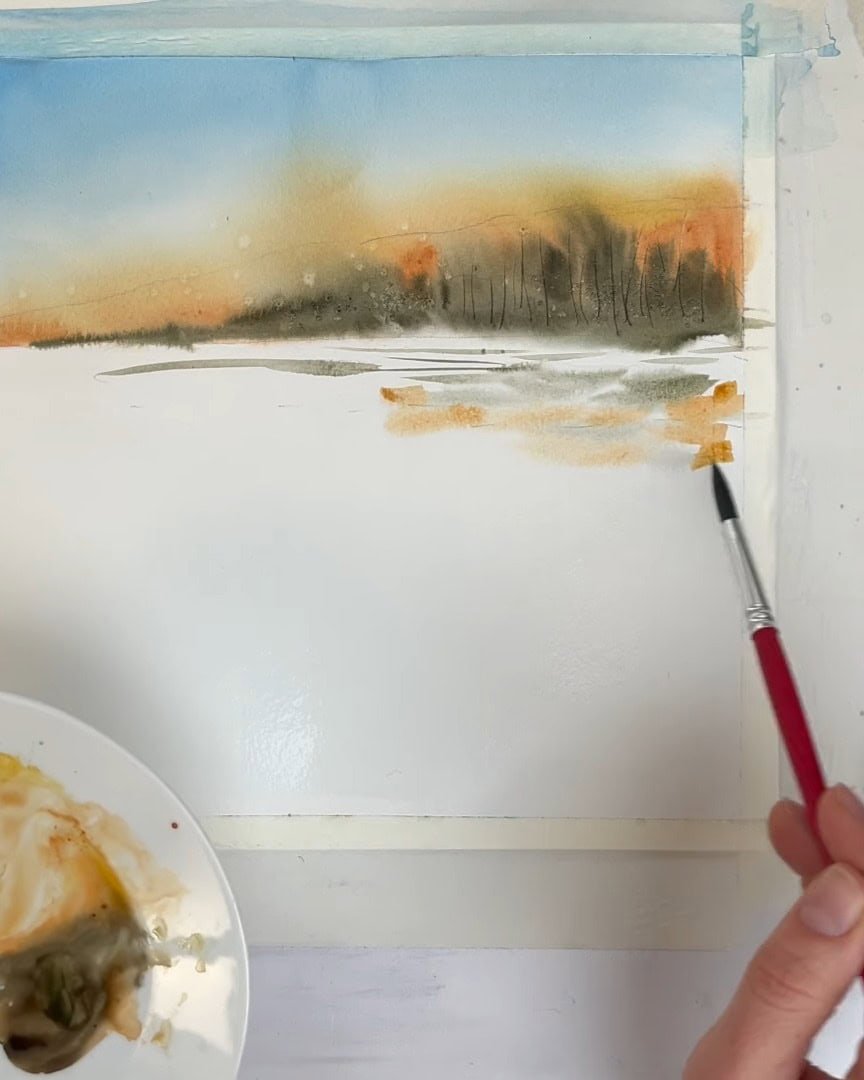
The thin white line at the horizon is then removed for a seamless transition.
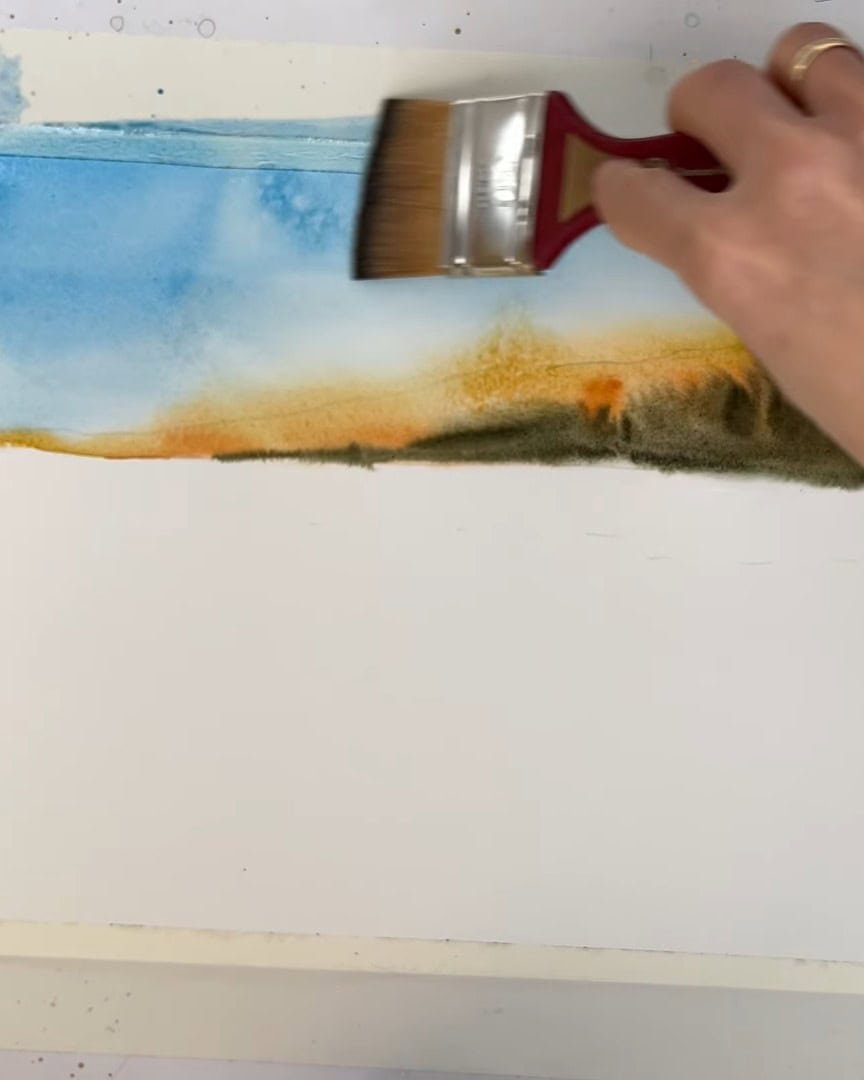
Step 6: Paint the Lake Area with Bold Strokes
The lake is painted with strong, energetic strokes. Beginning at the bottom, the deepest and boldest colors are placed first using wet, rich paint rather than dry strokes.
Small white gaps are intentionally left between strokes to add sparkle and visual movement.
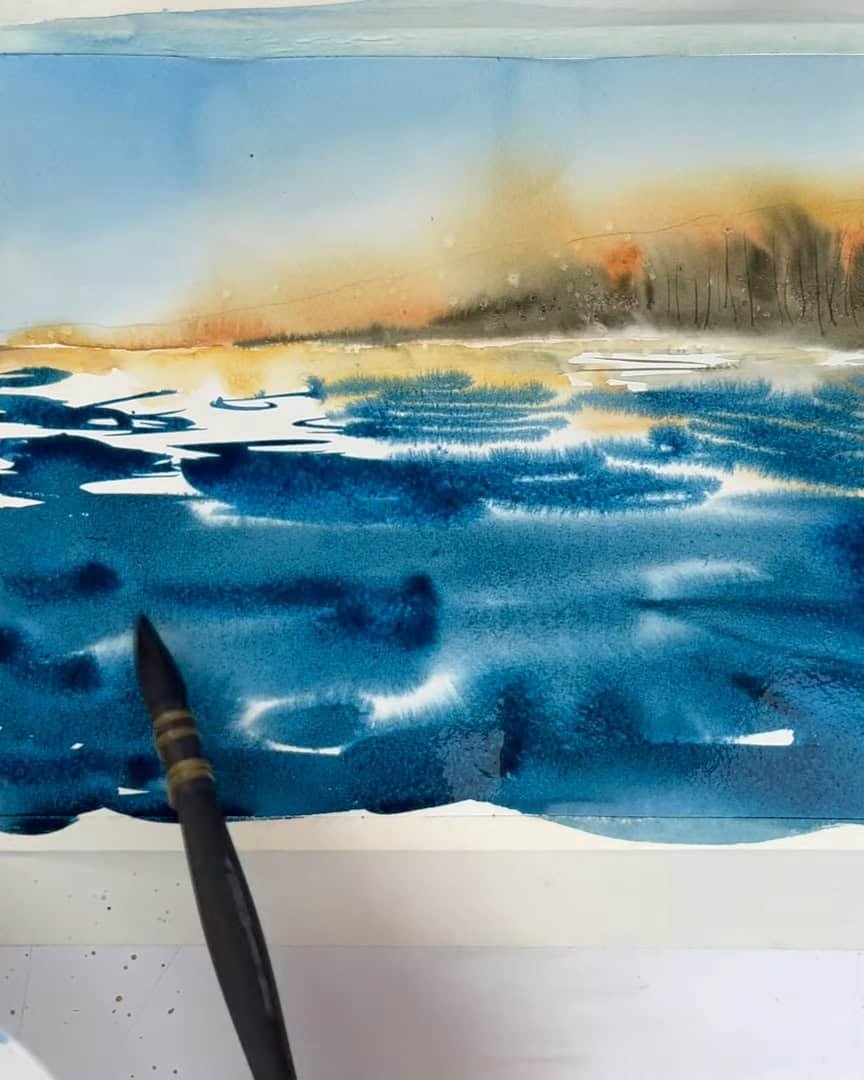
As the brush moves upward, the tip is used to paint over the reflections. Every bit of paint from the mixture is used to maintain vibrancy.
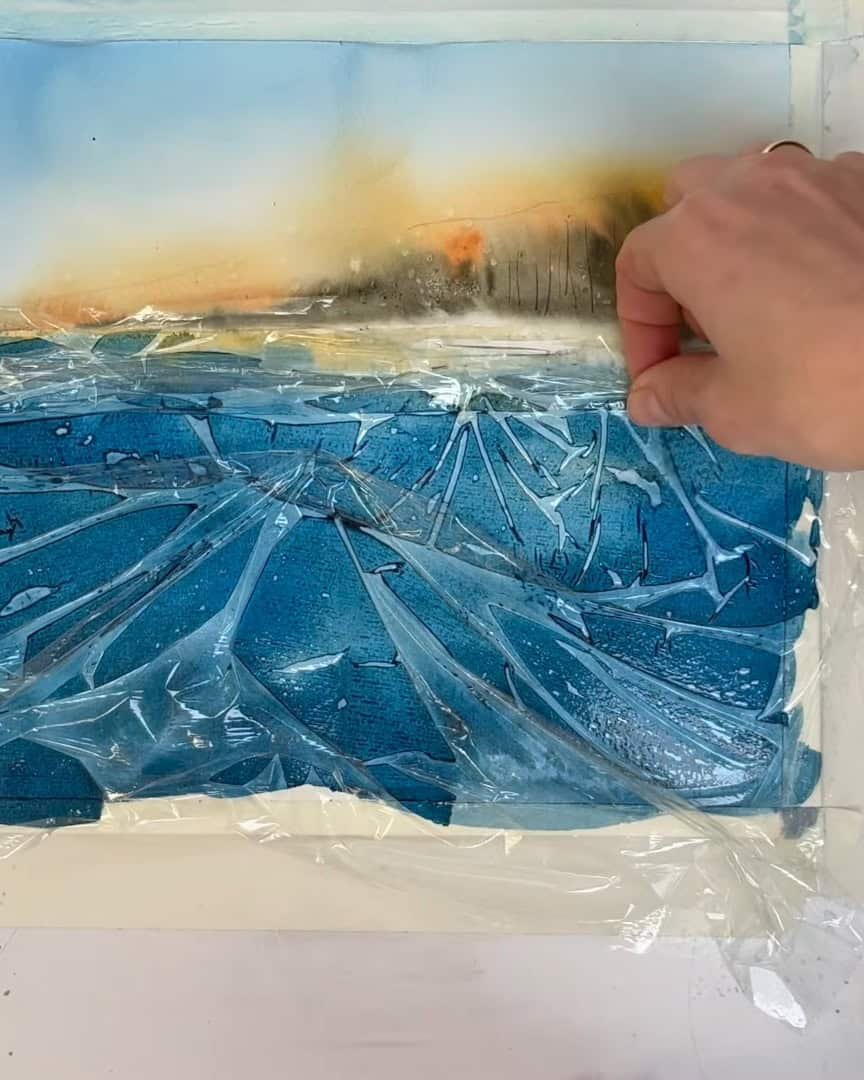
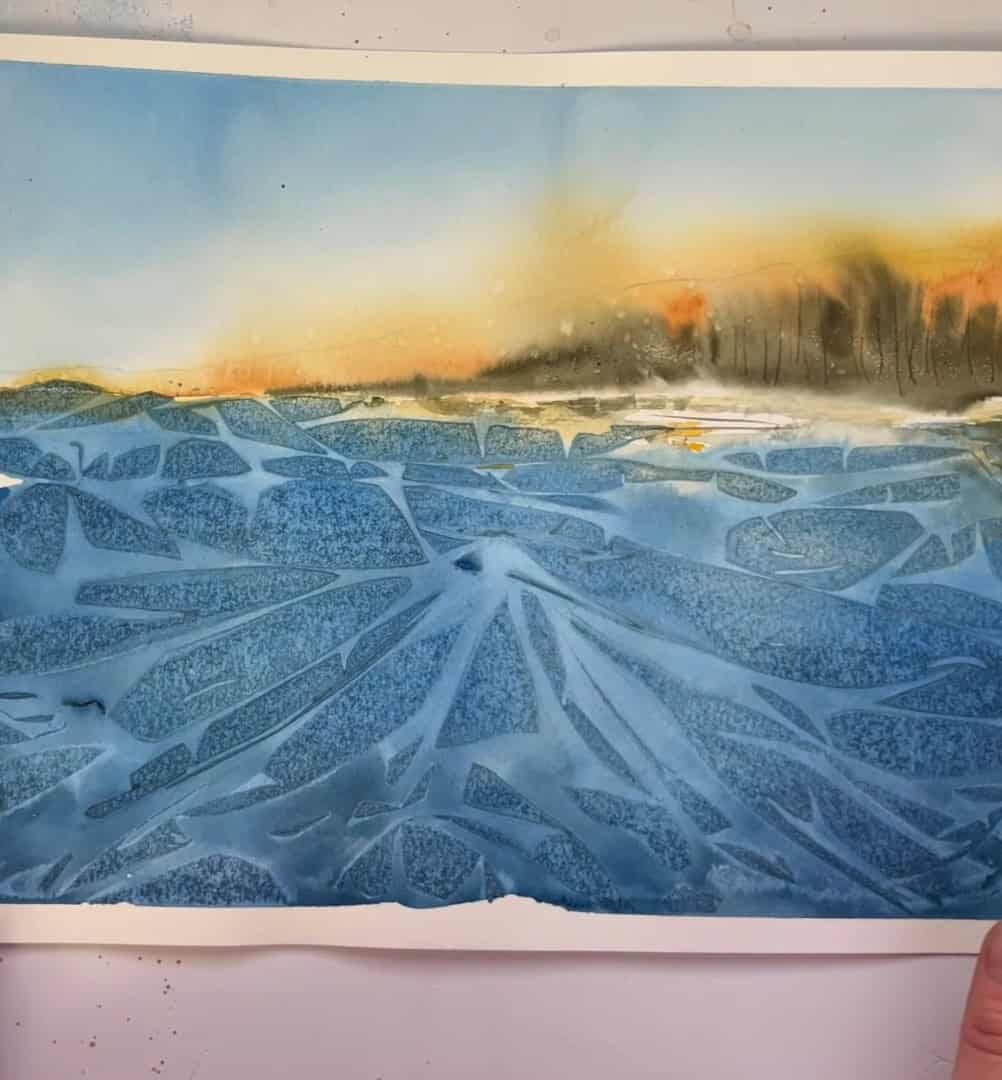
Step 7: Use Plastic Foil to Create Ice Texture
A key part of this technique is creating the frozen-lake effect. A sheet of plastic foil, slightly larger than the painting, is gently placed over the wet lake.
Immediately, an icy texture begins to form. The foil is shifted and adjusted—lifted, pressed, and moved slightly—to create natural-looking folds. Smaller folds are added near the top for a more delicate effect.
Nothing is overplanned; the best textures appear spontaneously.
Step 8: Reveal the Frozen Lake Effect
The painting is left to dry completely, which may take several hours. The foil is not removed until everything is fully dry.
Then, the foil is lifted carefully, revealing a beautiful frozen-lake texture beneath.
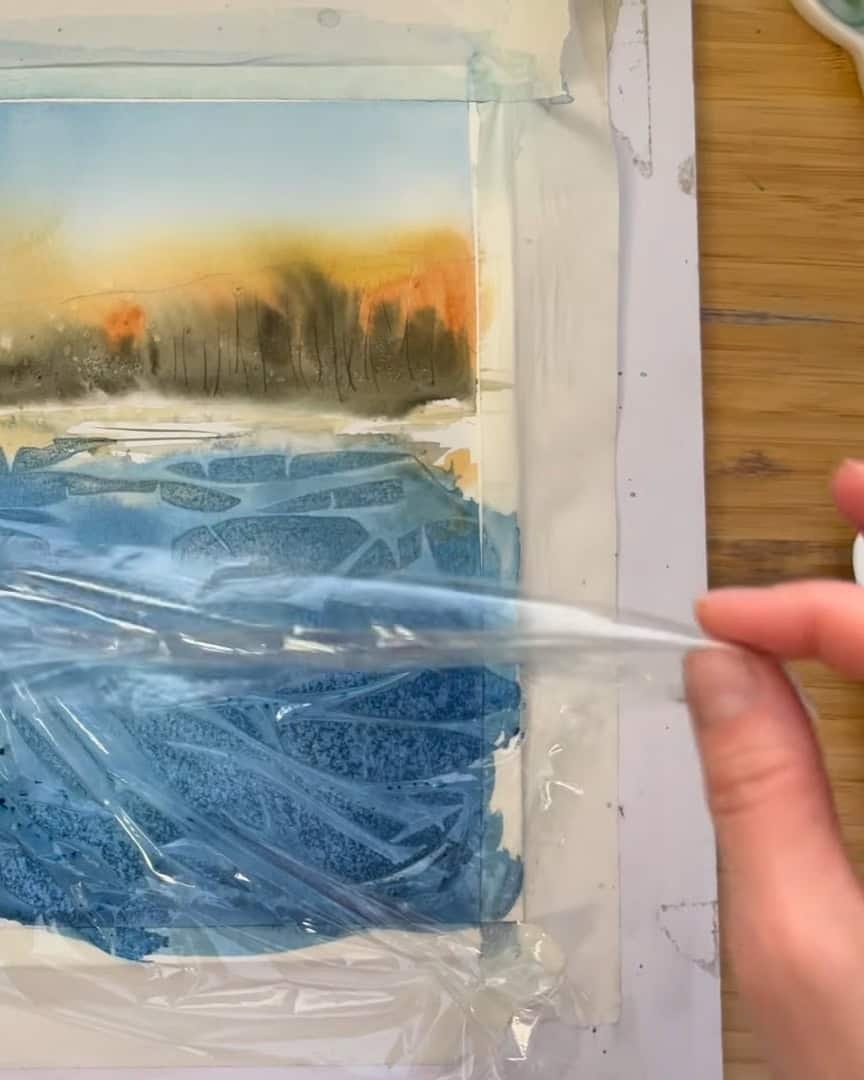
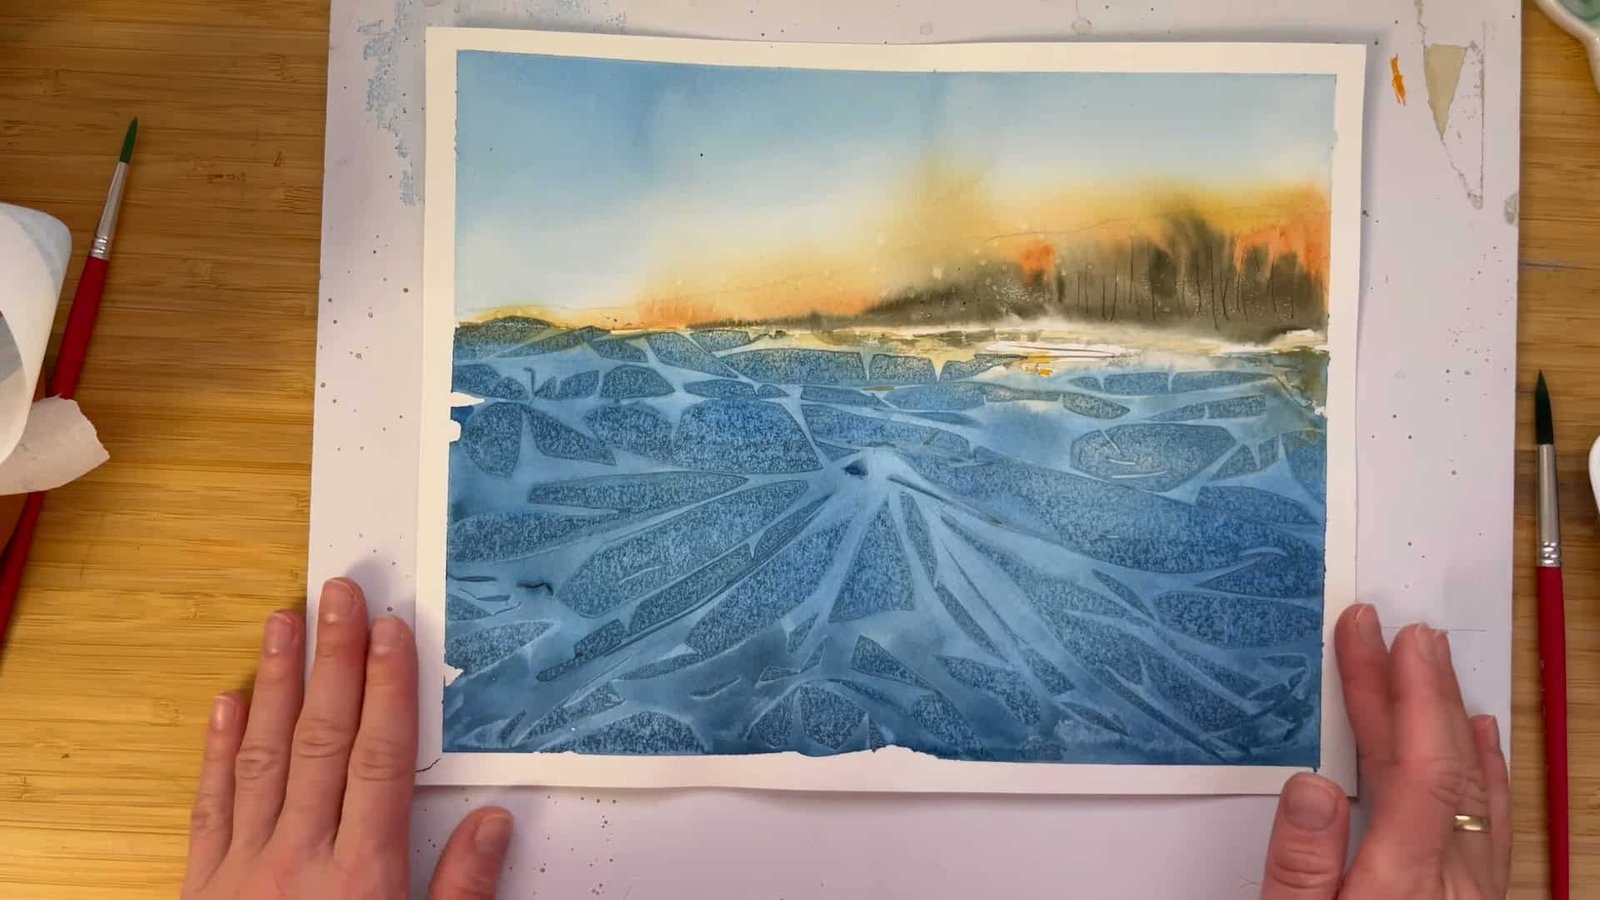
After removing the tape, the winter lake painting is complete.
Final Thoughts
Painting a winter lake scene is a wonderful way to explore color, texture, and light. Even simple tools—like plastic foil—can create stunning icy effects that make the landscape feel alive.
This process encourages experimentation, playfulness, and enjoyment. With each layer and texture, a calm yet vibrant winter landscape takes shape.