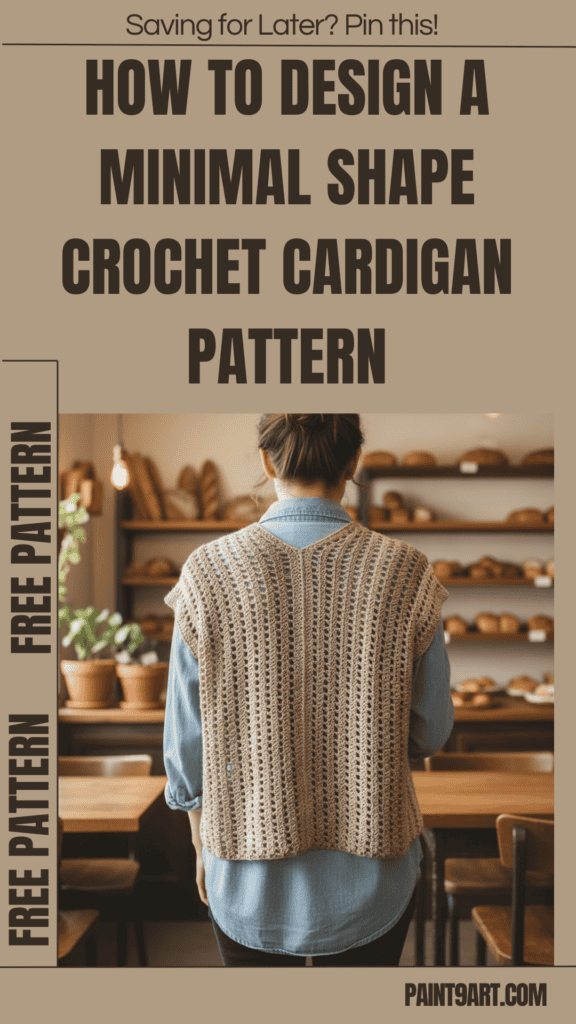
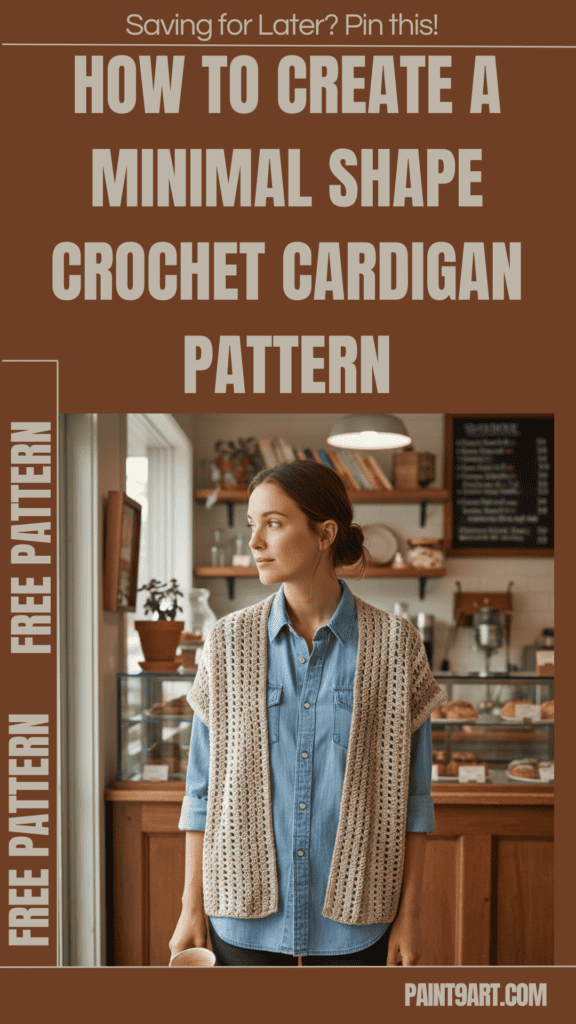
Looking for a modern, minimal, and beginner-friendly crochet garment? This Free Minimal Shape Crochet Cardigan Pattern is made from just two rectangles, making it an easy yet stylish project you’ll actually finish—and wear.
Contents
About the Design
Skill Level
Easy
Why You’ll Love This Pattern
This cardigan uses a clean, minimal construction that works beautifully across seasons. The relaxed shape flatters many body types, and the open stitch pattern keeps it light yet cozy.
Finished Measurements
Directions are for size Small. Changes for sizes Medium, Large, X-Large, 2X, and 3X are in parentheses.
Finished Chest:
48 (52, 56, 60, 64, 68)”
[122 (132, 142, 152, 162, 173) cm]
Finished Length:
25 (25, 29, 29, 33, 33)”
[63.5 (63.5, 73.5, 73.5, 84, 84) cm]

Materials Needed
- Yarn: 4 (5, 6, 6, 8, 8) balls, color Cappuccino
- Yarn weight: Medium 4
- Crochet hook: 6 mm [US J-10]
- Locking stitch markers
- Yarn needle
Gauge
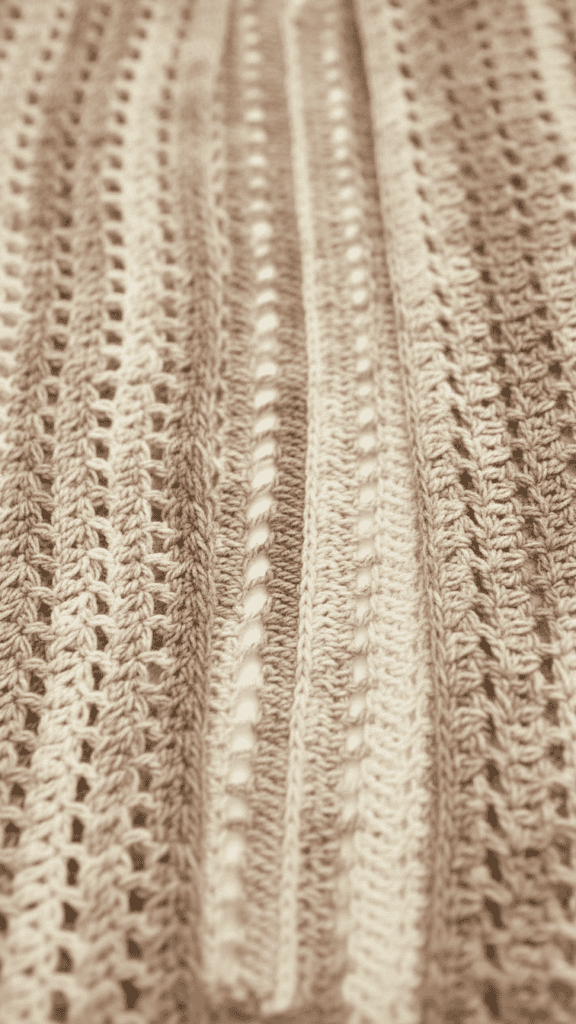
14 dc = 4″ [10 cm]; 8 rows = 4″ [10 cm] in double crochet.
Check your gauge. Use any size hook to obtain the gauge.
Note: When measuring gauge, lay the material on a flat surface without stretching it. Because of the stitch pattern, the gauge measure will be approximate.
Pattern Notes
- Cardigan is worked in two long rectangles which are then folded in the middle for shoulder.
- Each rectangle forms one side of the front and one side of the back.
- The center back seam is joined, leaving room for the neck opening.
- Then the two side seams are joined, leaving room for the armholes.
- Finally, borders are added to bottom, armholes, and front opening.
- Panels are worked lengthwise from side edges to center seam.
- Both Panels are worked the same.
Special Technique
Fsc (Foundation Single Crochet): Ch 2, insert hook in 2nd chain from hook and draw up a loop (ch stitch made) *yarn over and draw through 2 loops on hook (sc made), insert hook in ch stitch and draw up a loop; repeat from * for as many Fsc as called for in pattern.
Crochet Instructions
Front and Back Panels (Make 2)
Method 1
Row 1: Work 171 (171, 199, 199, 227, 227) fsc.
Method 2
Ch 172 (172, 200, 200, 228, 228).
Row 1: Sc in 2nd ch from hook, sc in each ch to end – 171 (171, 199, 199, 227, 227) sc.
For Both Methods
Row 2: Ch 3 (counts as first dc here and throughout), turn, dc in each sc across – 171 (171, 199, 199, 227, 227) dc.
Mark center dc for shoulder seam.
Row 3 (Right Side): Ch 3, turn, dc in next dc, (ch 1, skip next dc, dc in next dc) across, dc in last dc –
87 (87, 101, 101, 115, 115) dc and
84 (84, 98, 98, 112, 112) ch-1 spaces.
Row 4: Ch 3, turn, dc in each dc and each ch-1 space across – 171 (171, 199, 199, 227, 227) dc.
Rows 5–24 (26, 28, 30, 32, 34): Repeat Rows 3–4.
Fasten off.
Mark center dc in last row for shoulder seam.
Finishing
Joining Center Back Seam
Measure and mark 3″ [7.5 cm] down from marked center st along last row of Back side of each Panel for Neck.
Joining Row: With right sides together and working through both layers, join yarn at lower edge with slip st in first st of both Panels, sc in each dc to Neck marker. Fasten off.
Joining Side Seams
Measure and mark 8 (8, 9, 9, 10, 10)”
[20.5 (20.5, 23, 23, 25.5, 25.5) cm]
on either side of marked center st along first row of each Panel for Armholes.
Turn sweater inside out, lining up sts.
Joining Row: With right sides together and working through both layers, join yarn at lower edge with slip st in first st of both Panels, sc in each sc to first marked Armhole marker. Fasten off.
Repeat for opposite side seam.
Bottom Border
Round 1: With right sides facing, join yarn at bottom right front corner of Cardigan with a slip st, ch 1, working along front edge, sc in each dc and ch-1 space up Right Front, along Back neck edge to back seam, sc along remaining Back neck edge and Left Front edge to lower edge, working one sc in end of sc rows, 2 sc in end of each dc row and working sc in each seam, sc around to first sc, slip st in first sc.
Fasten off.

Armhole Border
With right sides facing, join yarn in st before one side seam with a slip st, ch 1, sc in same st, sc in each st around, skipping side seam, slip st in first sc.
Fasten off.
Repeat for opposite Armhole. Weave in ends.
Blocking
Place cardigan on flat surface over a towel and spray with cold water to flatten edges and straighten sides if needed. Flatten edges and corners with fingers and leave until completely dry.
Abbreviations
- ch = chain
- cm = centimeters
- dc = double crochet
- mm = millimeters
- sc = single crochet
- st(s) = stitch(es)
- [ ] = work directions in brackets the number of times specified
Final Thoughts
This free minimal shape crochet cardigan proves that simple construction can still deliver stunning results.
Grab your yarn, enjoy the process, and create a timeless handmade garment you’ll reach for again and again.