

Heyyyyy
Starting to crochet can feel tricky, especially for beginners. A scarf is a great first project and needs just basic crochet techniques. This guide will show simple steps to make your own cozy scarf using a crochet hook and yarn.
Get ready to start your new hobby!
Contents
Materials
To start, you will need a few simple tools. Gather everything before crocheting to save time and stay focused!
100% acrylic yarn
Acrylic yarn is great for beginner crochets. It is affordable, easy to use, and shows stitches well.
Weight 4 or 5 acrylic yarn works best because it is easier to handle. Lighter colors make threads more visible while crocheting. Many enjoy brands like Saver 100 from Ice Yarns; each skein offers 175 meters of good-quality thread for practice projects such as scarves or washcloths.
5.5 mm crochet hook
A 5.5 mm crochet hook works well for beginners. It pairs perfectly with Worsted/Aran Weight 4 yarn, making it simple to create smooth stitches. This size is great for learning basic moves like single crochet or chain stitch.
The hook gives a balanced grip that helps control tension. With this tool, crocheters can work on patterns that turn out neat and pretty! For larger projects, some might use a US K/10.5 (6.5 mm) crochet hook instead, but the 5.5 mm fits most scarf designs nicely.
Scissors
Scissors play a key role in any crochet project. Crocheters need them to cut yarn cleanly, especially during color changes. For example, while crocheting a scarf, you might follow steps like “chain one, cut the yarn with scissors leaving a length.” This ensures neat edges and prevents fraying.
They are also useful for trimming excess yarn after weaving in loose ends. Using small sharp scissors makes it easier to create tidy finishes on projects like beginner crochet scarves.
Adding them to your tool kit saves time and keeps your work looking polished!
Sewing needle
A sewing needle helps finish a scarf by weaving in loose yarn ends. It secures the yarn tails after color changes, giving the project a clean look. This tool ensures no frayed edges or messy knots remain visible on your crochet scarf.
Use it to hide tails along stitches for a professional touch. A darning needle, which has a larger eye, works best with thicker yarns like acrylic or wool blends. Keep one handy in your kit to make every scarf neat and polished!
Ruler
A ruler helps keep the scarf accurate in size. It checks if the chain length matches the desired width, like 11 inches for a cozy fit.
Measuring early avoids mistakes later. This simple step ensures the beginner crochet project stays on track from start to finish.
Crochet Scarf Patterns
You can mix and match yarns to create fun looks. Try playing with colors and stitch rows for unique styles!
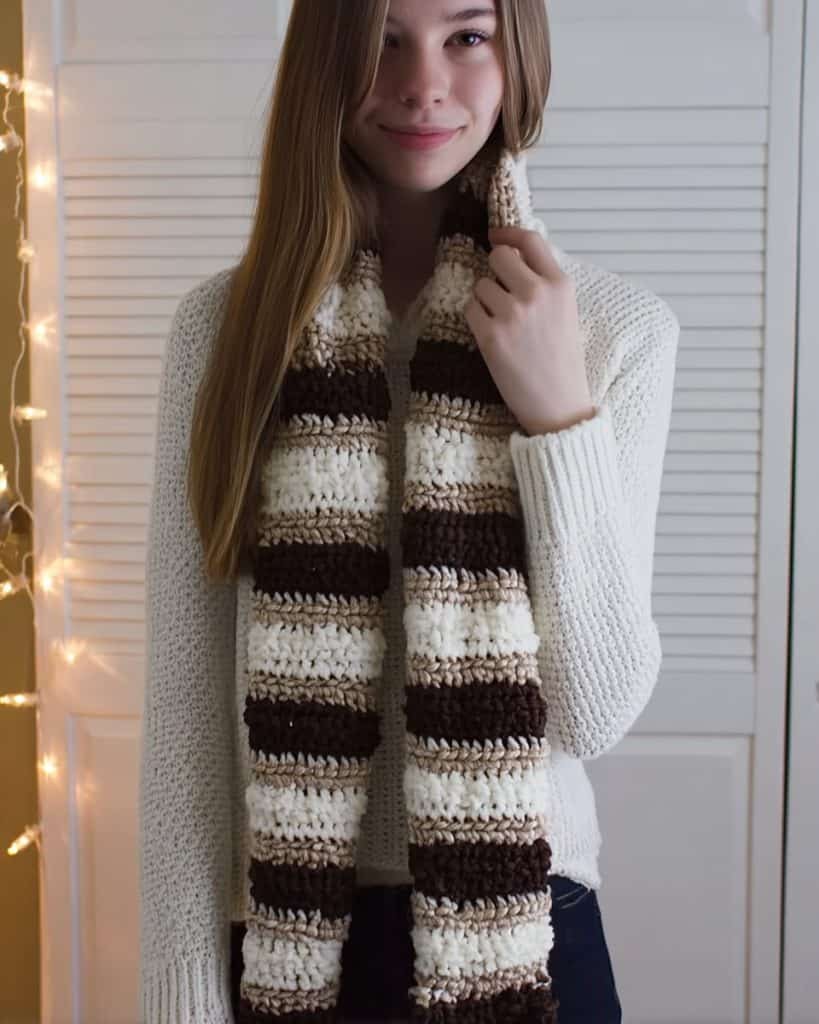
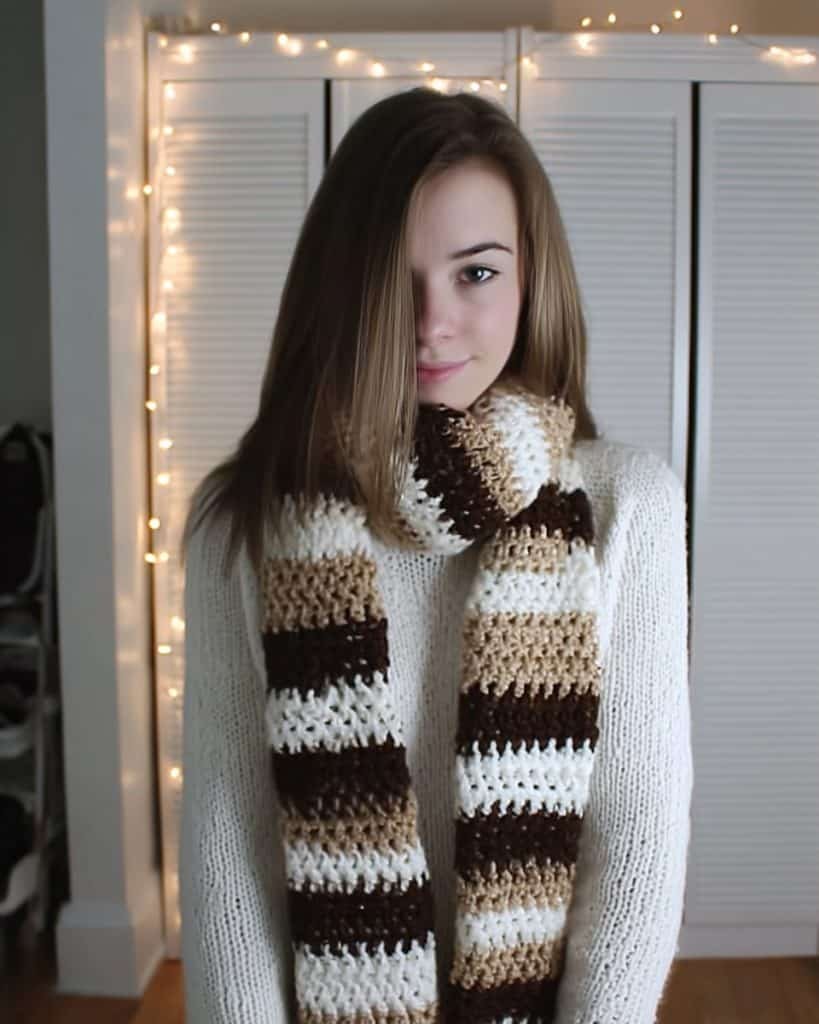
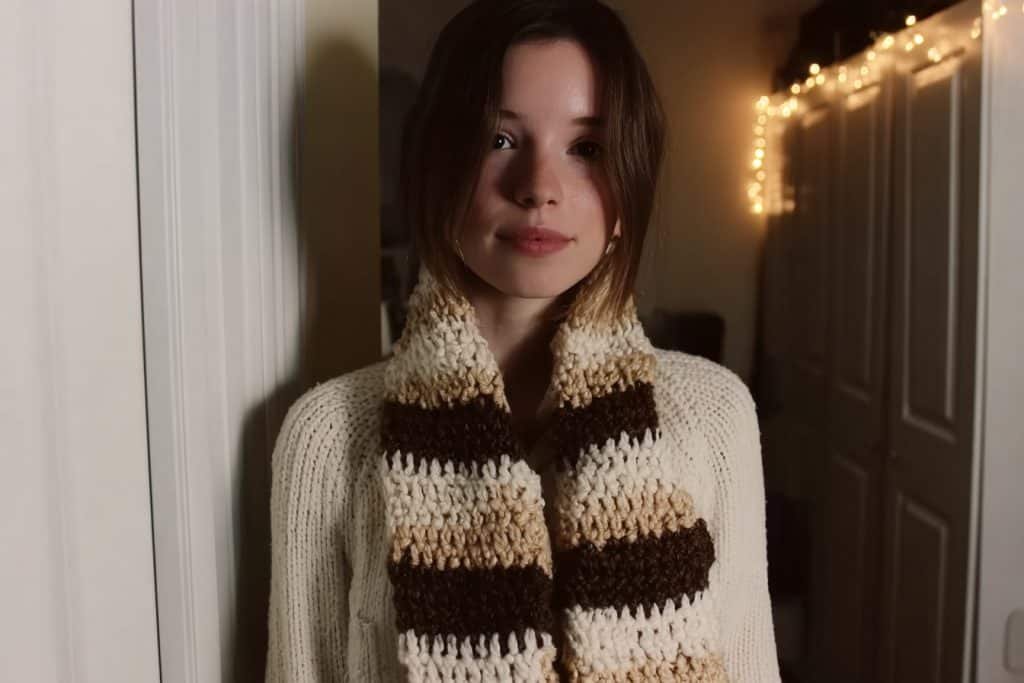
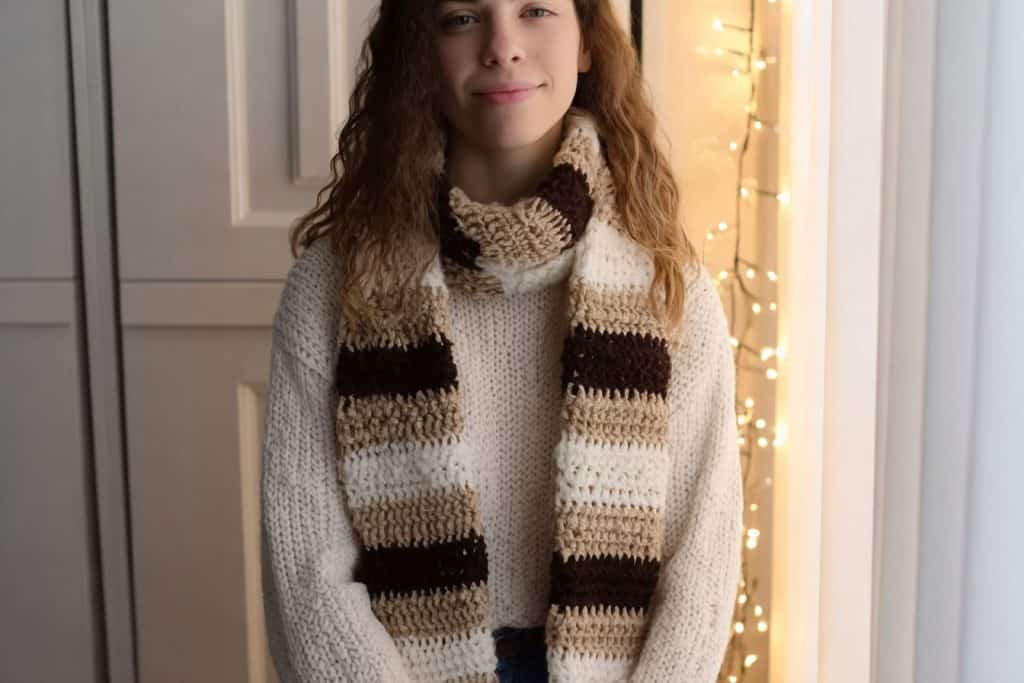
Brown, tan, and cream color scarf with variable rows
This scarf uses 100% acrylic yarn in brown, tan, and cream shades. The mix of colors adds warmth and texture to the design. Its rows are not uniform in size, giving it a fun, playful look.
Beginners can try this pattern to explore different row sizes and color changes. A crochet hook with a 5.5 mm size will work best for this project. This simple crochet scarf lets crocheters experiment with stitch counts without stress!
Wool and acrylic scarf crocheted lengthwise
A scarf made of 80% wool and 20% acrylic yarn offers warmth and comfort. Crocheting it lengthwise means starting with a long chain, which reduces the number of rows needed. This method makes the scarf feel softer and cozier.
Use a crochet hook that matches your yarn size for best results. A neutral color palette works well, or try using bold shades for variety. The lengthwise approach is great for beginners since it keeps things simple while producing a stylish result!
Acrylic and nylon scarf with automatic color changes
This scarf uses yarn made of 58% acrylic and 42% nylon. The mix makes the yarn soft and light, perfect for beginners. The best part is the automatic color changes. No need to switch threads manually; the yarn does it for you.
Use this type of yarn with a simple crochet pattern. It creates a colorful design without any extra effort. Crocheters will love how easy it is to get a polished look with minimal work!
Basic Crocheting Techniques
Learning simple moves sets the stage for your scarf. Focus on smooth, even stitches to keep it neat!
Slip knot creation
A slip knot starts by holding the yarn in the left hand. Twist it to form a loop and cross, then pull the tail through to create another loop. This loop will hold the crochet hook securely.
There are two ways to make a slip knot for flexibility. A video tutorial helps guide both right-handed and left-handed beginners step-by-step. Using acrylic yarn or any beginner-friendly ball of yarn makes this process easier.
Importance of tension
Proper tension keeps stitches even and neat. Loose tension can make the scarf too floppy, while tight tension might cause stiffness or curling edges. Beginners often struggle with this balance in their first crochet projects like scarves.
Consistent tension is crucial, especially on the initial chain and first row. Uneven stitches can create a distorted look in the final piece. Techniques like Foundation Half Double Crochet help maintain steady tension while crocheting a beginner scarf pattern.
Crochet hook holding technique
Hold the crochet hook in the right hand like a knife. This is common for most beginners. The left hand manages the yarn, wrapping it around the pointer finger to control tension.
Each hand works together during crocheting. The right rotates the crochet hook, while the left keeps stitches even. There are two main grips: pencil and knife. Choose what feels natural for smooth stitching and better control of your crochet scarf project!
Starting the Scarf Project
Begin your scarf with a simple chain—it’s the foundation for everything to come!
Creating the initial chain
Start with a slip knot on the crochet hook. Use 100% acrylic yarn for beginners as it’s easy to handle. Then, chain 44 stitches for an example scarf that is about 11 inches wide. This amount gives an even number of stitches, which keeps patterns neat.
Hold the crochet hook firmly but not too tight. Keep the tension in the yarn steady so each chain looks even and smooth. The initial chain is very important because it sets the width of your scarf!
Checking the chain length
Use a ruler to measure the chain. Make sure it matches the desired width, like 11 inches for most scarves. This step helps keep your crochet scarf the right size.
If the chain is too short or long, adjust it now. Add more stitches if needed or undo a few to fix the length. Doing this early saves time later!
Beginning the first row
Start by making three extra chains at the end of your initial chain. These help with turning and make the edge neat. Count back to find the fifth chain from your crochet hook.
Insert the crochet hook into this fifth chain. Work a half double crochet stitch here. Keep going, repeating half double crochets in each chain across the row. This step sets up both the scarf’s width and its pattern texture!
Crocheting the Scarf
Keep crocheting row by row to grow your scarf—it’s relaxing! Switch yarn colors for a fun design (it keeps things interesting!).
Continuing the pattern across the rows
Start each row by chaining three and flipping the work. This helps keep the edges straight and neat. Use a half double crochet stitch in the gap formed by the previous row’s chain-one space.
Chain one, skip two chains, then half double crochet into the next gap. Repeat this across the entire row to create a pattern of gaps and stitches. Work like this until you reach your scarf’s desired length.
Changing colors
Chain one and cut the yarn with scissors, leaving a small tail. Pull this tail to tighten and secure the knot. To add a new color, insert the crochet hook under the V of the first half double crochet stitch.
Tie a knot to attach the new yarn color. Yarn over and create three chains before flipping your work. Continue crocheting in your pattern using this fresh color change. This method keeps transitions smooth and neat on your scarf!
Finishing the scarf
Weave in the loose yarn ends with a sewing needle. Do this by threading the needle and tucking the yarn into nearby stitches. This keeps everything secure and neat.
Trim any extra yarn using scissors for a clean look. Pick colors or patterns that match your style, or experiment with different yarns. This project makes a thoughtful gift or cozy item for yourself!
Conclusion
Crocheting a scarf is fun and simple. With basic tools like yarn, a crochet hook, and scissors, anyone can start. Beginners can enjoy learning slip knots, chains, and rows while creating something cozy.
It’s all about practice and patience. Grab your materials and try it!
FAQs
1. What do I need to start crocheting a scarf as a beginner?
You’ll need yarn, a crochet hook, and patience! Start with simple tools like a medium-sized crochet hook and soft yarn that’s easy to work with.
2. How do I begin my first crochet scarf?
Start by learning basic stitches through a crochet tutorial. Practice making chains and single crochets before moving on to more advanced patterns.
3. Can beginners use granny squares for scarves?
Yes, absolutely! Granny squares are great for beginners because they’re simple and fun. You can join them together to create unique scarf designs.
4. Do I need special skills like embroidering or using a crochet needle?
No, you don’t need those skills right away. For your first scarf, focus on mastering the basics of beginner crochet techniques with just your hook and yarn!