Contents
Supplies
- Water
- Paper towels
- Paint brushes in various sizes (see above)
- Watercolor Paints, any brand
- Cardboard
- Masking Tape
- Watercolor Paper: hot press at least 90lb

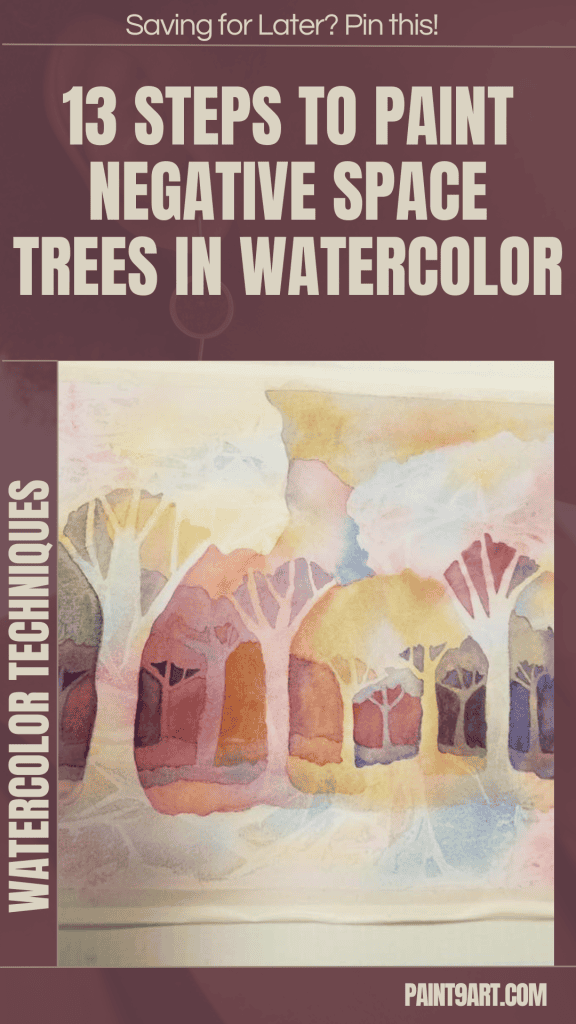
How To Negative Paint In Watercolor
Step 1
“Stretch” your watercolor paper by neatly and evenly taping it down to the cardboard on all 4 sides.
Step 2
Using variations of the three primary colors (I use a bright crimson, phthalo blue and yellow ocher), paint a VERY LIGHT wet on wet wash. You want to BARELY see the color when the page is dry, as seen below.

Step 3
While the paint is drying, do some research and find a tree shape that is pleasing to you. Once it is completely dry, LIGHTLY sketch in 1 tree, with a little bit of ground, so that you can see where it is planted. This will help create the illusion of depth.


Step 4
Begin painting the space AROUND the tree you drew, the negative space. Use colors that blend together well.
For example, blue or red would go well over the yellow because they will start to blend secondary colors.
As you build your layers, you will begin to create many tints and shades of colors using just the 3 primaries.

NOTE: The second layer MUST be light as well, so use more water than paint!
Step 5
DRY THE LAYER
Step 6
LIGHTLY Sketch in the next layer of trees (2-3 trees). As the trees go back, the trunks get thinner, the ground gets higher and the canopy (leaves/branches) get lower.

If you were to keep the trees all the same size, the painting won’t have the same “depth” effect we are trying to achieve.
Step 7
Begin painting AROUND ALL the trees! Continue building the layers of colors, working on really blending secondaries on top of the primaries to begin to create a lot of variety in color.
This is where your painting starts to take on warm or cool tones, OR both!

Step 8
LET IT DRY (or use a hair dryer)
Step 9
Sketch in another layer of trees, focusing on making them smaller than the others and more than the other 2 layers (4-6 trees)
Step 10
Using a much smaller brush, begin slowly painting in the negative space again! Focus on using a darker color, I used shades of purple, because this will be your shadows!

Step 11
LET IT DRY!
Step 12
Draw in the final layer of trees. The smallest trees, with the least amount of detail.
Very carefully, with the deepest hues you can mix, but still keeping the paint fluid (don’t use it like acrylics!), paint the last layer of negative space around the trees.

Step 13
If you have followed the steps, you should have created a successful watercolor painting that utilizes negative space and creates the illusion of great depth on your flat, 2d
paper.
This does take practice, especially with knowing how much water to use and what colors mix well with others.
These paintings make quite the statement and in years past when students have completed this project, I have had several blue ribbon winners at art shows, a congressional art award and many honorable mentions. They make great gifts too!