
Can painting a simple balloon dog really be this fun and relaxing? Olga Koelsch will take you step by step through each part, from the soft pink body to the tiny finishing touches.
You’ll see how easy it is to create bright colors and smooth, rounded shapes—even if you’re completely new to watercolor.
Contents
- 1 Step 1: Start with the Balloon Dog’s Body
- 2 Step 2: Paint the Head and Nose
- 3 Step 3: Paint the First Front Leg
- 4 Step 4: Paint the First Back Leg
- 5 Step 5: Connect the Neck and Body
- 6 Step 6: Add the Tail
- 7 Step 7: Paint the First Ear
- 8 Step 8: Add the Other Front Leg and Back Leg
- 9 Step 9: Paint the Second Ear
- 10 Step 10: Final Touches and Details
- 11 Wrapping Up
Step 1: Start with the Balloon Dog’s Body
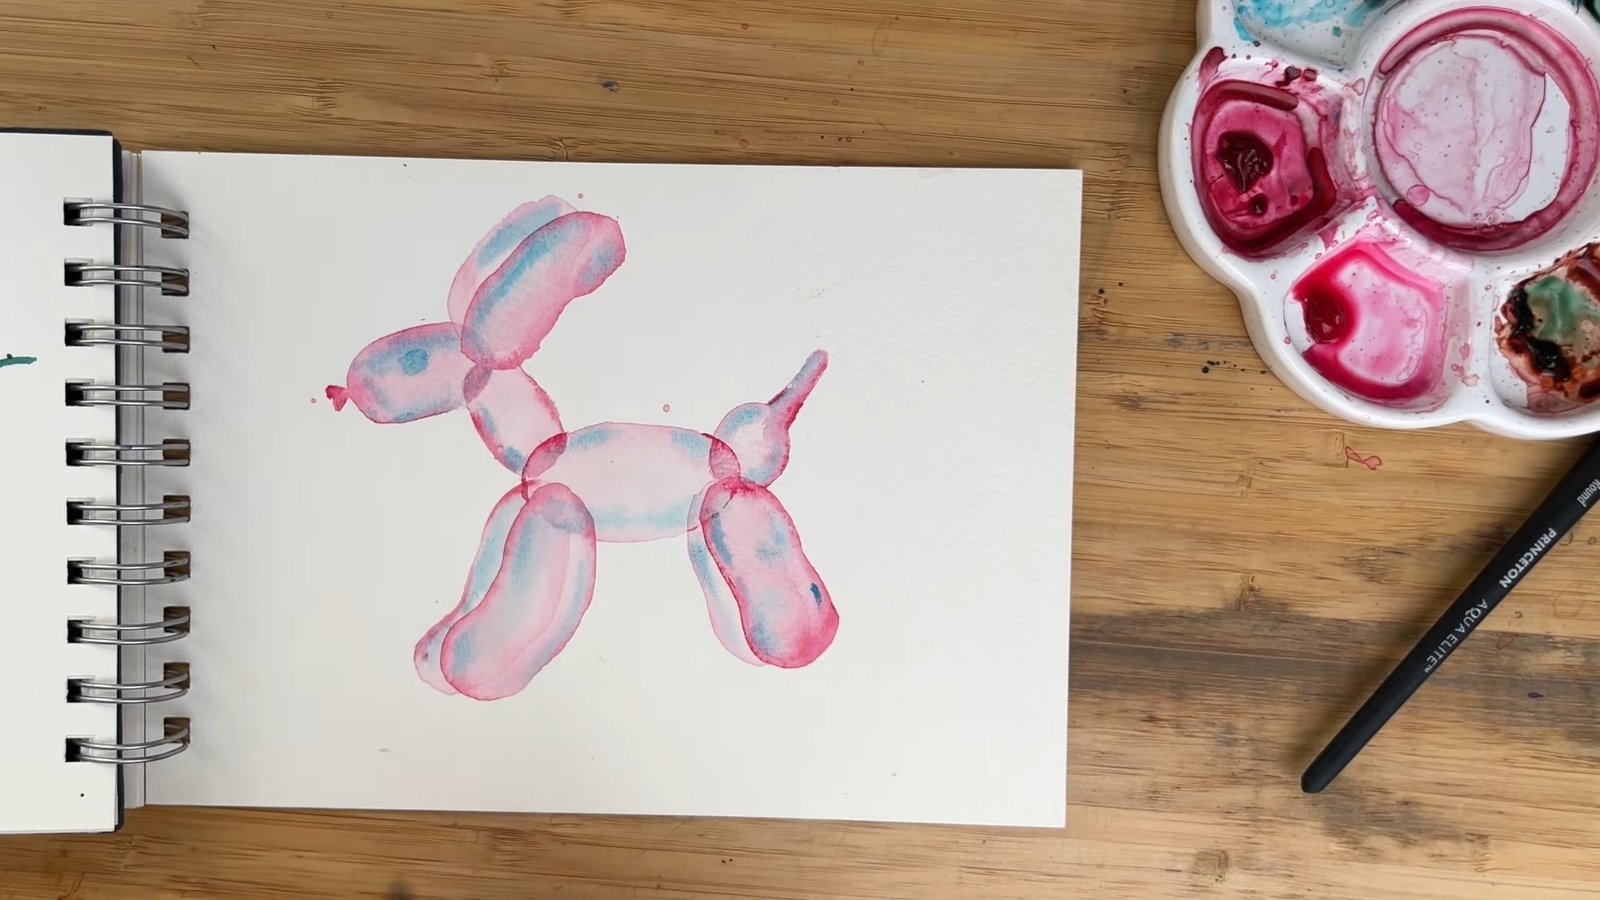
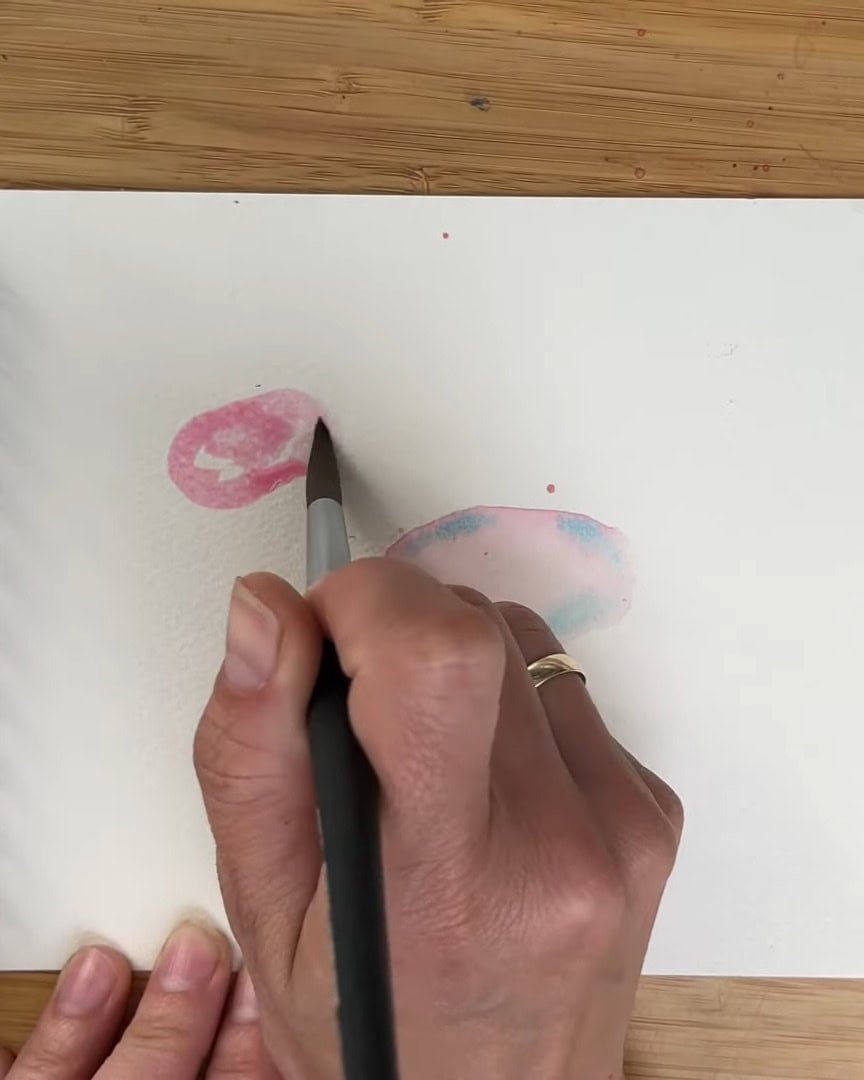
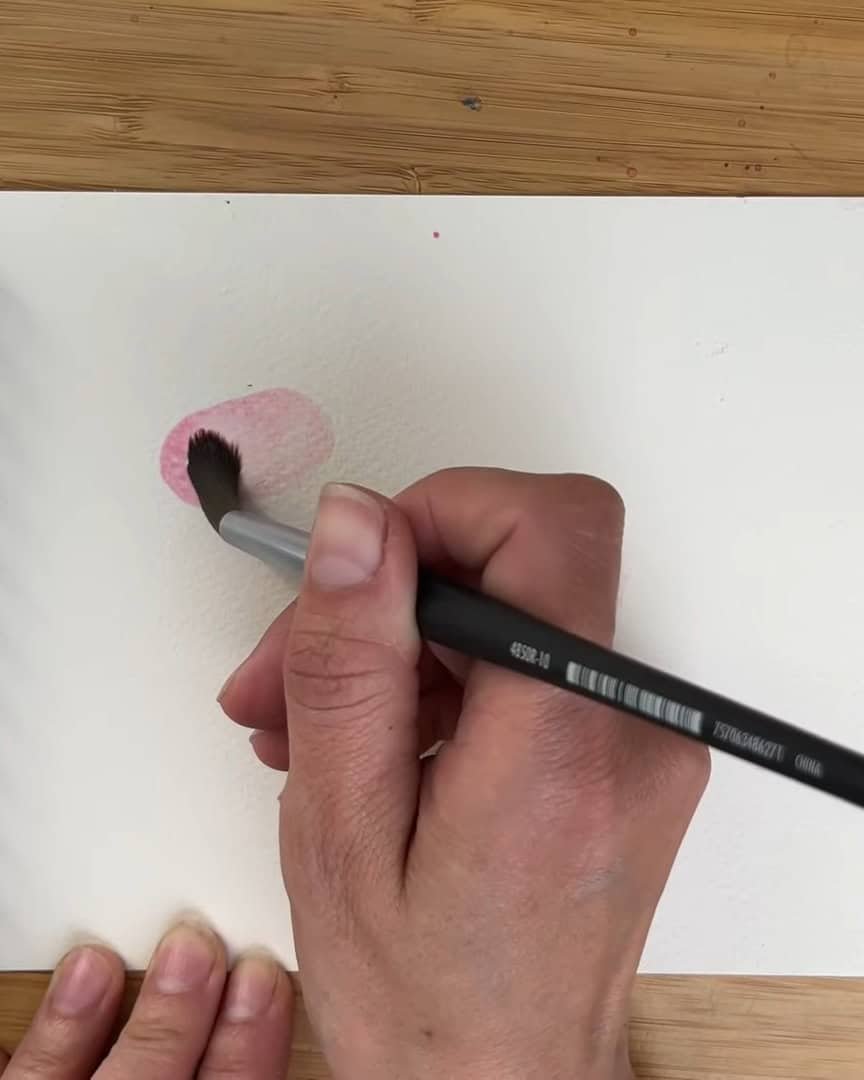
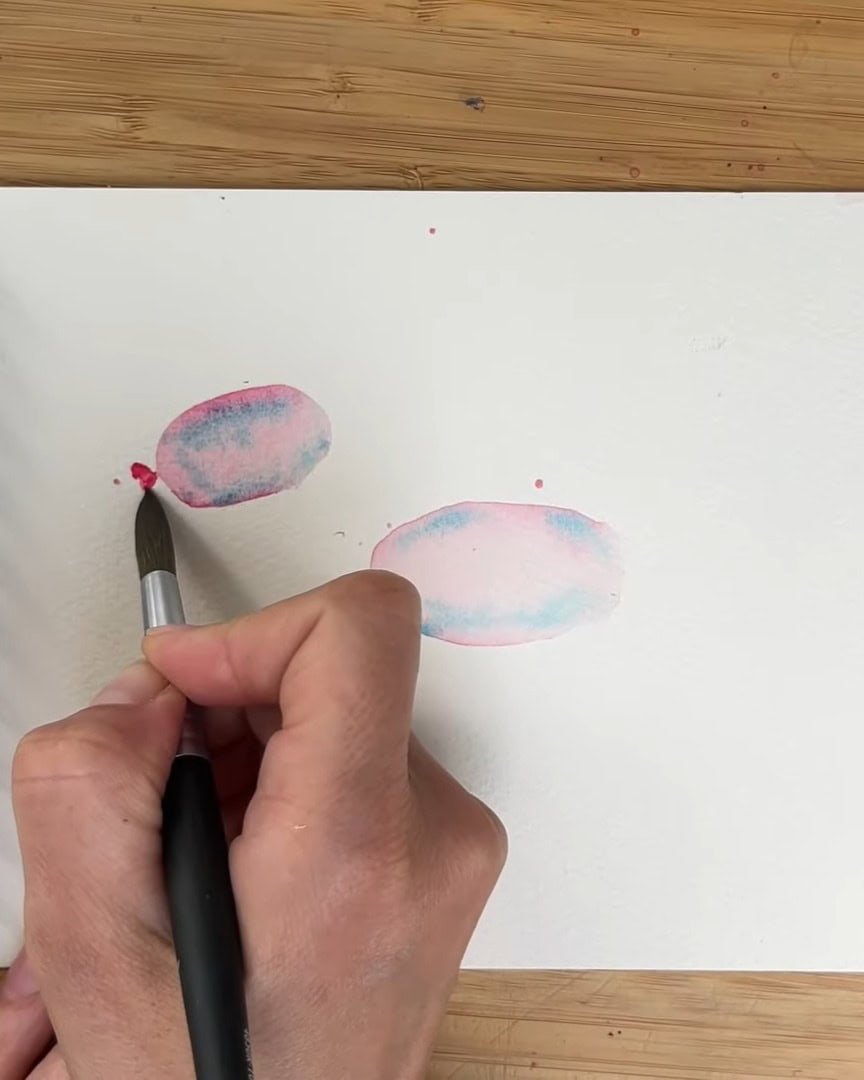
Let’s start painting a cute balloon dog! The artist chooses a fun pink color, but any favorite color works well.
Quinacridone rose is used, watered down to keep it light. The artist begins with an oval shape for the first balloon, which represents the dog’s body. The inside is kept soft by diluting the paint with more water.
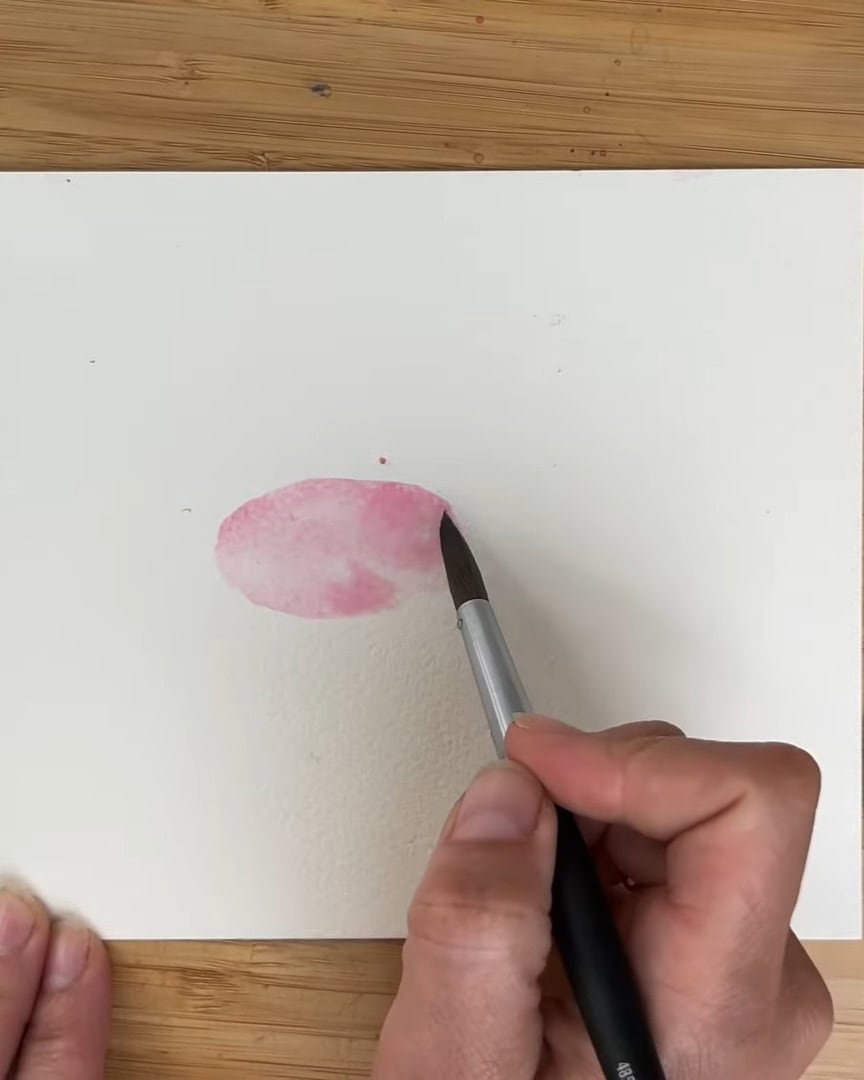
Then, the brush is washed, dried with a paper towel, and some paint is lifted from the middle. This creates brighter edges, just like a real balloon.
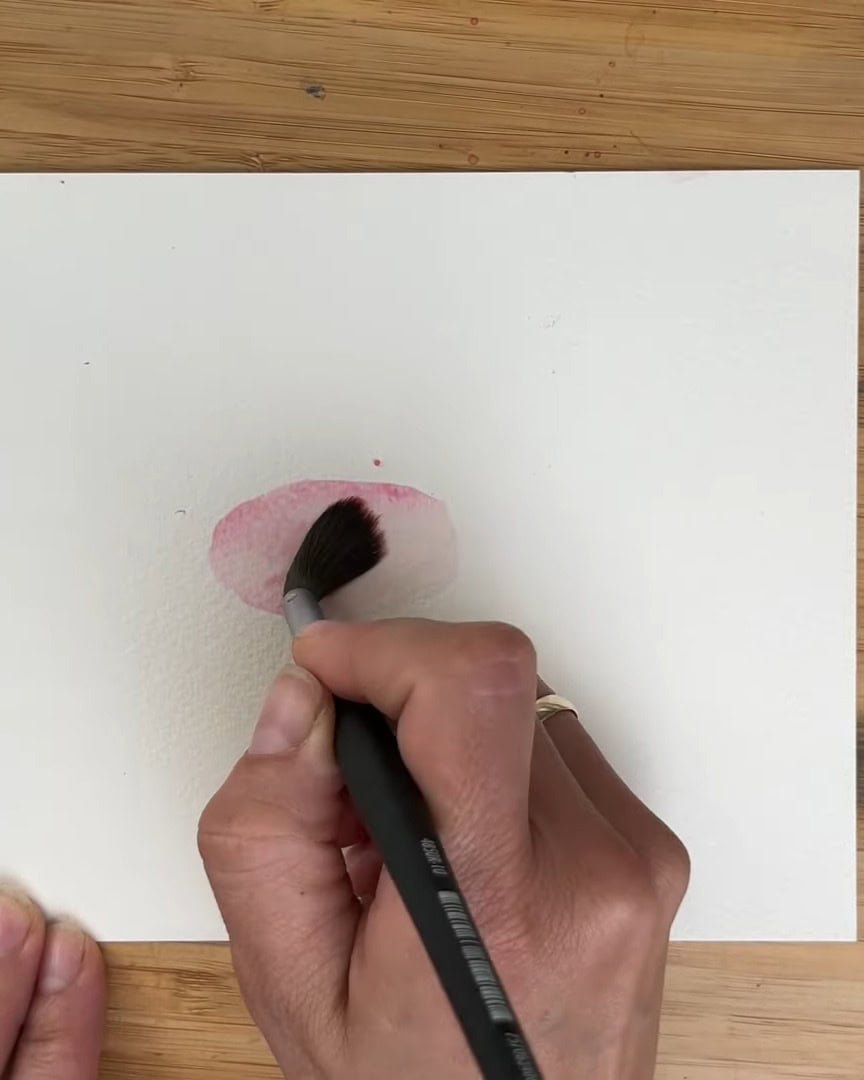
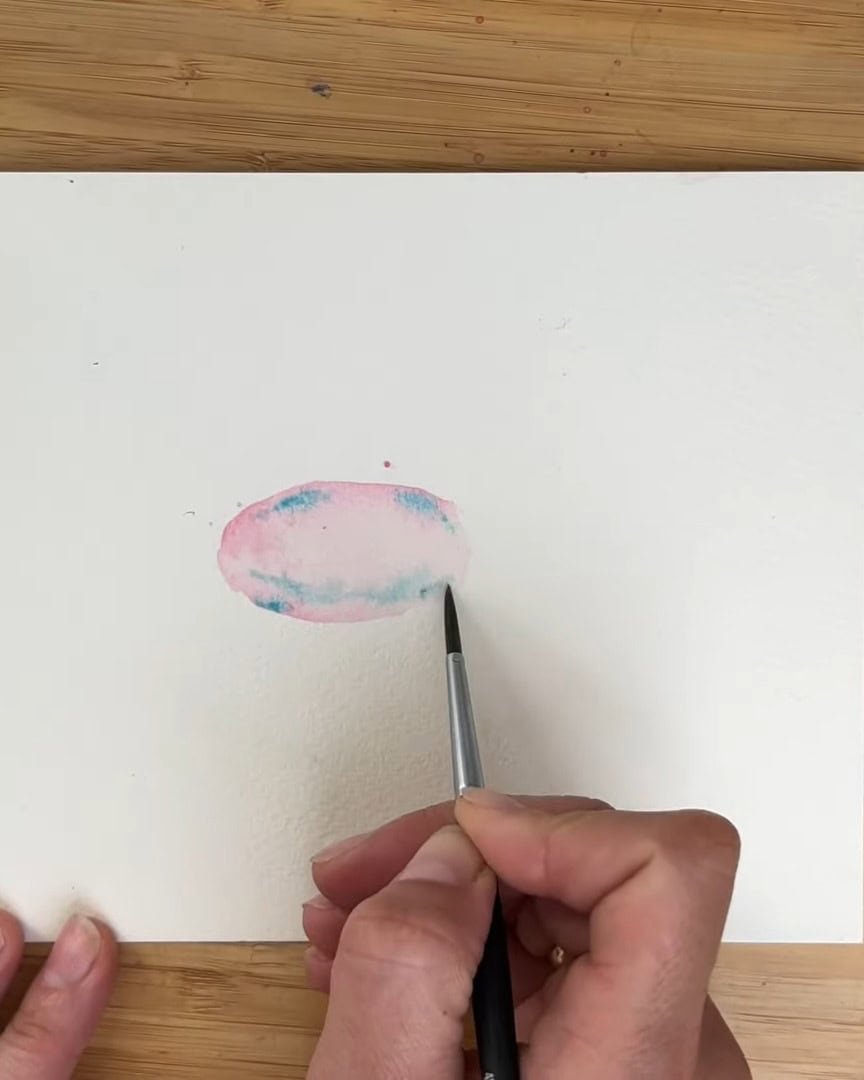
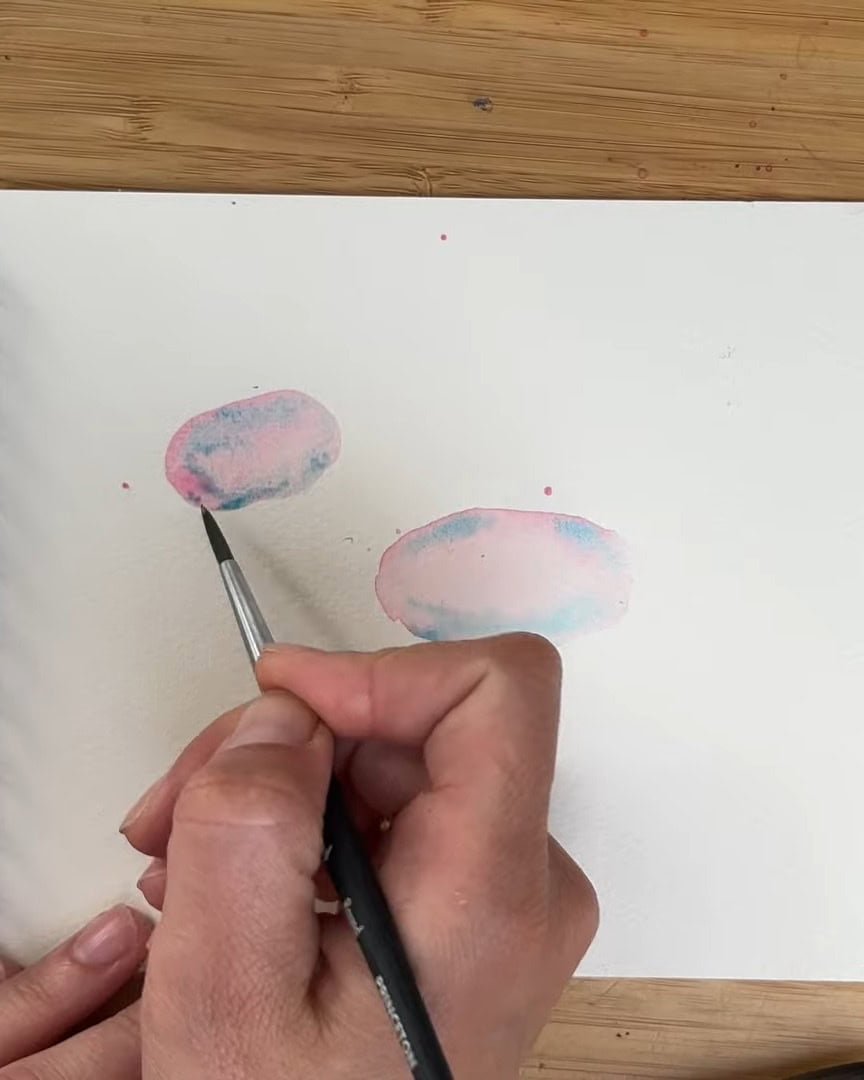
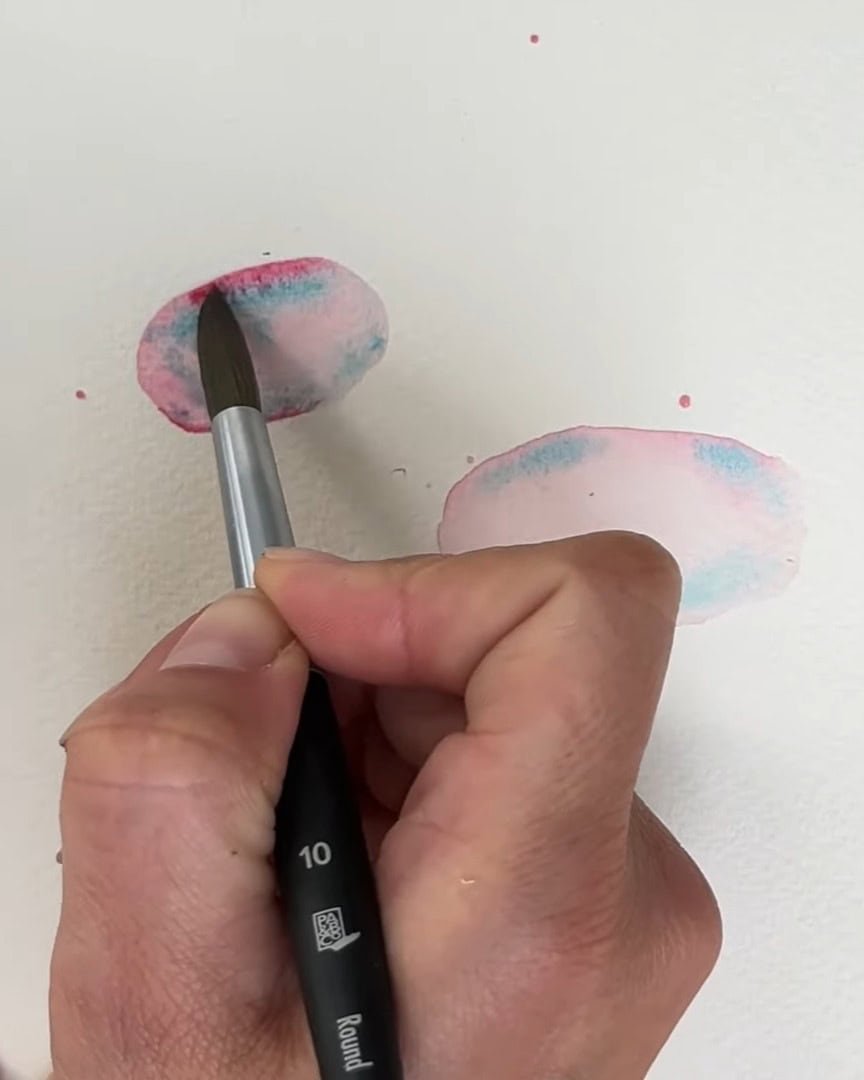
To add excitement, a bit of turquoise is mixed in. Ultramarine blue also works beautifully. The artist places playful accents around the body for extra charm.
Step 2: Paint the Head and Nose
With the body complete, the artist moves on to the head and nose, keeping the same soft, simple approach.
The neck is imagined rising from the body, so a small space is left. Then, another balloon shape is attached for the nose, which also forms the face.
Again, a damp brush is used to lift some paint from the inside of the balloon, creating a gentle glow and transparent feel.
To save time, two brushes are used—one for pink and one for turquoise—so rinsing between colors isn’t necessary. Soft turquoise accents are added around the edges.
A brighter pink is also dropped in with the tip of the brush to make the edges pop.
The small balloon bump where the balloon is tied is painted next. Water is used to soften it, connect it to the nose, and brighten the inside.
This section is left to dry before starting on the legs.
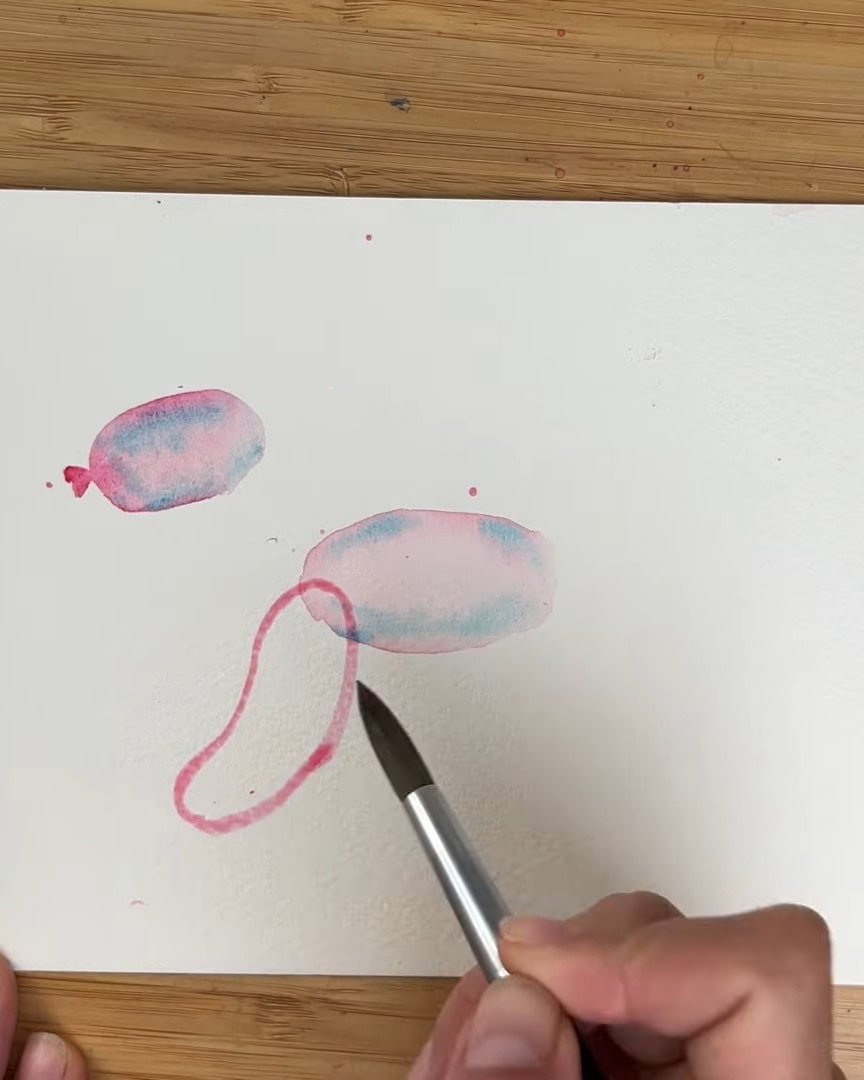
Step 3: Paint the First Front Leg
Once the head is dry, the artist moves to the front leg. A hint of the second front leg—the one not fully visible—is also added.
A very diluted mix of paint is used first. The artist imagines where the leg sits and lightly places the color.
After that, the brush is washed, and a clean, damp brush is used to soften the edge. The brush is lifted gently to remove extra water and pigment.
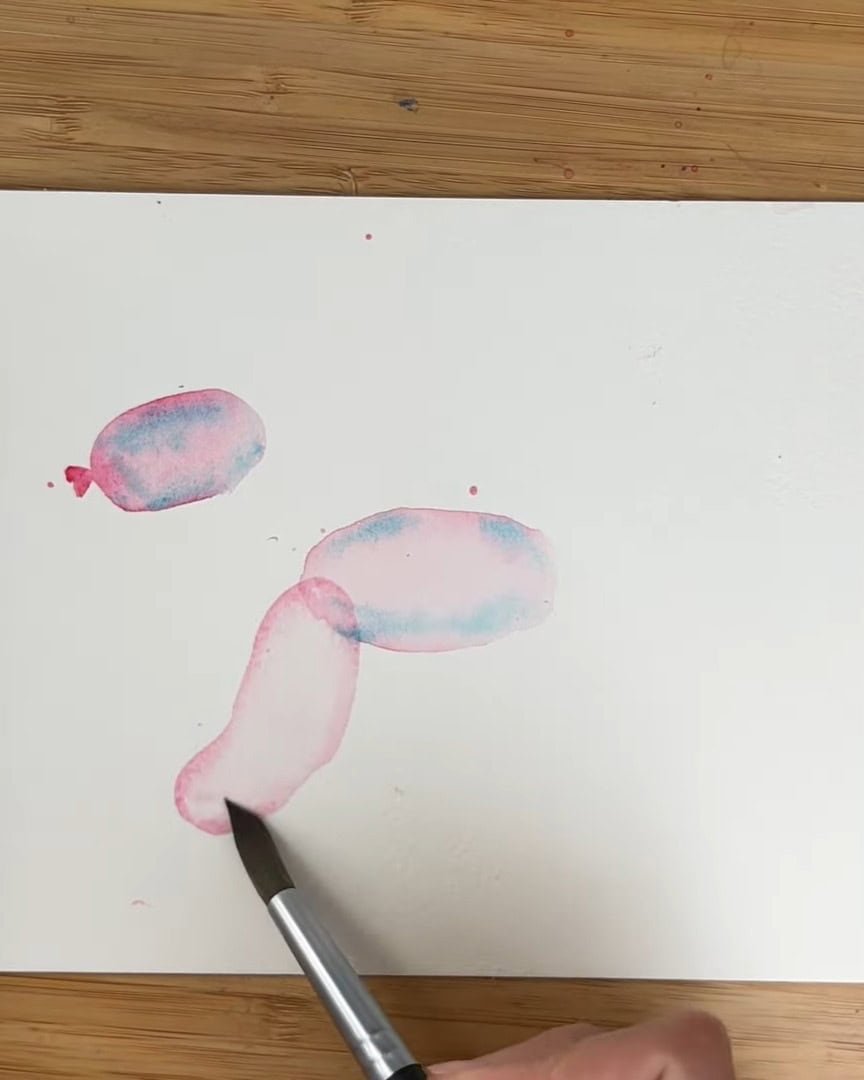
While the area remains wet, colorful accents are added with just the tip of the brush. This helps the colors blend seamlessly.
A brush with a fine tip is essential here. Size doesn’t matter—if the tip is sharp, even a large brush can create clean, controlled lines. A few pink accents complete the leg.
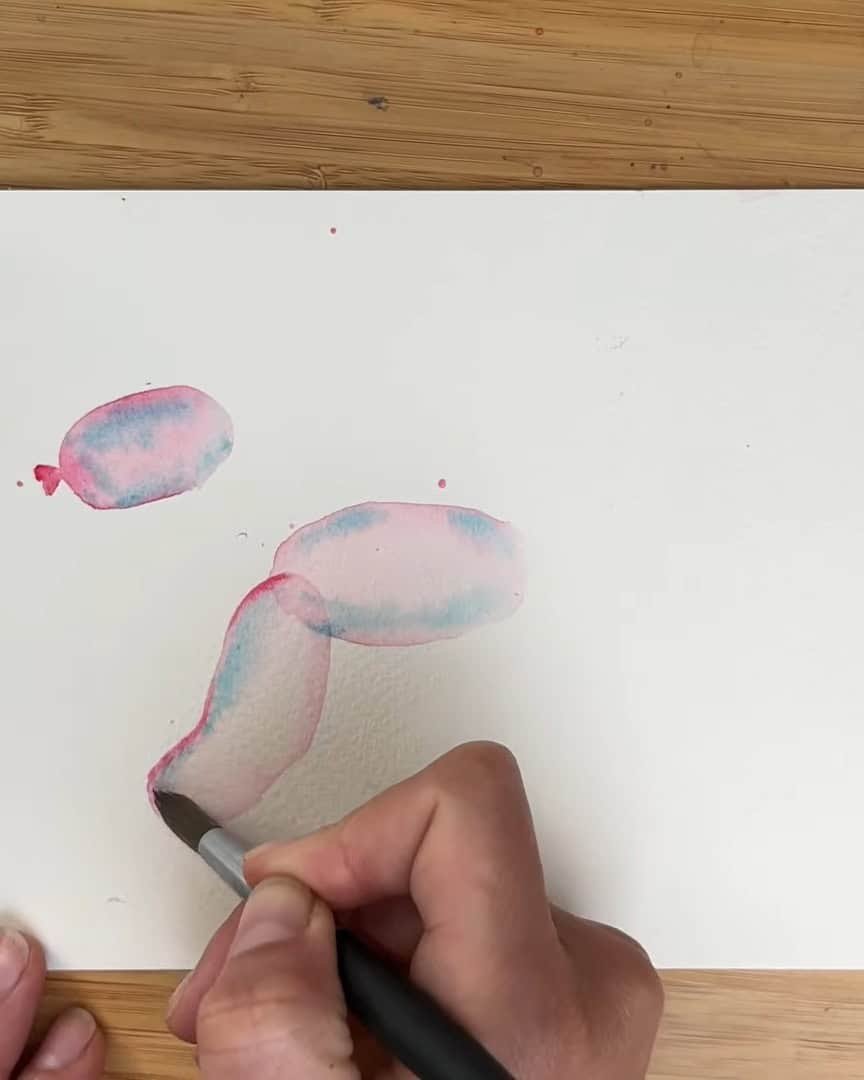
Step 4: Paint the First Back Leg
With the front leg finished, the back leg on the same side is added. The artist keeps it aligned with the front leg.
After placing the paint, the brush is washed. The pigment inside the oval is lifted with a damp brush to create the balloon effect.
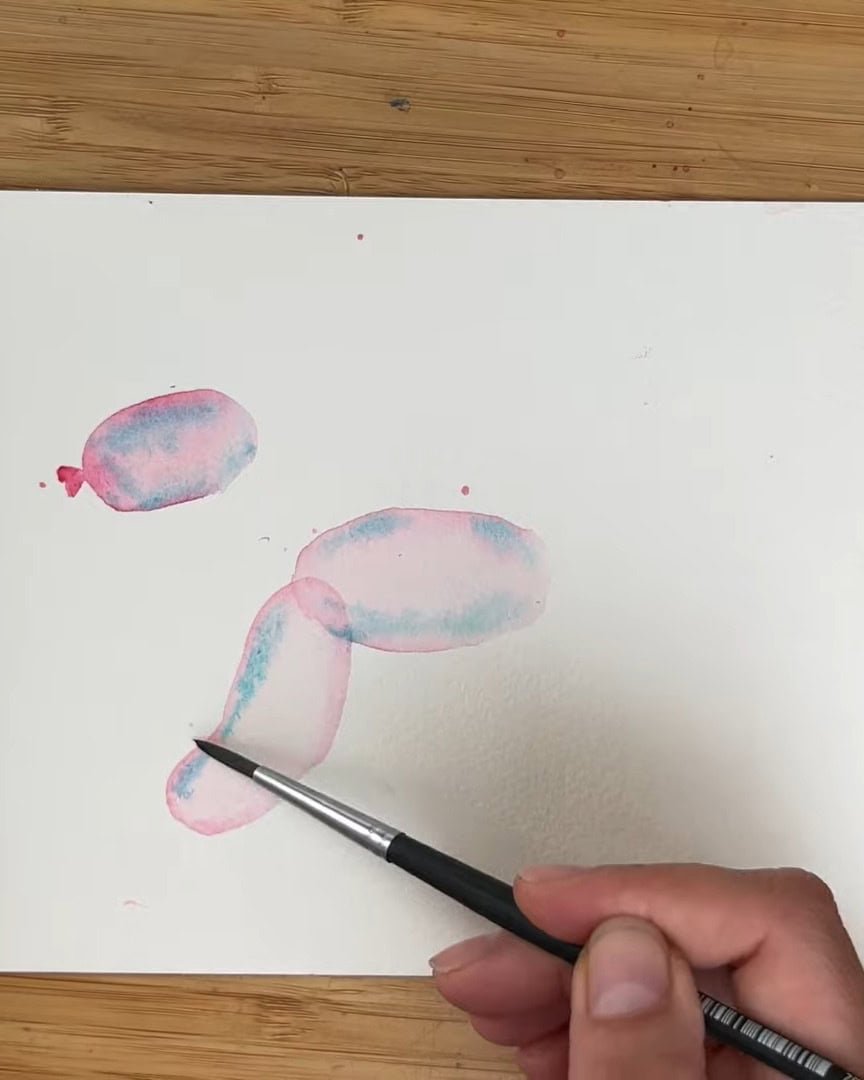
Step 5: Connect the Neck and Body
It is time to join the head and body with a neck balloon. The artist paints the neck shape and then washes the brush.
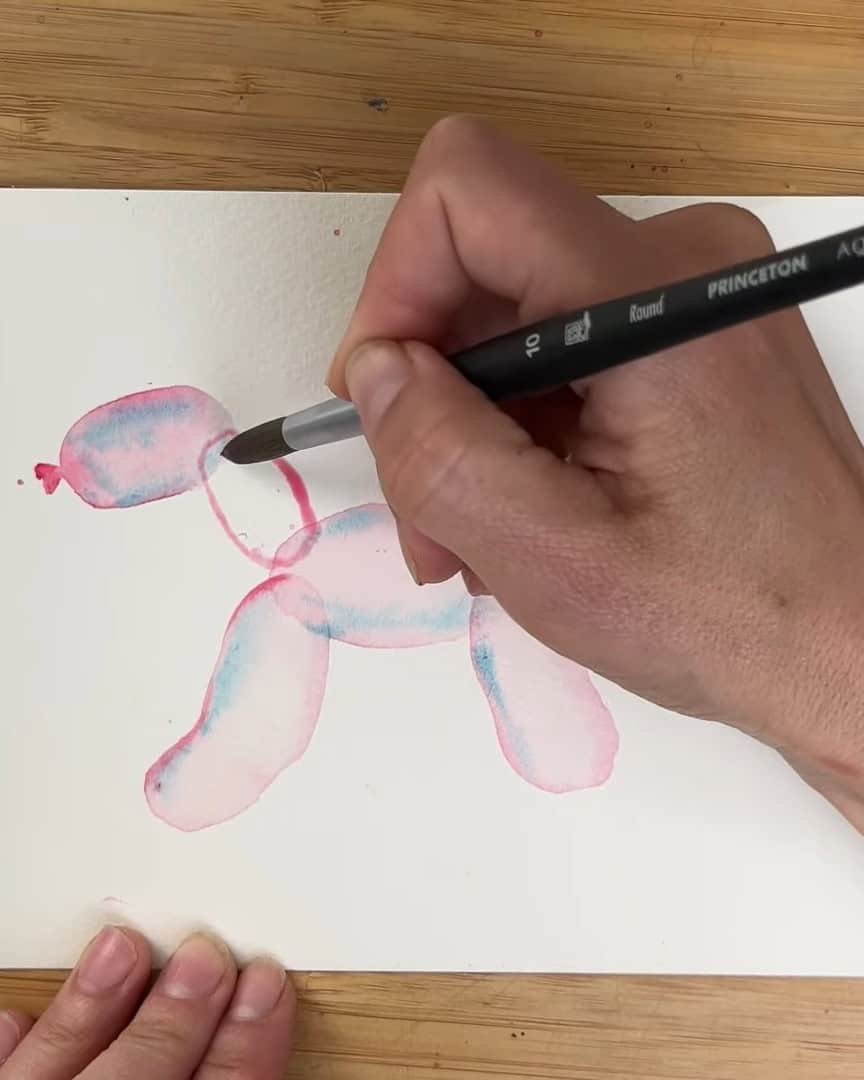
Clean water is used to create a soft, diluted inner wash. A few outlines and colorful accents are added—this is where the second color comes in.
Step 6: Add the Tail
Next, the artist checks which area is dry enough to continue. Once a dry spot is found, the tail is painted.
The tail has a round, gentle shape. After placing the paint, the brush is washed and clean water is used inside the shape to soften it.
With a damp brush, paint is lifted from the center. Bright accents—using the same pink but in a stronger concentration—are added. This keeps all parts of the dog consistent and unified.
If an additional color such as turquoise or blue is used, the artist continues incorporating that color throughout the painting for harmony.
The tail appears slightly darker because it contains less air. This difference adds depth and realism to the balloon dog.
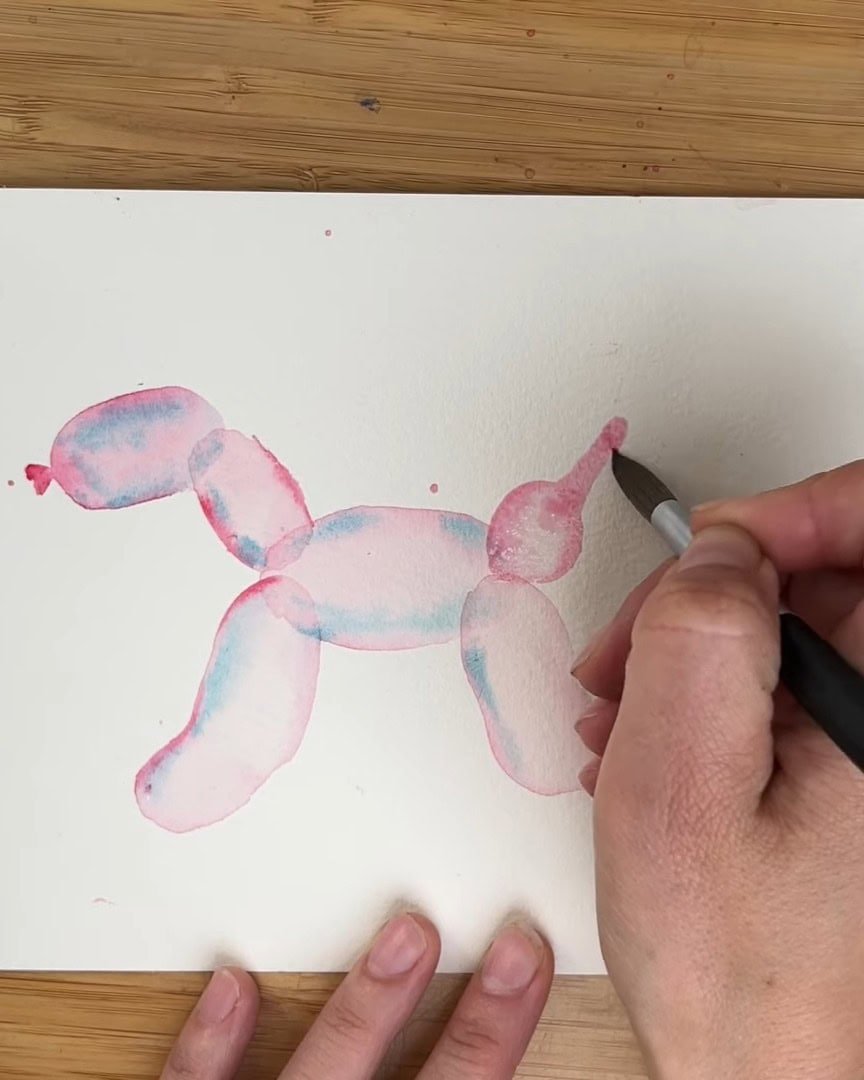
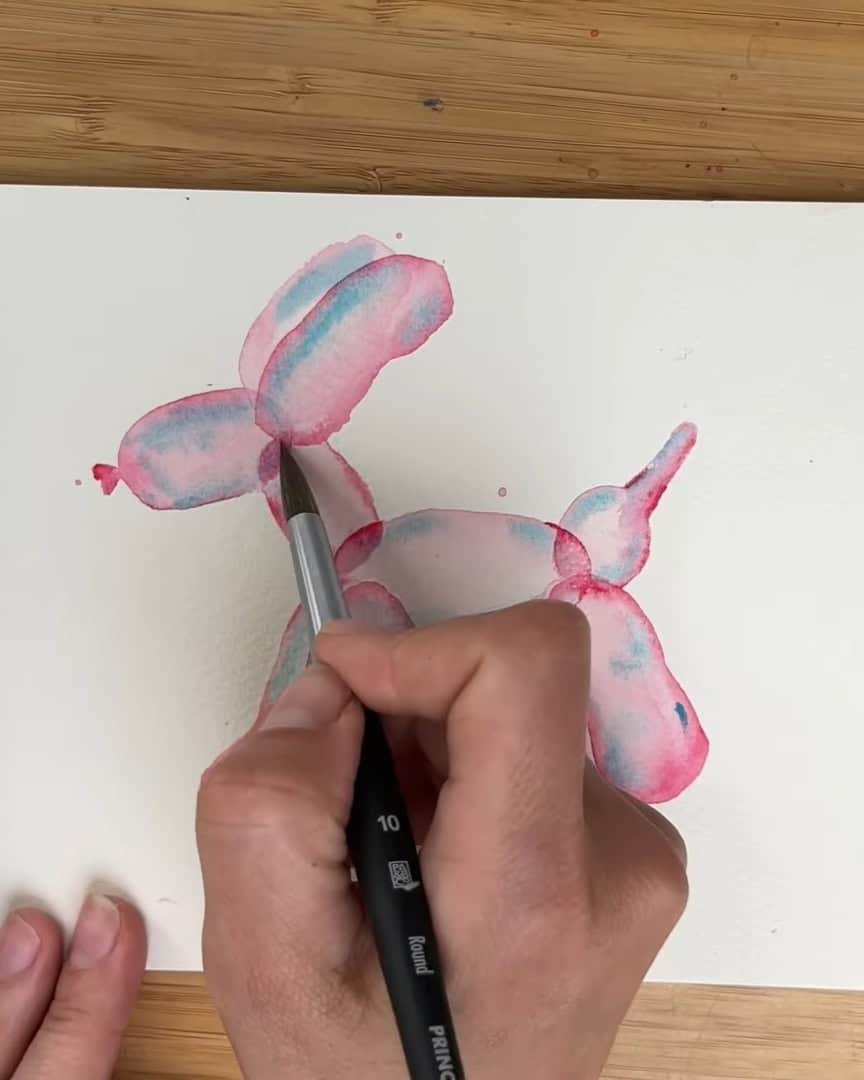
Step 7: Paint the First Ear
Now it is time to paint the ears. One ear sits in the background and remains very light, while the front ear is given more attention to appear cute and lively.
The artist lifts the middle part of the ear gently, adding a soft touch of turquoise. This subtle accent brings charm and life to the balloon dog.

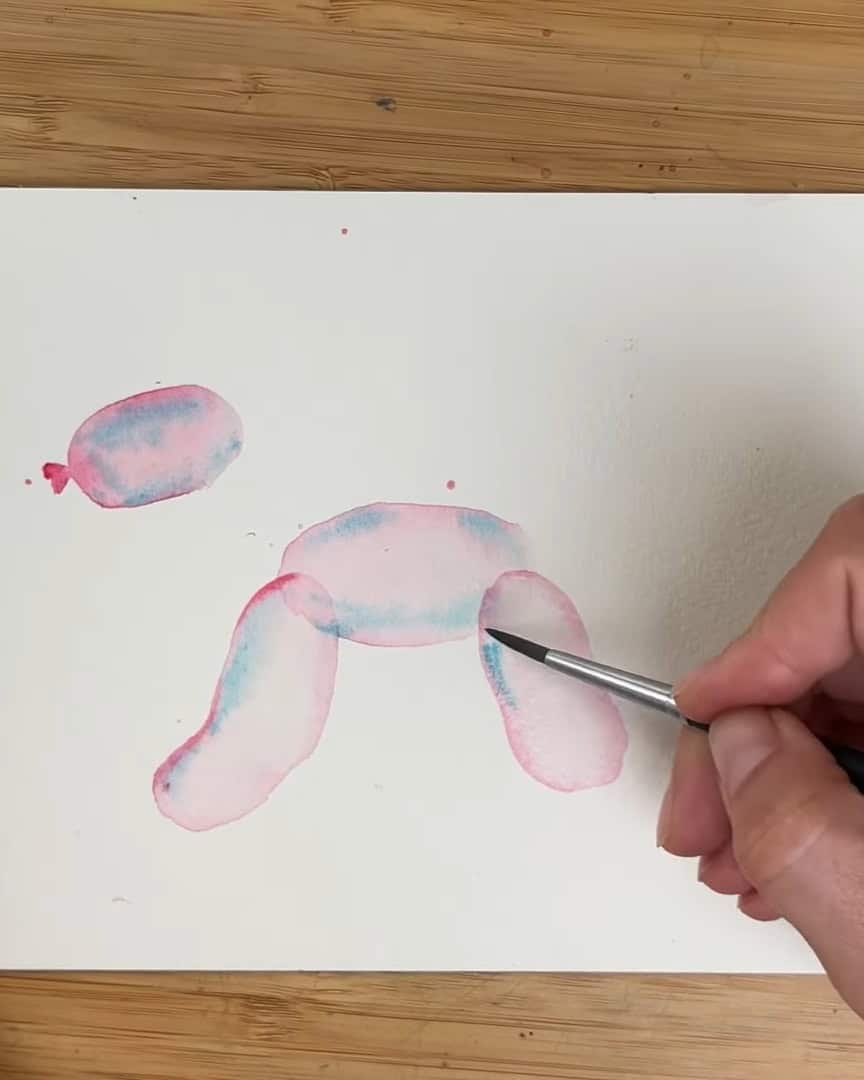
Step 8: Add the Other Front Leg and Back Leg
Now, the other front leg and back leg are added. The same principle is followed as before. The artist recreates the same shape but shifts it slightly so this new leg becomes visible.
When the opposite leg is painted, it is placed on the other side to maintain visual balance.
The brush is washed, and diluted color is brought inside the balloon shape. Because a transparent technique is used, this creates a soft, see-through effect that enhances the charm of the painting.
While everything is still wet, details and bright accents are added. At times, one or two extra colors are mixed in to create more playfulness and depth.
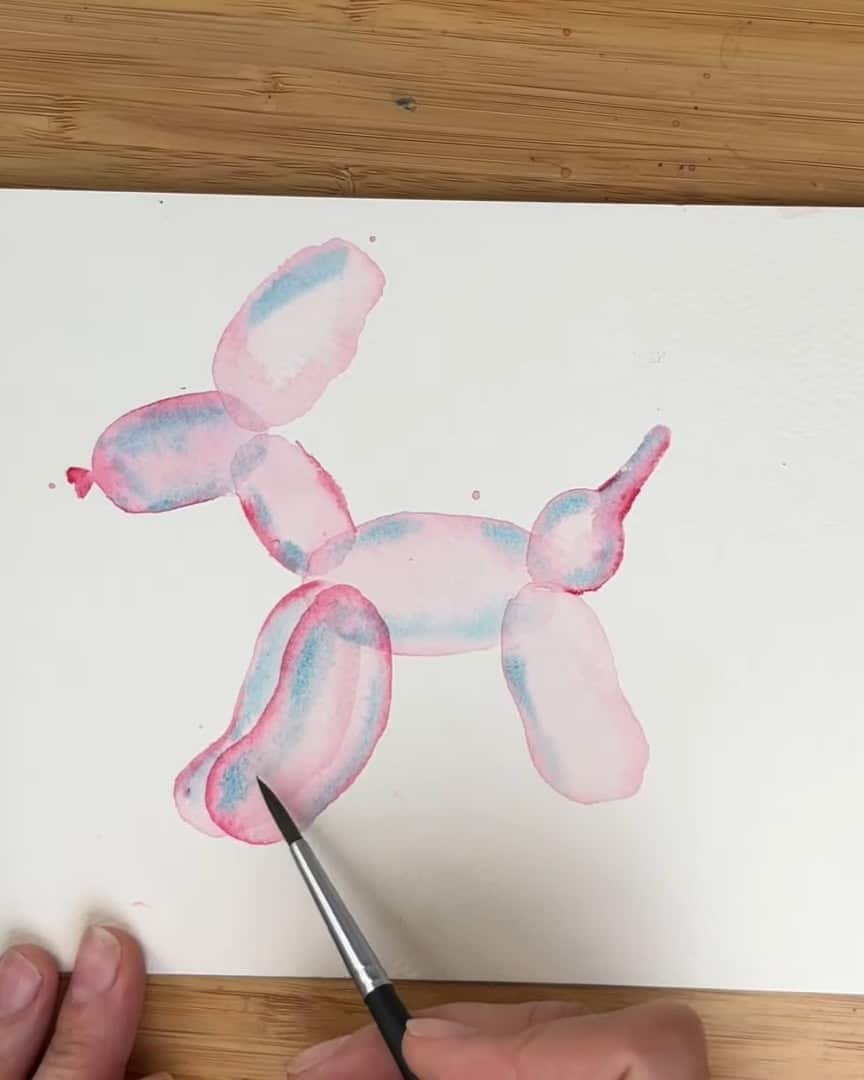
For the final leg, the artist recreates the shape with slight variations, keeping it similar to the previous legs.
Once again, the brush is washed, the edges are softened, and paint is lifted from inside the leg. This keeps the edges crisp and clean. A few small areas are refined, such as rounding one side of the edge.

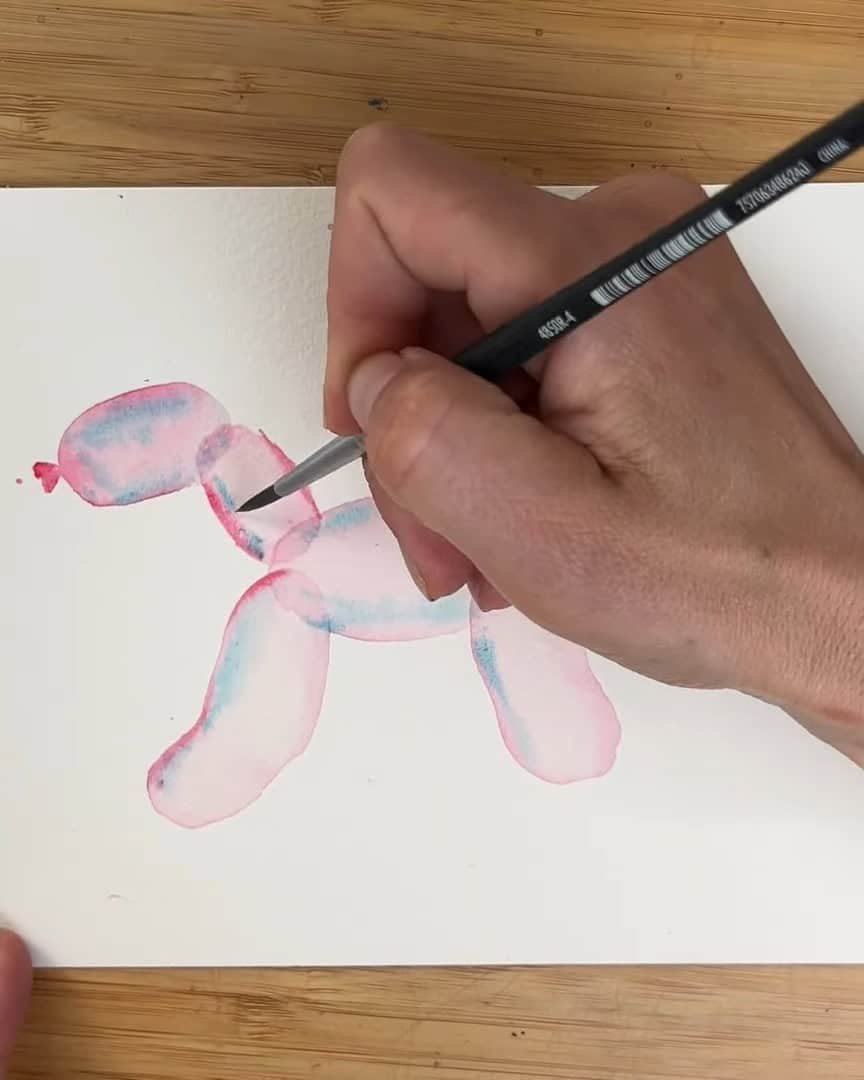
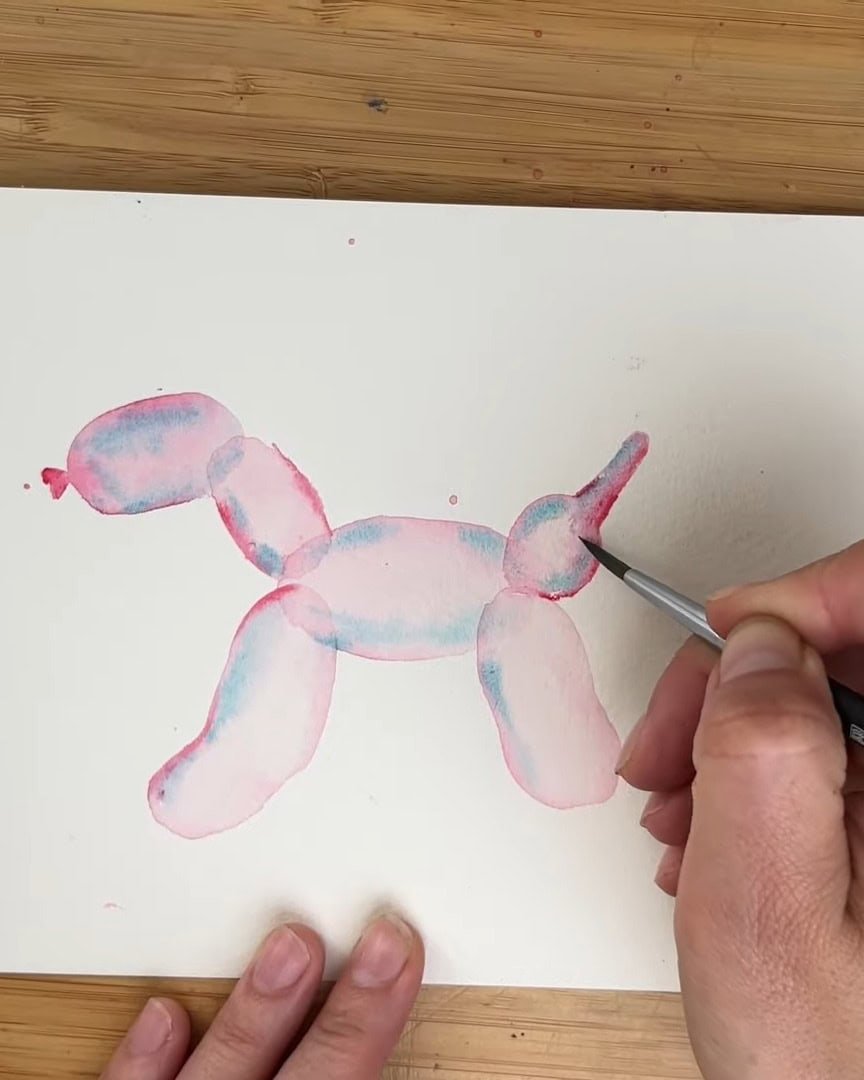
Step 9: Paint the Second Ear
For the second ear, the same steps are repeated. The artist outlines the shape carefully, then washes the brush and gently softens the outline.
Paint is lifted from the inside of the ear to create lighter spots. A second color is added afterward to give it more life and depth.
With both ears complete, the balloon dog begins to feel lively and expressive.
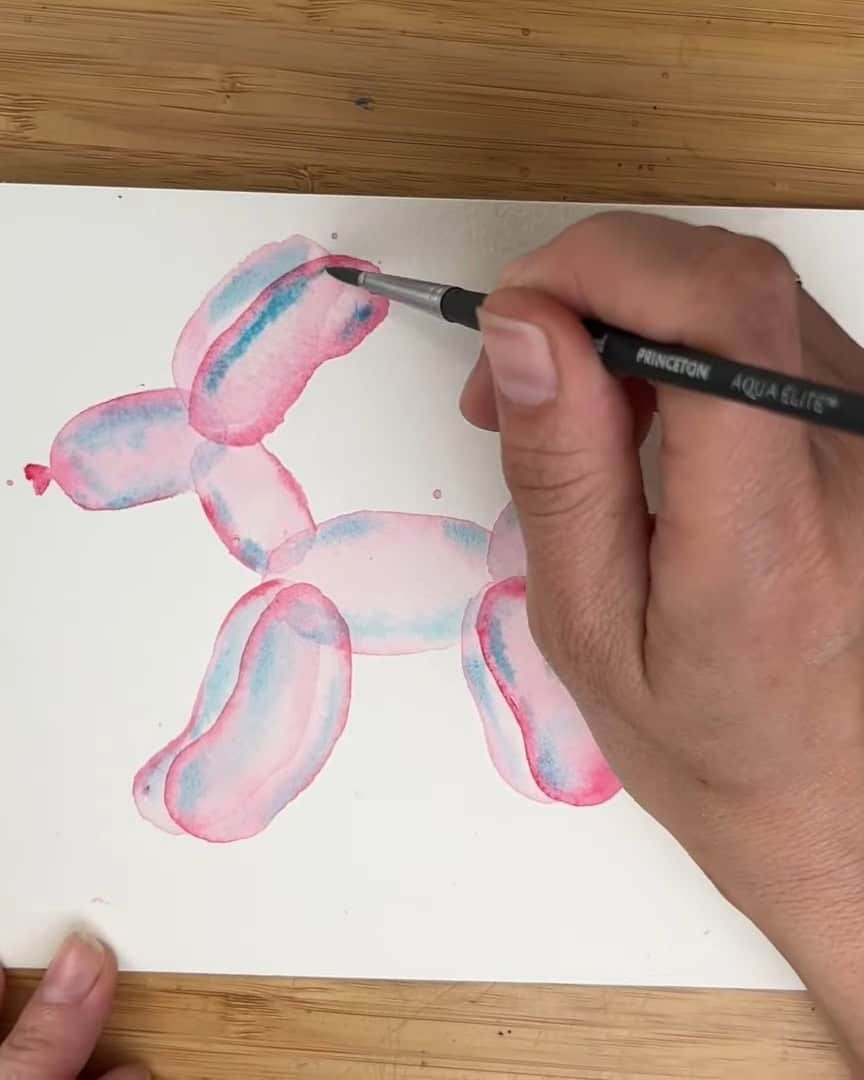
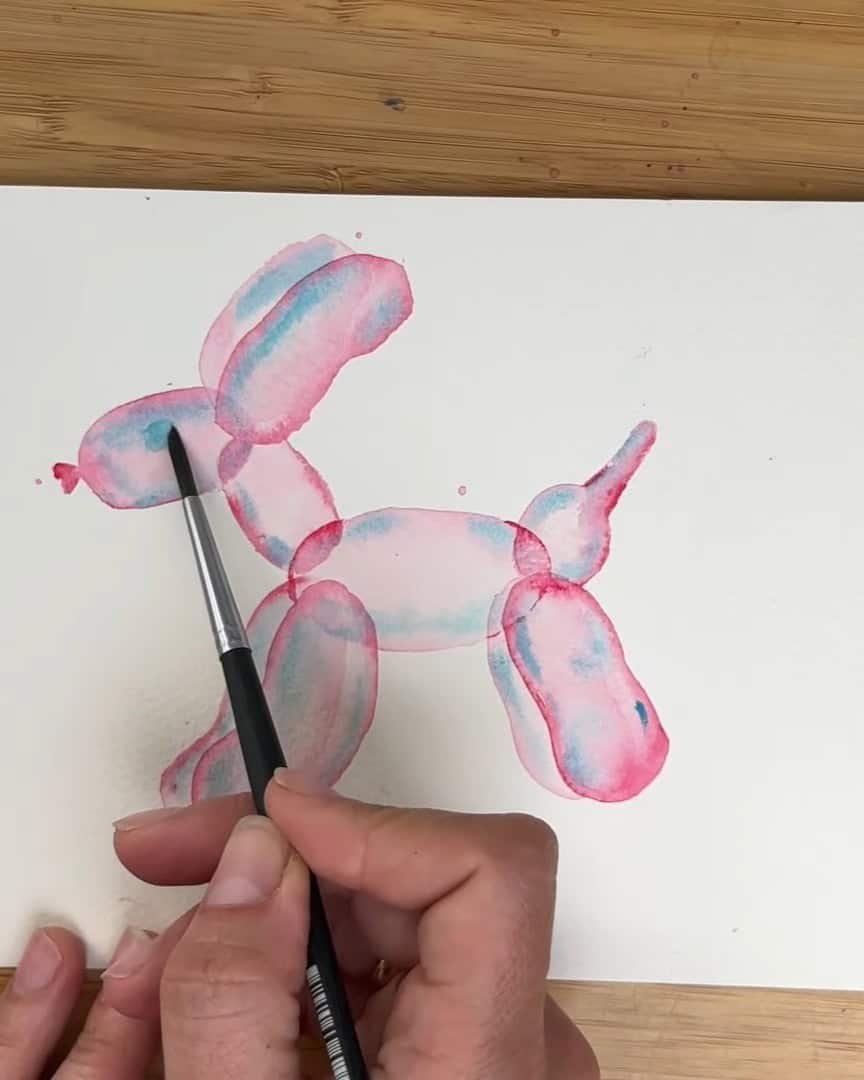
Step 10: Final Touches and Details
To finish the balloon dog, additional accents are added to the body, especially in areas that appear faded.
The overlapping spots—such as where the tail meets the body—receive an extra layer of paint.
The same is done between the neck and body to increase intensity and emphasize the balloon’s transparency.
Using the tip of the brush, thin outlines are added around these areas to sharpen the shapes. If any part has lost texture, the artist gently paints over it to restore definition.
For the final touch, a small blue dot is added to suggest an eye. A highlight is brightened in a previously painted spot so the eye feels natural and cohesive with the overall style.
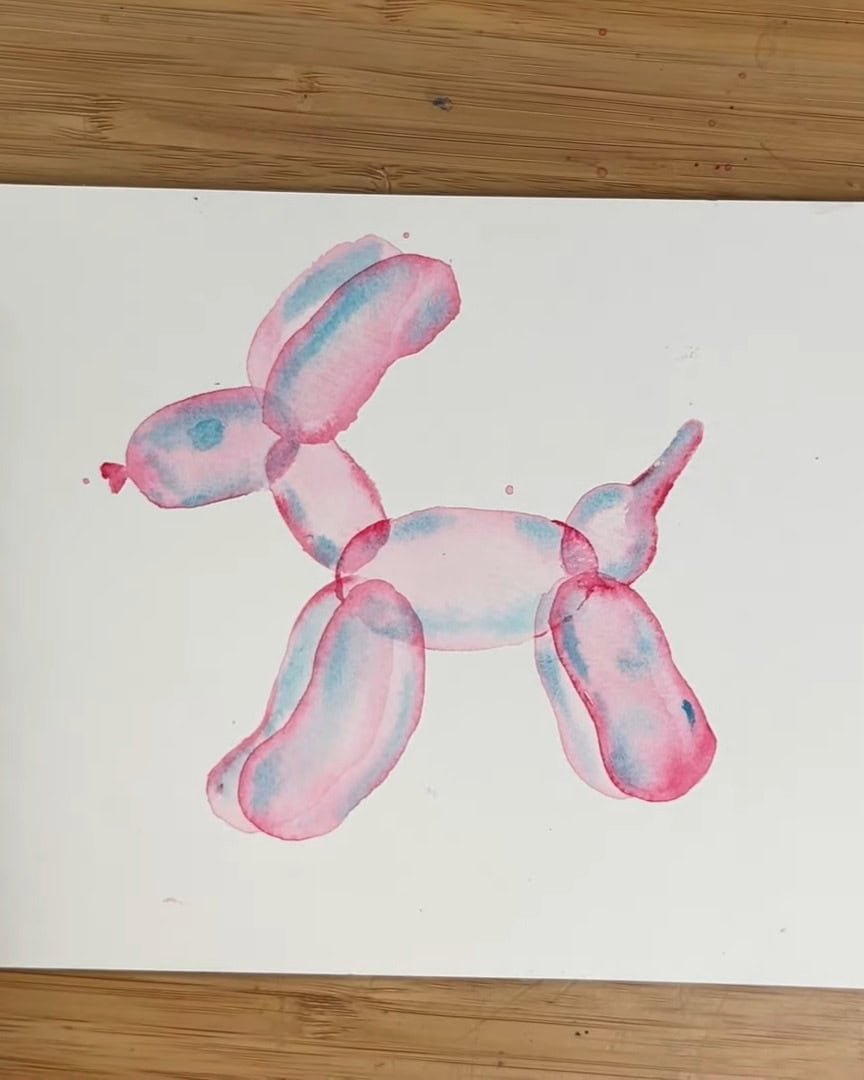
And with that, the adorable watercolor balloon dog is complete.
Wrapping Up
Painting this balloon dog is a joyful way to practice watercolor techniques such as soft washes, color lifting, and controlling transparency. With each step, more personality and dimensionality are added to the artwork.
By continuing to experiment with colors, layering, and small details, any artist can develop playful designs full of charm and character.