

I enjoy playing around with watercolor textures, and cling wrap is one of my go-to tools. It’s such an easy method that makes beautiful patterns.
You can use it for abstract art, landscapes, or even animals.
Stay tuned to see what I created!
Contents
The Cling Wrap Method
The cling wrap method creates surprising patterns in watercolor. It’s simple but opens up endless creative doors.

Common uses in abstract and landscape art
Plastic wrap textures often show up in landscape painting to create depth. I use it for tree bark texture or as a background effect.
Abstract artwork also loves this technique, adding layers and movement to the piece.
It’s quick, creative, and adds stunning dimension with minimal effort.
Exploration of unconventional uses
I wanted to think outside the box with cling wrap textures. Instead of sticking to abstracts or landscapes, I tried layering them over portraits.
It gave a cracked glass effect that felt edgy and fresh.
I also experimented with making galaxy art by dabbing paint under the wrap, creating star-like bursts.
These experimental cling wrap methods sparked ideas for future projects!
Experiments with Cling Wrap Textures
Trying new textures with cling wrap feels like uncovering hidden treasures. Each crinkle and fold creates exciting surprises on the paper.
It’s a hands-on way to bring ideas to life!

Creating coral-like texture and tortoiseshell texture in ocean scenes
I experimented with cling wrap to mimic coral textures. Using simple materials, I found ways to give underwater art a natural look.
I started by mixing indigo, raw sienna, and Van Dyke brown. These colors helped create depth for the ocean floor texture.
Pressing cling wrap onto wet paint made a random coral reef texture. The plastic left grooves that looked like flowing patterns in corals.
To make details pop, I let the paint dry under the cling wrap for 15 minutes. Then, I gently peeled it off to reveal interesting shapes and lines.
Adding touches of white acrylic brought life to marine forms like algae or small corals on the reef texture.
Blending darker shades along edges gave shadows that feel like cracks or ridges in natural reefs.
My focus was on creating textures that felt alive and dynamic!


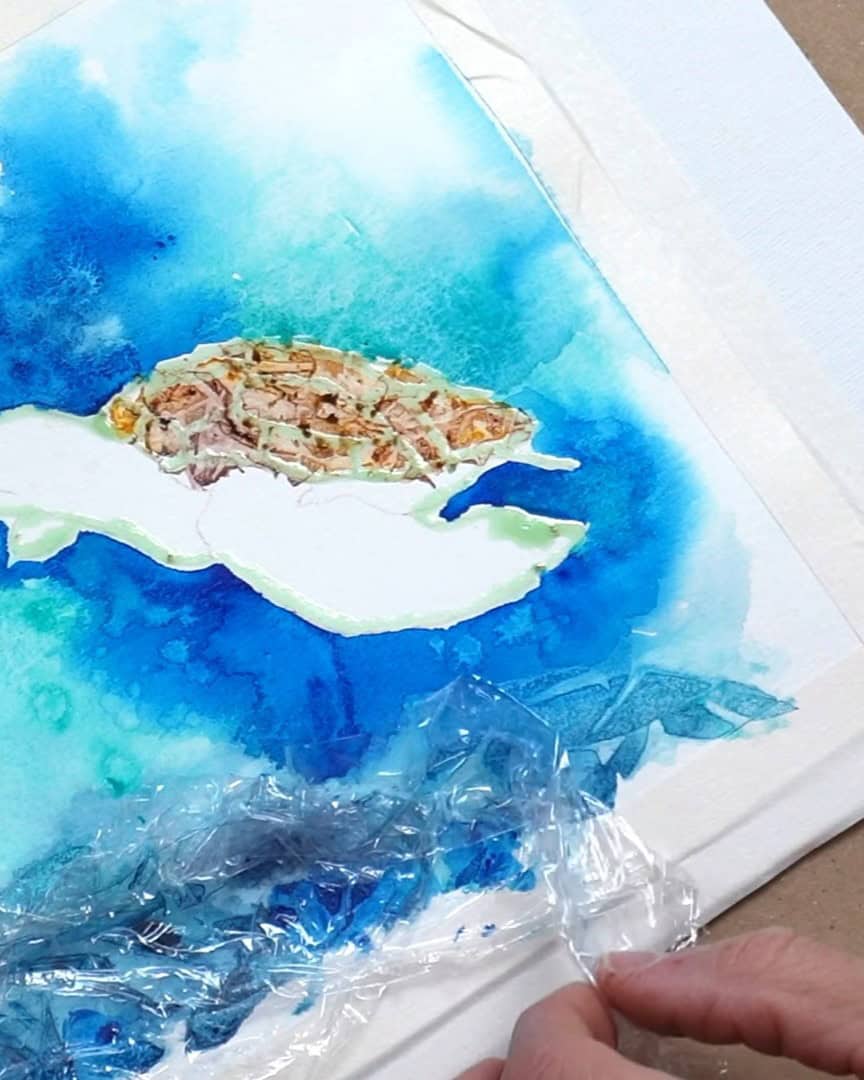


Creating a tortoiseshell texture with cling wrap was an exciting challenge. The results turned out mixed, but it taught me a lot.
I started by using warm colors, like brown, yellow, and black, to mimic real tortoiseshell patterns. The color choice was key to the effect.
Pressing the cling wrap onto wet paint created random shapes. Some areas looked close to a tortoiseshell pattern, but others felt messy or unclear.
Adjusting the scale of the texture seemed necessary for smaller details. Smaller patches might work better for realistic results in future attempts.
Changing perspective could enhance certain parts of this pattern too. A shift in angles might bring more depth and make shapes pop.
Although not perfect, this experiment sparked excitement for new ideas. Improving these techniques feels like an artistic adventure!
Creating scales of fish texture


I like using cling wrap to make textures in my watercolor art. It’s fun and gives surprising results, especially for animal themes and patterns.
I tried painting a fish with cobalt blue and purple violet. The cling wrap made the scales look textured, giving it an underwater feel.
Using masking fluid, I avoided the fish’s eye. This kept it sharp and clean while the rest of the body had rich details.
Fan coral came out well by layering paint with cling wrap pressed on it. It adds depth to oceanic elements like this.
For a turtle, I imagined its tortoiseshell pattern using different shapes of cling wrap folds. The effect looked organic and earthy.
I speculated about creating alligator skin textures too. With darker tones and tight folds in the wrap, this could mimic rough wildlife details easily.
Seashells are fun to test as well! A mix of light pinks and yellows blends beautifully under the plastic’s pressure for a soft yet lively finish.
Each new texture opens up ideas for other aquatic life forms or wild animals in my future work!
Mixed Feelings and Lessons Learned
Some textures turned out better than I expected, while others missed the mark. It’s a mix of excitement and “back-to-the-drawing-board” moments.

Areas for improvement and future changes
The coral reef texture didn’t feel right. I plan to test softer colors and gentler strokes next time. Adding more contrast may also help the details pop.
I might try layering cling wrap differently to avoid harsh edges. Testing thicker paints or varying drying times could lead to better results too.
Progress takes tweaks and patience!
Success and excitement in certain experiments
Creating fish textures felt like a true triumph. The patterns came alive, resembling shimmering scales under sunlight.
Seeing the vivid results filled me with enthusiasm and satisfaction.
It sparked exhilaration to know my vision turned into something so visually fulfilling!
Conclusion
Trying cling wrap with watercolor is exciting. Some textures worked better than others, but each taught me something new.
I hope you try it too and create your own stunning effects!