
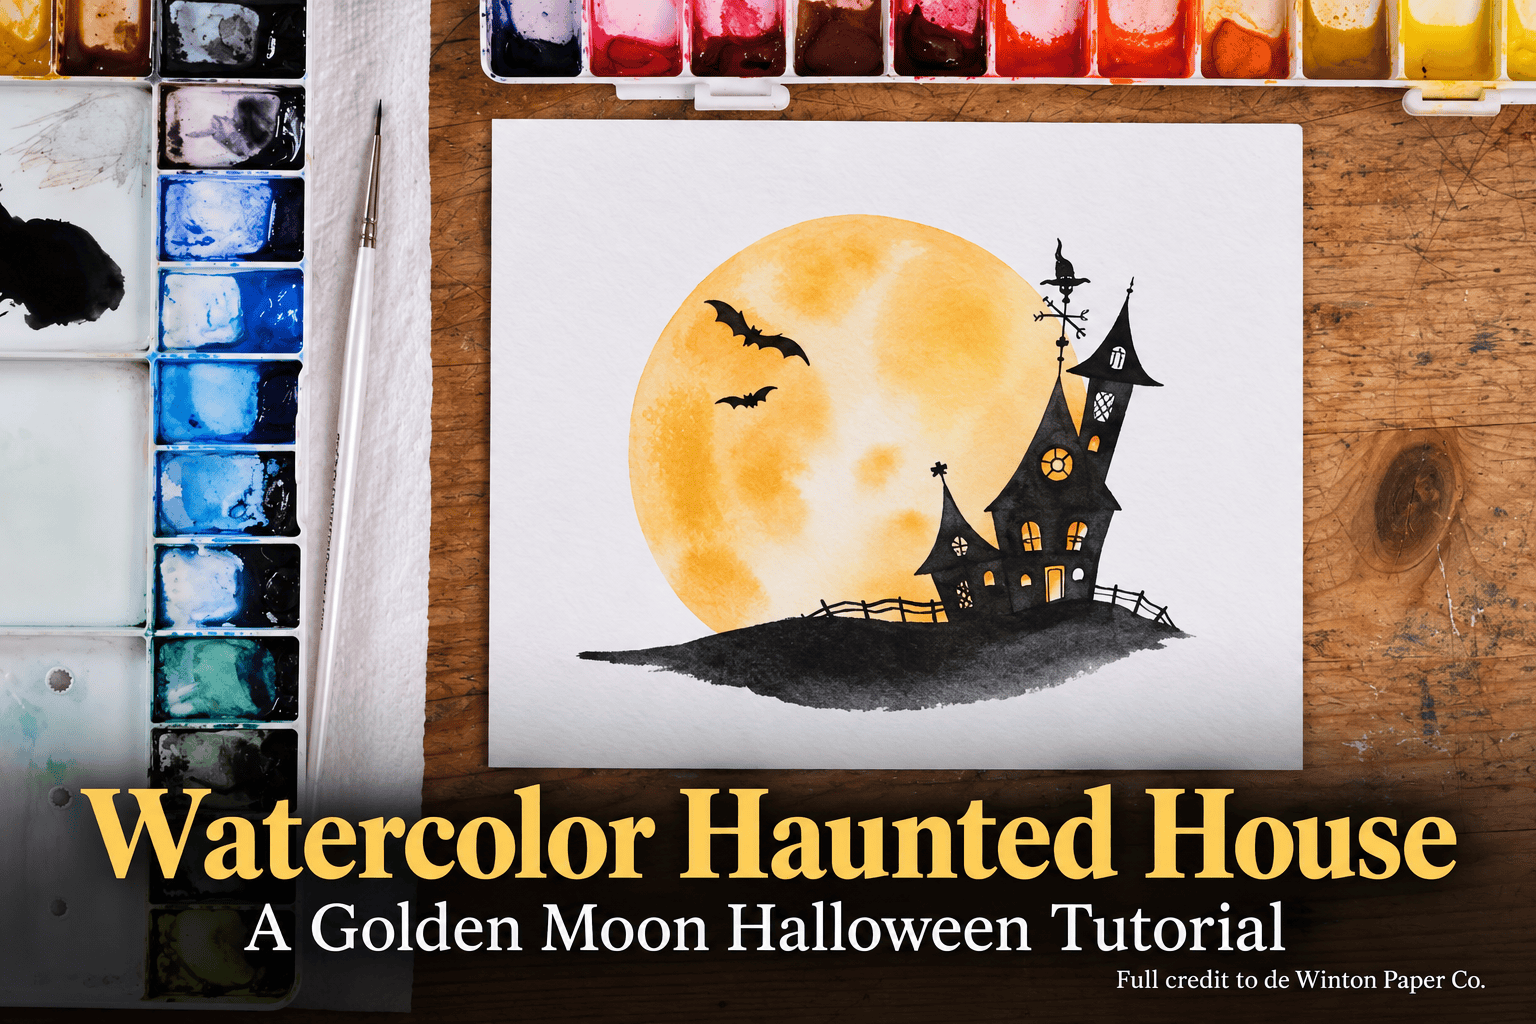
A golden moon and a crooked little house give this watercolor Halloween scene its character. In de Winton Paper Co.’s tutorial, a warm wash becomes the backdrop for a dark silhouette, while reserved windows let the moon’s color show through.
Inspired by the house in Practical Magic, the artist develops a small seasonal design for cards, journaling, and similar projects. The demonstration moves from a simple circle to playful architectural details, a winding fence, and two finishing bats.
Materials
The transcript names the following materials and tools:
- Watercolors: Hansa Yellow Medium, Yellow Ochre, Permanent Orange, Ivory Black, and Payne’s Gray.
- A palette for preparing the colors and concentrated dark mixture.
- A pencil for the hill and haunted-house guides.
- A compass, or a round object to trace, for the moon.
- A size 0 brush for painting the house silhouette and working around small windows.
- A fine detail brush, described as “4/10” in the transcript, for the weather vane and other small marks.
- A fineliner pen, mentioned as an optional alternative for the fine-detail stage.
The transcript does not specify a paper brand, paper weight, or the size of the brush used for the initial moon wash.
A Small Halloween Scene with a Playful Mood
The artist introduces autumn and Halloween as subjects that offer plenty of opportunities for seasonal painting. This project takes that inspiration into a compact moon-and-house composition. Its intended uses are modest: a small card illustration, a journal decoration, or another little seasonal design.
The house in Practical Magic provides the initial spark. Rather than recreating the film’s building, the artist develops a small haunted house with deliberately distorted proportions. The result depends on recognizable Halloween elements, but the mood remains sweet and whimsical.
That choice shapes the entire process. The moon supplies warmth, the silhouette supplies the house’s outline, and a handful of details suggests a witch’s home. There is no need for the demonstration to develop a fully rendered building before the design becomes recognizable.
Painting the Glowing Golden Moon
Establishing the Circle and First Wash
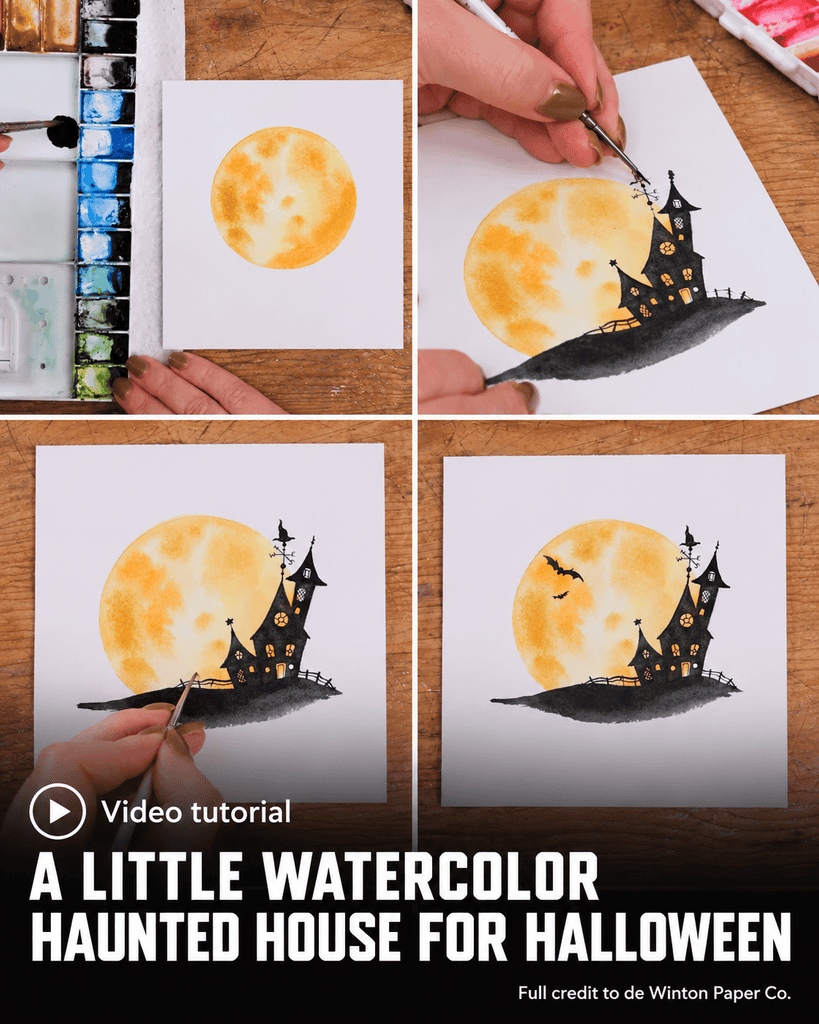
The demonstration begins with a drawn circle. The artist uses a compass, while also mentioning that tracing something round is an alternative. This simple outline defines the moon before any paint is applied.
Hansa Yellow Medium starts the light, golden wash. The artist describes the moon as the source of the painting’s glow, making this first stage more than a background filler. Its warm color will remain visible behind the house and inside some of the windows.
The moon comes first because the house is built over it later. At this point, the painting’s color is concentrated in the circular wash; the dark architectural shapes have not yet been introduced.
Adding Texture with Ochre and Orange
Yellow Ochre introduces variations within the moon, followed by Permanent Orange. These additions give the circle areas of warmer, deeper color rather than leaving it as one uniform yellow shape.
The artist uses the added colors to suggest moon texture and create an atmospheric glow. This is a stylized golden moon rather than a detailed study of its surface. The color changes carry the effect without requiring a separate drawing of individual lunar features.
The three warm colors also establish the contrast that the silhouette will use. The moon is already a distinct part of the design before the building appears, so the later dark paint has a luminous area behind it.
Preparing the Dark Silhouette Color
Combining Ivory Black and Payne’s Gray
While the moon dries, the artist prepares the darkest colors in the palette. Ivory Black is the starting point, with a little Payne’s Gray added to the mixture.
In this demonstration, the artist finds that the addition makes the black appear even darker. That observation explains the mixture used for the silhouette; it is presented as a practical choice for this painting.
The paint is mixed into a concentrated dark color. This stage takes place during the pause between the moon wash and the house, so the mixture is ready when the artist returns to the paper.
Waiting Until the Moon Is Completely Dry
The artist emphasizes that the moon is fully dry before the next stage begins. The transcript repeats this point clearly: the surface is completely dry when the pencil guides and dark silhouette are added.
This pause separates the soft wash stage from the small architectural shapes. The moon has already established its color and texture, and the next part of the demonstration shifts to drawing and defining the foreground.
The tutorial does not give a fixed drying time. The stated condition is a completely dry moon, rather than a particular number of minutes.
Drawing and Painting the Haunted House
A Hill and Deliberately Crooked Architecture
A pencil guide establishes a small hill, followed by the house. The artist describes the architecture as Tim Burton–like, with warped shapes and sides that taper outward.
The building stays small within the composition. An additional section extends the main house, giving the outline more variety while keeping the design compact.
The drawing is a guide for the silhouette rather than a detailed architectural plan. Its main purpose is to establish the hill and the unusual shape of the house before dark paint fills those forms.
At this stage, the artist also considers a weather vane topped by a bat or cat. These are possibilities mentioned during the planning; the detail later painted in the demonstration is a little witch’s hat.
Reserving the Windows
The house is painted as a silhouette, with the window areas left free of the dark paint. This is the central decision behind its glowing appearance.
Where a reserved window overlaps the moon, the earlier golden wash remains visible. The artist therefore creates the bright openings by painting around them, instead of covering the entire house and adding light windows afterward.
A size 0 brush provides the detail needed for this part of the process. It allows the silhouette to be developed around the small openings while keeping the house’s outer shape clear.
The reserved spaces also break up the dark building. Even before the window panes are added, the openings give the silhouette an inhabited quality and connect it to the warmth of the moon behind it.
Adding Character with Fine Details
The Weather Vane and Witch’s Hat
For the fine-detail stage, the artist changes to the small brush described as “4/10” and uses a more concentrated portion of paint. A fineliner pen is mentioned as an alternative for this kind of work.
The weather vane is the first of these details. Its small witch’s hat develops the Halloween theme above the house, adding a playful focal point to the silhouette.
The artist emphasizes taking time over these little additions. They are small in scale, but they give the house more individuality than a plain dark outline would have on its own.
Window Panes and a Stylized Door
Fine lines are added inside the reserved windows to suggest panes and decorative divisions in the glass. The artist aims for something more interesting than repeating the same simple cross in every opening.
These marks change the windows from empty gaps into architectural details. The golden areas remain visible around the dark lines, retaining the effect established when the silhouette was first painted.
Some windows lie outside the moon’s colored area. The artist acknowledges that those openings do not share the same golden background and accepts the difference. Once the brighter windows and their details are present, the variation is not treated as a problem that needs correcting.
The door receives a stylized treatment as well. Like the uneven house shape and varied window divisions, it supports the playful character of the building rather than pursuing strict architectural realism.
Completing the Fence and Flying Bats
A Fence That Follows the Hill
A small fence is added beside the house. The artist makes its lines weave along the scene, then lets part of it disappear into the hill.
A few upright posts complete the suggestion of a fence. The detail gives the house a little surrounding setting while keeping the foreground connected to the same compact composition.
This addition follows the larger hill shape already established beneath the house. It develops the scene through a few thin marks instead of introducing another large painted form.
Two Bats for Balance
The artist adds a bat as a finishing element and explains that it helps balance the composition. A small central body comes first, followed by the wings.
The wing shapes prompt a comparison with painting holly leaves, particularly when deciding how many little points to include. The comparison describes the experience of shaping the bat’s outline, rather than introducing a different subject into the painting.
A second, smaller bat completes the pair. Their dark shapes carry the silhouette language beyond the house and make the Halloween subject immediately recognizable.
A Compact Design for Seasonal Projects
The finished painting brings together a golden moon, a crooked house, reserved windows, fine architectural marks, a fence, and two bats. Its sequence is straightforward, with the fully dried moon serving as the foundation for the silhouette and details that follow.
De Winton Paper Co. presents the design as a small project suited to cards, journaling, and similar seasonal uses. The artist also notes that the moon backdrop could support other Halloween silhouettes. In this demonstration, the witch’s house shows how a warm wash and carefully placed dark shapes can develop into a playful little scene.