
Perspective can transform your house drawings from flat to realistic. If you struggle with buildings that look awkward or out of proportion, learning perspective will help.
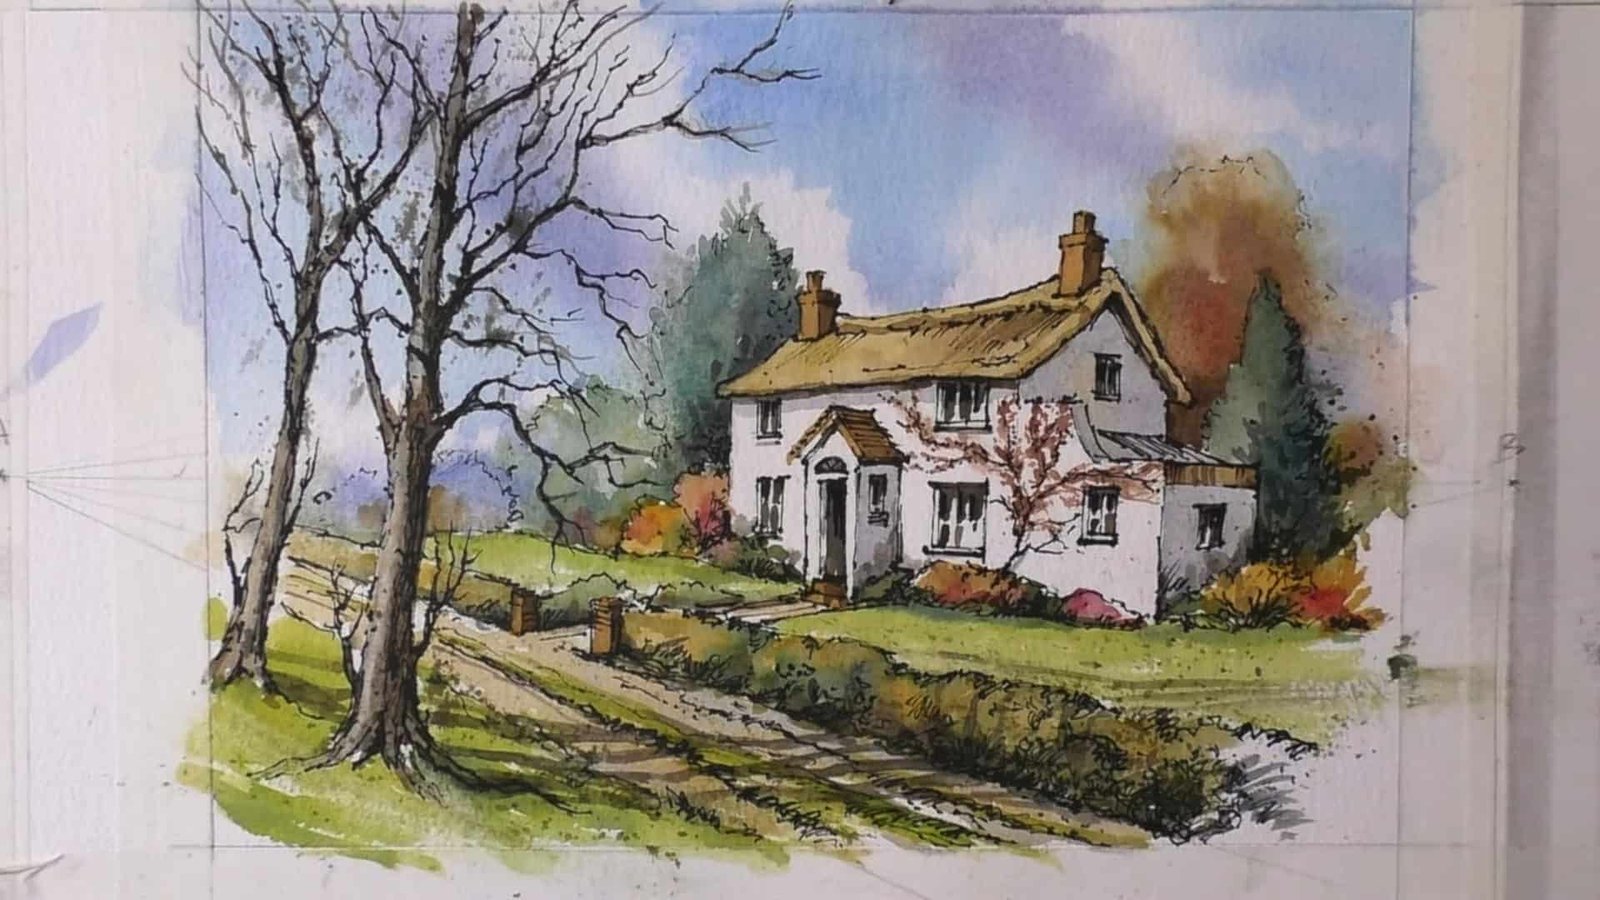
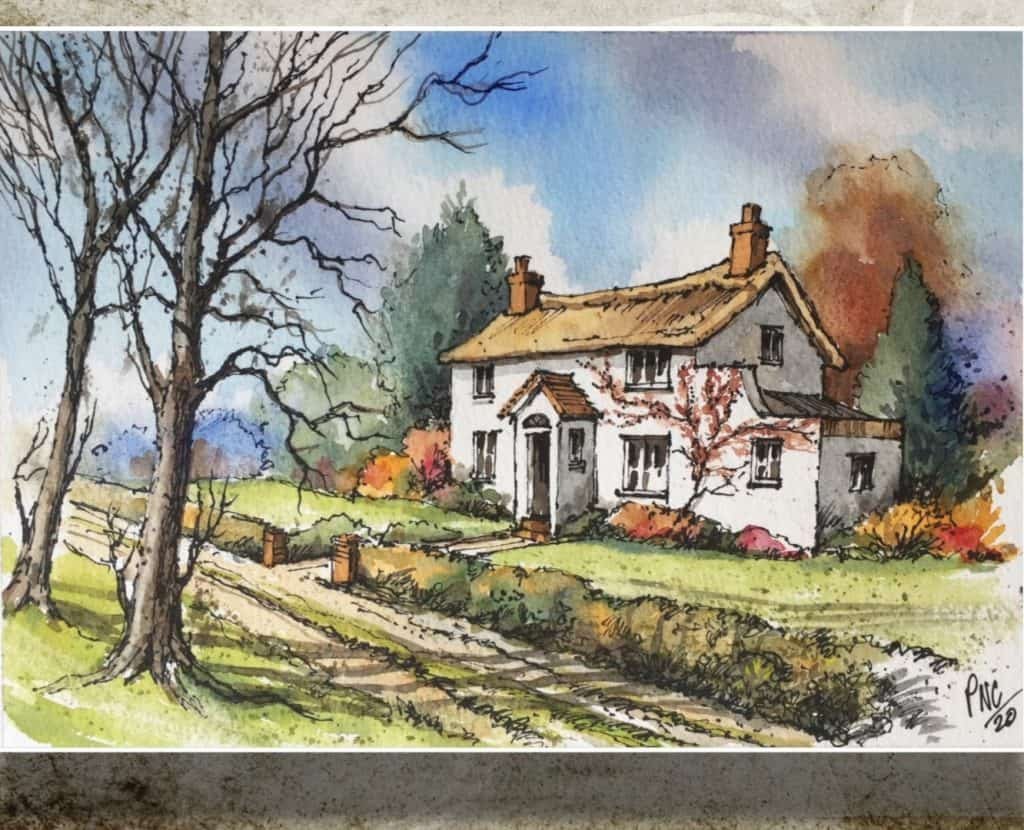
In the guide, Paul Clark will share a detailed tutorial on how to draw and paint a cottage in two-point perspective using line and wash.
Let’s explore his method step by step and practice drawing with confidence.
Contents
- 1 Why Perspective Drawing is Important for Artists
- 2 One-Point vs. Two-Point Perspective in Drawing
- 3 How to Draw a House in Two-Point Perspective
- 3.1 Step 1: Draw the Horizon Line & Vanishing Points
- 3.2 Step 2: Sketch the Basic Walls of the House
- 3.3 Step 3: Build the Roof Using Perspective Rules
- 3.4 Step 4: Add Extensions and a Porch in Perspective
- 3.5 Step 5: Draw Windows, Doors, and Chimneys
- 3.6 Step 6: Add Paths, Hedges, and Foreground Details
- 3.7 Step 7: Refine the House with Freehand Lines
- 4 Inking the House Drawing with a Waterproof Pen
- 5 How to Paint a House in Perspective with Watercolor Washes
- 5.1 Step 1: Essential Supplies
- 5.2 Step 2: Painting the Sky and Clouds
- 5.3 Step 3: Adding Color and Shadows to the House
- 5.4 Step 4: Painting Trees, Bushes, and Grass
- 5.5 Step 5: Creating Textures and Details in the Landscape
- 5.6 Step 6: Finishing the Foreground and Final Washes
- 5.7 Step 7: Final Pen Details for a Finished Line and Wash House
- 6 In A Nutshell
Why Perspective Drawing is Important for Artists
Before you pick up your brush, you need to understand why perspective matters. Without it, your houses may look uneven or unnatural on the page.
Understanding Perspective in Drawing and Painting
Perspective is one of the most essential principles in art. It allows you to transfer what you see in a three-dimensional world onto your two-dimensional paper.
According to Paul Clark, as objects move farther away, they always appear smaller. That is the golden rule you should remember.
You may not think about this when you walk outside, but the moment you draw, perspective becomes essential.
It helps you place objects at the right scale so they look convincing in your artwork.
Eye Level and Vanishing Points Explained
Now let’s connect this with vanishing points. Your line of sight, also called eye level, is where vanishing points meet. If you look at any street photo, you will see lines converging at this level.
Paul Clark explains that there are many types of perspectives, like one-point or even three-point.
But in practice, you only need one-point and two-point perspectives for most drawings. These are the key ones for sketching houses and landscapes.
One-Point vs. Two-Point Perspective in Drawing
Once you know the basics, you can compare one-point and two-point perspectives.
How One-Point Perspective Works
All the lines converge into a single vanishing point in one-point perspective. Let’s imagine standing right in front of a building. The front face is flat, and all lines move back into the same spot on the horizon.
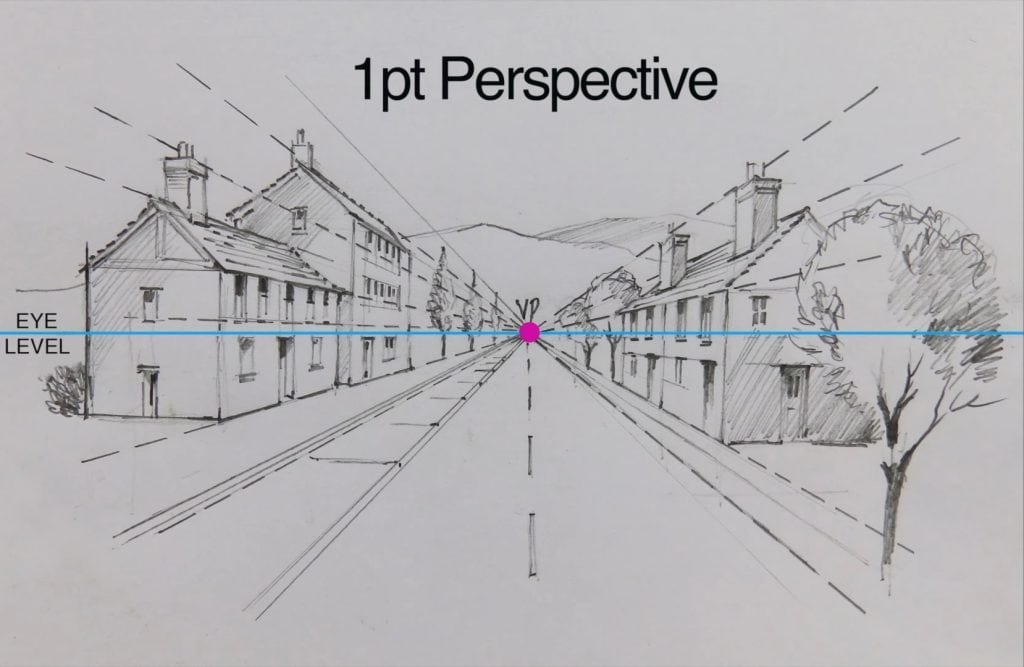
Paul Clark suggests you look at holiday photos to see this.

Roads, buildings, and fences often vanish into one point in the distance. It’s simple and very common in everyday views.

How Two-Point Perspective Works
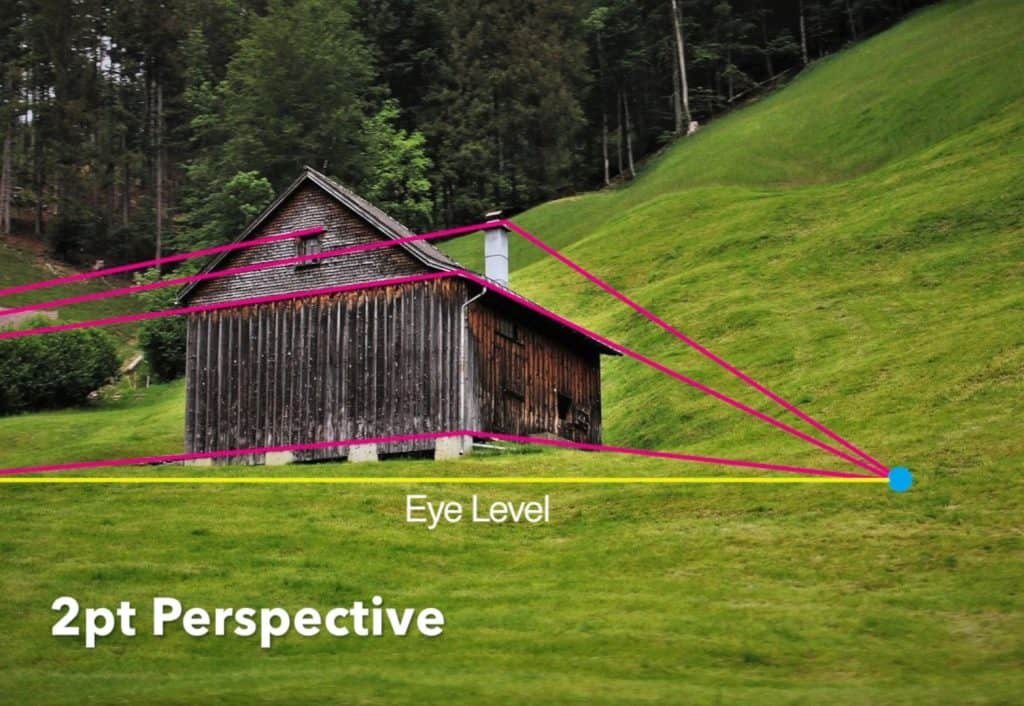
Two-point perspective, however, shows more complexity. You use it when you look at a building from a corner, so you see two sides at once. Each side goes back into its own vanishing point.
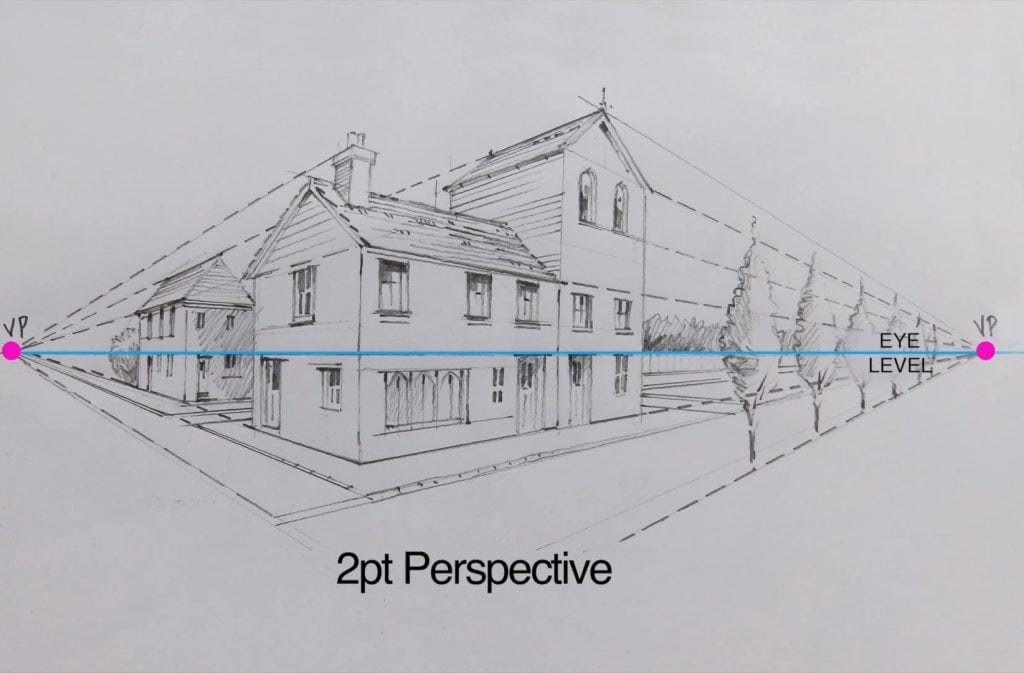
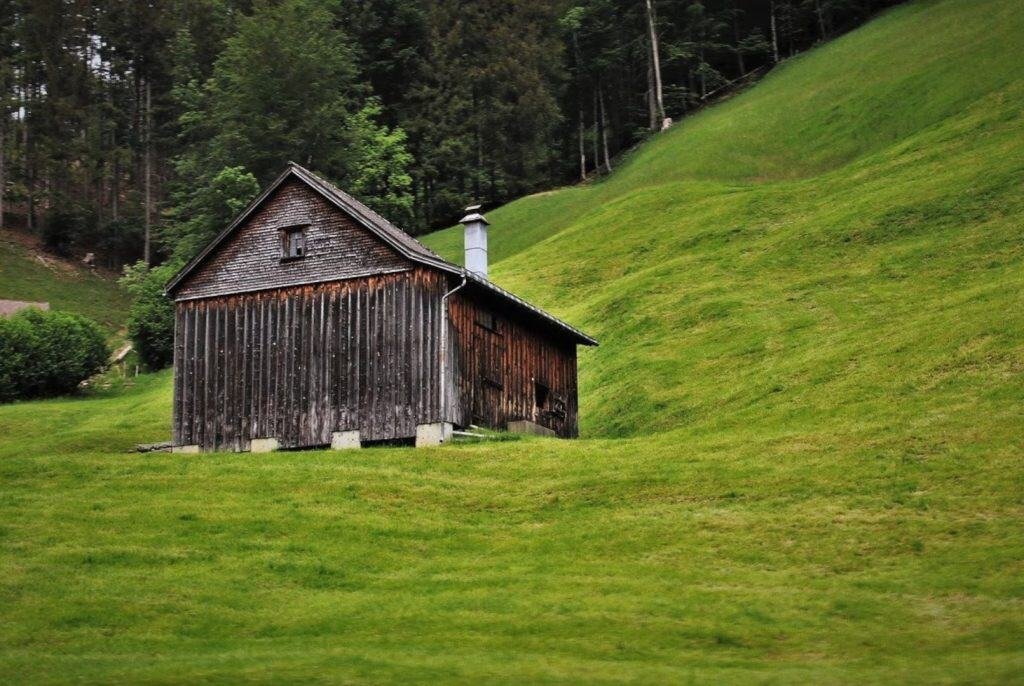
Clark demonstrates this with a barn sketch. Sometimes the vanishing points are even off the page.
When your eye level is low, it means you are looking upward at the building. This is exactly what you need when you draw cottages or houses from an angle.
How to Draw a House in Two-Point Perspective
Now it’s time to apply this knowledge. Paul Clark takes you through each stage of sketching a house with two-point perspective.
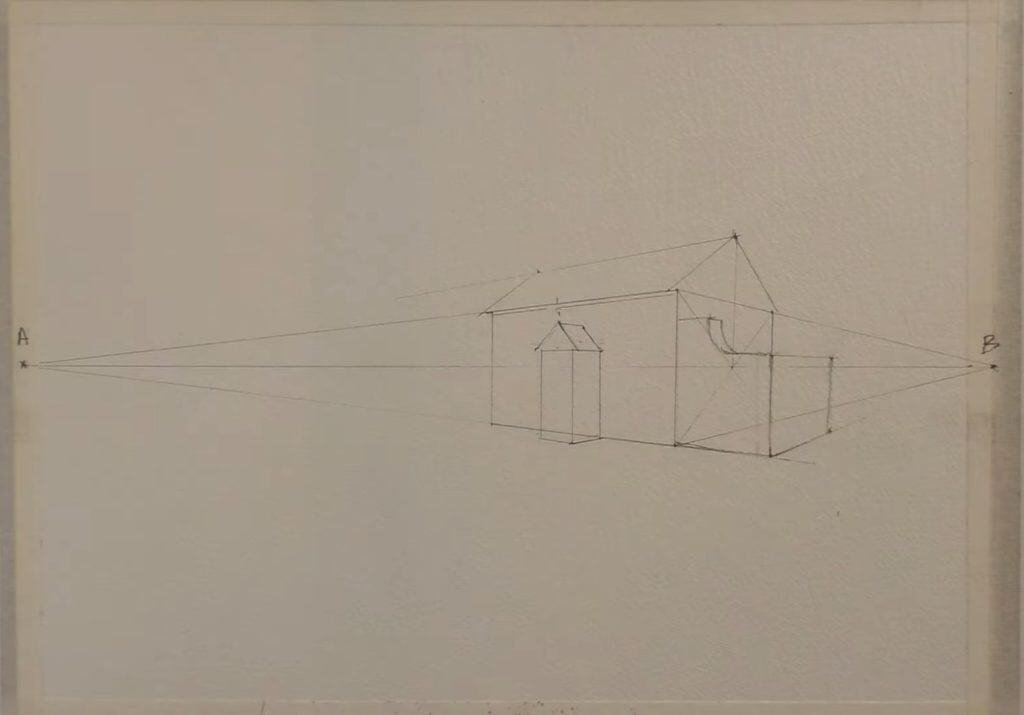
Step 1: Draw the Horizon Line & Vanishing Points
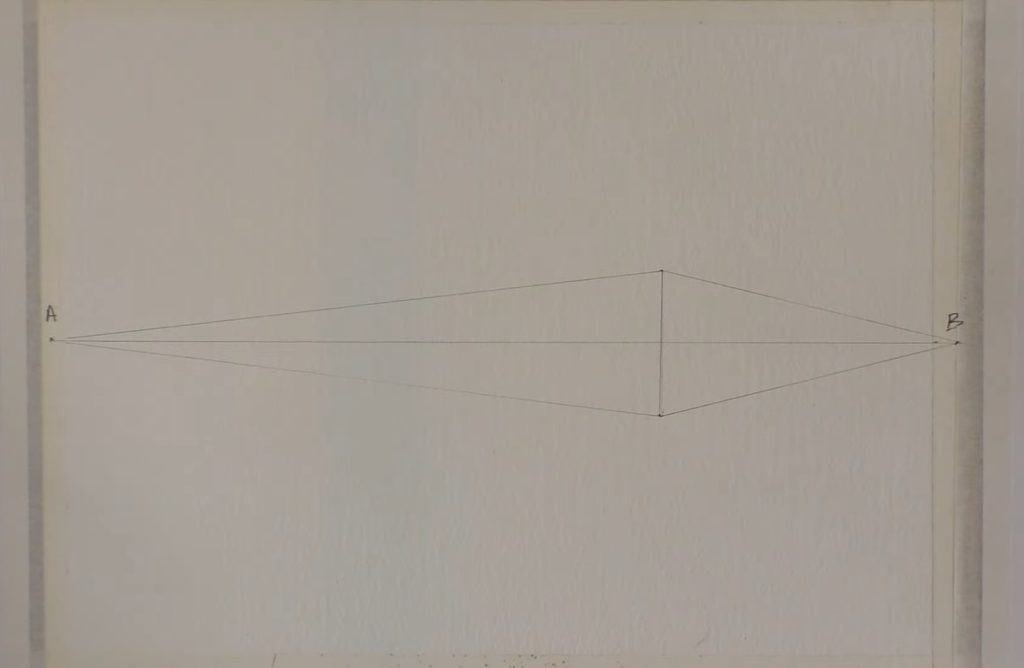
First, draw a straight line across the middle of your page. This is your eye level or horizon. Then place two points on it. Mark them as A and B. These are your vanishing points.
This setup will guide every wall, roof, and path in your drawing. Without it, proportions can slip out of balance.
Step 2: Sketch the Basic Walls of the House
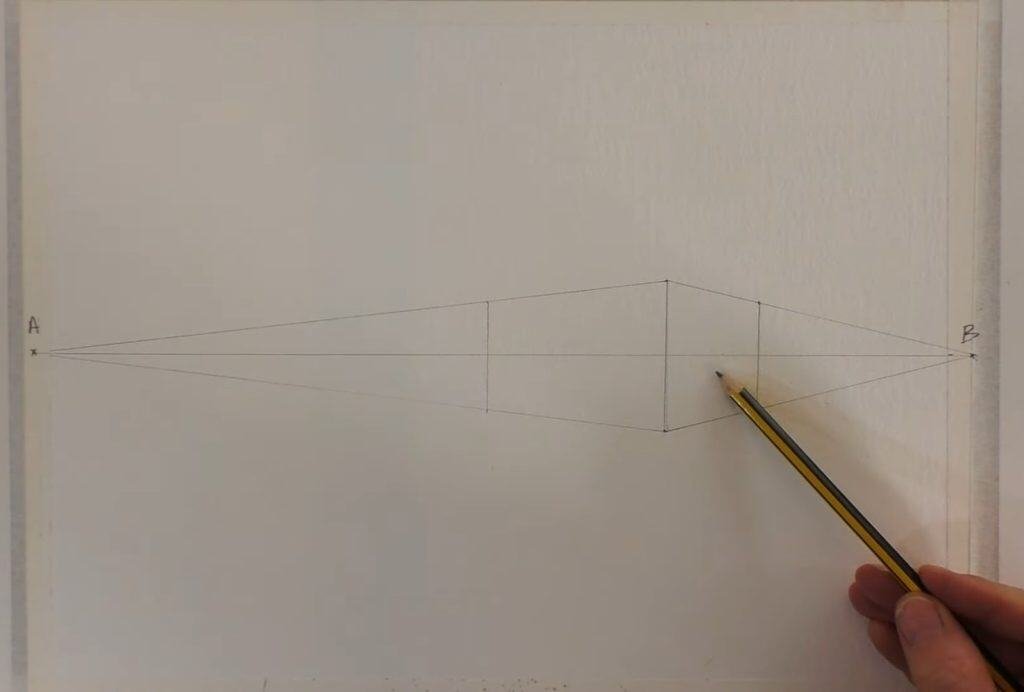
Draw a vertical line about three-quarters across the page. This becomes the corner of the house. From this line, draw guidelines toward A and B. These give you the two visible sides of the cottage.
Clark notes that keeping track of which side goes to which point keeps the house realistic.
Step 3: Build the Roof Using Perspective Rules
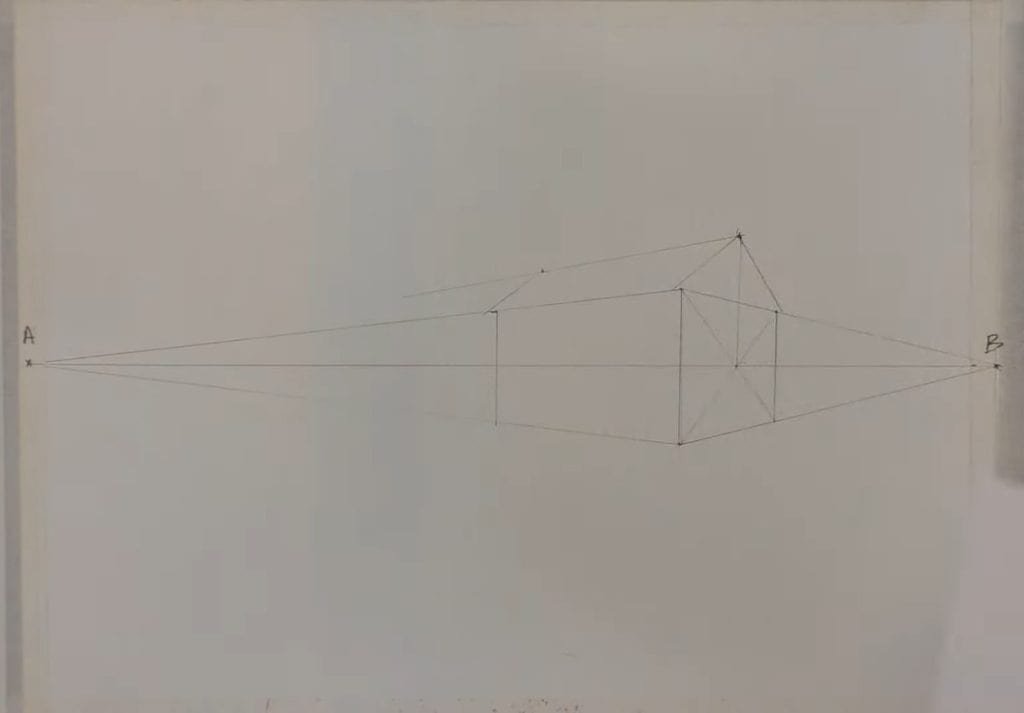
Now add the roof. First, find the center of the side wall by drawing two diagonals. The spot where they cross is the exact center. From there, draw a line up for the roof peak.
Then connect that peak back to vanishing point A. This ensures the roof angles are correct. Clark stresses that diagonals work like magic to solve perspective puzzles.
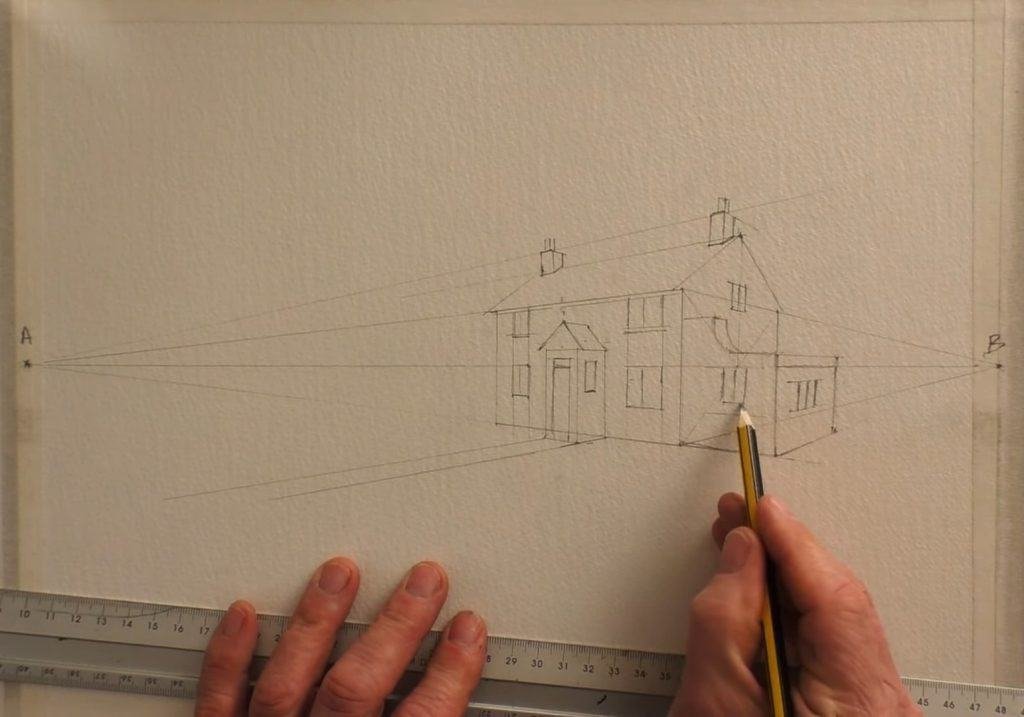
Step 4: Add Extensions and a Porch in Perspective
Many cottages have extra walls or porches. Use the same system. Extensions on the front wall follow vanishing point A. The thickness of walls goes to vanishing point B.
Porches can feel tricky, but if you anchor each side to the correct point, they fall into place. Paul Clark corrects himself during the demo, reminding you that it’s fine to adjust. Accuracy grows with practice.
Step 5: Draw Windows, Doors, and Chimneys
The next step is to add details like chimneys, windows, and doors. For windows on the front face, use guidelines to A. For the side face, use guidelines to B. It keeps them aligned naturally.
Even small features like chimneys must follow perspective. One face goes to A, the other to B. These details help the drawing look complete.
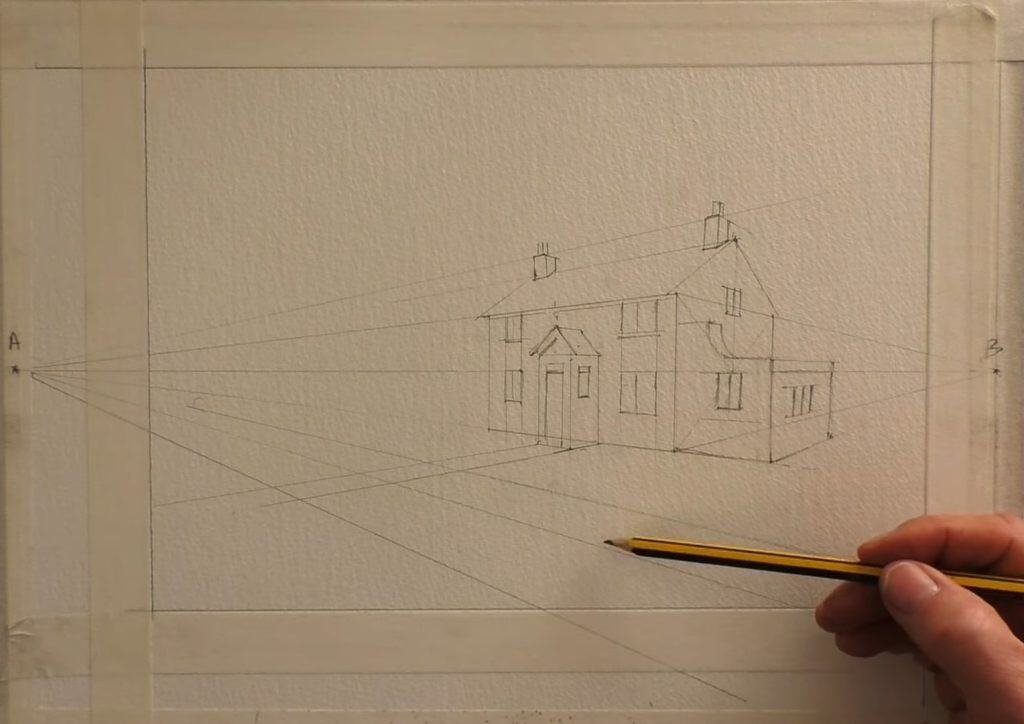
Step 6: Add Paths, Hedges, and Foreground Details
Now place the cottage in its setting. Draw the path, hedge, and little lane. Again, follow vanishing points. The path runs to B, while the lane in front goes back to A.
Clark crops his composition to balance the view. He also adds a hedge quickly, reminding you that even simple lines should respect perspective.
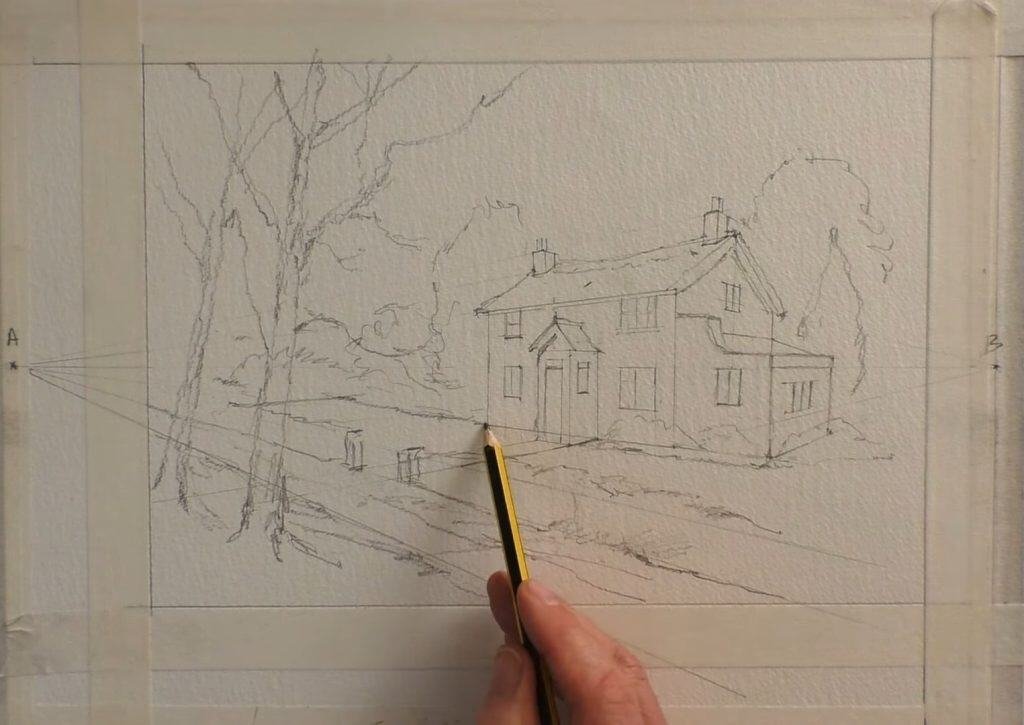
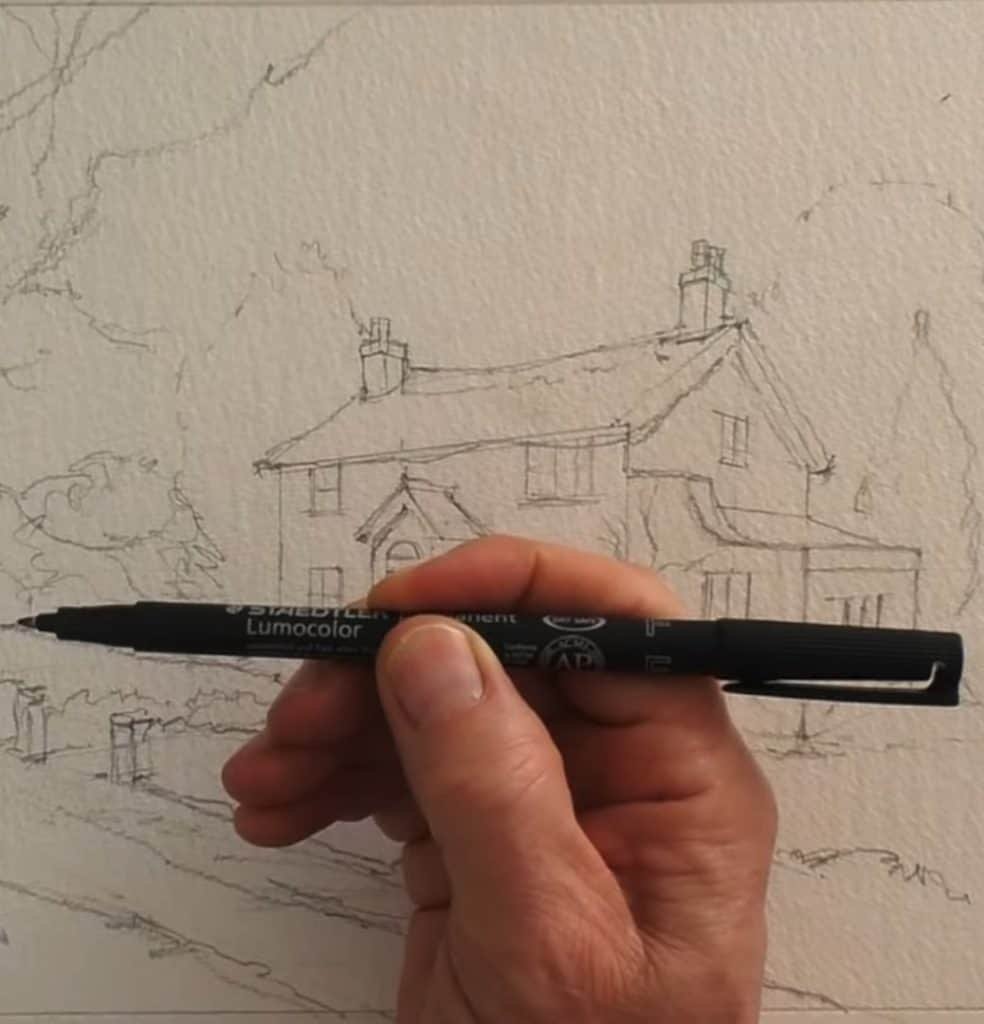
Step 7: Refine the House with Freehand Lines
At this stage, erase the guidelines. Then take an HB pencil and redraw the house loosely. This makes the sketch look natural.
Paul Clark shares that he doesn’t always use vanishing point setups when sketching outdoors. But because he understands perspective, he can draw buildings more convincingly by eye. He believes good drawing is more about seeing than measuring.
Inking the House Drawing with a Waterproof Pen
With the pencil work ready, it’s time to use ink. This step prepares the sketch for watercolor.
Why Use Waterproof Ink for Line and Wash
You must use a waterproof marker. If not, the ink will run when you add water. A permanent pen keeps your lines crisp.
Clark stresses that waterproof ink is non-negotiable. It protects your hard work during the wash stage.
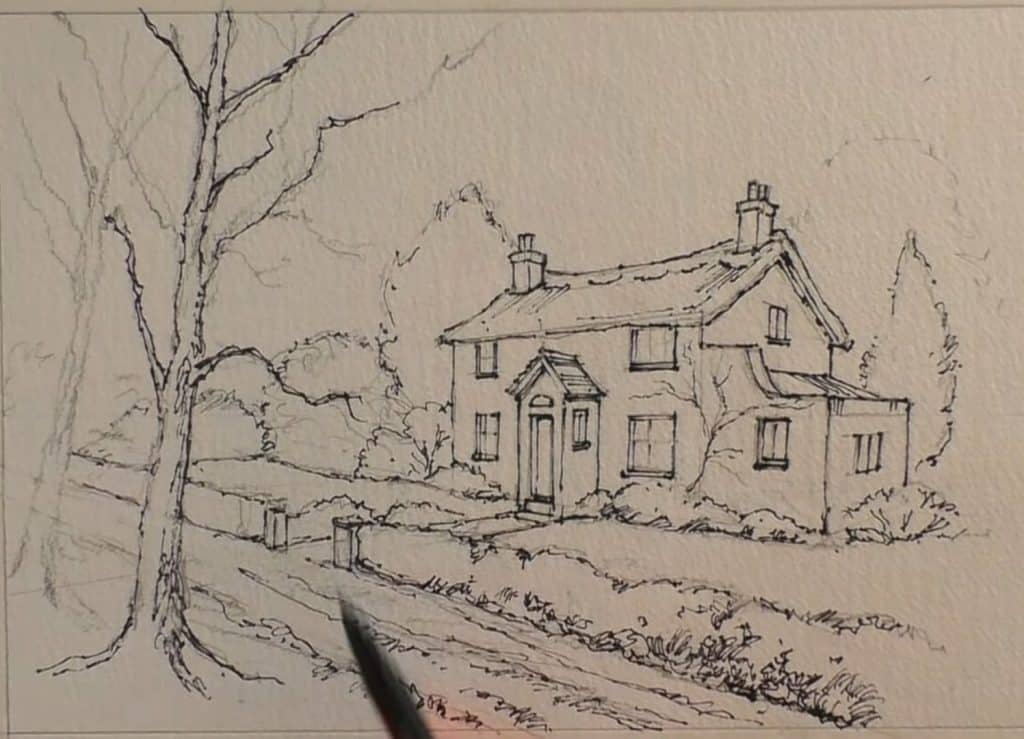
Adding Expressive Line Work to Your Sketch
Don’t aim for perfect, stiff outlines. Instead, move your pen quickly. Let it wobble. Allow some gaps. This creates energy and character.
Paul Clark explains that the style makes the house feel alive. Straight mechanical lines would make it dull.
How to Paint a House in Perspective with Watercolor Washes
Now comes the painting stage. This is where your house sketch comes alive.
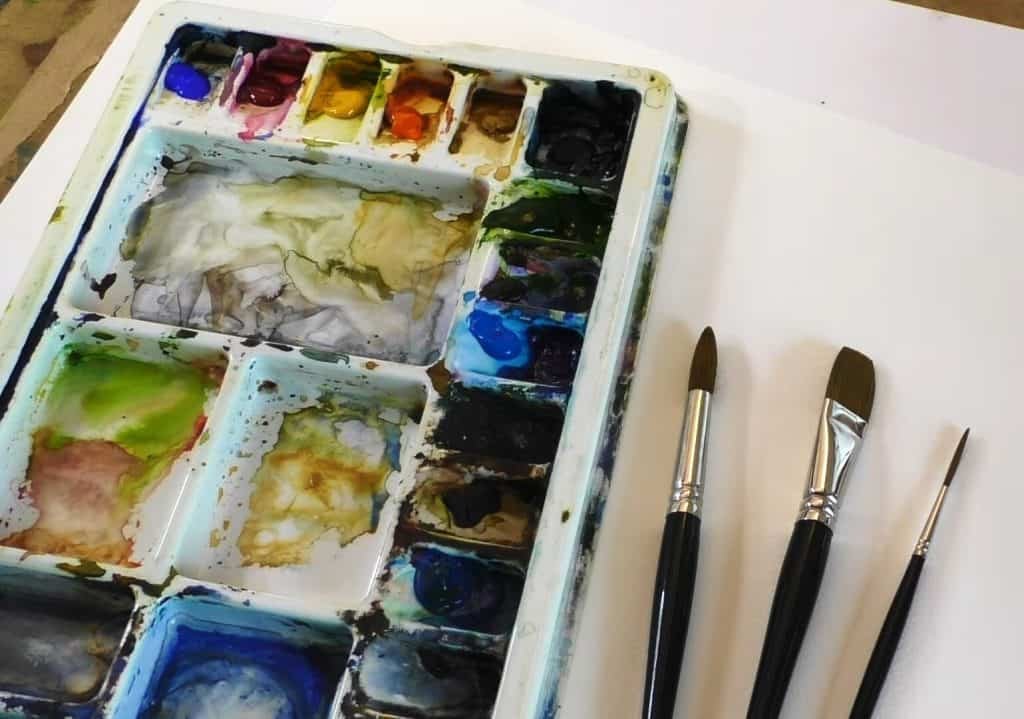
Step 1: Essential Supplies
Paul Clark uses:
- Cobalt blue
- Alizarin crimson
- Cadmium yellow
- Cadmium orange
- Yellow ochre
- Payne’s grey
- Cerulean blue
- Burnt umber
This palette gives a full range of mixes for sky, walls, trees, and shadows.
Clark uses Fabriano cold-press watercolor paper. It has texture but still works well with ink.
His brushes include a number 12 round, a ¾ inch flat, and a number 3 rigger. With these, you can cover large washes and add fine details.
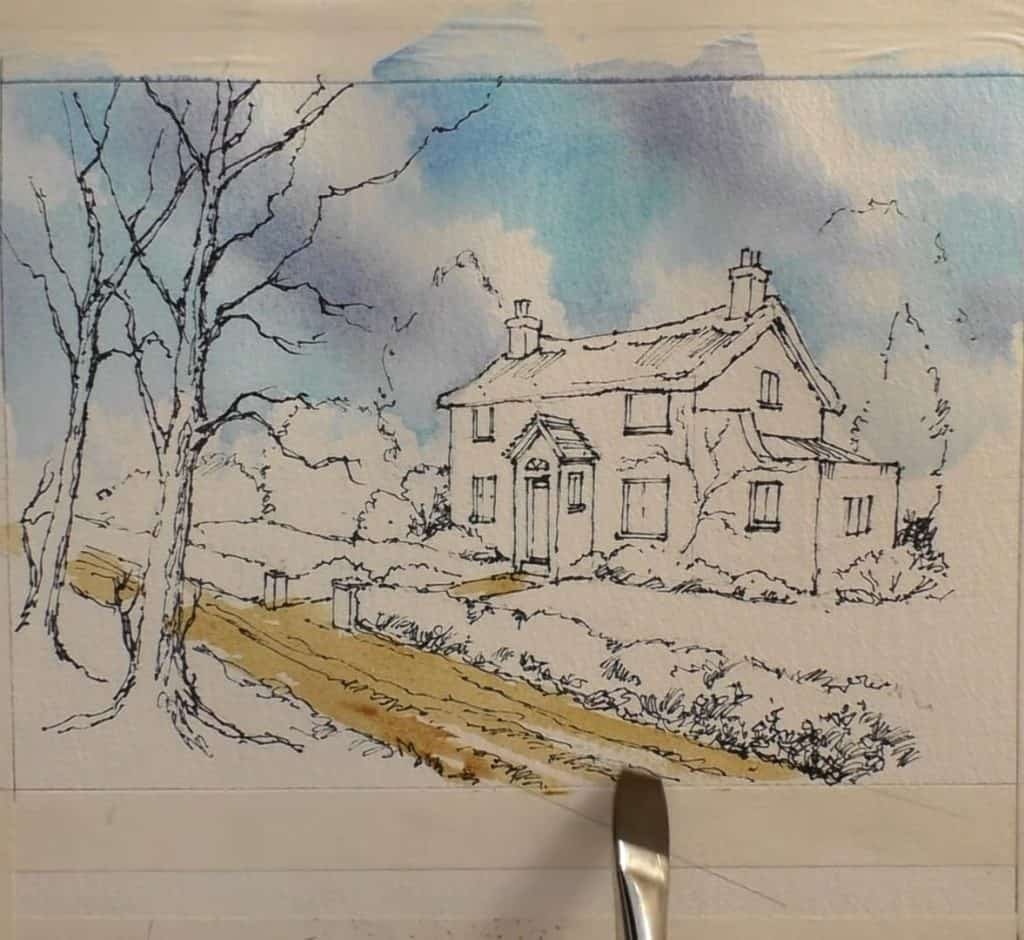
Step 2: Painting the Sky and Clouds
First, wet the sky area with the flat brush. Then drop in a mix of cobalt blue and cerulean blue.
Add touches of alizarin crimson and yellow ochre to soften the tone for clouds.
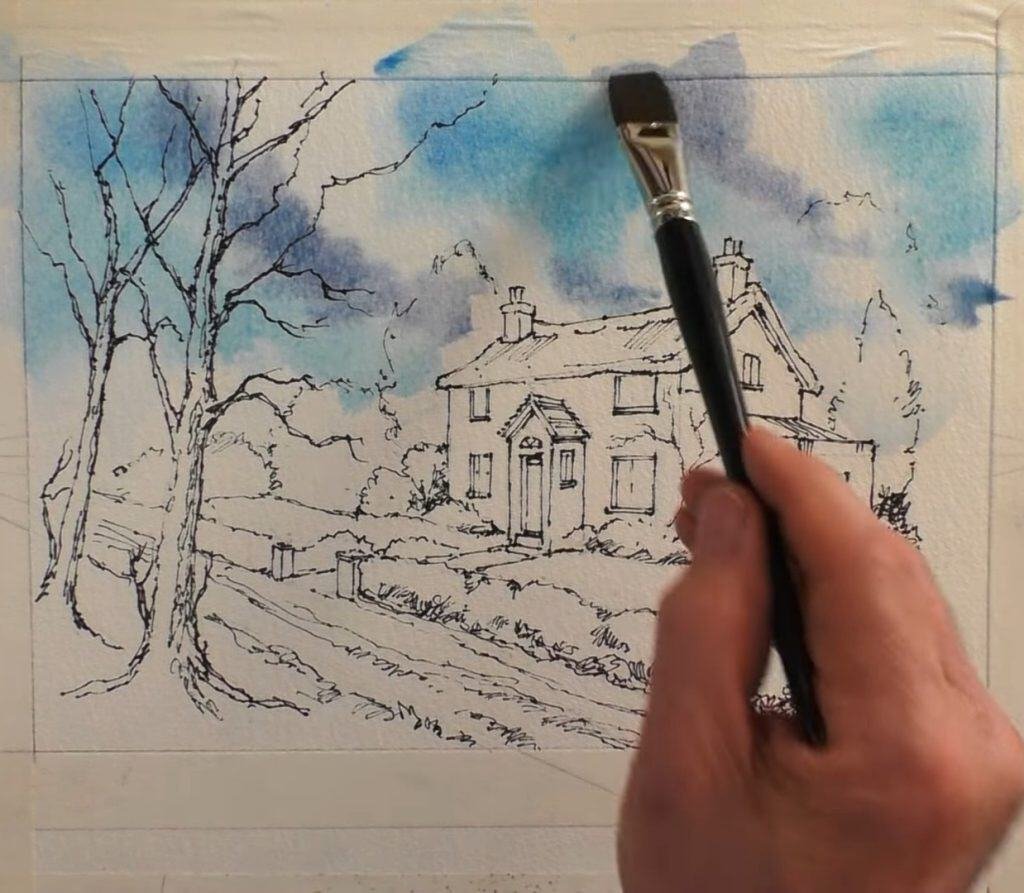
Blot with tissue to lift highlights. This creates soft, fluffy clouds naturally.
Step 3: Adding Color and Shadows to the House
Mix yellow ochre with burnt umber for the path.
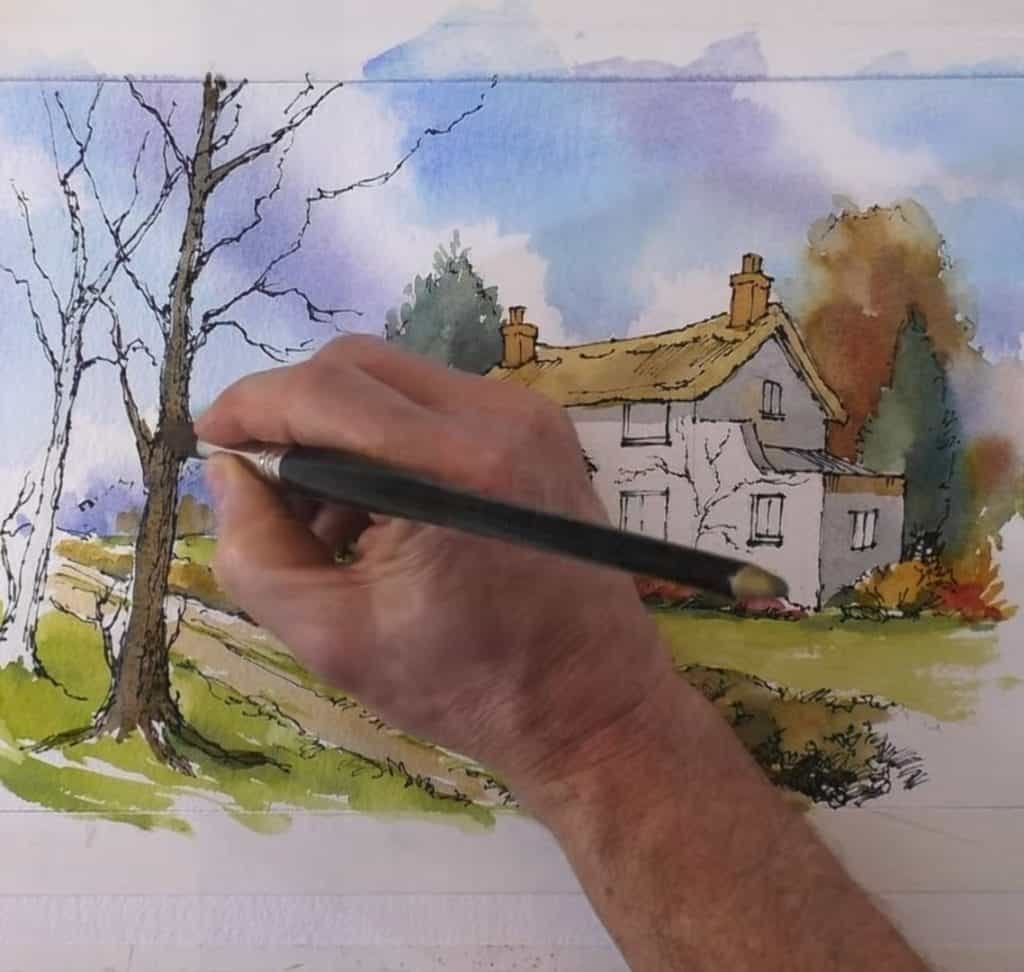
Use Payne’s grey on the shaded wall of the cottage, keeping the light direction consistent.
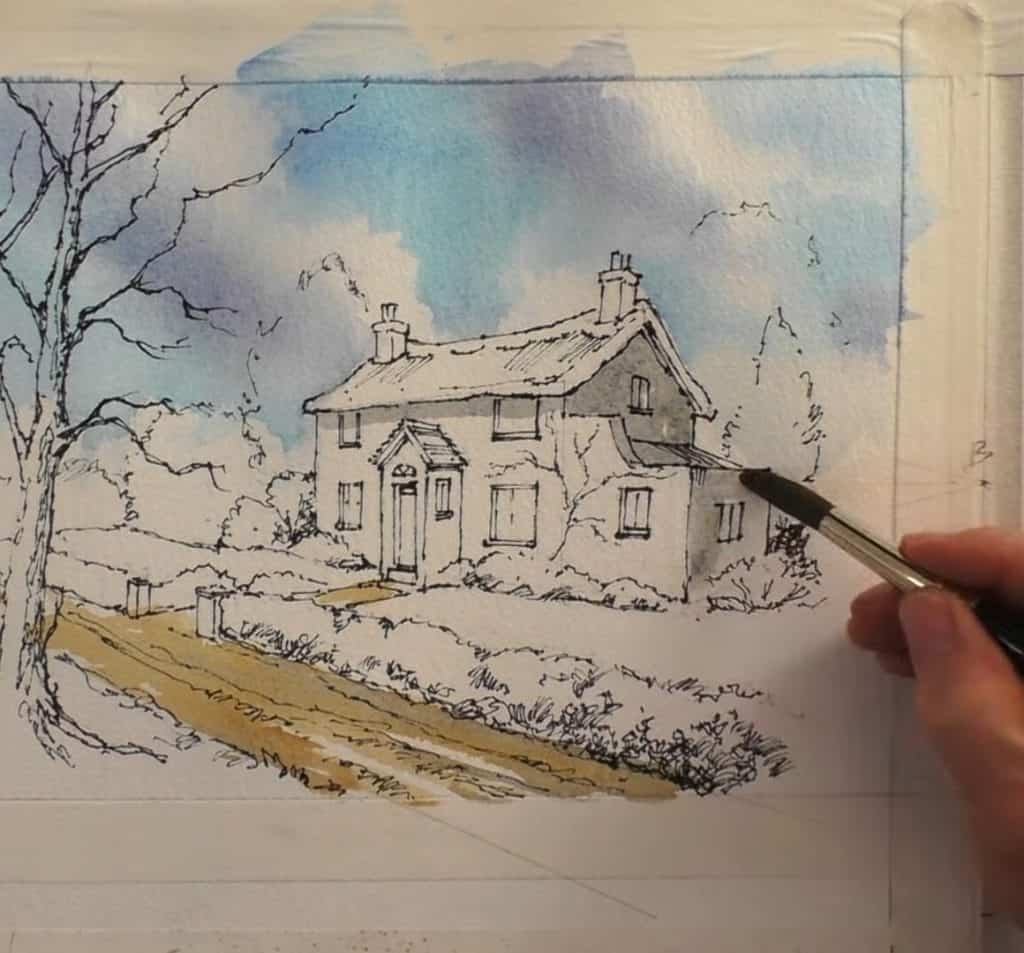
Paul Clark reminds you to think of the light source. Shadows on the right side deepen the realism.
Step 4: Painting Trees, Bushes, and Grass
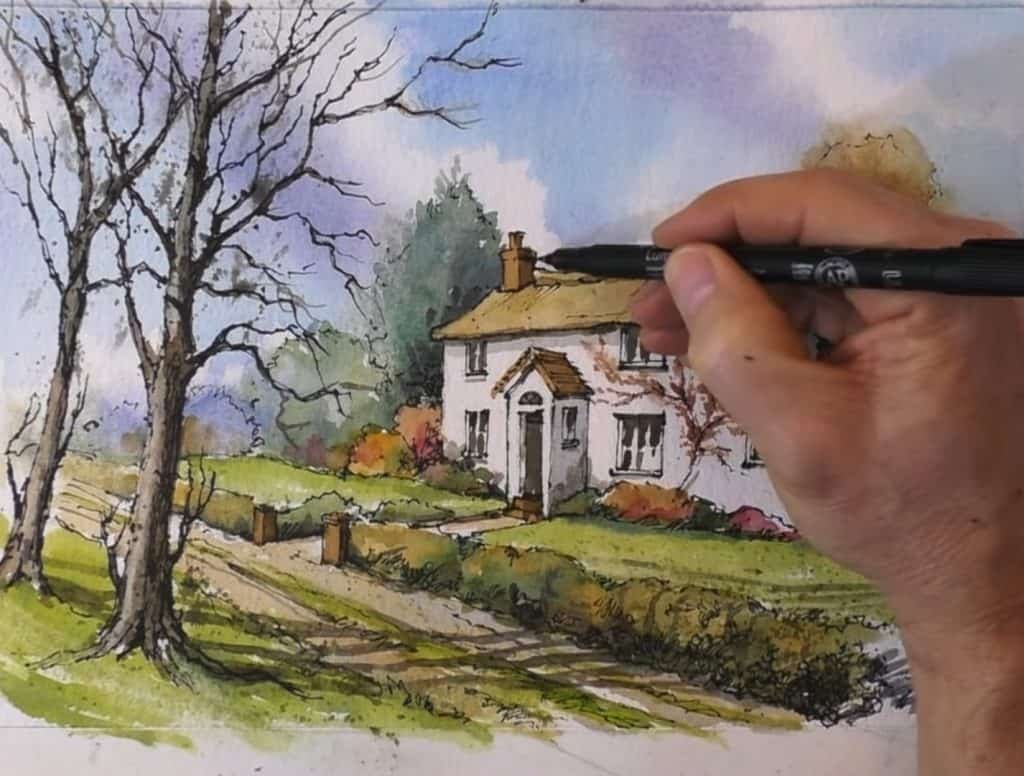
For distant trees, use cobalt blue with water to fade edges. This makes them recede. For nearer bushes, blend warm autumn tones like golds and browns.
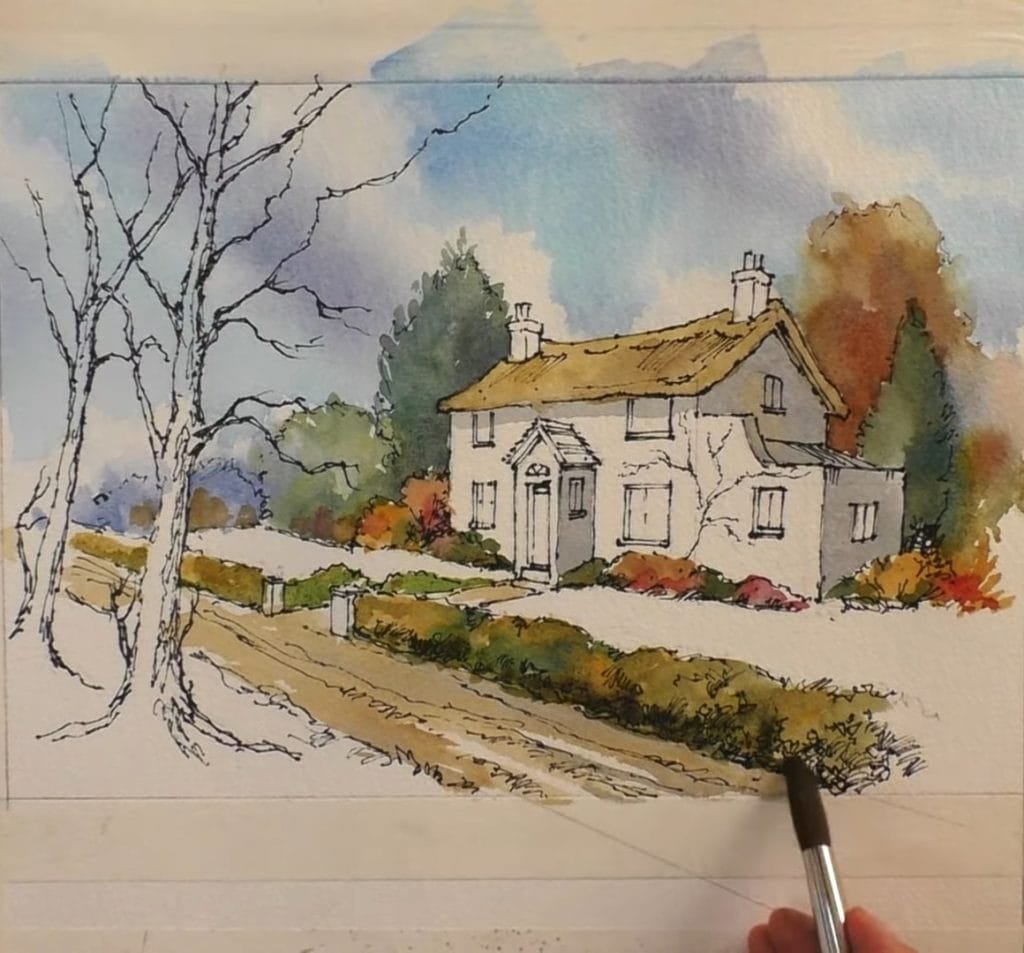
For grass, mix 70% cadmium yellow and 30% cobalt blue. Work quickly and leave some white gaps. These little highlights make the grass sparkle.
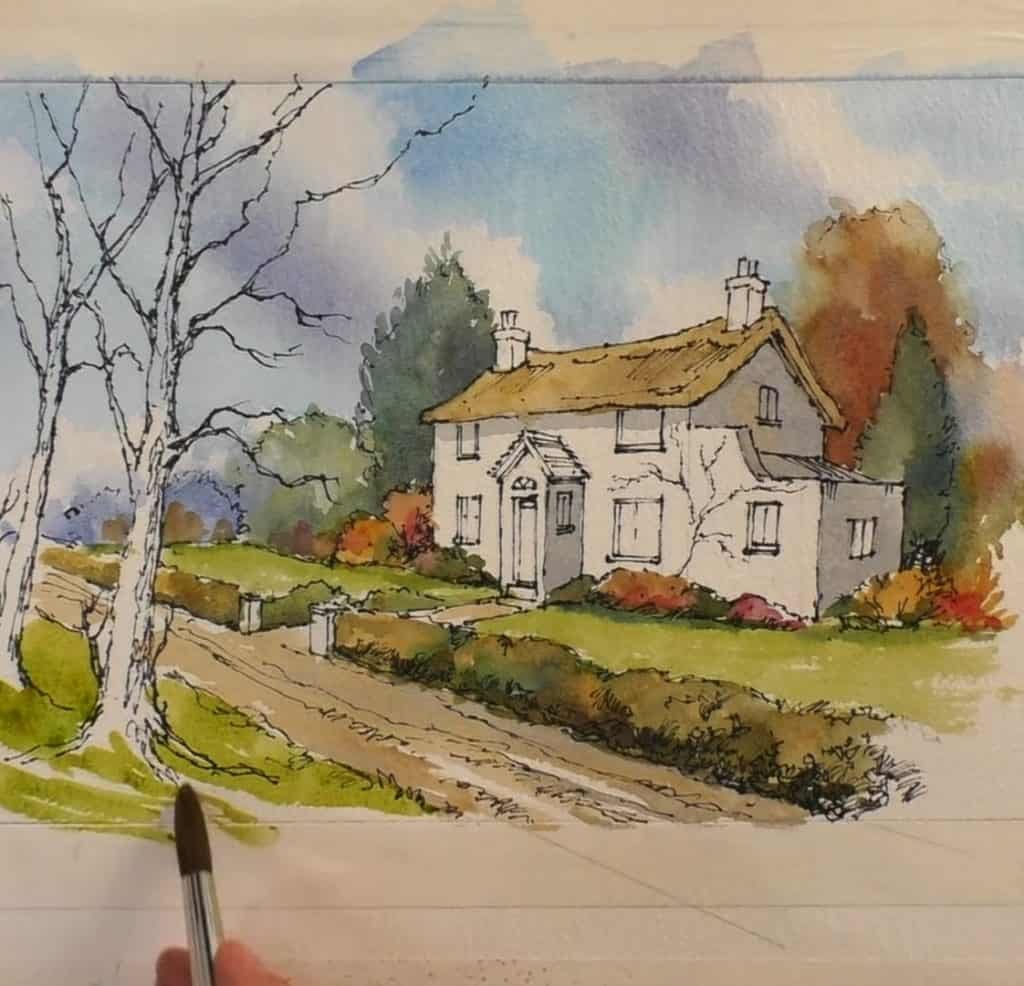
Step 5: Creating Textures and Details in the Landscape
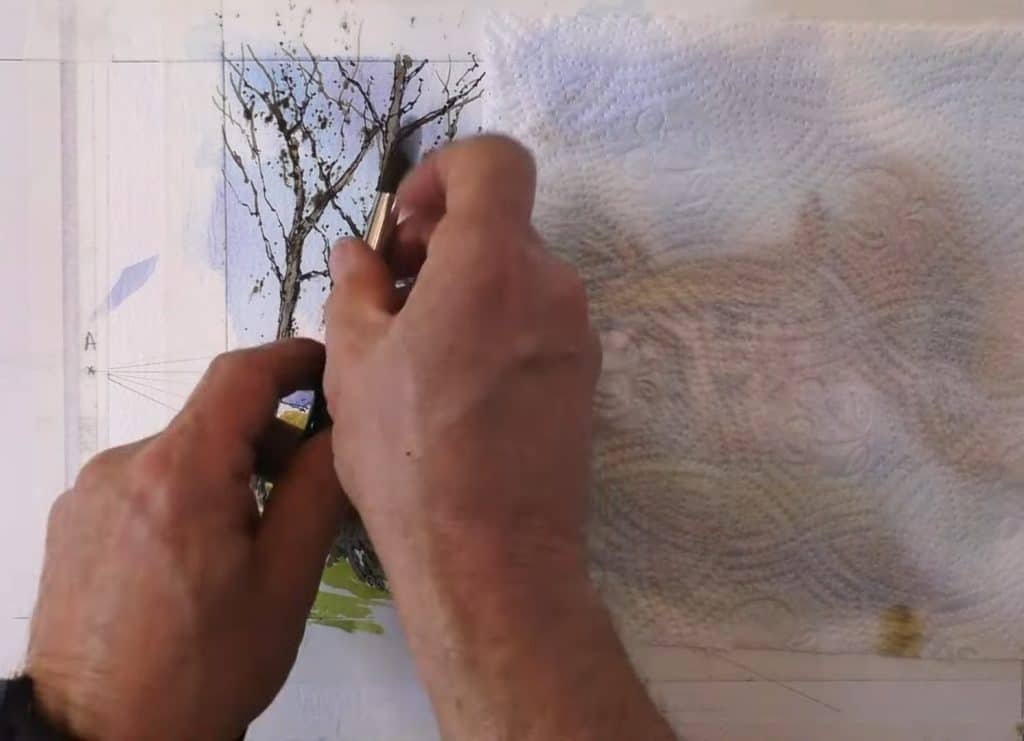
The next step is to add brick color with burnt umber and cadmium orange. Paint tree trunks with burnt umber.
Then dry the brush and lift highlights for texture.
Use the rigger brush for thin branches. For Virginia creeper, blend burnt umber with alizarin crimson. Each step builds character in the scene.
Step 6: Finishing the Foreground and Final Washes
Add splatters for tree texture. Dab out any heavy spots with tissue. Soften foreground washes with a damp cloth to blend edges.
Clark warns not to overwork the painting. Too many layers can flatten the freshness.
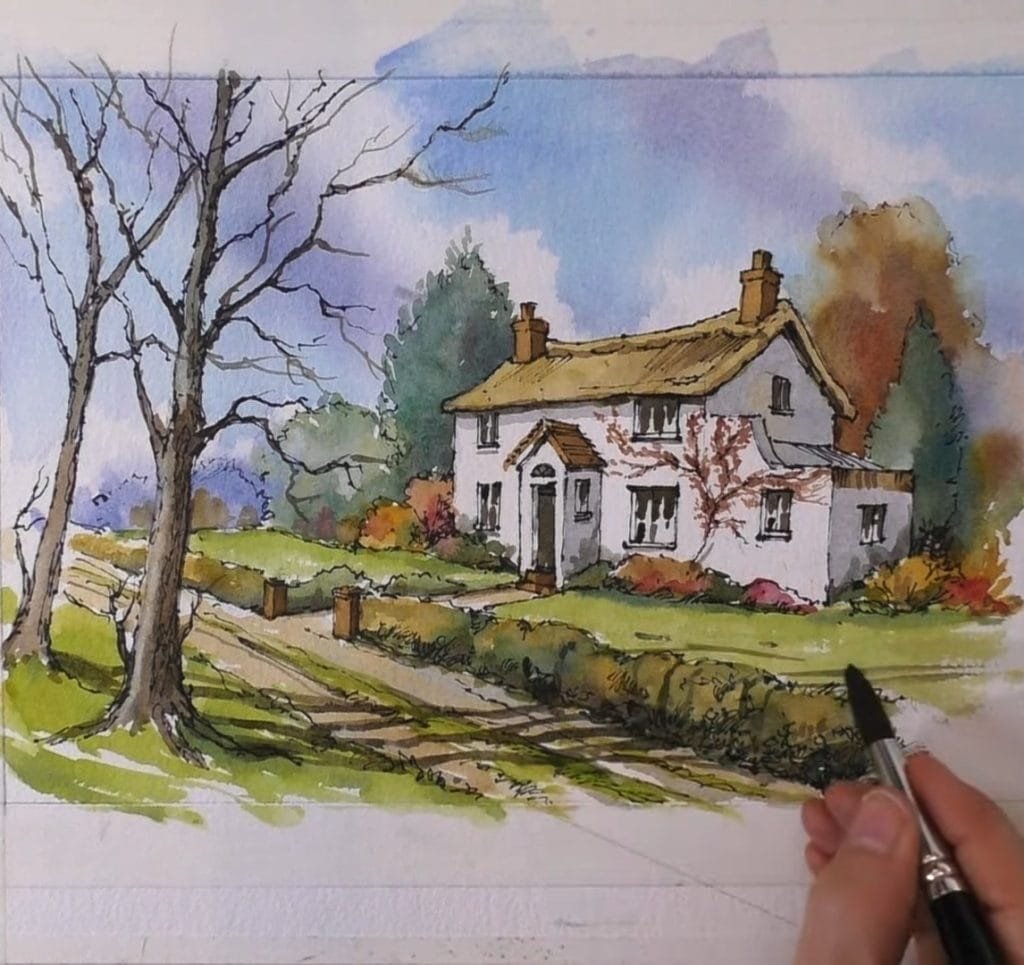
Step 7: Final Pen Details for a Finished Line and Wash House
When the paint is dry, return to your pen. Go over areas that need more clarity. Strengthen windows, edges, or branches that faded. This adds depth and pulls focus.
Paul Clark notes that you must do this carefully, only where needed.
Stop before you overdo it. Less is often more in line and wash. A few strong marks are better than too many.
In A Nutshell
Perspective makes your drawings stronger and more believable. Two-point perspective is especially useful when sketching houses. Paul Clark’s method shows how line and wash can bring charm and life to your cottage scenes.
Why not grab your sketchbook today and try drawing a house with perspective? Once you add watercolor, your scene will shine.