
Are you looking for a creative and playful way to explore abstract watercolor art?
As Kate Miles Art loves to demonstrate, experimenting with unexpected tools and vibrant colors can unlock a whole new level of expression.
In this post, Kate Miles Art will walk you through a fun painting session using masking fluid, a ruling pen, and bold neon watercolors.
Whether you’re new to abstract art or simply want to try something different, this simple, exploratory process might spark your creativity and help you loosen up with colors and textures.
Contents
What The Artist Will Need for This Abstract Art Painting
Before diving in, the artist walks through the supplies used in this project. It’s always easier to enjoy the process when fully prepared.
To start, the artist grabs watercolor paper and some drawing gum—also called masking fluid or frisket. It helps preserve the white of the paper, which adds beautiful contrast later.
The artist also uses a ruling pen to apply the masking fluid. If someone has never tried a ruling pen for this, it’s fun. It puts the fluid down smoothly and is easy to clean.
Along with the pen, the artist uses some brushes and a range of watercolor paints. For this painting, the artist focuses on blues, greens, and a super bright neon red to add a bold pop of color.
 The essential materials
Preparing the Paper: Creating Organic Marks with Masking Fluid
Now it’s time to prep the paper and lay down some interesting shapes. This step sets the tone for the whole artwork.
Applying Masking Fluid
The artist dips the ruling pen into the masking fluid and makes random marks across the page.
One of the artist’s first blobs spreads out more than expected, so the artist stretches it out and lets it become part of a longer organic shape.
These marks help preserve the white of the paper, which adds a nice contrast once painted over.
The artist treats this central area like a focal point. From here, the artist lets some tendrils stretch outward, off the page, and in various directions.
Some curl, some stretch straight, adding variety and keeping the composition lively.

Letting the Masking Fluid Dry
The artist lets the masking fluid dry completely once finished drawing with it. This step is important. It keeps those light areas safe while layers of color are added later.
Letting it dry fully helps preserve crisp edges and stops bleeding when painting.
Experimenting with Colors: Wet-on-Dry Technique
With the masking fluid dry, it’s time for paint! The artist loves this part because the color blending and layering bring the whole piece to life.
Choosing The Artist’s Colors
For this piece, the artist paints wet-on-dry. That means the artist goes in with a dry paper surface and wet paint. The artist starts by choosing deep blues and rich greens.
Then, the artist mixes things up and dips into a neon red. It’s super bright—like highlighter bright—but the artist loves experimenting, so the artist goes for it.

Applying Paint
The artist loads the brush and goes straight from the pan to the paper. Starting on one side, the artist pushes the color into the nooks and crannies around the masking fluid.
The fluid resists the paint, leaving behind interesting negative space.

Next, the artist paints turquoise.
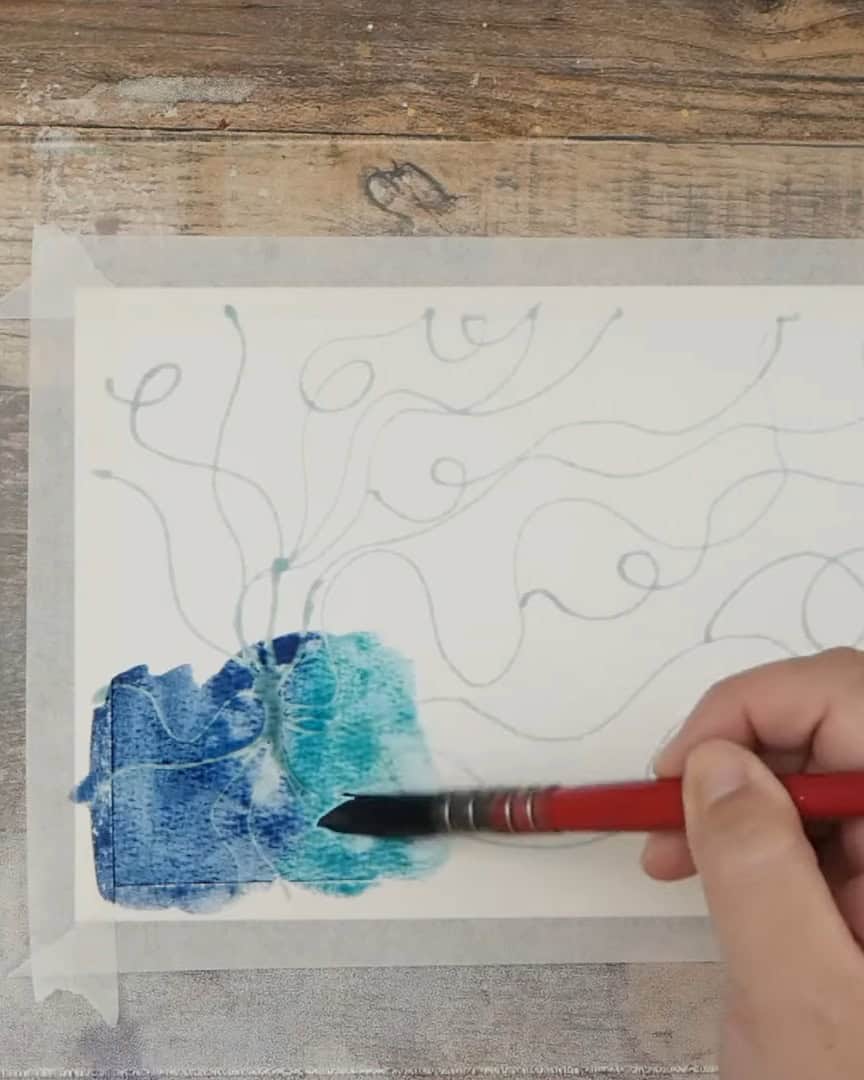
Then, the artist grabs that neon red and blends it with the blues. It mixes beautifully and gives a purply neon effect that the artist enjoys.

The artist switches between colors—deep blue, neon red, a bit of turquoise—and lets them blend on the page. The shapes created are loose and organic. The artist varies their size and lets the colors mix naturally.

As the artist moves through the painting, the artist rinses the brush often. Since colors are being mixed directly on the paper, the artist wants to keep the paint pans clean but still allow those wet blends to happen.
The artist adds more turquoise in the top corner and covers all the edges with color. One section turns into a bright area; the artist loves how that glow adds energy.
When satisfied with the layers, the artist sets the paper aside and lets everything dry.
Adding Depth with Stencils and Layers
With the paint dry, it’s time to build more structure into the abstract piece using circles. The artist loves how this part brings everything together.
Using Stencils to Create Circles
The artist pulls out a stencil filled with circles of different sizes. The artist keeps the focus area near the center and uses the biggest circle. The artist lightly traces it in pencil, just to get the right placement.
As the artist moves outward, smaller and smaller circles are drawn, some even off the edge of the page. This gives a sense of movement and fading.
The artist also spaces them out more as they spread, like they’re drifting away from the center.

Filling in the Circles
The artist returns to turquoise paint, but this time with a lighter wash. The artist fills in each circle, using the stencil to guide the shape.
The artist isn’t too worried about being perfectly inside the lines—the basic circle shape simply needs to show.

These layers create a subtle 3D effect. The artist loves how some paint and placement can make the circles rise off the page.
Final Touches: Adding Contrast and Detail
The painting looks good so far, but it still needs a bit of contrast to make the shapes pop. Now the artist adds some black lines to pull the composition together.
Adding Black Lines for Contrast
The artist grabs a liner brush and dips it into pure black watercolor. It’s a deep, solid black. The artist keeps the brush off-screen but dips carefully and returns to the paper.
The artist slowly pulls the brush across the paper from the focal point, letting the paint flow. The artist moves slowly so the lines don’t break.
This creates clean, smooth lines that cut through the shapes and give the piece structure.

The artist doesn’t overdo it. Just a few lines are enough to bring value contrast and guide the eye. It adds a nice balance to the soft blends and bright neons.
Removing the Masking Fluid
Everything is dry now, and it’s time for the best part—pulling off the masking fluid. The artist uses a small gunk remover tool and gently rubs the surface.
If the artist gets a good starting point, the artist can pull off big chunks simultaneously, which is satisfying. One swipe, and all that preserved white space pops through the colors.
Now the artist removes the tape, and the final result is revealed.

The painting is complete! Let’s step back and admire the beauty of the artwork.

Final Thoughts
The artist hopes this inspires others to grab their supplies and try something playful with their watercolor set.
Which part of the process is the artist most excited to try—masking fluid, neon colors, or layering with stencils? Anyone can choose any of them, and most importantly—have fun with it!