

Love the cozy colors of fall? Let Kerrilyn Cheah show you how to bring that warmth straight into your sketchbook with watercolor.
Autumn is full of rich hues and soft transitions, and capturing them doesn’t have to be complicated.
In this guide, Kerrilyn Cheah walks you through six different autumn trees you can paint using simple techniques and beautiful, seasonal colors.
Whether you’re just starting out or simply want to have fun with color mixing, come paint along and enjoy the magic of fall!
Contents
- 1 Tree 1: Painting a Red Autumn Tree with V-shaped Leaves
- 2 Tree 2: Painting a Rounded Yellow Tree with Soft Shadow Blends
- 3 Tree 3: Tall Cone-Shaped Tree in Orange and Yellow
- 4 Tree 4: Fluffy Brown Tree with Layered Shadows
- 5 Tree 5: Creating a Layered Green Tree with Soft Transitions
- 6 Tree 6: Painting a Maple Tree with Mushroom Shape and Textured Leaves
- 7 Creative Ways to Display Your Autumn Trees
- 8 Closing Words
Tree 1: Painting a Red Autumn Tree with V-shaped Leaves
Let’s start with the first tree in a simple and fun way, using a soft V-shape as the main structure.
For this red autumn tree, the leaves are painted branching out in various sizes of a V-shape. It helps to picture a cone with the tree trunk running through the middle.

Sennelier’s Rooster Medley is used for the red, but any red already available in the palette will work.
Using just the tip of the brush, small strokes are painted to form those V-shapes. Then a second brush is used to pick up some Brown Pink.
It is a dirty, muddy yellow that blends beautifully with the red. Brown Pink is dropped onto both sides of the tree — left and right. It creates a smooth transition from red to yellow, giving the tree that autumn warmth.
The first brush returns to layer more red leaves in that same V-pattern, spreading them from both sides of the trunk.

Now, it is time to work on the trunk and branches. Sepia, a dark brown, is used to paint the center part of the branch. Then, tiny leaves are added at the base to round out the shape.
To finish, broken sepia lines are painted along the trunk, especially where there are white gaps. This makes the trunk look like it is peeking out from behind the red foliage.

Some splatters are also added to finish off.

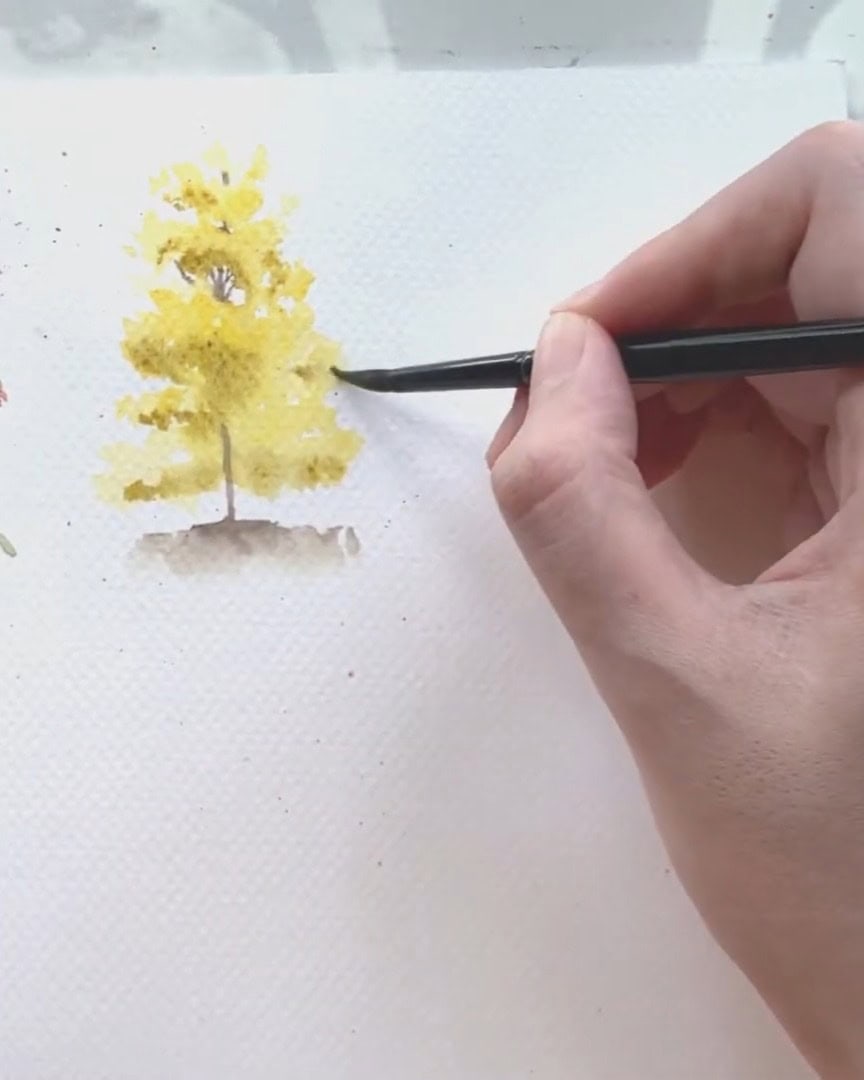
Tree 2: Painting a Rounded Yellow Tree with Soft Shadow Blends
For the second tree, a thicker tree shape is created compared to the first one. This time, the tree has a more curvy, rounded end, giving it a fuller look.
Just like the first tree, the structure is based on a cone shape, but the edges feel softer and rounder.
When starting, attention is paid to where the shadow areas will go. These shadows sit at the bottom of each bunch of leaves and also in the center, near the main trunk.

Yellow is used for this tree. To begin, the leaves are painted using a yellow hue. As the leaves are painted, the brush is pressed down a little more to create larger strokes, allowing some white gaps to remain in between.
These gaps are important, as they give the leaves a natural, airy look.

Halfway through painting the leaves, the tree branches are added. By doing this while the yellow paint is still wet, the brown tones blend into the yellow, creating a soft, fluid transition that looks beautiful and organic.
The focus here is on having fun and mixing colors to capture vibrant autumn vibes.

If the yellow paint has already dried, a bit of water can simply be sprayed on the yellow areas with a spray bottle to re-wet them.

Once the area is damp, a little bit of sepia is mixed into the yellow paint and this mix is applied to the shadow areas of the tree.
If there is uncertainty about where to add shadows, the pencil sketch can serve as guidance. Shadows are typically placed at the bottom of each cluster of leaves, and pre-wetting helps achieve a lovely wet-on-wet effect.
Next, a stronger dark brown is used to redefine the trunk of the tree. The branches are also extended further around the leaves, painted in broken lines to give a more natural, free-flowing feel.

After this, yellow is used again to add tiny strokes of leaves, filling in gaps and adding more detail to the tree.
To finish up, yellow strokes are painted onto the ground to suggest fallen leaves around the tree.

To give the painting a final touch, some splatters are added for a more dynamic effect, creating a lively finish.
This tree now has soft yellow leaves with beautiful, blended shadows that capture the autumn essence.

Tree 3: Tall Cone-Shaped Tree in Orange and Yellow
For the third tree, a taller, cone-shaped tree is painted. The leaves spread out in a V-shape, similar to the first tree.

A smaller V is painted at the top of the tree and gradually made larger toward the bottom. This gives it a nice, natural look.

Next, parts of the tree trunk are filled in with dark brown, creating a solid base. To add depth, a darker orange called Cernelius Orange is used.
This rich, pigmented color helps create shadows and adds dimension to the tree.

A few branches are also extended to complete the look and add details.

After that, another yellow tree is painted behind the orange one. Since this second tree is further away, not much detail is added.
It is kept simple with just a touch of shadow using a mixture of sepia and yellow. Splatters are also added. And there it is – a beautiful, vibrant cone-shaped tree.

Tree 4: Fluffy Brown Tree with Layered Shadows
For the fourth tree, the trunk is drawn first. This tree has large, fluffy bunches of leaves, and each trunk that branches out carries one of these bunches.
Shadows are added at the bottom of each bunch to create depth.

To achieve a brownish shade for the leaves, four colors are mixed: yellow, yellow ochre, burnt umber, and sienna.
Sepia is used first to draw the main trunk and branches. Then, yellow is applied using the full belly of the brush to create fluffy, soft leaves.

Next, shadows are added to the bottom of each bunch using burnt umber.

A more pigmented burnt umber is then used to darken the shadows further, and sepia is applied to deepen them even more.

For a fun effect, a little water is dropped in to create blooms around the leaves. While the paint is still wet, a palette knife, finger, or even the edge of a card is used to scratch out the branches. This technique adds nice texture, helping the tree come to life.

Now that the trunk and fluffy leaves are done, it’s time to move on to the next tree.
Tree 5: Creating a Layered Green Tree with Soft Transitions
For this next tree, the form is separated into three layers with gaps in between to draw the trunks.
The primary focus is on a green tree, so yellow and yellow ochre are used for the highlights and darker greens mixed with sepia for the shadows.

To begin, the leafy clusters are painted with yellow, using the belly of the brush to make broad, fat strokes.
Once that’s done, some brown paint is added near the shadow areas. These shadows sit on the left side of the tree, where the light is less direct.

Next, the left side of the tree is filled with different greens. The bottom of the shadow areas is finished with a darker green called Greenish Umber.

While the paint is still wet, sepia is used to paint the tree trunks.
Everything is done in one layer while the paint is wet, which helps achieve a soft, smooth transition between the yellow and green shades.

This method gives the tree a lovely, blended look, with colors fading into each other naturally.
A bit of splatter and additional details can be added if desired. It is a very fun process.

Tree 6: Painting a Maple Tree with Mushroom Shape and Textured Leaves
For the final tree, a maple tree with a unique mushroom-like shape is painted.

To start, orange is used to create tiny brushstrokes, leaving some white gaps between them. As the painting moves downward, the mushroom shape is kept in mind, gradually forming the tree’s outline.
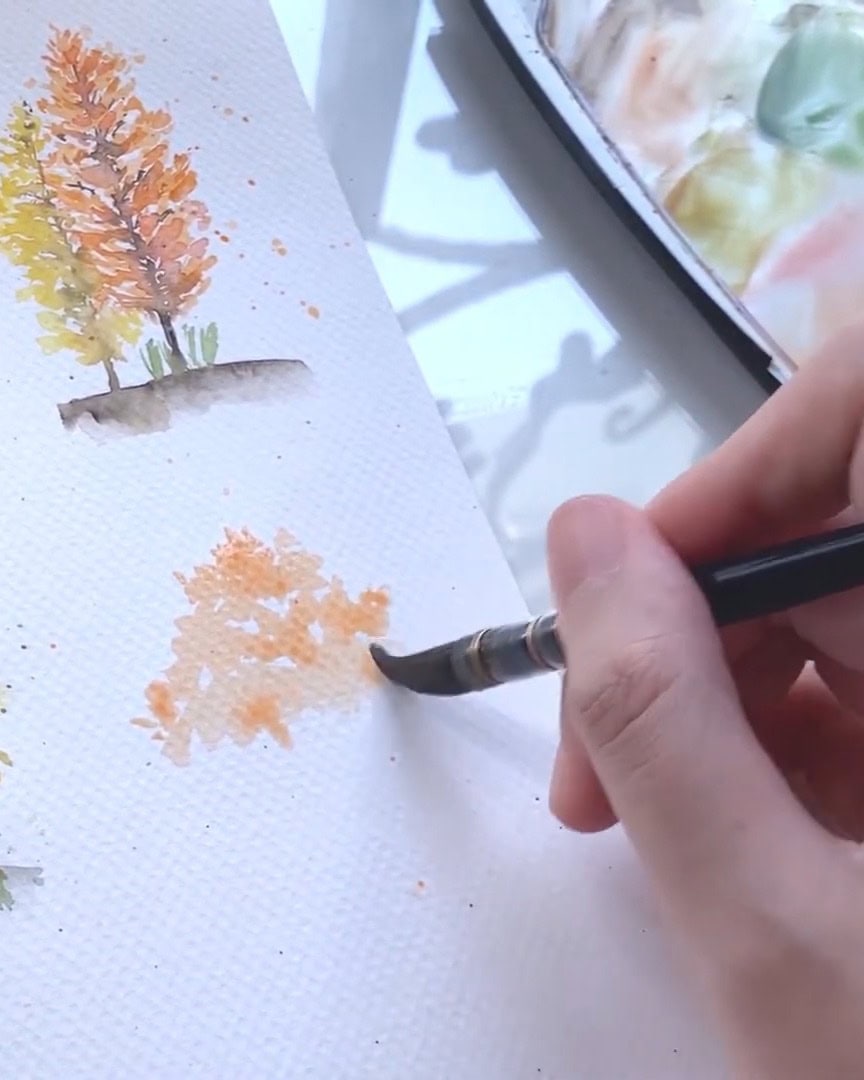
Once the base layer is done, a thicker layer is added in the center to darken it.

Next, red is used and dropped into the center and outer edges of the tree to create depth.

After drying it quickly, sepia is used to paint the trunks and branches, keeping them shorter to reflect the natural size of maple trees. More tiny brushstrokes are added to detail the leaves.

A fun trick is then used: cling wrap from the kitchen is dabbed in the orange and red paints, then pressed onto the inner parts of the tree.
This creates a textured leaf pattern, giving the maple tree an extra layer of creativity.

Once that is done, the brush is used to finalize the composition. And there it is—the last autumn tree.

The autumn tree painting is now complete. The warm colors and the feeling of fall are captured on paper.

Creative Ways to Display Your Autumn Trees
For those who enjoy journaling, there is a fun idea: the autumn trees can be cut into smaller shapes, favorites can be picked out, and arranged in a sketchbook like little stickers.

They can then be stuck into a journal and decorated with masking tape for a creative touch.

They can also be cut out and hung on a wall for a personalized display. There are many ways to get creative with these autumn trees—there is plenty of room to explore and enjoy.
Closing Words
This collection of autumn trees offers many opportunities to play with watercolor—from vibrant red leaves to textured maple canopies.
Experimenting, exploring personal touches, and trying different tree designs will continue to build skill and confidence. It’s the perfect time to grab a paintbrush and begin the next autumn tree.